
Linux offers a world of options. No matter your need, you’ll find a tool for the purpose. This holds true for servers, productivity, games, and everything in between. While you’re working on your desktops or servers, however, there’s one task of singular importance. That task is backups.
You probably already know of rsync and other command-line tools that enable Linux to handle backups in incredibly flexible ways. But, what if you prefer a GUI for such tasks? Where do you turn? The tool I used for years was Lucky Backup. Unfortunately, the development on Lucky Backup has frozen, so it will not be receiving any new features. The developer does still support the tool, but it’s not possible to install his latest release on anything but outdated distributions (such as Ubuntu 14.10). Even though Lucky Backup is still an outstanding backup solution, you’re going to want to find a tool that will continue development. For me, the obvious GUI replacement for Lucky Backup is Déjà Dup.
Déjà Dup offers just about any feature you’d need in a simple backup solution, driven by a GUI front end (for the duplicity command-line tool). It features:
-
Support for local, remote, or cloud backup location (including services like Amazon S3 and Rackspace Cloud Files)
-
Built-in encryption and compression support
-
Incremental backups (so you can restore from any particular point)
-
Scheduled backups
-
Integrates into Nautilus and other file managers
I rely on Déjà Dup to run a regularly scheduled backup and it has yet to fail me. Let’s install Déjà Dup, set up a job, run it, and then restore from the backup.
Installation
Déjà Dup can be installed on most Linux distributions. On some variations of Linux, such as Ubuntu, it will come pre-installed. To find out, open up your Dash (or menu) and search for either Backups or Déjà Dup (just type deja in your desktop search, and it should appear). If you do not find it, you can install directly from either your Software Center (search for deja) or you can install from the command line with the following:
-
Ubuntu: sudo apt-get install deja-dup
-
Fedora: dnf install deja-dup
-
openSUSE: zypper install deja-dup
Once installed, you’ll find Déjà Dup in your desktop menu. You’re ready to start backing up.
Usage
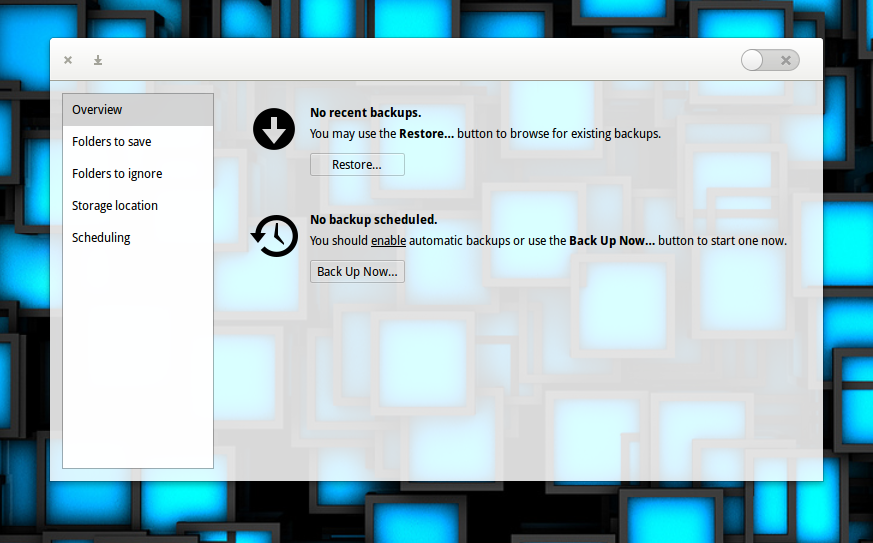
Working with Déjà Dup makes backups incredibly easy. When you first launch the app (I’m running the software on Elementary OS Freya), you’ll see a straightforward window, that clearly indicates Déjà Dup is disabled (Figure 1).
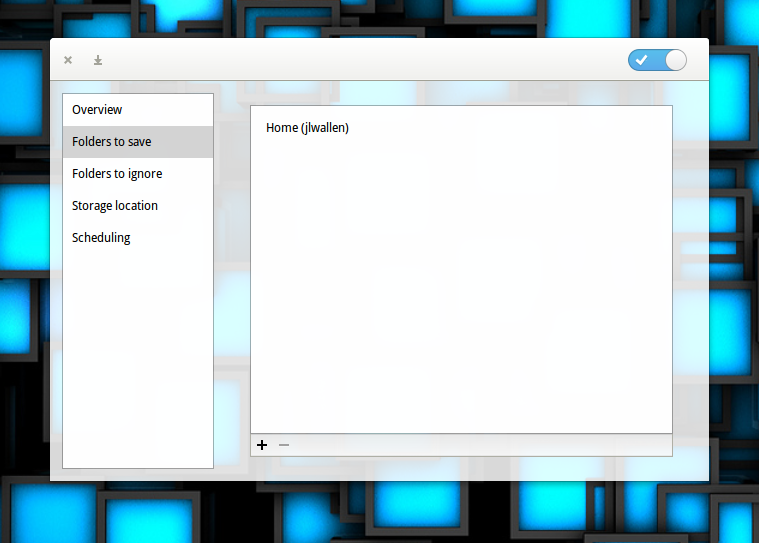
Let’s set up a backup. I’ll be backing up my most important folder (a local Google Drive folder synced using the Insync tool) to an external drive. The first thing to do is enable Déjà Dup by clicking the slider in the upper right corner. Once you’ve done that, click on Folders to save in the left navigation. In the resulting window (Figure 2) click on the + button, navigate to the folder to be backed up, and click Add.
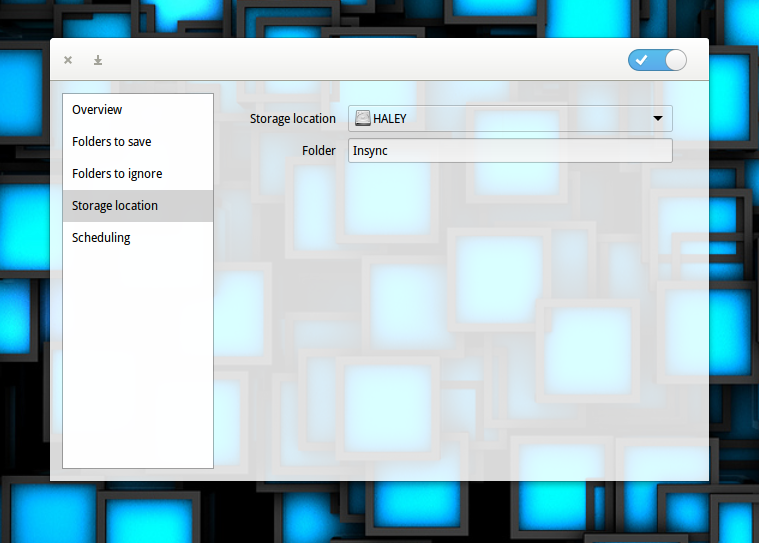
If there are any folders that need to be excluded from your backup, click on Folders to ignore and add them in the same way you added the folder to save. Otherwise, click on Storage location. In the resulting window (Figure 3), select the storage location from the drop-down (in my case a locally attached drive) and then enter the folder the backup is to be saved to.
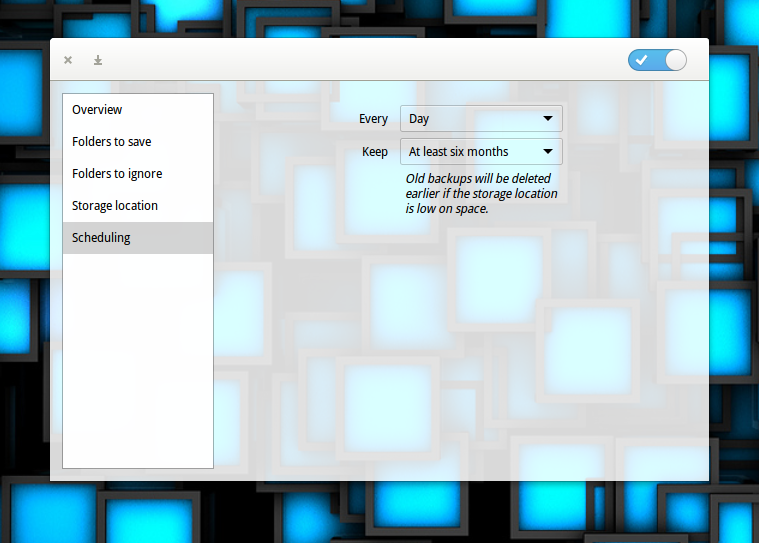
The final step is to click on Scheduling and then, select when you want to run the backups and how long you want to keep a backup (Figure 4).
Finally, click back on Overview and you can either run a backup now or wait for the backup to run at its scheduled time. If you click Run Now (from Overview), you will be prompted to either enable or disable encryption for the backup (Figure 5).
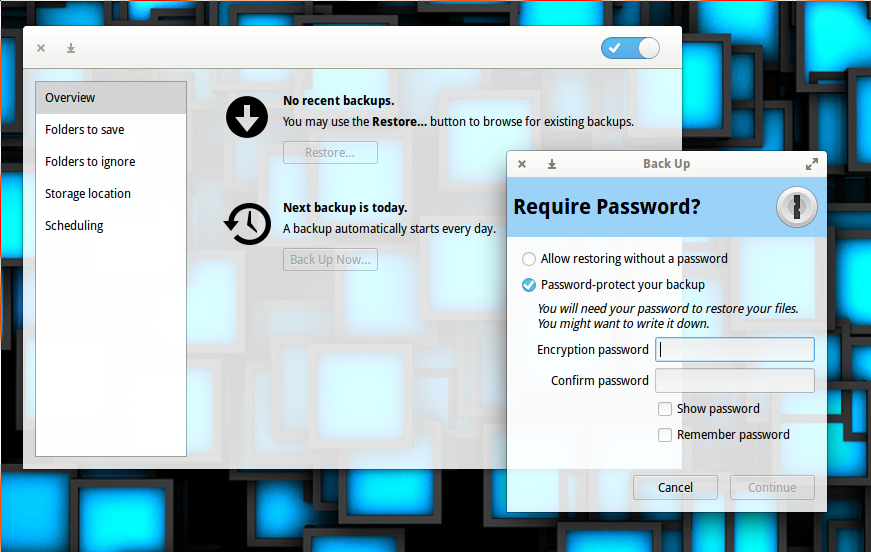
If you opt for encryption, enter your password and then click Continue. If you opt out of encryption, select Allow restoring without a password and then click Continue. The backup will immediately start running. If necessary, you can click Resume later (if the backup is taking too long). An initial backup will take a considerable amount of time (depending, of course, on the amount of data to be backed up). You should start seeing your destination fill up with files. Each of these files is a tar file containing backup information. If you enabled encryption, each file will end with a .gpg extension (otherwise they will end in .difftar).
Restoring a backup
How you restore will depend on which desktop you use. First, we’ll walk through the process of restoring from within the Déjà Dup application (on a Ubuntu 16.04 desktop). This process will work, regardless of what desktop you use.
From the main window, click the Restore button. Next, select the backup location (Figure 6).
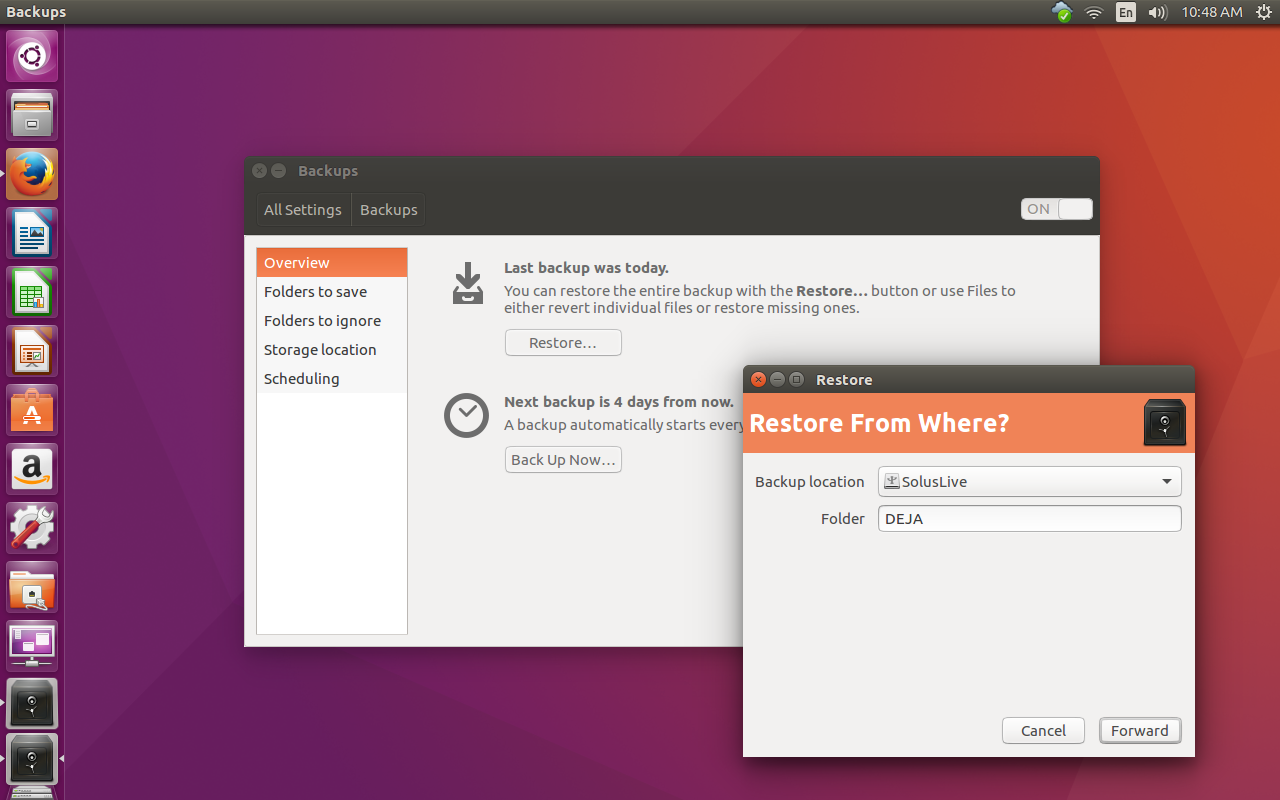
Click Forward and then select the restore date. Click Forward again and select where you want to restore the files to (Figure 7).

Finally, if you’ve enabled encryption, you’ll be asked to enter your encryption password and the restoration will begin.
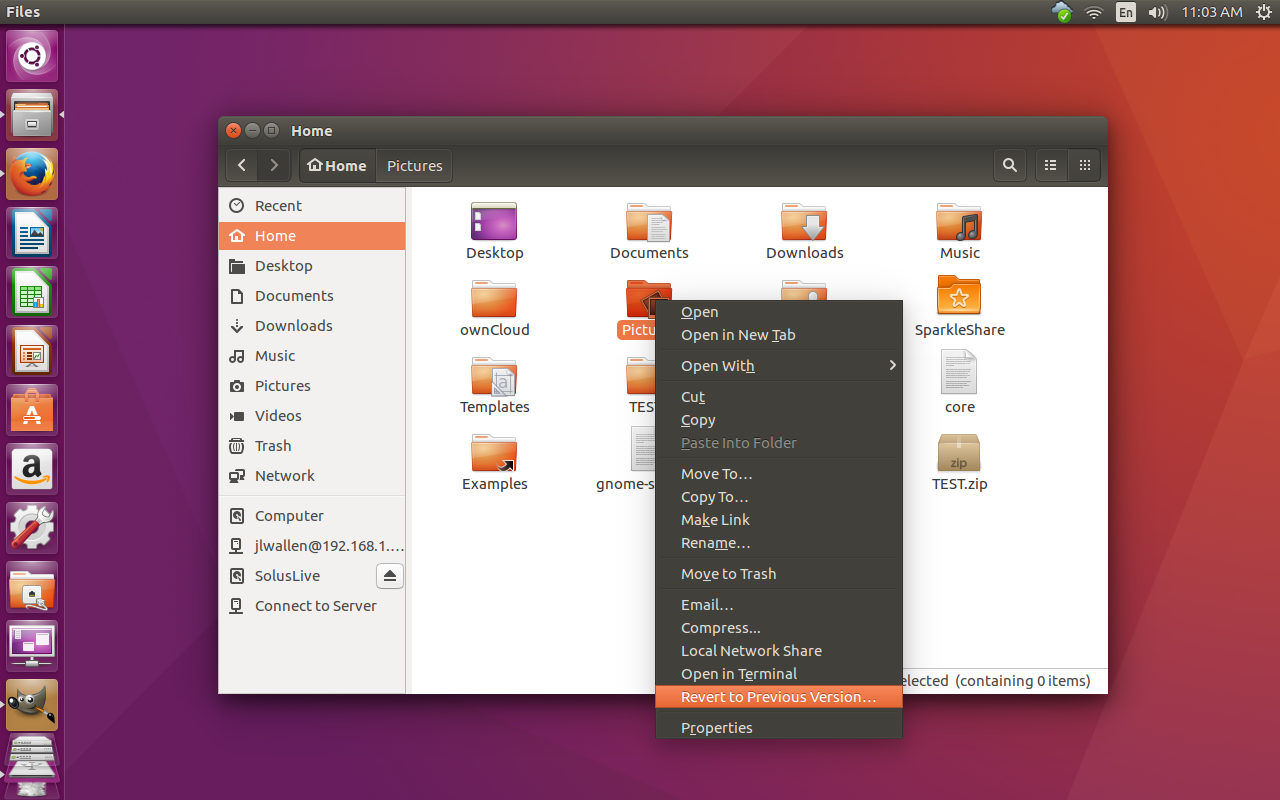
If you’re using Ubuntu (with Unity) or a GNOME-based desktop, you can do the following:
Locate and right-click on the folder to be restored (the folder you backed up with Déjà Dup). When the contextual menu appears (Figure 8), select Revert to Previous Version and the Déjà Dup application will open up to the Restore from where window. You can then continue the process in the fashion as you did above.
A Solid and Simple Backup
You will be hard pressed to find an easier, more reliable backup GUI for Linux than Déjà Dup. Although it might not have all the flexibility of some of its command-line counterparts, it is a solution that anyone can depend upon. Install it and schedule a regular backup of your important data…and hope that you never have to use (but rest assured it’s there).
Learn more about backups and system management in the Essentials of System Administration course from The Linux Foundation.


