The GNU Image Manipulation Program (GIMP) is one of the most powerful image editing tools available. It is, effectively, the Photoshop of the open source world; and with that kind of title comes a level of power most never take advantage of. One feature that should be a must-use for all digital artists is the layer. Using layers not only makes work easier, it gives digital art more depth and more flexibility.
What I want to do is to illustrate some of the more advanced methods for using layering in GIMP. Once these techniques have been mastered, creating and editing digital masterpieces will be so much easier. I will assume the basics of layers is understood (such as how to add, copy, and delete layers), so the 101-level layer steps will not be discussed.
Layer Mask
This might well be the best feature of layering. It’s also one that’s not the easiest to explain. A layer mask is a special mask that represents the alpha channel of an image layer and controls the transparency of that layer. It’s quite a complicated feature, but I will demonstrate it so it’s obvious how this tool can be used to create some pretty cool effects.
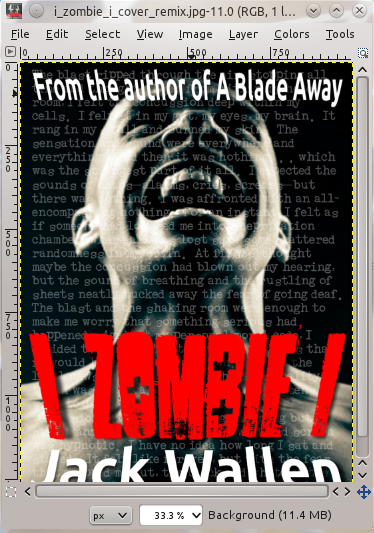
What I am going to do is open the same image twice (open as layer) and then use layer mask to create a blurred effect on a specific section of an image. The original image is the cover for my book I Zombie I (as seen in Figure 1).
This original image was actually created using numerous layers.
The end result (as seen in Figure 2) is a subtle change, but when used correctly can be quite effective.
 Figure 2
gimp_layers_zombie_effect.png
Here the man in the image has effectively been blurred while all else remains clear.
To get to the end result, follow these steps:
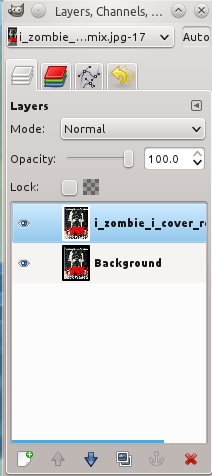
- Open the image and then open the same image as a layer (click File > Open as Layers). There will now be two layers opened with identical images (see Figure 3).
- Right-click the top layer and select Add Layer Mask.
- In the resulting window, select Black Full Transparency.
- From the Toolbox select the Pencil and make sure the foreground color is white.
- With the pencil and the top layer selected, begin to fill in the areas of the image that will not have the effect applied (in the case of the sample, it will be everywhere but the man’s head.
- Once the area is sufficiently painted over (you can check it by right-clicking the layer and selecting Show Layer Mask.)
- Right-click the top layer and select Apply Layer Mask.
- Select the bottom layer from the Layers and Channels window.
- Right-click the image and select Filters > Blur > Gaussian Blur. This will blur the entire bottom layer.
Make sure to name (or rename) your layers according to their purpose, or your image will get lost in a sea of similarly-named layers.
Since the top layer made use of the Layer Mask, the portion that wasn’t made transparent will cover the lower, blurred layer, and the end result will be what was shown back in Figure 1. Obviously this can be used to great effect (and with different filters), but the demonstration here illustrates how the process is done.
Hiding Layers
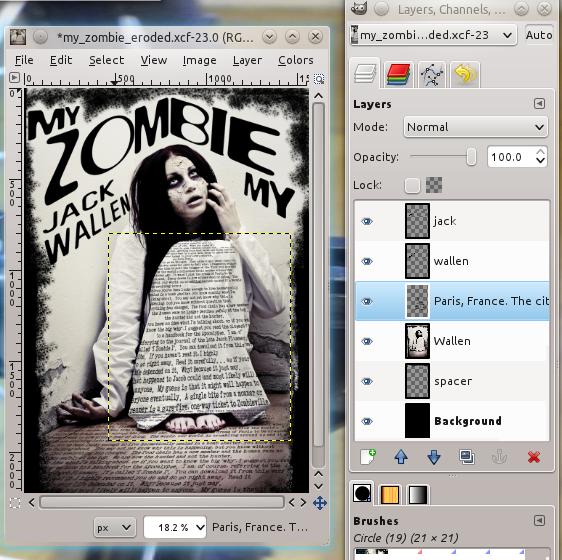
Sometimes an image becomes so cluttered with layers it’s hard to know what layer needs work or what layer is affecting a specific area. Fortunately there is a very quick way to alleviate that headache — hiding layers. If you look at an image with multiple layers (see Figure 4) it is possible to hide each layer from view. 
The dotted box in the left window surrounds the current working layer.
To hide a layer from view, do the following:
- Select the layer to hide.
- Click on the “eye” icon to hide the layer. When the icon is not visible, the layer is hidden.
- To unhide the layer, click on the square where the icon was.
Layer Modes
Twenty-one different modes can be assigned to a layer. The modes (also called “blending modes”) allow complex color changes within a layer. Modes are also very complex, but the application of the modes is not. To change a layer mode simply select the layer and then select the Mode type from the drop down. There must be more than one layer for modes to actually have any effect. The mode’s opacity can then be effected by sliding the Opacity slider either to the right or left. Some of the different modes include:
- Normal: This is the default mode and will, when the Opacity is lessened, reveal the layer underneath.
- Dissolve: The dissolve mode will take a percentage of pixels from the upper layer and replace them with pixels from the lower layer. This percentage is determined by the opacity level chosen with the slider.
- Multiply: This mode is similar to normal, but the end results will be a darker opaque upper layer than would be found with Normal.
- Screen: This mode will result in more opacity for darker colors and lesser opacity for lighter colors. Black becomes transparent and white becomes pure white.
- Dodge: This mode will result in an opacity with some inverted colors. This is useful to bring out details in shadows.
- Overlay: This is a combination of two modes (Multiply and Screen) but more subtle than the originals. If a lower layer is overlaid with a darker layer, the result will be darker (but not pure black). The lower layer is overlaid with a lighter layer, the result will be lighter (but, again, not pure white).
- Difference: This might be one of the niftiest of the modes. All colors have a mathematical value and difference calculates the difference between the values of the colors between two layers. This mode is really handy when adding a gradient level above an image and then manipulating the opacity of the Difference Mode.
For most works, the Normal Mode is going to be the best fit (especially if a level of opacity is all that is needed.) But when a different type of end result for the layer opacity is required, select a different mode, move the toggle to change the level of effect, and repeat with a different mode until the desired effect is found. Some of the modes are quite similar, but have varied effects, depending upon the type and color of the layers being used. Some layers lighten color, some darken color, some even transfer color between layers. The best way to see how a mode effects a layer is to play around with each to find out which mode is best for a particular task. But when the right mode is found, it can have a very dramatic effect on the end result.
Manipulate What is Visible
On a number of occasions, I have created an image and added a layer, only to have a portion of a layer visible that I do not want visible. This is especially true when adding box, or box-like, shapes where corners or edges can insist themselves upon images found in lower layers. Figure 5 illustrates this perfectly.

Here you see a layer that has a portion covered by another layer.
As you can see, the right edge of the “Pow” thought balloon is hidden behind the image of the nail polish bottle. To fix this issue the though balloon layer must be raised. In order to raise a layer, do the following:
- Go to the Layers window.
- Select the layer that needs to be raised.
- Click the up arrow to raise the layer with the portion being hidden by the upper layer.
There may be instances where a layer will have to be raised above a number of layers in order for it to be seen properly. This will depend upon the complexity of the image and the shape of the images in the layers. Using this technique will avoid having to make sure the images used in layers do not have to be perfectly cropped.
Get Creative
Using layering in The GIMP is one of the best ways to take creativity to the next level. Layers bring depth, perspective, and complexity to graphics that would otherwise be missing. Play around with layering. It takes a while to master, but once mastered the time invested will pay off.


