Virtual machines make¬†administrative¬†live so much easier. Not only can you test out new operating systems (without damaging your currently running OS), you can test new features, you can sandbox your web sites, you can develop new security models…the list goes on and on. But just as there are numerous reasons why you would want to run a virtual machine, there are numerous ways to create a virtual machine.
You have already seen my articles on virtualization, here on Linux.com. If not check out “Virtualbox offers simple, easy to use virtual solutions” and “Installing Virtual Machines in VMWare“. Another virtual machine solution is virt-manager. The virt-manager tool is a GUI tool that can use either QEMU or KVM as its hypervisor. Unlike VirtualBox or VMWare, there are a few tools that have to be installed, but more importantly, your CPU must be able to support hardware virtualization. So before we get into the installation of any of the tools (and the setting up of your virtual machines) it’s best to run a simple test to find out if your hardware will support this technology.
The Test
Open up a terminal window and issue the command:
egrep '(vmx|svm)' --color=always /proc/cpuinfo
You should get returned something like:
flags: fpu vme de pse tsc msr pae mce cx8 apic sep mtrr pge mca cmov pat pse36 clflush mmx fxsr sse sse2 ht syscall nx mmxext fxsr_opt rdtscp lm 3dnowext 3dnow extd_apicid pni cx16 lahf_lm cmp_legacy svm extapic cr8_legacy 3dnowprefetch

flags: fpu vme de pse tsc msr pae mce cx8 apic sep mtrr pge mca cmov pat pse36 clflush mmx fxsr sse sse2 ht syscall nx mmxext fxsr_opt rdtscp lm 3dnowext 3dnow extd_apicid pni cx16 lahf_lm cmp_legacy svm extapic cr8_legacy 3dnowprefetch
Installing All of the Components
- virtinst
- virt-manager
- kvm
- python-libvirt
- libvirt-bin
- qemu
- virt-viewer
- bridge-utils
Configuring Your Bridged Networking
iface eth0 inet static
        address 192.168.1.10
        network 192.168.1.0
        netmask 255.255.255.0
        broadcast 192.168.1.255
        gateway 192.168.1.1

auto br0
iface br0 inet static
        address 192.168.1.21
        network 192.168.1.0
        netmask 255.255.255.0
        broadcast 192.168.1.255
        gateway 192.168.1.1
        bridge_ports eth0
        bridge_fd 9
        bridge_hello 2
        bridge_maxage 12
        bridge_stp off
sudo /etc/init.d/networking restart
Create a New Virtual Machine
sudo virt-manager
sudo /etc/init.d/libvirt-bin start
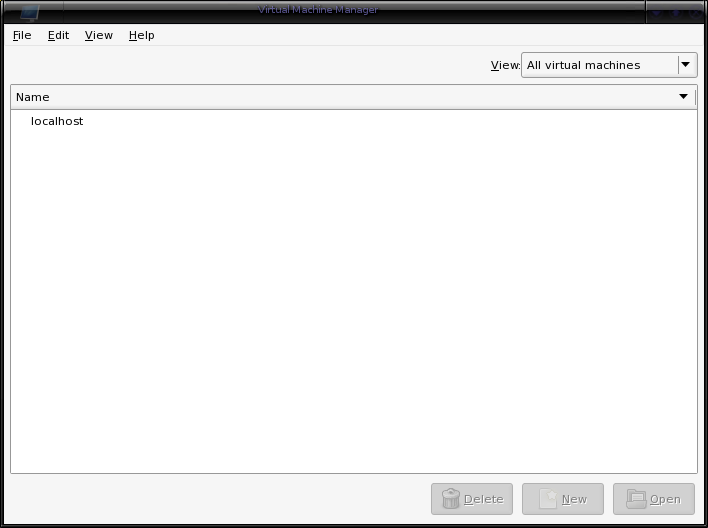
 Now you can go back to the GUI tool.
- Click the New button in the main window.
- Give your virtual machine a name.
- Choose if your vm will be fully or paravirtualized.
- Locate the files for installing your vm operating system.
- Enter the storage details for your vm.
- Configure networking.
- Allocate memory and CPU for your VM.
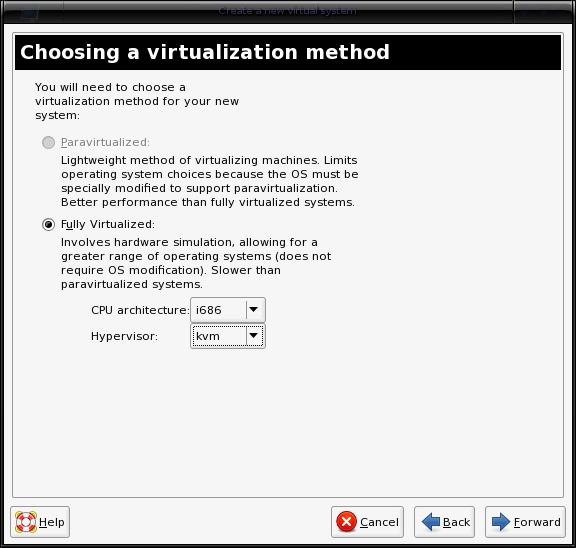
 Step 3: In this step you are going to decide if your machine will be para or fully virtualized. Most likely you will be choosing Fully Virtualized. Although you will have better performance from a paravirtualized virtual machine, you might have to modify the guest operating system to support it. 
- CPU architecture: 32 or 64 bit, MIPS, SPARC, or PPC.
- Hypervisor: KVM or QEMU
- Local install media (either an ISO image or a CD)
- Network install (HTTP, FTP, NFS)
- Netwwork boot (PXE)
 In this same window select the operating system type and variant for installation. From the dropdown some of the possibiltities might seem a bit out-dated. It is safe, for modern Linux distributions to select Generic 2.6.x kernel for OS Variant. Since I am going to install Debian I will select Linux from the OS Type drop down and Debian Etch from the OS Variant drop down.
Once you have made your choices, click Forward to move on to the next step.
Step 5:  In this step you only have to select where your installation media will come from. Since this example is using a local installation method there are only two choices:
- ISO Image
- CD/DVD Rom
¬†For this tutorial I will select CD/DVD.Prior to starting up virt-manager insert the install CD/DVD, that way when “CD-ROM or DVD” is selected the install disk will automatically be available in the drop down. Once that is configured click the Forward button to move on to the next step.
 Step 6: It is time to configure the storage space for your virtual machine. Figure 4 shows the configuration options available for this step.  I would avoid choosing a Normal Disk Partition as an incorrect choice could over-write your data drive. Instead select Simple File and accept the default offers for the file location. You can locate this file into a different location, but to make life easier for you and virt-manager, leave it at the default. 
You can also adjust the file size to suit your needs. The default is 4 Gigs. I would recommend unchecking the Allocate entire virtual disk now check box as this will create a dynamic drive. The dynamic drive will grow, as needed, instead of just creating a large file immediately.
Once you have configured your storage space click the Forward button to move on to the next step.
Step 7: This step sets up a method for the guest to connect through the host for networking purposes. There are two choices:
Virtual networking
Shared physical device
If you want your virtual machine to be seen on your network select Shared physical device and then select the device with Bridge attached to it. 
You can also set a fixed MAC address for your virtual machine. Most likely this won’t be necessary. Make your choices and click the Forward button.
Step 8: This step requires the allocation of Memory and CPU. Make sure you give your guest OS enough memory to run well, but do not take away so much memory from your host that it will run poorly. Also in this step you can configure your guest to use a specific number of virtual CPUs. Do NOT configure more virtual CPUs than your machine has Logical CPUs. If your host machine has 2 Logical CPUs either configure your host to use 1 or 2 virtual CPUs. Make your choices and click Forward
The final window is a summary for your new virtual machine. Go over this summer and click Finish if all is correct. When you click Finish the virtual machine will be created and you will be back to the virt-manager main window. The newly created virtual machine will be listed in the main window. Double click the new listing to start up your virtual machine.
Congratulations, you just created a virtual machine!
Final Thoughts
Although using these tools might not be as simple as using VirtualBox or VMWare, you might find these tools much more flexible than the other choices. And in many instances, the combination of virt-manager and either KVM or QEMU will run much faster than either Virtualbox or VMWare.


