
Most people in the desktop gaming world are familiar with Valve’s Steam service. Last year they added a new feature to the regular desktop app called Big Picture. This newer interface for Steam is intended to be more TV and controller friendly while still being perfectly usable with a traditional mouse and keyboard. This year Valve announced its new Steam Machine, which will bring a Big Picture-type interface into a stand-alone entertainment system.
Note: Read more about SteamOS and related hardware on Steam’s site.
Powering all of this and more (keep reading) is Valve’s SteamOS software. This Debian-based operating system slices out much of the overhead from separate OS tasks like you would expect to find in a normal gaming setup and gets straight to Steam. Valve has made the beta version free to download, so let’s take a look at the steps to set it up.
Minimum Hardware Requirements
(from Steam’s website: store.steampowered.com/steamos/buildyourown)
-
Intel or AMD 64-bit processor
-
4GB RAM
-
500GB hard drive
-
NVIDIA graphics card (AMD and Intel support coming soon)
-
UEFI-boot capable motherboard
-
USB port (and a 1GB+ USB stick to put in it)
Note: The install method presented here will completely erase your hard drive. USE WITH CAUTION!!!
What I Used
This happened to be what was available. If I had time and resources, I’d certainly find a better graphics card.
-
Intel i7
-
32GB RAM
-
2TB hard drive
-
16GB USB drive
-
NVIDIA GeForce 9800 GTX+
Setting up the USB Installer
You will need to format your USB disk as FAT32.
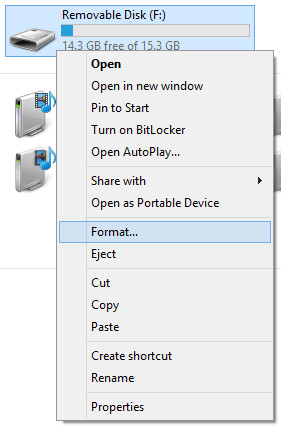
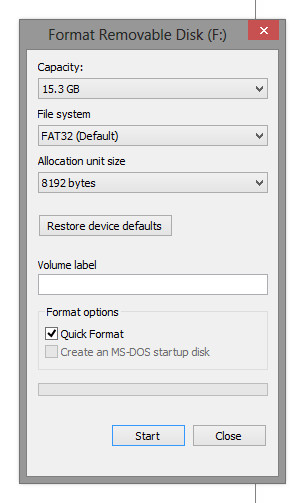
If you prefer to do this from the command prompt the Windows command for this is “format f: /FS:FAT32” where “f” is the drive letter for your USB stick.
Download the custom installer from: http://store.steampowered.com/steamos/download/?ver=custom
Once downloaded extract it (using 7zip or standard Windows tools) and copy the contents to the reformatted USB. If done correctly you should now have a working installer disk.
Starting the Installer
Insert your USB disk into the computer and boot it up. During the boot process you should be able to get to the “Device Select Menu” by pressing F12 or whatever key your motherboard/BIOS is set to use. This should get you to a menu looking something like this:
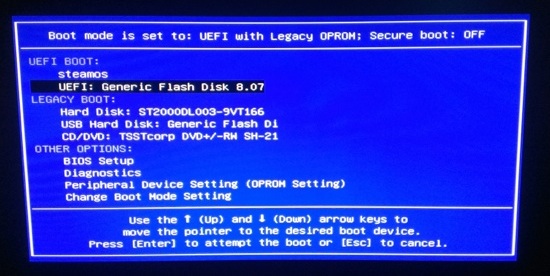
Select the installer disk (highlighted above) with the arrow keys and hit enter. You should now be presented with:
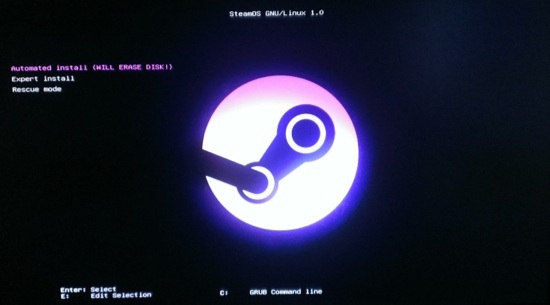
Simply hit enter (assuming the Automated install is selected), and it’ll go off and do its thing. Eventually it will reboot into a Linux environment.
Post-Install
After this process is finished we still need to do a couple of things manually: (1) set up wifi and accept the EULA, and (2) run the post_login.sh script to finish setup.
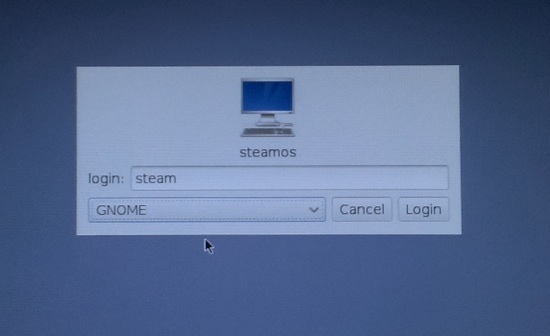
From the login screen (above), select “GNOME” as the environment and login as username: “steam” and password: “steam”. If you’re using wifi like me, you’ll need to connect to the internet at this point. Use the wireless drop-down in the top-right to find and connect to your network.
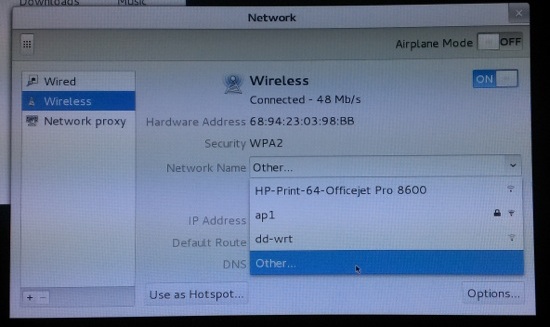
Note: If you use a hidden wifi network you may need to trick the OS into letting you connect to it. Set up a temporary open wifi network (I used an Android phone to create a fake hotspot) and connect to it. Then use the wifi drop-down on the desktop to get to Network Settings. From here you can edit the wireless connection and select “Other” and then “New” from the drop down menus to manually enter your wifi information.
Once you’ve connected, open a terminal using the activities box in the top-left to search for “terminal.” From here run the command “steam” to launch a regular desktop interface to Steam. After you accept the EULA, install updates, and log in you’re ready to move on.
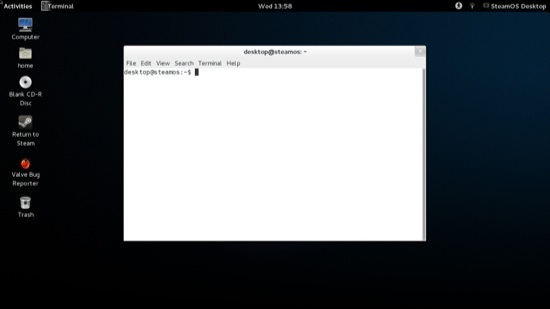
Sign out of the “steam” account and log in using the GNOME option and username: “desktop” password: “desktop”. Once logged in, open terminal again and run the command “./post_logon.sh” to start the post-install script. It will ask for a password (“desktop” again) and for permission to continue (y + enter) and the rest should be automated. When the system reboots again you should have a functioning SteamOS install.
Checking the Audio
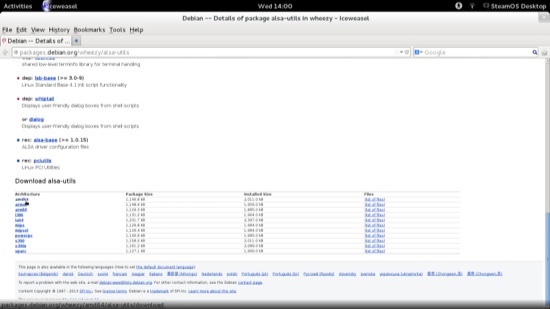
If your audio remains silent after you’ve set up SteamOS, you may have muted devices. Thanks to an error report on github there’s a pretty simple solution. In Steam settings go to “Interface” and enable the desktop mode. Now you can go to Exit -> Return to desktop to get back to the Linux desktop. Launch the browser (iceweasel, again from activities) and download alsa-utils from here: packages.debian.org/wheezy/alsa-utils.
After the download finishes, open a terminal as above and use the following command to get to the file: “cd Downloads”. Once there we need to run a command as root, but for some reason the “desktop” user has a different password after post-install. To fix this run “passwd desktop” to trigger a password update (I just changed it back to “desktop”). After that’s done run “sudo dpkg –I alsa-utils_1.0.25-4_amd64.deb”. When this finishes run “alsamixer” to see your audio devices.
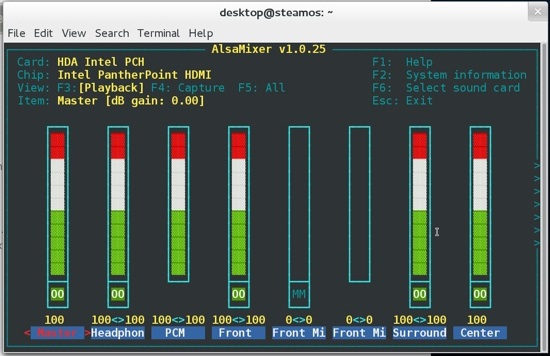
Use F6 to select your sound card and then make sure the volume levels aren’t muted (shortcut is “m”) or too low. In my case, the master volume was muted by default. Once this is changed double-click the “Return to steam” link on the desktop to get back to the regular interface. If all went as planned you should have working sound!
Setting up your Games
After installation the Big Picture style interface will come up and allow you to log in to your Steam account and download your games. For the moment only Linux compatible games are supported. I tinkered with Half Life 2: Episode 2 and Counter Strike: Source doing side-by-side comparisons with my regular machine and they ran just fine aside from the weak graphics card. Eventually we’ll be able to stream games from existing hardware to a Steam Machine over LAN to combine the power of a custom gaming rig with the convenience of a small gaming console and a good TV. If you want to see what the UI will be like check out the Big Picture feature in Steam on your current machine. The interface is nearly identical.
Stuff “Coming Soon” and Others that Should Be
You can read more on the Steam site, but the short version is that streaming (not just normal media, but all of your games from existing machines on your home network) and family options (restrictions and easier game sharing) are coming to SteamOS in the “near future”. Personally, I’d love to see some kind of dual-boot option and general setup improvements (see wifi and audio above).


