
In the previous article, I looked at the Intel Edison — how fast it was, and how much power it needed. This time, I will show how to start getting the Edison board to interact with surrounding electronics with the help of SparkFun Blocks (Figure 1).
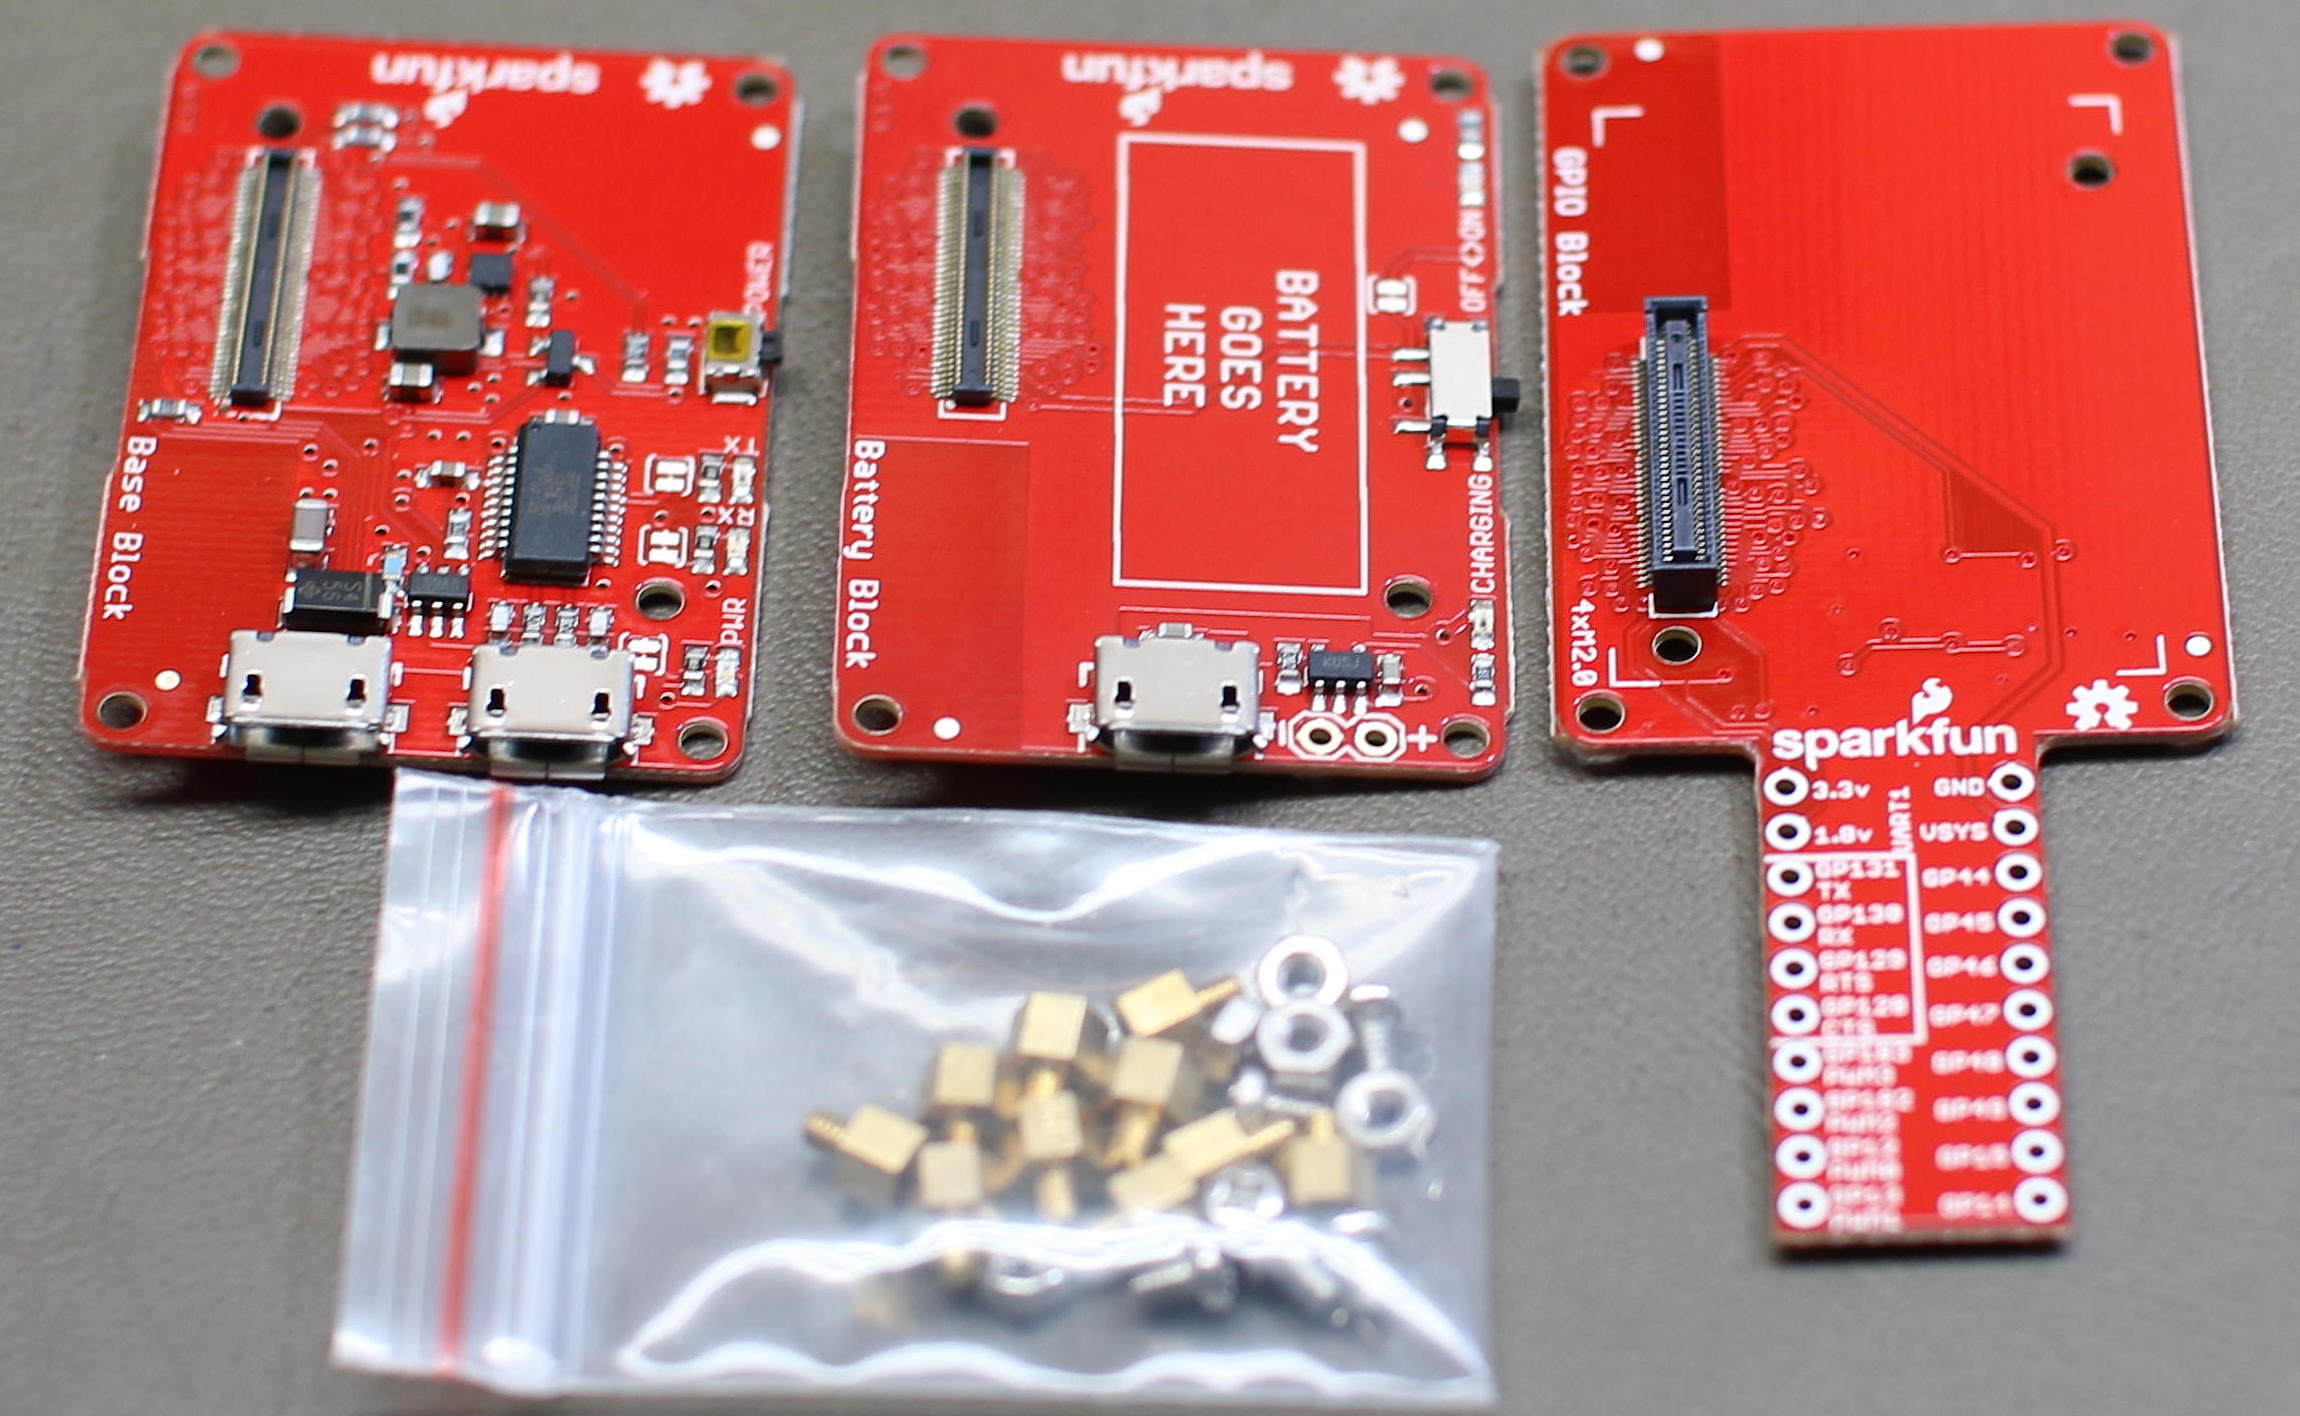
GPIO Block
The SparkFun GPIO Block breaks out various power and ground, along with a UART and four GPIO that can perform PWM output, and eight additional GPIO pins from the Edison. There is level shifting, which is enabled by default on the GPIO block to move things to a more convenient 3.3 volts. You cannot draw a great amount of current from the level shifted GPIO — it’s probably plenty if you are talking to an IC, but maybe not enough if you want to light up an LED.
The great part about the Edison running Linux is that the GPIO is exposed from the Linux kernel just as on other machines. If you have an application that can communicate with GPIO on the BeagleBone Black, porting it to run on the Edison might only require changing the paths to the GPIO pins you want to use. Below I expose pin 14, which is at the far end of the SparkFun GPIO block and toggle its state to a high voltage.
root@edison:/sys/class/gpio# echo 14 > export
root@edison:/sys/class/gpio# cd ./gpio14
root@edison:/sys/class/gpio/gpio14# cat value
0
root@edison:/sys/class/gpio/gpio14# echo out > direction
root@edison:/sys/class/gpio/gpio14# echo 1 > value
root@edison:/sys/class/gpio/gpio14# cat value
1
You can set the GPIO to ‘in’ and the ‘edge’ file to read the state of the pin instead. I tried a few ways to use tools like tail and inotify to monitor the ‘value’ file for changes when the value on the GPIO changed. Things got a little tricky, tail expects new data to become available on the file. Instead of that, the new value replaces the old one at the start of the file. I didn’t get inotify to notify me of changes either. A plain C file that I developed years ago for reading interrupts on the BeagleBone Black worked just fine on the GPIO pin of the Edison. I only had to change the path to the GPIO to pin 14, and then I got a message on the console as I applied ground and 3.3 volts to pin 14 on the SparkFun block.
root@edison:~/src# g++ watch-button-glib.cpp -o watch-button-glib
 $(pkg-config  --cflags --libs glib-2.0)
root@edison:~/src# ./watch-button-glib

onButtonEvent
rc:1  data:0

onButtonEvent
rc:1  data:1

onButtonEvent
rc:1  data:0
The program is quite simple. A channel is set up for the file and notifications are connected to a onButtonEvent callback function.
int main( int argc, char** argv )
{
   GMainLoop* loop = g_main_loop_new( 0, 0 );

   int fd = open( "/sys/class/gpio/gpio14/value", O_RDONLY | O_NONBLOCK );
   GIOChannel* channel = g_io_channel_unix_new( fd );
   GIOCondition cond = GIOCondition( G_IO_PRI );
   guint id = g_io_add_watch( channel, cond, onButtonEvent, 0 );

   g_main_loop_run( loop );

}
The onButtonEvent function seeks the file read position back to the start of the file and prints the contents of the file, up to 100 bytes.
const int buf_sz = 100;
char buf[ buf_sz ];

static gboolean
onButtonEvent( GIOChannel *channel,
              GIOCondition condition,
              gpointer user_data )
{
   cerr << "onButtonEvent" << endl;

   GError *error = 0;
   gsize bytes_read = 0;

   g_io_channel_seek_position( channel, 0, G_SEEK_SET, 0 );
   GIOStatus rc = g_io_channel_read_chars( channel,
                                           buf, buf_sz - 1,
                                           &bytes_read,
                                           &error );
   cerr << "rc:" << rc << "  data:" << buf << endl;

   // thank you, call again!
   return 1;
}
The mraa package provides a tool to list, set, get, and monitor GPIO pins. The two push buttons on the OLED screen block mentioned below are 47 and 32 and can be monitored as shown below.
edison:~/src/screen/node# mraa-gpio monitor 47
Monitoring level changes to pin 47. Press RETURN to exit.
Pin 47 = 1
Pin 47 = 0
Pin 47 = 1
MicroSD Block
Given the Linux kernel support, the microSD Block is one of the easiest things to use with the Edison (Figure 2).
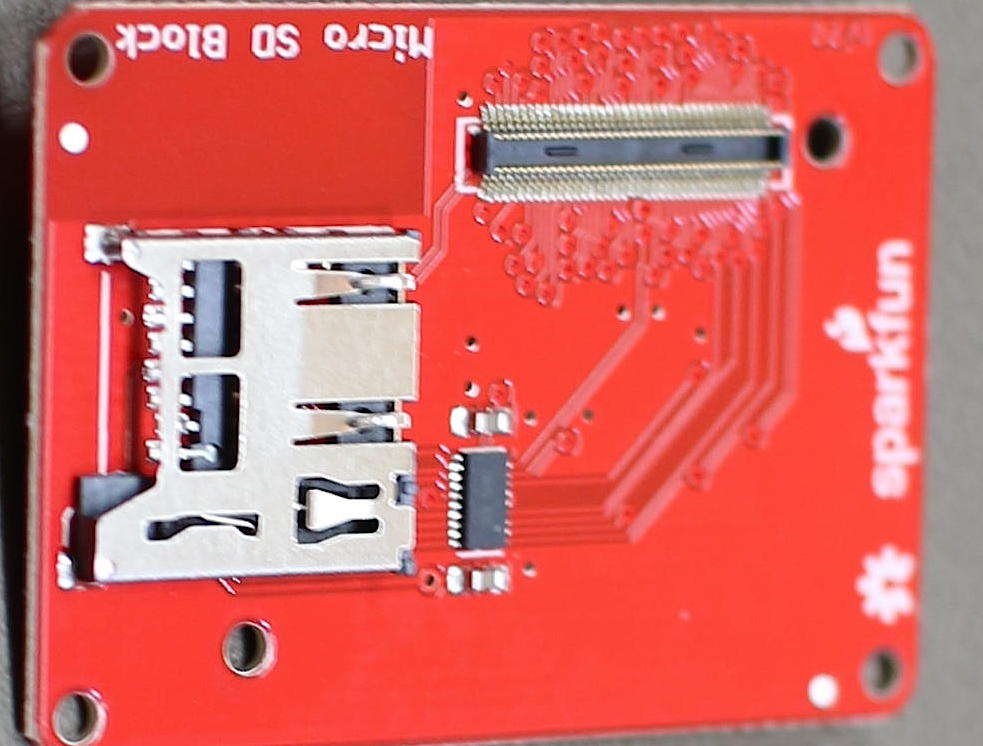
You might want to use a microSD card, for example, if you want to log data over time and do not want to run into limitations of using the main flash storage for logs.
The most time-consuming part of using the microSD Block was turning off the Edison and connecting the block into the stack. When I booted up and inserted a microSD card, it appeared in the dmesg output. From there I could mount and use the card using the same commands that are used on a desktop Linux machine.
# dmesg
...
[   60.303228] mmc1: new high speed SDHC card at address 1234
[   60.304193] mmcblk1: mmc1:1234 SA04G 3.63 GiB
[   60.306139]  mmcblk1: p1

root@edison:~# ls -l /dev/disk/by-id
...
lrwxrwxrwx 1 root root 13 Feb 19 02:14 mmc-SA04G_0x3534550a -> ../../mmcblk1
lrwxrwxrwx 1 root root 15 Feb 19 02:14 mmc-SA04G_0x3534550a-part1 -> ../../mmcblk1p1

root@edison:~# mkdir /mnt/test
root@edison:~# mount /dev/mmcblk1p1 /mnt/test
root@edison:~# ls -l /mnt/test
-rwxr-xr-x 1 root root         30 Feb 19  2017 df.txt
root@edison:~# cat /mnt/test/df.txt
Mon Feb 20 08:56:25 2017
Because the operating system runs entirely from the onboard flash inside the Edison, you don’t have to take the operating system into consideration when exchanging the microSD card on the Edison.
IMU Block
An Inertial Measurement Unit (IMU) is a system that records information about how something moves around. Depending on the IMU you can see how fast it is turning, if it is accelerating in a given direction and perhaps a compass heading, you know how things are rotated.
The SparkFun 9 Degrees of Freedom Block exposes an IMU over the TWI of the Edison.
The sample code allows you to get up and running, seeing the rotation and acceleration of the block as you move it around. Compilation is fairly simple once you have the mraa development package installed.
edison:~# opkg install mraa-dev

edison:~/src/sfe_imu$ g++ SFE_LSM9DS0.cpp
  SparkFun_9DOF_Edison_Block_Example.cpp  -lmraa
  -o SparkFun_9DOF_Edison_Block_Example

edison:~../sfe_imu# ./SparkFun_9DOF_Edison_Block_Example
...
Gyro x: -30.1166 deg/s
Gyro y: -0.411224 deg/s
Gyro z: -0.897217 deg/s
Accel x: -0.0253906 g
Accel y: 0.153503 g
Accel z: -1.02899 g
...
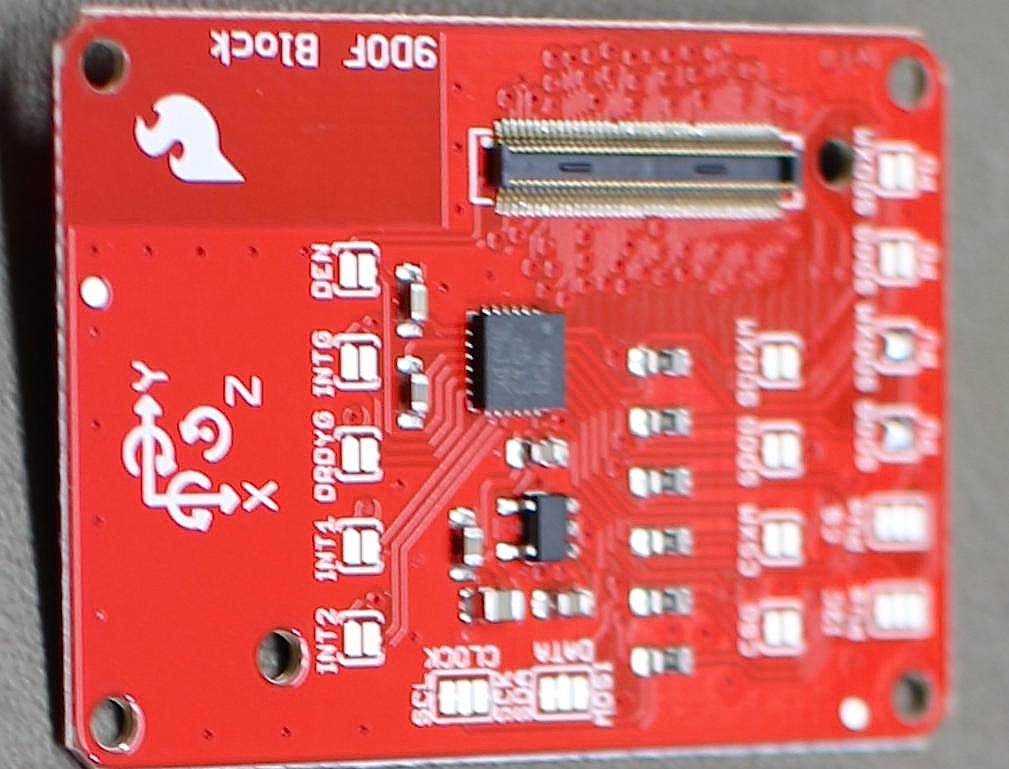
The chip on the SparkFun IMU Block is a LSM9DS0 (Figure 3). There is another driver for this chip in the st_lsm9ds0 project. I tried to install the kernel-dev package on the Intel Edison but that process ran out of space. I assume this is because /boot was full. To try to get around that I downloaded the source ipk file and expanded the kernel to a subdirectory of the root user with the following commands.
As you can see this allows access to not only the kernel files but also the config file used to make that kernel.
edison:~/bak# wget http://iotdk.intel.com/repos/3.5/iotdk/edison/edison/kernel-dev_1.0-r2_edison.ipk
edison:~/bak# ar x kernel-dev_1.0-r2_edison.ipk
edison:~/bak# tar tzvf data.tar.gz
edison:~/bak# cd ./boot
edison:~/bak# cp config-3.10.98-poky-edison+ ../usr/src/kernel/
edison:~/bak# cd ./usr/src
edison:~/bak/usr/src# ln -s `pwd`/kernel /usr/src/kernel
Unfortunately, after many attempts I did not manage to get the st_lsm9ds0 project to compile against the kernel-dev installation. I hope to cover module compilation in a future article, which covers setting up a Yocto compile environment on a desktop Linux machine to compile code including kernel modules for the Edison.
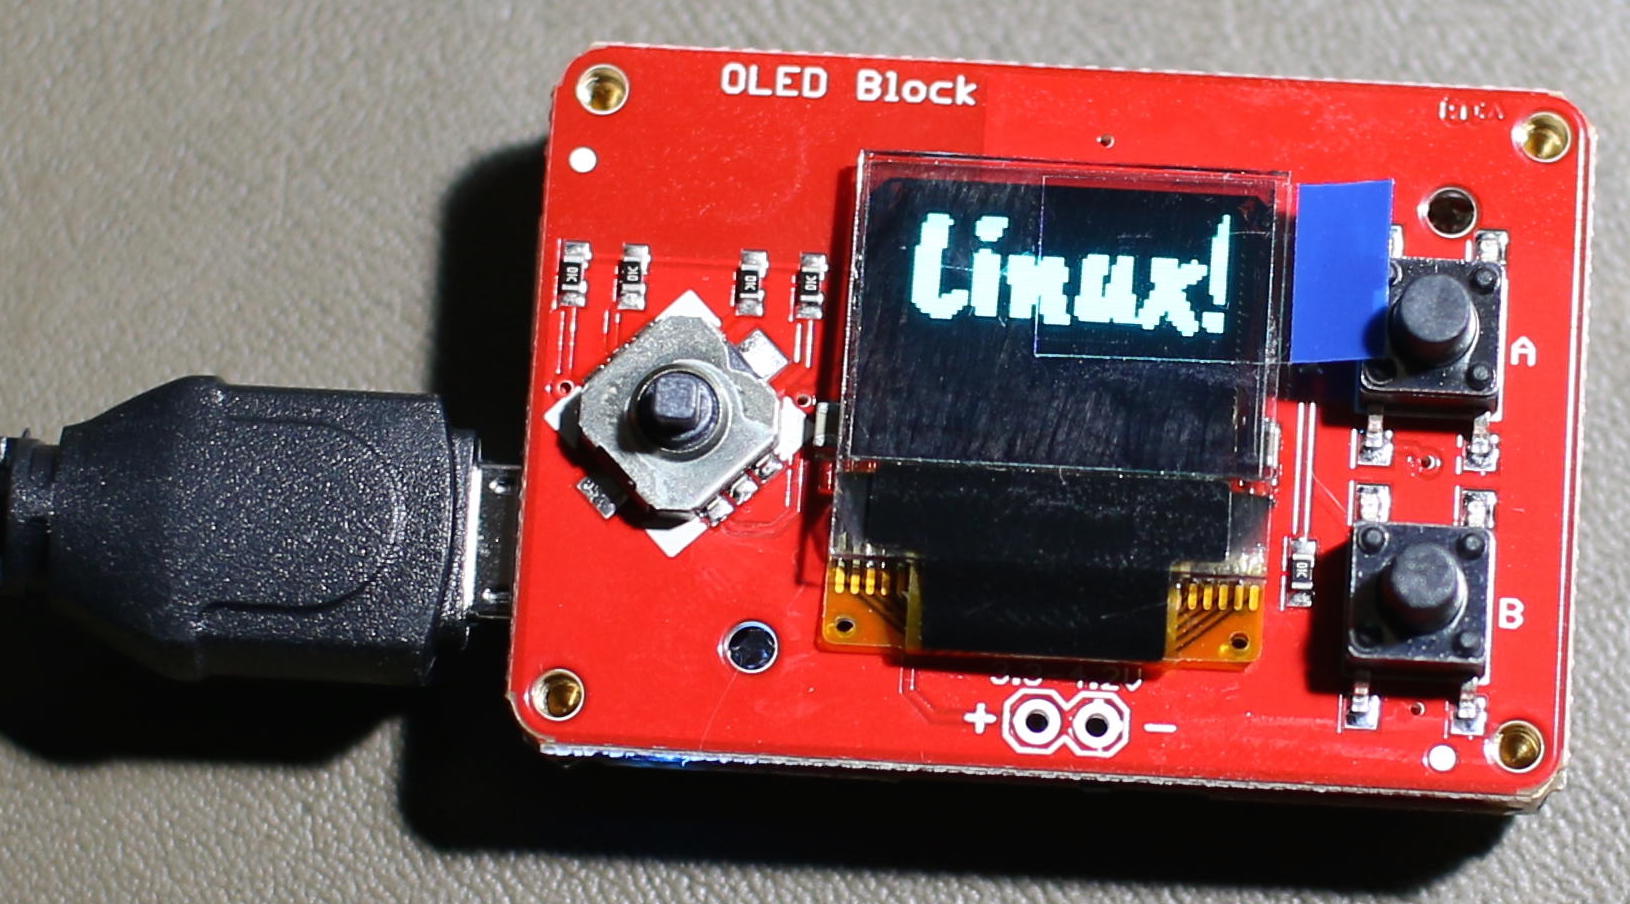
OLED Block
The SparkFun OLED block features a small 64×48 single color OLED screen (Figure 4). There is a small pong game as an example of using the screen that is quite cute.
Instead of using the lower level SPI or little screen library directly, it can be useful to have your application use Cairo as the rendering backbone and just ship the image off to the screen when needed. There are many advantages to doing this; the Cairo API is likely to be more widely known than the library for any specific screen, and you can change the screen out to something else without major changes to your program. Cairo also has access to great font rendering so you can browse free fonts such as those on Google Fonts and quickly start using them on your screen.
I’ll show how to do this from Node.js on the Edison. First, you’ll want to install a few modules including the interface to Cairo and the edison-oled node module as shown below.
edison:~/src/screen/node# npm install edison-oled
edison:~/src/screen/node# opkg install libcairo-dev
edison:~/src/screen/node# npm install canvas
edison:~/src/screen/node# npm install canvas-to-pixels
There are a few abstractions to set up as shown below. The Edison and OLED objects drive the particular screen and shouldn’t be used directly by your application. After objects are declared, the screen is cleared so that there is no unexpected data displayed before the application does any explicit screen update.
var fs = require('fs');
var path = require("path");

var runscreen = 1;
var forceBlackScreen = 0;

var canvas_width = 64;
var canvas_height = 48;
var Canvas = require('canvas')
, Image  = Canvas.Image
, Font   = Canvas.Font
, canvas = new Canvas( canvas_width, canvas_height )
, ctx    = canvas.getContext('2d');
var canvasToPixels = require('canvas-to-pixels');

var edison = require('edison-oled');
var oled = new edison.Oled();

function fontFile(name) {
 return path.join(__dirname, '/fonts/', name);
}

oled.begin();
oled.clear(0);
oled.display();
oled.setFontType(0);
The mydraw function is the core function where your application updates the screen to show what is going on. It is cairo only and doesn’t need to know anything about how to drive the OLED screen. In this case, I take advantage of the Edison to load and use an open font file to render the message “Linux!” at almost full screen.
var mydraw = function( cc, cb ) {

   var ctx = cc.getContext('2d');

   var myfont = new Font('CaveatBrush', fontFile('CaveatBrush-Regular.ttf'));
   ctx.addFont(myfont);
   ctx.font = 'normal 32px CaveatBrush';

   ctx.antialias = 0;
   ctx.fillStyle = '#000000'
   ctx.fillRect(0,0,canvas_width,canvas_height);

   if( forceBlackScreen ) {
    cb();
    return;
   }

   var msg = 'Linux!';
   var te = ctx.measureText(msg);
   ctx.fillStyle = '#FFFFFF';
   ctx.fillText(msg, 0, te.actualBoundingBoxAscent);

   cb();
}
The screen update is done every 200ms in an idle function. This idle function uses the mydraw function above to actually populate the Cairo Canvas with something interesting. The data from the Cairo Canvas is then converted over to binary pixel data using the oled object and the physical screen is updated. Notice that the r, g, b, and alpha values are all available to this idle function, so if you update to a color OLED screen then you can start taking advantage of that by updating this idle function copy out loop. The SIGINT callback clears the OLED screen to prevent junk from being left on it if the application is closed.
setInterval( function() {
   canvasToPixels({
    width:  canvas_width,
    height: canvas_height,
    js:     mydraw,
   }, function receivePixels( err, pixels ) {

    oled.clear();

    var normalArray = Array.prototype.slice.call(pixels);
    var len = normalArray.length;
    var i = 0, x = 0, y = 0;

    for( i=0; i < len; i+=4 ) {
        var r = normalArray[i+0];
        var g = normalArray[i+1];
        var b = normalArray[i+2];
        var a = normalArray[i+3];
        if( r > 1 || g > 1 || b > 1 ) {
        oled.pixel( x, y );
        }
        x++;
        if( x >= canvas_width ) {
        x = 0;
        y++;
        }
    }

    oled.display();
   });

}, 200 );


process.on('SIGINT', function() {
   // clean off the screen. no junk left.
   oled.clear();
   oled.display();

   process.exit();
});
Final Thoughts
The SparkFun blocks allow you to quickly snap together functionality and avoid having loose wires or making sure your connections do not accidentally put power to ground or other nasty things. There are pads on some Blocks to expose interrupts and configure the Block functionality by adding a dab of solder over some connections.
I want to thank SparkFun Electronics for supplying the Intel Edison and Blocks used in these articles.


