
GIMP isn’t the only graphics application for Linux, though you might think so since it gets all the attention. Today we turn our attention to the wonderful Krita drawing, painting, and illustration program for Linux. We’ve talked about Krita before: Demystifying Krita with Comics, Modern Art: A Look at Krita 2.3, and Calligra Suite, the Promising Not-An-Office Suite. Today we’re going to learn about the important fundamental Krita tools, Tools, Brushes, and Colors. I’m not much of an artist, but I can show you how to use the excellent Krita features.
Krita is No Fun Without a Tablet
Krita has great support for Wacom drawing tablets, including pressure sensitivity, so I’m using my ancient Wacom Graphire 2 for this article. Tablets are super-easy to use in Linux: just plug them in and go. Use them like a real pencil, pen or paintbrush: Touch the tablet to draw, lift to not draw, tap, press harder for more “ink”, press lighter for a fainter image. Use the duo-switch on the handle for right-click and left-click, and single- and double-tap for single- and double-click.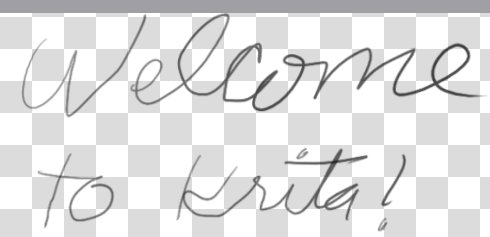 Fig. 1: Cursive writing! Not very good after years of typing.
You don’t need a tablet and can follow along using your mouse. Open Krita and you will be greeted with a screen that gives you various options such as opening recent documents, creating a new one, which color space to use, and size. Click on RGB and select Transparent 640×480. Why? Why not? This puts us in the RGB color space with a transparent background. Now, without changing any settings, make some squiggles. I demonstrate my beautiful cursive writing in figure 1.
That’s boring, so let’s play with tools, brushes, and colors. A key concept to understand is that tools and brushes have different functions but work together. Tools are on the left dock of your Krita screen, and these control the shapes that you can draw. Brushes control textures and line thicknesses. The default brush is the pixel brush ![]() , and the default tool is the freehand tool
, and the default tool is the freehand tool ![]() .
.
Let’s pick a color from the color picker. There are two: the basic color picker in the top toolbar, and the advanced col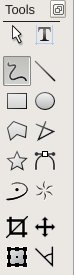 or picker in the right dock. It doesn’t matter which one you use; just pick a color, any color. I like purple. Now click on different tools and try them out (figure 2.) These are surprisingly flexible: try different pressures, turning them in different directions, and making them different sizes. The polygons are completed with a double-click or double-tap.
Fig. 2: shape-drawing tools
My shapes are empty, so let’s use the fill tool, and practice using the very cool right-click color picker. 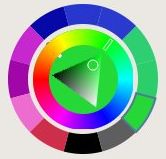 Right-click color picker
This is a fast way to pick a new color without leaving your work. Click the fill tool button![]() , then right-click anywhere in your drawing to open the quick color picker. Notice that as you work and select different colors the color picker automatically saves them. In the right-click color picker your saved colors are in the outer ring. And voila, figure 3 emerges in all of its purple majesty.
, then right-click anywhere in your drawing to open the quick color picker. Notice that as you work and select different colors the color picker automatically saves them. In the right-click color picker your saved colors are in the outer ring. And voila, figure 3 emerges in all of its purple majesty.
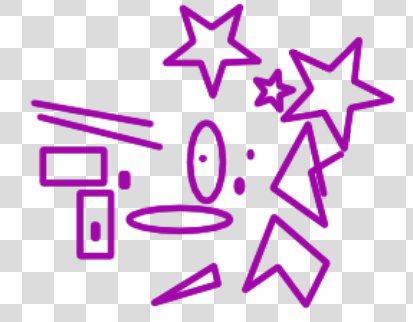 Fig. 3: Purple shapes!
Playing With Brushes
Click the brush tool on the top toolbar, and a giant screen full of rich choices spreads out before you. The quickest way to learn what the brushes and different controls do is to play with them. You’re not wasting materials, after all. I like the Curves brush, so let’s have a little fun with that. It’s especially good with a tablet, but you can do cool stuff with a mouse too. Note how the textures and shapes vary with the stroke pressure, direction, and speed (figure 4).
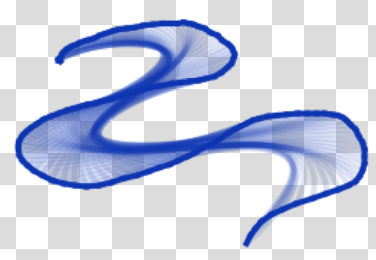 Fig. 4: Curves brush
The hairy brush, as figure 5 shows, is indeed hairy-looking.
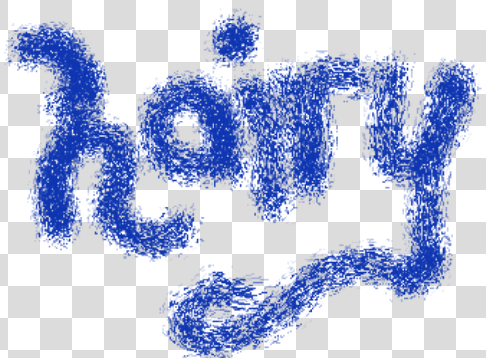 Fig 5: Hairy brush
Brush controls
The blue bars are sliders, and there are also arrow controls on the left. And for us keyboard fans, right-click to type in your values. The Predefined Brushes tab contains a hoard of wonderful special effects, and the Custom Brush lets you create your own brush pattern and save it (figure 6).
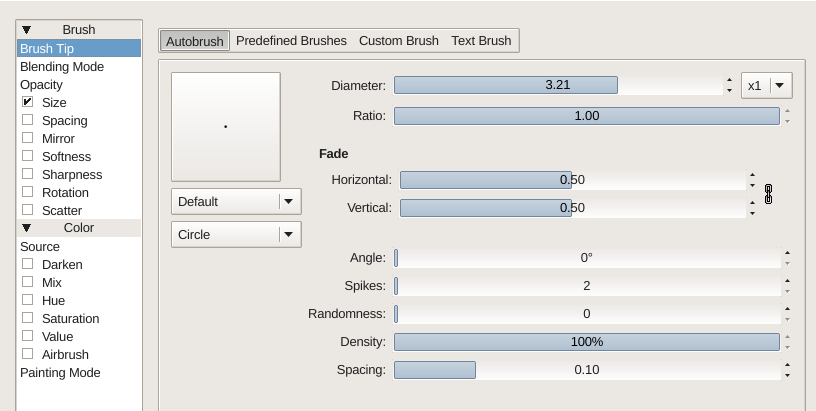 Fig. 6: Brush controls
Text Brush gives you two cool ways to brush on text: in a straight line with a click, or in Pipe Mode, which follows your stroke. (Figure 7.)
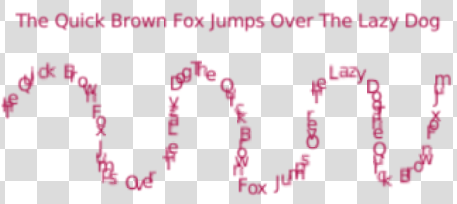 Fig. 7: Text brush
Shapes
You’ve doubtless noticed there are some Tools we have not tried out yet, the Select Area tools, so let’s go try them out (figure 8).
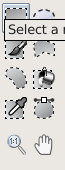 Fig. 8: Select area tools
I’ll use a simple diagram to illustrate how the area selection tools work. First I created a red rectangle with the draw rectangle tool and filled it with blue. Then I selected an oval area with the elliptical area selector, filled the ellipse with darker blue, and then moved it with the move a layer tool, resulting in figure 9.
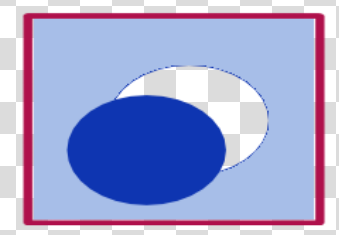 Fig. 9: Select and move an oval area
There is a bit of trickiness introduced when you use the move layer tool: it creates a new layer. Layers are wonderful things that make it easy to edit complex images, and we’ll talk about them more someday. The layers windows is on the lower right, and the active layer is always highlighted. So if you are trying to draw on the non-active layer and getting frustrated, just go click on it to make it active.
Erasing
Krita supports ctrl+z to undo, ctrl+shift+z to redo, and also has Edit > Undo and Edit > Redo. You can also use the eraser, which is in the top toolbar. Click it to turn it on, erase with your cursor, and then click to turn it off. Nice and fast.
Saving Your Work
You’ll probably want to save your work twice: first as a Krita document, and then as whatever final image format you want to use. When you save it as a Krita document then it saves all your layers, so you can easily go back and edit it. Once it’s exported to a normal image format, such as PNG or JPG, you lose all that.


