

This guide is intended to be a quick guide for first time Docker users, detailing how to spin up a container to run simple tests in. This is definitely not meant to be an exhaustive article by any means! There’s tons of documentation for Docker online, which can be a little daunting, so this is just meant to be a super short walk-through of some really basic commands.
For the SRE part of the Holberton School curriculum, we’re required to write several Bash scripts that essentially provision a fresh Ubuntu 14.04 Docker container with a custom-configured installation of Nginx. The scripts are checked by an automated system that spins up a container, runs our script inside of it, and grades us based on the expected result. So obviously, the best way to check our work is to spin up a container ourselves and run the script!
First, let’s run a new container with `docker run`, using sudo to run as root. Docker will need root permissions to run and do magical container things. There’s a lot of arguments to the docker run command, so I’ll break them down real fast:

- -t: Creates a psuedo-TTY for the container.
- -d: Detaches the container to start. This leaves the container running in the background, and allows you to execute additional commands, or use docker attach to reattach to the container.
- –name: Assigns the container a name. By default, containers are assigned a unique ID, and a randomly generated name. Assigning it a name can make life a little easier, but it isn’t necessary.
- -p: Publishes a port. The syntax is a little tricky at first. Here we use 127.0.0.1:80:80, and this binds the port 80 on the container to port 80 on 127.0.0.1, the local machine. This means the port will be published to the host, but not the rest of the world. If we used -p 8080:80, this would bind container port 8080 to 80 to your external IP address, and you’d be able to get there from outside the localhost (if there’s no firewall, etc. blocking access). We can also use -p 8080, which would bind port 8080 on the container to a random port on the host, or specify a range of hosts. Check the docker-run man page for more!
Then, we run `docker ps`. The output shows us any currently running containers, and gives us the id, name, and command the container is running.
Before we can do anything else, we need to copy our script into the Docker container. Luckily, this is easy.

Running `docker cp` allows us to copy a file from the local host to the container, or vice-versa. The syntax is `docker cp <source> <destination>`, and to specify the location in the container, you simply use `container-name:location`. So here, `docker cp nginx_setup.sh testing:/` will copy the file nginx_setup.sh in the current host folder to the root directory of the container named testing.
Now, let’s get inside the container, and see if our script actually works. We’ll do this with `docker exec`.

If you haven’t guessed, `docker exec` executes a command inside a currently running container. There are two flags being used, similar to the ones I used for `docker run`:
- -i: Interactive. Keeps STDIN open even when not attached.
- -t: Allocates a false TTY, just like run.
So `docker exec -it 43a0 /bin/bash` executes /bin/bash inside the container 43a0. As you can see from the output of `docker ps`, that’s the start of the container ID of the container we named testing. We can use either the ID or name to refer to specific containers.
So now that we’re in a Bash shell, let’s check out our script.
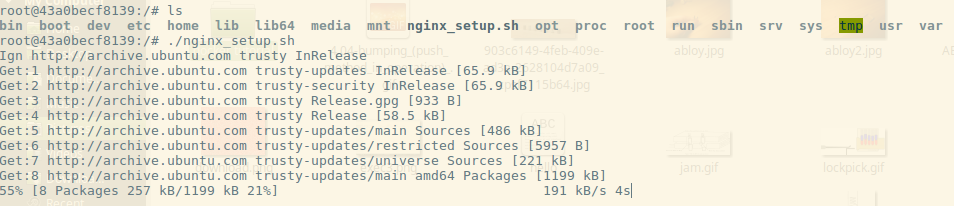
Running ls in the root directory, we can see the script I copied over, nginx_setup.sh. It’s just a simple script to run `apt-get update`, install a few packages (including Nginx), and set up a Nginx web server. Here we can see all I have to do is execute it like normal, and the script starts going. By default, when we execute /bin/bash in the container, we’re starting as root, so no need for `sudo`.
Once the script finishes, let’s check the output! The whole reason we’re doing this, right?

I run `service nginx status`, and I can see that my script was at least partially successful. The Nginx service is running. I check the /etc/nginx/nginx.conf file and see that my script successfully set the configuration for me. But that doesn’t prove that we have a running web server. I’ve left Nginx running on the standard port, 80, the same one we published with -p when we initially ran the container. So let’s pop out of the server and see if we can use curl to check if the container is running.

We exit out, and I run `docker ps` to show you two things. The container is still running, and as a reminder, it shows you that port 80 is published to 127.0.0.1:80. So let’s see if we can curl our container.
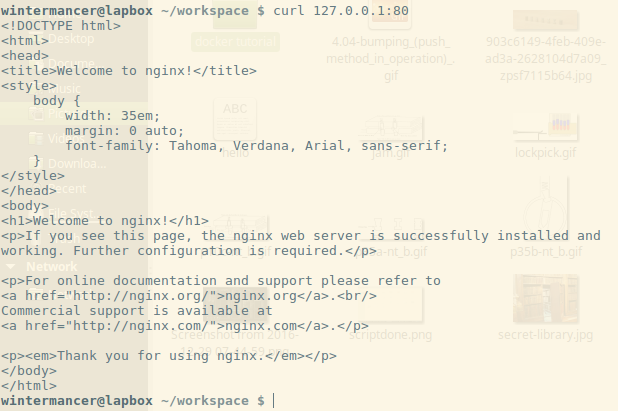
I run curl, and lo-and-behold, the default Nginx landing page! Mission accomplished, my script works. Now, I’m done with this Docker container, so I’m going to use `docker rm` to shut it down.

Since the container is still running, I have to use the -f flag to ‘force’ its removal. -f simply sends SIGKILL to the container. After we run it, the container is spun back down, and we’re done testing.
In closing, I hope this draws some attention to how easy it can be to use Docker for simple testing, once you understand the lay of the land. Docker Training has some great resources with free self-paced online courses that can help expand your knowledge a little further, and the Docker community is full of helpful folks!
Tim Britton is a full-stack software engineering student at Holberton School and a wannabe Docker evangelist! You can follow him on Twitter or on Github.


