
After a short introduction (http://www.linux.com/community/blogs/vpn-o-rama-vpns-intro-practical-howtos-screenshots.html) it’s time to face the facts and see something practical.
As previously mentioned I’d like to focus on ready made Linux distros so you can create a VPN connection on the fly and easily in just few easy steps. In my first episode I’ll approach IPCop (www.ipcop.org) and I’ll create a VPN connection between two IPCop machines, screenshots are something nice to see but our first step is to plan the example.
This example is built in a private network with virtual appliances, you can obviously modify it to fit your needs, I’ll use fake names and networks, translate them to your current network if needed
Network topology:
|
Office |
Network |
Subnet |
|
Headquarter (Coruscant) |
10.0.2.0 |
255.255.255.0 |
|
Subsidiary 1 (Alderaan) |
10.0.3.0 |
255.255.255.0 |
Firewalls:
|
Location/Name |
Linux Distro |
Private IP (LAN) |
Public IP (WAN) |
|
Coruscant |
IPCop v1.4.21 |
10.0.2.94 |
10.0.0.94 |
|
Alderaan |
IPCop v1.4.21 |
10.0.3.95 |
10.0.0.95 |
For simplicity I’ve two private and separate networks (representing two offices) connected to a private net (10.0.0.0/24) representing the Internet. It’s an easy example quite portable to everything. I also have static IP Addresses (LAN and WAN) and no NAT traversal troubles around (at least in this example, I’ll come back with NAT traversal and dynamic IP addresses later…).
IPCop installation is pretty straightforward, I’ll assume you’re familiar with it or you can install it without serious issues (or let me know and I’ll write something for you if needed); from a basic installation without additional modules or plugins you’ve everything you need to setup an IPSec connection between your machines.
I’ll use IPCop IPSec built in capabilities to set everything up, first connect to your machine in you headquarter (Coruscant), just go to: https://10.0.2.95:445, then select VPNs Menu and choose VPNs option or go directly to https://10.0.2.94:445/cgi-bin/vpnmain.cgi if you prefer. Here’s what you see with a clean installation
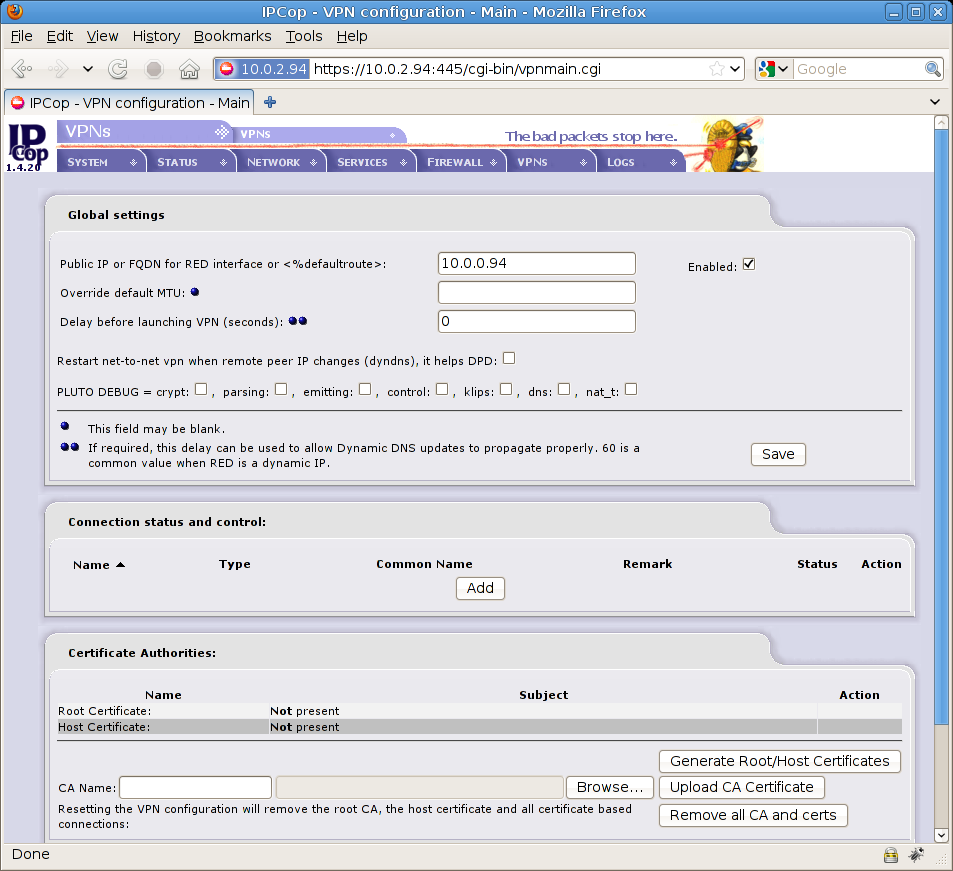
If you’ve done some tests or you’ve some previous configurations you may press “Remove all CA and certs” to wipe everything. If you want to use IPSec on this host you need to check the “Enabled” flag (on top left) and issue a fully qualified domain name (FQDN) or public IP address for this machine (in our case is 10.0.0.94) than it “Save” button to start IPSec on IPCop.
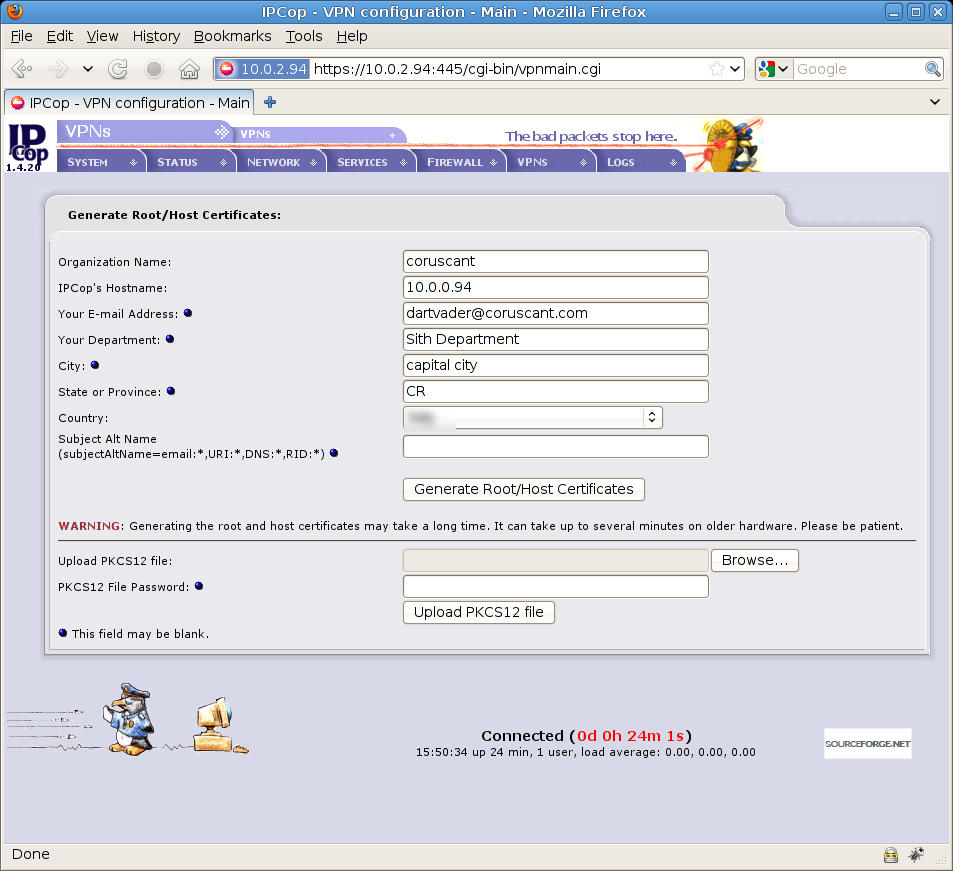
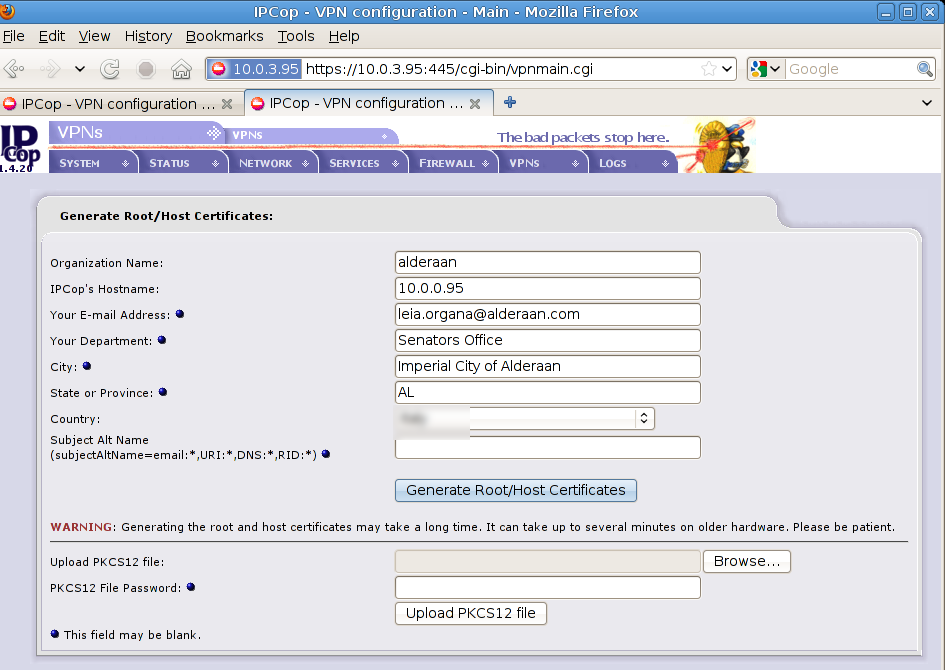
Now as your first step you’ll create root/host certificates, press “Generate Root/Host Certificates” to create an X509 cert from Coruscant firewall (10.0.2.94), in the next screen you need to fill some data related to your host and office, here are mine :
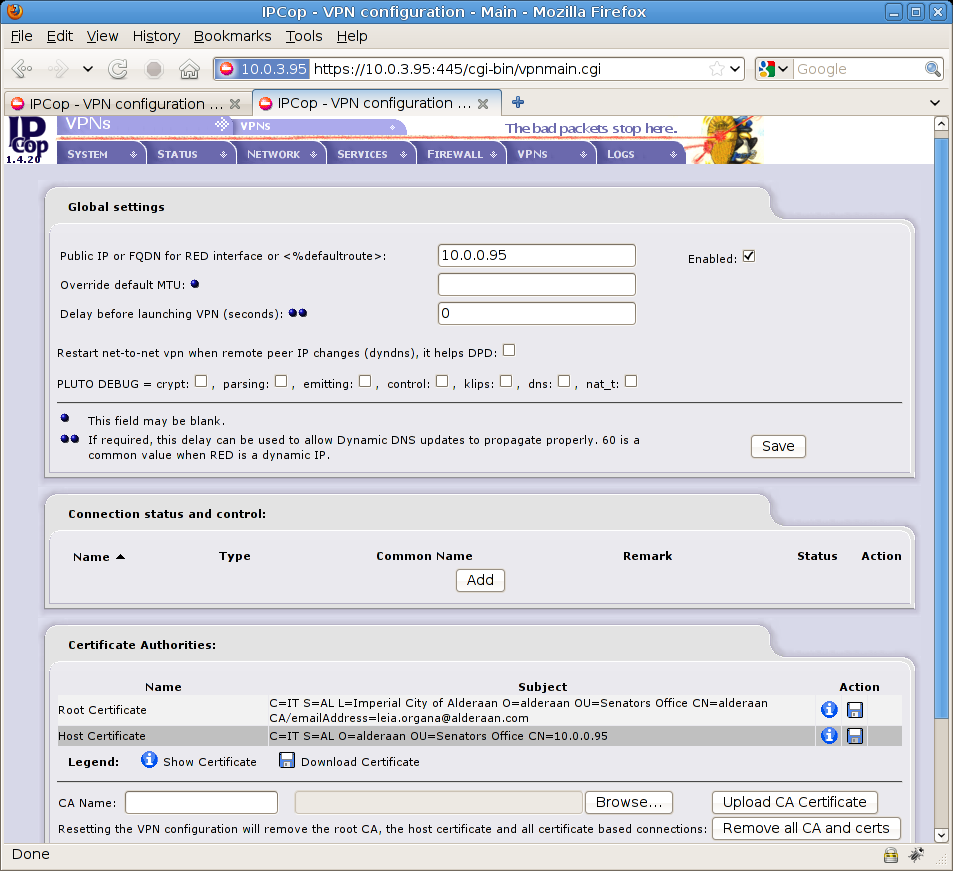
You’ve just created an X509 certificate inside your firewall (Coruscant) with a root and host certificate for your machine, here’s what you’ll see after this:
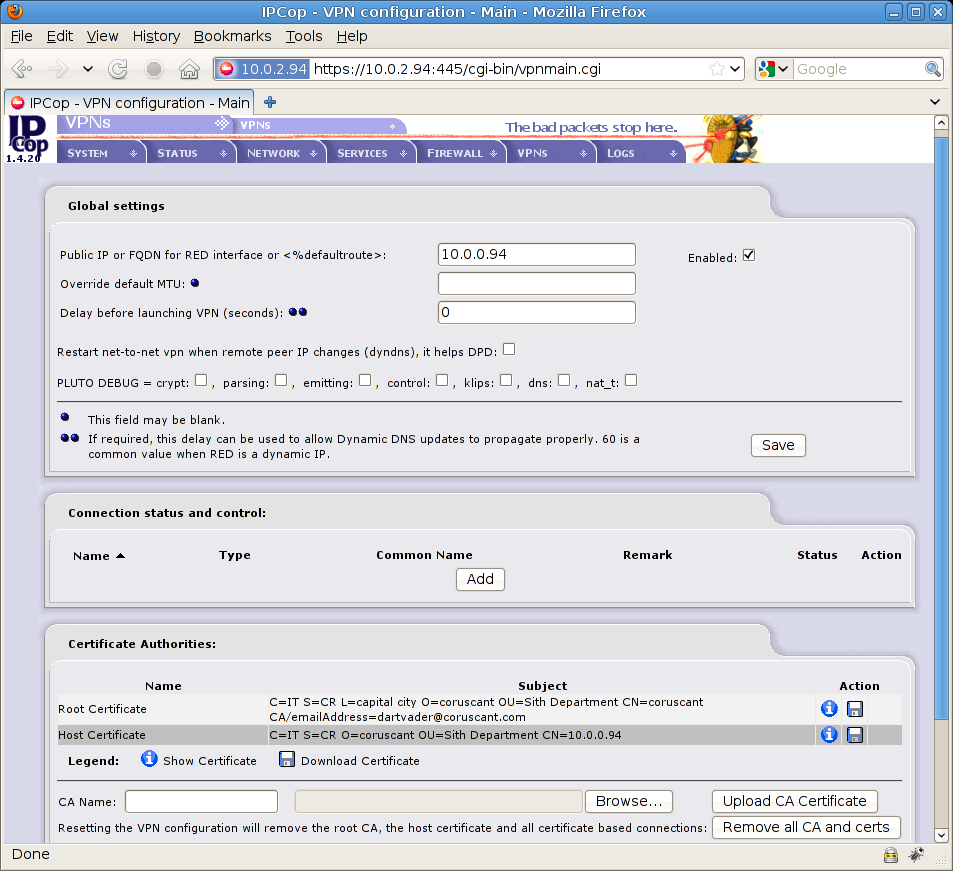
Now save your root and host certificates by hitting the two little disk icons on the bottom right (download root certificate / download host certificate) and name them as:
- cacert.coruscant.pem
- hostcert.coruscant.pem
Now we need to do the same in the other IPCop machine (Alderaan), here are screenshots taken from https://10.0.3.95:445/cgi-bin/vpnmain.cgi :
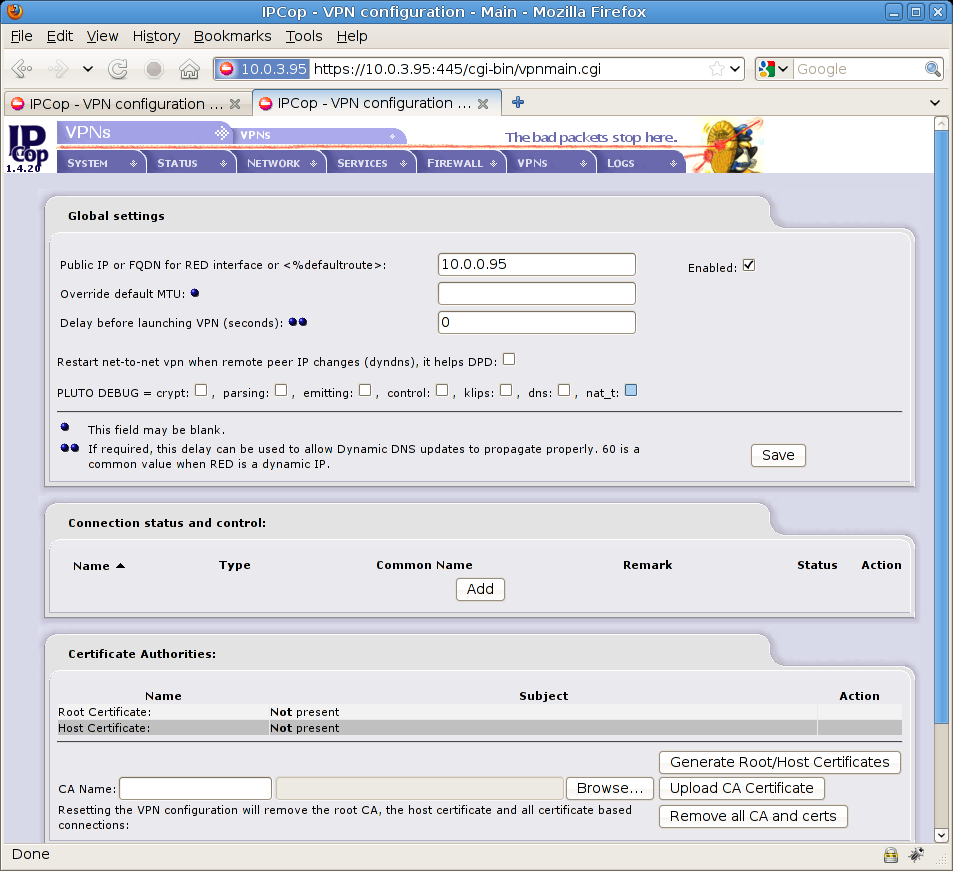
Generate Root/Host Certificates button
hit Generate Root/Host Certificates button and here’s the result
Now save your root and host certificates by hitting the two little disk icons on the bottom right (download root certificate / download host certificate) and name them as:
- cacert.alderaan.pem
- hostcert.alderaan.pem
Importing Certificates on both sides
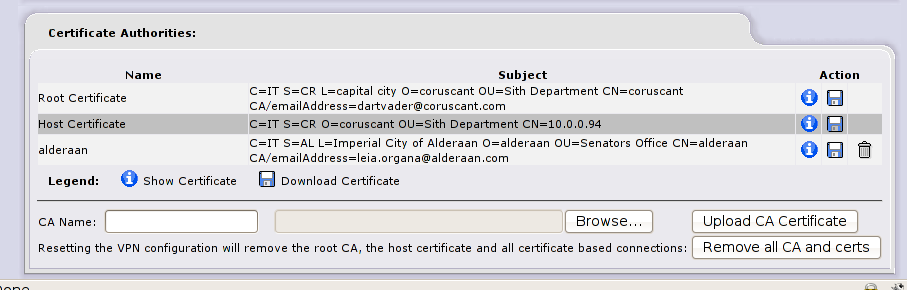
Now on Coruscant firewall (10.0.2.94) you need to import Alderaan root certificate, in VPN page type “Alderaan” as CA Name and select cacert.alderaan.pem by hitting the “browse” button, see image for details:

Hit “Upload CA Certificate” to continue, here’s the result
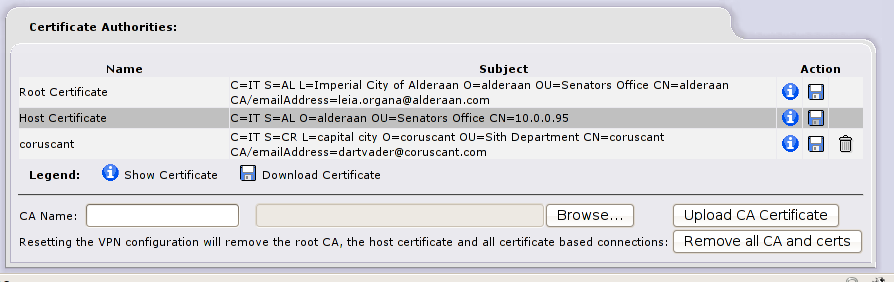
Now you know Alderaan certification authority on this machine and you’re ready to create a VPN tunnel, let’s do the same on Alderaan firewall (10.0.3.95), see screenshots:

Ready, Set, Go !
Where’s my VPN tunnel ? Relax, we’re creating it now; we’ve done the tough part related to certificates and authorities, now let’s establish the tunnel.
On Coruscant firewall hit the “Add” button in the middle of “Connection status and control” tab so you can decide the type of VPN connection; we’re trying to connect two networks so we choose Net-to-Net Virtual Private Network in the following screen, then we press add to continue (screenshot)

Now fill remote data (Alderaan) with proper values, as you may see they match remote Alderaan network (10.0.3.0/255.255.255.0) and Alderaan public/static IP address.
In the authentication section you need to select “Upload a certificate” and use hostcert.alderaan.pem certificate downloaded before, in the bottom of the page hit the “Save” button to continue,
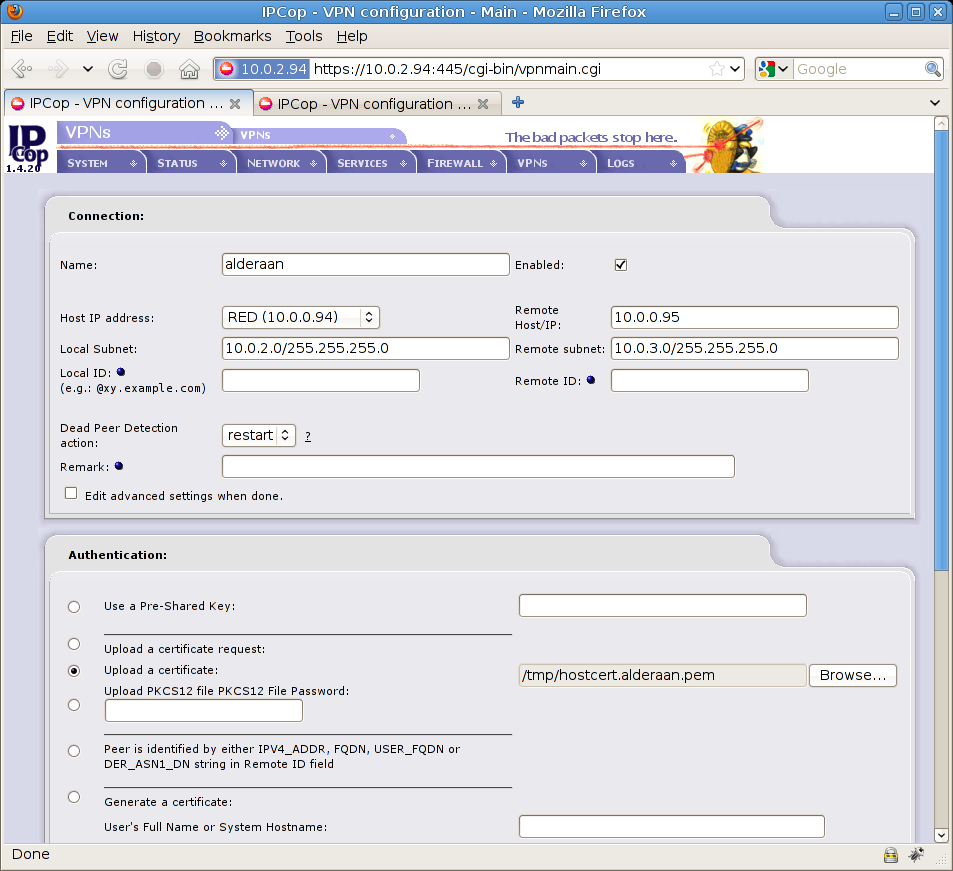
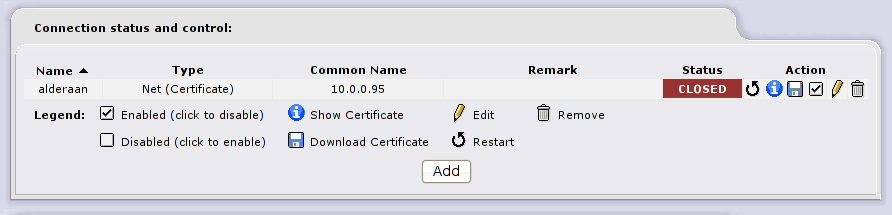
you’ll now see a new closed VPN connection on Coruscant firewall
Now do the same on Alderaan firewall to establish the connection, go to https://10.0.3.95:445/cgi-bin/vpnmain.cgi (Alderaan) and press the “Add” button to create a new VPN connection, select NET-TO-NET as done before
Now fill remote data (Coruscant) with proper values, you’re on the other side so you need to reverse everything: Coruscant network (10.0.2.0/255.255.255.0) and Coruscant public/static IP address (10.0.0.94). In the authentication section select “Upload a certificate” and hit “browse” to select hostcert.coruscant.pem , see the screenshot
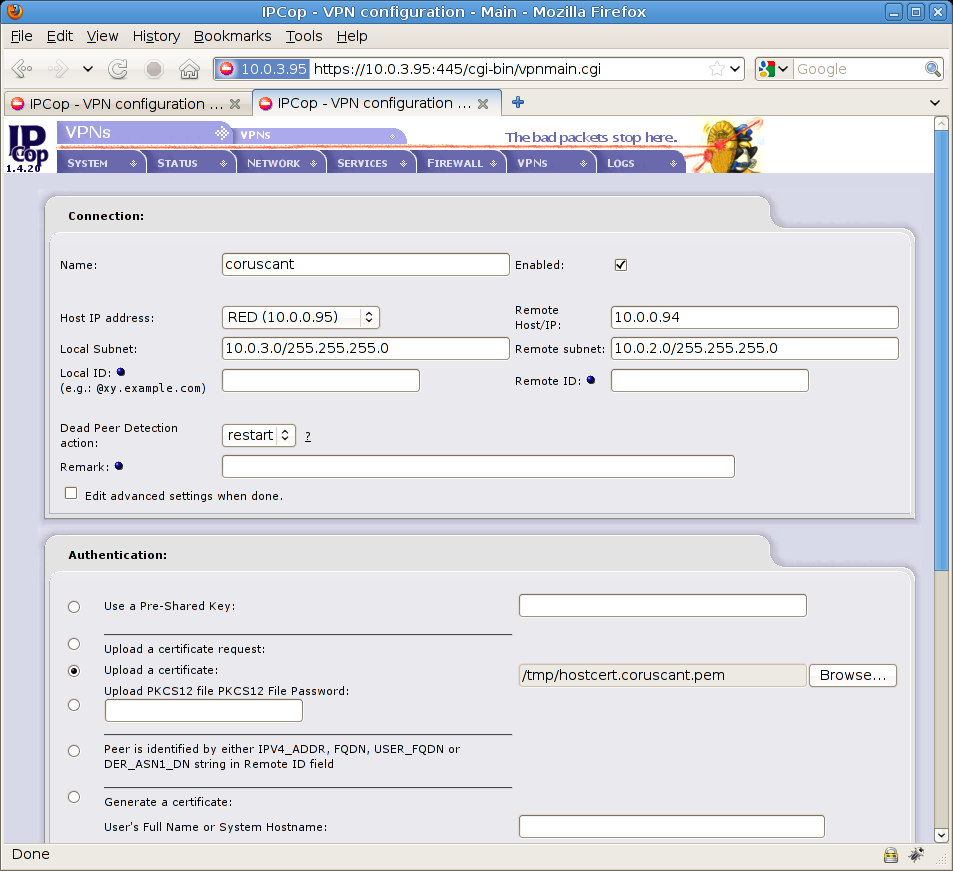
Then press save on the bottom of the page to continue
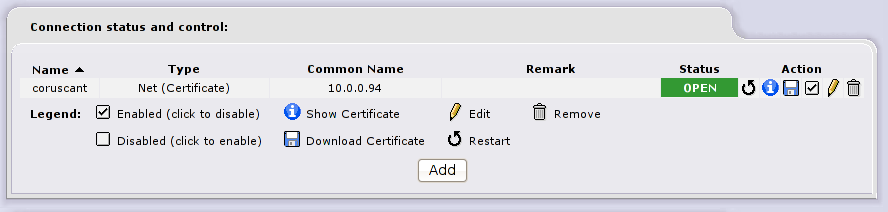
Yeah ! we’re up and running
Now these two networks are fully connected and working, I hope you’ll benefit from this article and find it useful for your work; let me know if you want further details or additional information.
Next episodes will cover, different Linux and BSD distro, more configurations, NAT and dynamic IP addresses as well.
Previous:
VPN-O-Rama: VPNs intro, practical HOWTOs
Next:
IPCop to PFSense with IPSec
Andrea Benini


