
If you’re a DBA, chances are you do most of your database administration via the command line. But when you have a number of databases to work with, running on multiple database servers, a GUI would certainly come in handy. Of course, you could always install phpMyAdmin on each server, but then you’re having to log into a different web interface for each machine. What if you could have a single point of entry for every MySQL database you administer? If that’s something you’re looking for, then you might want to give MySQL Workbench a try.
MySQL Workbench is a unified GUI for database architects, developers, and DBAs, that makes administering multiple databases (from multiple hosts) significantly more efficient. With this tool you can get an at-a-glance for the database server’s status, client connections, and server variables; manage users and privileges; export/import data; run queries; create new schema; inspect objects; create tables; create views; create stored procedures and functions; search table data; and more. MySQL Workbench is a powerhouse tool for developers and administrators. And with MySQL Workbench, you can also migrate Microsoft SQL Server, Microsoft Access, Sybase ASE, PostreSQL, and other RDBMS tables, objects, and data to MySQL with ease.
I want to walk you through the installation of MySQL Workbench as well as the steps necessary on your MySQL servers to enable connection from the new tool. I’ll be demonstrating this on a Ubuntu 16.10 desktop connecting to a Ubuntu 16.04 server. The same results can be had on different Linux distributions, only the steps may require alteration (depending upon your choice of platform).
Installing MySQL Workbench
Before you continue, know that in order to download an installation file for this tool, you do have to register for an Oracle account (both the tool and the account are free). Head over to the official MySQL Workbench download page, select your platform, click Download, and then log into your Oracle account. Once logged in, your download should start. Save the file to ~/Downloads.
The installation of MySQL isn’t challenging, but it will fail. Don’t worry, that failure is easy to fix. To start the installation, open up a terminal window and then change into the ~/Downloads directory with the command:
cd ~/Downloads
To run the initial installation, issue the command:
sudo dpkg -i mysql-workbench-community-*.deb
That installation will error out (Figure 1).
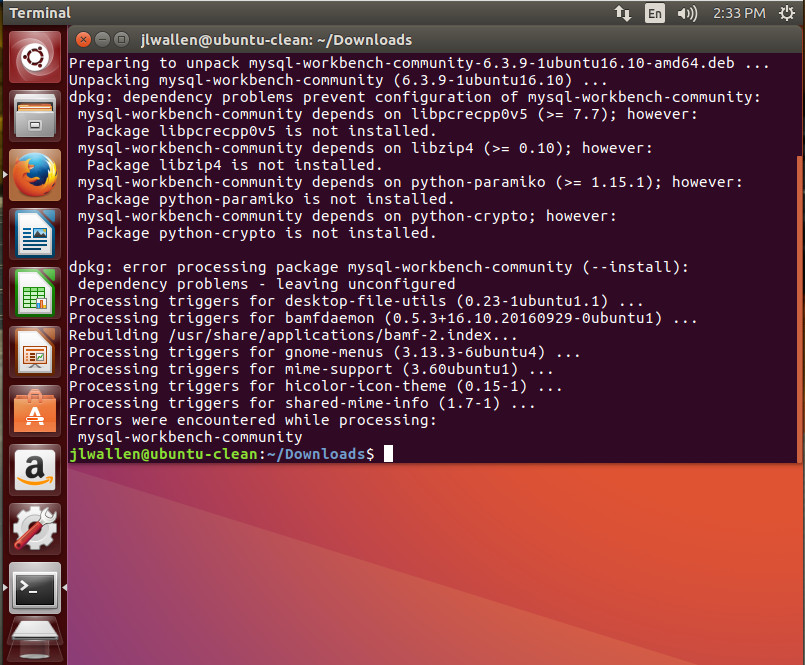
To fix these problems, issue the command:
sudo apt-get install -f
The above command will resolve all of the missing dependencies, which may (or may not exist, depending on your platform) include:
-
libglibmm-2.4-1v5
-
libgtk-3-0
-
libgtkmm-3.0-1v5
-
libpangomm-1.4-1v5
-
libpcrecpp0v5
-
libpng16-16
-
libsigc++-2.0-0v5
Once apt-get fixes the dependency errors, you are good to run MySQL Workbench from your desktop menu. However, before you use it to connect to your MySQL server, you might have to configure your server for remote connections.
Configuring your MySQL server for remote connections
If you haven’t configured your MySQL servers for remote connection, MySQL Workbench will fail to connect. There are two configurations to be taken care of. The first is to configure your MySQL database to allow connections other than 127.0.0.1. To do this you must log into your MySQL database server and open the /etc/mysql/mysql.conf.d/mysqld.cnf file for editing. With that file open, look for the line:
bind-address 127.0.0.1
Change the above line to:
bind-address 0.0.0.0
Save and close the mysqld.cnf file and restart the MySQL server with the command:
sudo systemctl restart mysql.service
Now that your server is open to remote connections, you need to enable it to allow connections with a specific user from a specific address. This is done from the MySQL command prompt. Issue the command:
mysql -u root -p
NOTE: You can substitute root for whatever user happens to be your MySQL admin account.
When prompted, enter the root password and you’ll find yourself at the MySQL prompt. Here you need to execute a command that will allow your admin user to connect to the server via MySQL Workbench. Let’s say that user is root, the IP address you’ve installed MySQL Workbench on is 192.168.1.139, and you want to allow access to all databases on the server. The command for this would be:
GRANT ALL ON *.* TO 'root'@'192.168.1.139' IDENTIFIED BY ‘PASSWORD' WITH GRANT OPTION;
Where PASSWORD is the actual password for the admin user.
Once you’ve successfully executed the above command, issue the command exit; to leave the MySQL Prompt.
You can now connect MySQL Workbench to that MySQL server.
Connecting MySQL Workbench to your server
Open up the MySQL Workbench app and then click Database > Connect to database. In the resulting window (Figure 2), fill out the details for your connection.
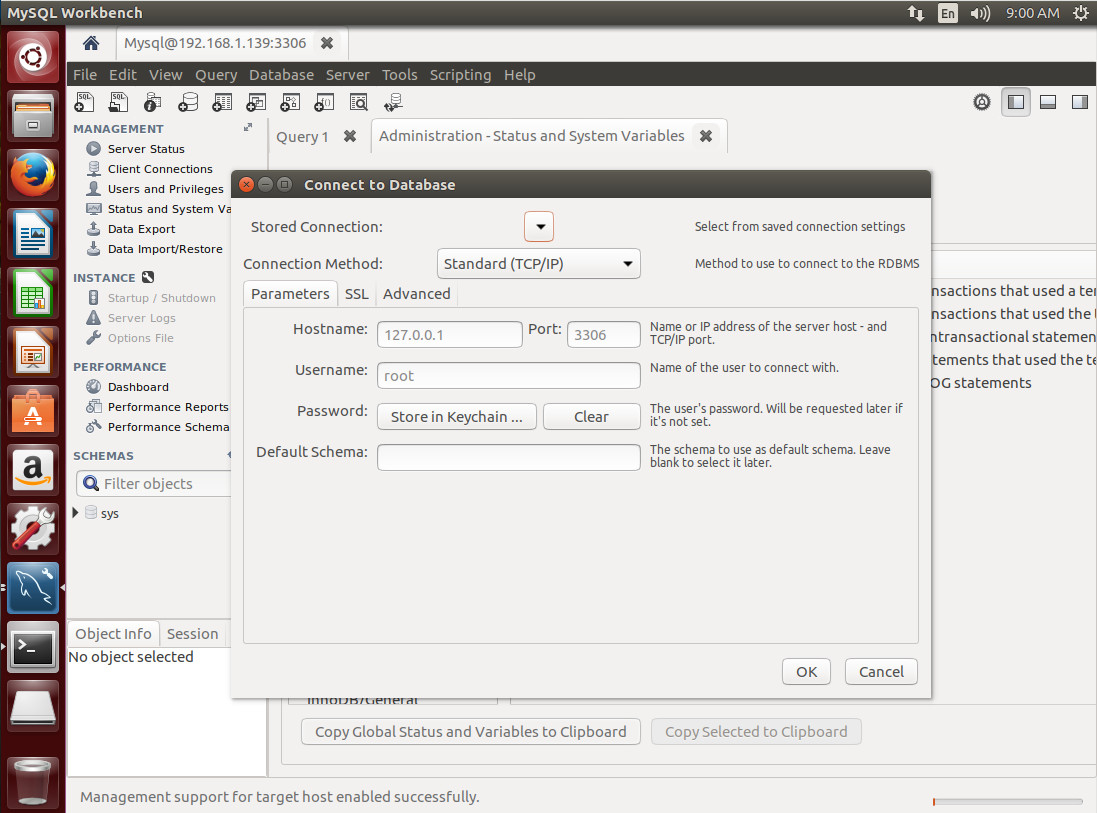
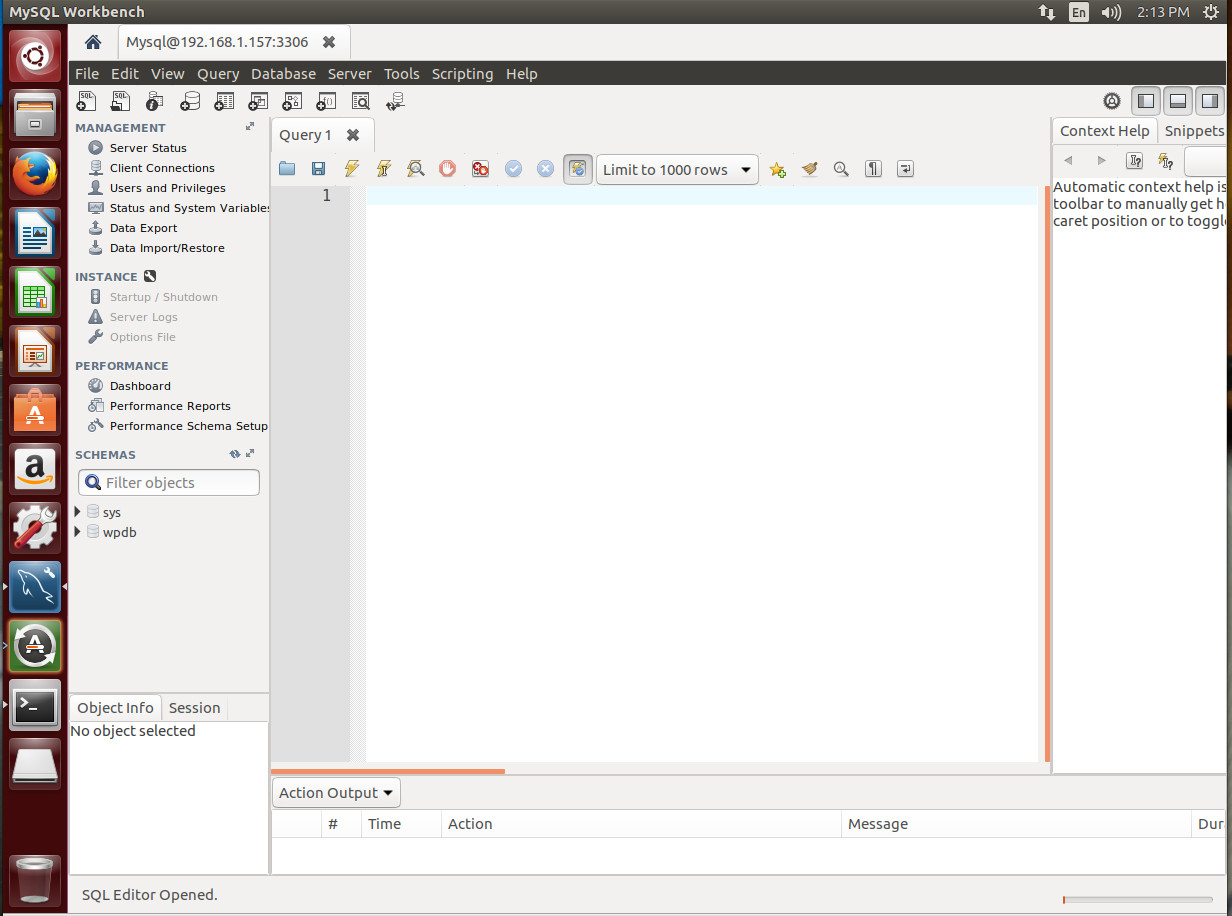
Click OK and you will prompted for the MySQL user password. Once a successful authentication occurs, you will find yourself on the main page for the connection (Figure 3), where you can take care of any number of tasks.
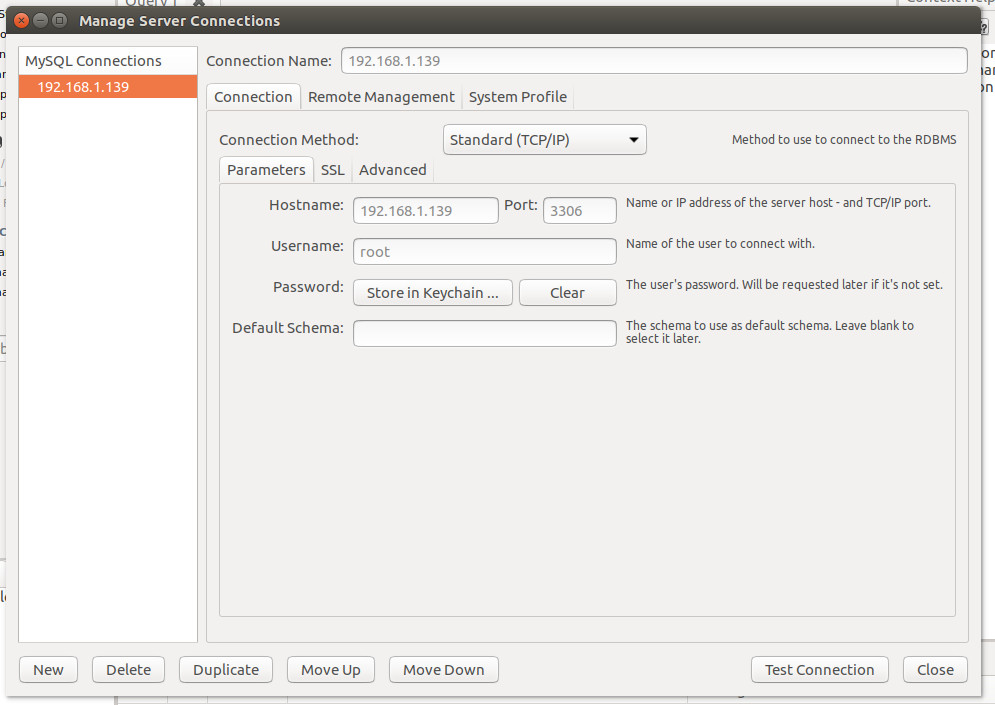
The above method for connection creates a one-time connection. If you know you’ll be connecting to this particular server frequently, you’ll want to instead create the connection through Database > Manage Server Connections. In that resulting window (Figure 4), click New, fill out the necessary details for the connection (making sure to give the connection a name), click Test Connection, enter the remote MySQL admin user password, and click OK. If the connection succeeds, click OK a second time, and click Close.
Once you close out that window, the connection will be saved. You can then go to that connection by clicking Database > Connect to Database, and select the server you wish to connect to from the Stored Connection drop-down (Figure 5).

At this point, you can start creating, administering, and managing your databases with the help of a very powerful (and user-friendly) GUI.
The MySQL Workbench is just one of a few GUI tools that can help make your MySQL database administration significantly more efficient. Give this tool a try and see if it doesn’t very quickly become your daily driver.
Learn more about Linux through the free “Introduction to Linux” course from The Linux Foundation and edX.


