
Linux is well known for being a highly secure platform. One of the reasons for said security is the Netfilter system. For those that don’t know, Netfilter is a framework, provided by the Linux kernel, that allows for various networking operations, such as packet filtering, network address translations, port translation, and the ability to block packets from reaching specific locations. For most distributions, Netfilter is implemented through the user-space application, iptables. Although many would agree that iptables is the most powerful security tool you can work with, along with that power comes a level of complexity that stumps many an IT administrator.
That’s where the likes of Shorewall comes into play. Shorewall is an open source firewalling tool that not only makes the task of network security easier, it also allows for much easier handling of zones. Shorewall uses zones to define different portions of a network. Say, for instance, you want to create a private internal network that can only be accessed by specific machines, a guest network that can be accessed by anyone, a network dedicated to production machines, and a network that can be accessed from machines outside your Local Area Network (LAN). With Shorewall, you can easily do this.
How Shorewall works
Shorewall is a high-level configuration tool for Netfilter. Shorewall works by reading configuration files (with the help of iptables, iptables-restore, ip, and tc) found in /etc/shorewall. The primary files used are:
-
Interfaces — defines the physical networking interfaces to be used
-
Policy — defines the high-level policy for connections between zones
-
Rules — defines connection establishment by defining exceptions to the policy file
-
Zones — defines your network zones
Shorewall can be used on a dedicated firewall system, a multi-function gateway, a router, a server, or a standalone system. One thing to note is that Shorewall is not a daemon. Once Shorewall has done its job configuring the networking subsystem (by way of the configuration files above), it’s job is done. You will not find a Shorewall process running in the background. Shorewall can also handle systems with multiple IP interfaces/addresses.
For the sake of simplicity, I’m going to walk you through setting it up on a system with a single IP address and single interface to allow SSH traffic to come in from an external address. NOTE: This sample would also require you to set up your external-facing modem to route traffic properly (otherwise, the packets wouldn’t even make it to the Shorewall-enabled system.
With that said, let’s install Shorewall and set up a basic configuration.
Installation
The installation of Shorewall is actually quite simple. I’ll demonstrate on an Ubuntu Server system, but the installation on CentOS or other system is similar (using a different package manager, of course). For installation, just open up a terminal window and issue the following two command:
-
sudo apt-get update
-
sudo apt-get install shorewall
Once the installation finishes, you need to set Shorewall to run. To do this, open up the file /etc/default/shorewall and set startup=0 to startup=1. Save and close that file.
Out of the box, Shorewall doesn’t add configuration files to the default directory (/etc/shorewall). Instead, you must copy the necessary files from one of the following directories:
-
/usr/share/doc/shorewall/examples/one-interface
-
/usr/share/doc/shorewall/examples/two-interfaces
-
/usr/share/doc/shorewall/examples/three-interfaces
-
/usr/share/doc/shorewall/examples/Universal
We’ll be copying from the one-interface directory. To do this, open up your terminal window and issue the following command:
sudo cp /usr/share/doc/shorewall/examples/one-interface/* /etc/shorewall/
At this point, you’re now ready to configure Shorewall.
Configuring for SSH
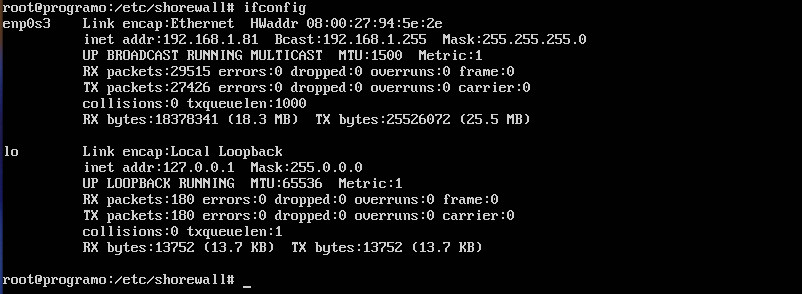
For our example, suppose we want to restrict secure shell access such that server at IP address 192.168.1.81 can only be reached by server at the 192.168.1.162 address. To do this, we have to work with the zones, interfaces, policy, and rules files. To complete this action, you’ll have to know the name of your interface to be used. This information can be discovered by issuing the ifconfig command (Figure 1).
We’ll first create a new zone and call it loc (for local traffic). Open up the /etc/shorewall/zones file and add the following two lines to the bottom:
net ipv4

loc ipv4
Save and close the file.
Now let’s open up the /etc/shorewall/interfaces file for editing and add the following to the bottom:
loc enp0s3
Save and close that file.
Next we open the /etc/shorewall/policy file and add the following line ABOVE the second to last line:
loc net ACCEPT
The last three lines of this file should now read:
loc    net    ACCEPT

# THE FOLLOWING POLICY MUST BE LAST

all    all    REJECT    info
Save and close that file.
Now we must edit the /etc/shorewall/rules file. This is one of the most important (and challenging) of the files to be edited. Remember, we are wanting to secure shell from 192.168.1.162 into 192.168.1.81. At the bottom of the rules file, you’ll need to add the following two lines:
SSH(ACCEPT)    loc:192.168.1.162    $FW    tcp    ssh

DNAT            loc:192.168.1.162    loc:192.168.1.81    tcp    ssh
The DNAT entry is used for port forwarding. Without this entry, Shorewall would not know where to send the ssh request to.
Save and close that file.
Checking and restarting
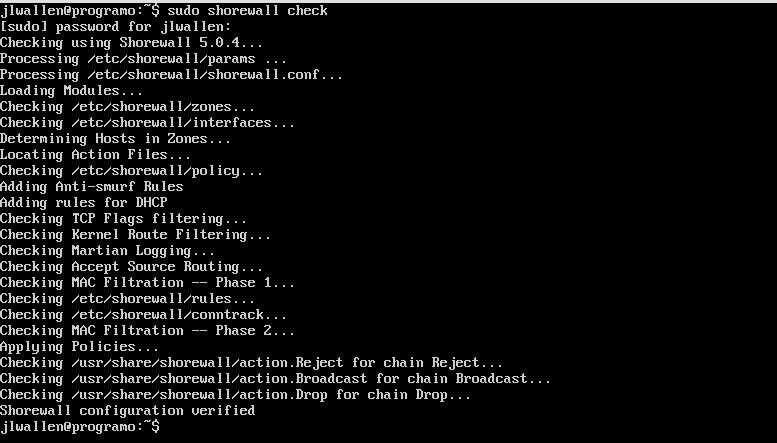
After you’ve configured and saved all your files, you need to run a check on them. Fortunately, Shorewall has a built-in checking tool. From a terminal window, issue the command sudo shorewall check. Shorewall will run through all of your config files to make sure there are no problems (Figure 2).
If no problems are found, clear Shorewall with the command sudo shorewall clear and then restart Shorewall with the command sudo shorewall restart.
At this point, you should now be able to secure shell into the 192.168.1.81 server from the machine at IP address 192.168.1.162.
Keep going
At this point, you have a basic understanding of how Shorewall works. It would behoove you to read through the crucial man pages:
-
man shorewall-zones
-
man shorewall-policy
-
man shorewall-rules
With the basic information you have, and the information available in the man pages, you should be able to make Shorewall do exactly what you want. Keep your systems safe, route your traffic as you need, and keep going with Shorewall.
Stay one step ahead of malicious hackers with The Linux Foundation’s Linux Security Fundamentals course. Download a sample chapter today!


