
ROS is an open source framework allowing you to create advanced robots. Using ROS takes much of the tedious work out of creating useful robots because it supplies code for navigation, arm manipulation, and other common robot tasks. ROS allows various software components to communicate between one or more computers and microcontrollers, and it allows you to control one or more machine robot networks from a desktop, web browser, and/or other input device. Although ROS stands for Robot Operating System, it is really a framework that sits on top of an existing operating system such as GNU/Linux. Packages are provided for Ubuntu Linux to help get your robot up and rolling.
The more ambitious your robot design becomes, the more ROS will be able to help you. For example, with ROS you can take a robot beyond manual control with a joystick and tell the robot to make its own way into the kitchen. The difference in complexity from the former to a robot that can create and use maps and avoid obstacles along the way is quite substantial. For example, joystick control of a robot can be set up fairly quickly just using an Arduino. For autonomous movement, ROS has map creation, depth map handling, and robot localization already available so you can use higher level “go to this place” commands.
A high-level overview
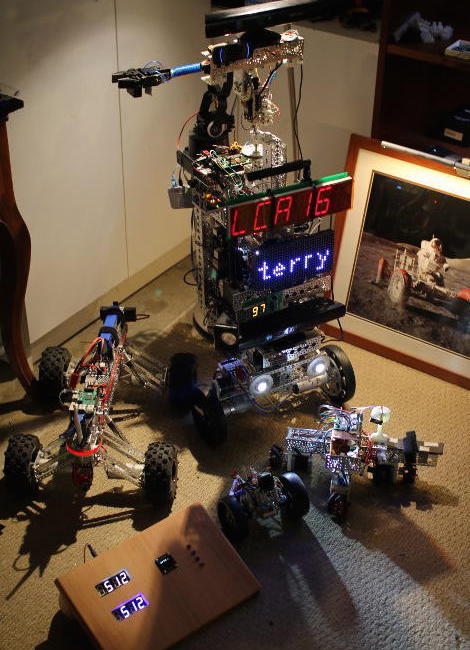
ROS provides support for a publish and subscribe message model using a namespace like a filesystem. A program can register one or more ROS nodes and these nodes can publish and subscribe to topics that are interesting to them. For example, you might have a ROS node that reads a USB camera and publishes the images to the “/camera” topic for the rest of your robot to enjoy. A small Arduino might subscribe to messages on “/clawpincer” and adjust the position of your robot claw based on messages that are sent to it. This separation of processing into nodes which send and receive messages on topics allows you to connect together specialized nodes to form an entire robot. The message passing helps to keep your nodes separate. A node might just display information on an LED screen without needing to know anything about the rest of your robot (Figure 1).
Messages sent to topics can use basic types like integers, floating point numbers, times, durations, strings, and multidimensional arrays as well as some robotics specific types for example setting the desired drive speeds(s) and direction(s). You can also define your own custom message types.
A complex robot is likely to run many nodes, and starting things up in the right order can be a complex task in itself. ROS uses launch XML files to describe how and what needs to be started. A launch file can also include other launch files, so you can create a single command that will start your motor controller, cameras, navigation and mapping stack, displays, custom radio control software, etc.
The ROS MoveIt! software lets your robot use one or more arms to manipulate objects. MoveIt! integrates with ROS, detecting objects which might be temporarily blocking the most direct path that an arm might have otherwise taken to move to a given location.
A ROS node can be written in either C++ or Python. A partial example of publishing a message to a topic in ROS is shown below. The NodeHandle can be reused to send multiple messages; in this case, we are sending a single string to a topic that is specified using the template parameter to advertise(). Instead of passing a std::string to publish(), the ROS std::msgs type is passed.
ros::NodeHandle n;
ros::Publisher chatter_pub = n.advertise("chatter", 1000);
...
std_msgs::String msg;
msg.data = "hello world";
chatter_pub.publish(msg);
Part of a Python program that listens on the chatter topic is shown below. As you can see, the basic type is accessed through the “.data” element much as in the C++ publisher shown above.
def callback(data):
   rospy.loginfo(rospy.get_caller_id() + "I heard %s", data.data)

def listener():
   rospy.init_node('listener', anonymous=True)
   rospy.Subscriber("chatter", String, callback)
It is very useful for your robot to present a web interface offering both information and remote control. By starting the rosbridge_websocket package, you can send and receive ROS messages from JavaScript in the browser.
The following fragments set up a “ros” object for communication and, when a bootstrap form is completed, will send a message to the “/screen/textbig” topic so that the robot shows a given string to you. Although this example is simply showing text on the robot, you can also use sliders to alter the position of your robot arm or set waypoints in the web interface to have the robot move around.
var ros = new ROSLIB.Ros({
  url : 'ws://192.168.2.3:9090'
});

var topic_screen_text_big = new ROSLIB.Topic({
   ros  : ros,
   name : '/screen/textbig',
   messageType : 'std_msgs/String'
});
var screen_showBigText = function() {
   var txt = $('#screen-textbig').val();
   topic_screen_text_big.publish( new ROSLIB.Message({ data: txt }) );
}
// ...
<form class="form-inline" onsubmit="screen_showBigText()" action="#">
 <div class="row">
     <div class="col-md-2"><label>BIG Text</label></div>
     <div class="col-md-4"><input  type="text"   class="form-control"
          placeholder="" id="screen-textbig" /></div>
     <div class="col-md-1"><button type="submit" class="btn btn-default">Submit</button></div>
 </div>
</form>
When starting out in robotics, it might be tempting to dismiss robot simulators. Simulators are great for folks who don’t have the real robot; but if you have the robot, why would you bother simulating it? Some things might be seen as a cross-over between simulation and reality. For example, when building a map, you are taking data from a camera or lidar device telling you how far things are away from your real robot in the real world. You can then mark that in your map and move your real robot around a bit and take another reading of how far things are away in the real world. You might think of the map that you are building as a model or “simulation” of the real world, which is affected by data that is acquired from the real world (your camera or lidar). Another example might be that you want to see how an arm movement will look on screen before performing it in the real world. So, the line between robotic simulation and the real robot can become a grey area.
ROS has support for simulation using Gazebo and a robot visualization tool called rviz, which lets to see your robot, its map, where the robot thinks it is located, and other data that is sent around through ROS topics.
You will often want to know exactly where something on your robot is relative to the real world. Is the camera located at ground level or 2 feet above the ground? You’ll need to know if the arm is at the front or the back of the robot to work out how far you extend the arm to pick something up. ROS provides the TF framework so you can describe in XML the layout of your robot and then easily find out where things are located without having to perform complex calculations in your own code.
Moving a robot is done by publishing a Twist message to the “/cmd_vel” topic. The Twist message is rather generic and allows a speed and heading to be given for up to three axes. For a robot that operates by turning two wheels, you will only need to set a single speed and a single angle or heading. To provide feedback about movement, a robot base will publish Odometry information, which contains information about the current twist the robot is following and the pose of the robot. The pose allows a robot to show what direction it is facing as it is moving — handy for robots that can move sideways as well as backward and forward. It is also very useful to know if the robot is facing the door or has just entered through it.
Driving with no hands
For a robot to move to a desired destination by itself, many things are likely to be needed. A map of the walls and obstacles in the environment are needed, for example. Other requirements include knowledge of where the robot is on that map, some method to detect objects that block the path but that are not always on the map, a way to generate a plan to get to the destination from the current location, and a means to monitor exactly where the robot is as it moves towards the goal position. Being able to send messages to the robot base telling it what speed and heading to follow and then to monitor the odometry information as the robot moves allows control of the robot to be abstracted from how motion is achieved.
One fairly affordable method to build maps is using an “RGBD” camera, such as the Kinect, which offers both color and depth information in each image. Another way to work out depth information is by using two cameras that are a known distance apart, such as with a PlayStation camera or creating a similar setup using two normal web cameras in a fixed location. The Kinect is designed for indoor use in gaming and does not work well outside where there is a lot of background infrared light. Using two cameras can work both inside and outside but also requires light in order to see objects.
ROS has support for depth information from both the Kinect and PS4 eye cameras. For the latter, you will also need to resolder the PS4 eye cable to obtain a USB3 connection to it. Although I have seen successful modifications like this, you should be prepared to possibly damage or destroy some of your hardware if you undertake them.
Although cameras can provide information about how far objects are away in three dimensions, you might like to start navigating around by converting the information from the camera into a 2D representation. This is much less computationally intense, and ROS has good support for converting information from a Kinect to a “laser scan,” where the depth information is converted into a 2Dl representation of how far away objects are from the robot. The laser scan is then used by the gmapping package to generate a map of the environment. The Adaptive Monte Carlo Localization (AMCL) package can use the current laser scan and a rough idea of where the robot started to determine where the robot currently is located on a map. As the robot moves around a little bit, the initial location estimate is improved because more depth information from the real world helps work out the position of the robot relative to the map.
Final words
ROS is a very powerful robotics platform. That said, it does have a fairly steep learning curve. Some key tutorials would help ease new users into creating fully functional robots. For example, detailed instructions for the creation of an extremely cheap robot arm complete with a ROS package to drive it would provide a great base for customization for the robot arm you might have on your desk. It is often much simpler to customize the arm segment lengths in your robot arm model from an existing software package than to start from scratch.
On the other hand, ROS does allow a determined hobbyist to create a robot with mapping and navigation and be able to talk from JavaScript through to Arduino code running on one of many specific hardware controller boards on a robot.


