
Introduction
Here’s another episode of my VPN saga, this time we’ll connect IPCop to PFSense with IPSec.
Just few words about PFSense (http://www.pfsense.org/) if you don’t know it; I’ve always used BSD and I’m a big fan of it, OK we’re in a Linux site but many of you may possibly argue about BSD proof of scalability, stability, security, simplicity (IMHO) and networking capabilities (even after recent events, fake or not).
BSD PF (http://www.openbsd.org/faq/pf/) (Packet Filter) if a great technology and I totally love it, I don’t want to start a flame war between Packet Filter and IPTables, this article is just focused on building an IPSec connection between Linux and a particular BSD distro (PFSense). I’ve done some research after dealing with M0n0wall, Smoothwall and so on and I’ve decided to give PFSense a try. It’s one of my favorite firewall distributions, SOHO installations but even heavy duty connections and features (NAT traversal or load balancing for example), it’s not a project for hobbyists, it may scale to business class installations easily.
Following this “VPN by examples” guide I’ll connect PFSense to IPCop with an IPSec connection, both machines have static IP addresses, in later examples I’ll use even dynamic IPs; I didn’t find anything related to IPCop to PFSense available on the web so I’ve decided to publish my documentation with a lot of screenshots as usual.
This article will follow my previous “VPN-O-Rama: IPCop to IPCop with IPSec” (http://www.linux.com/community/blogs/vpn-o-rama-ipcop-to-ipcop-with-ipsec.html) and I’ll add a new machine to the same network, so it will be:
Network topology:
|
Office |
Network |
Subnet |
|
Headquarter (Coruscant) |
10.0.2.0 |
255.255.255.0 |
|
Subsidiary 1 (Alderaan) |
10.0.3.0 |
255.255.255.0 |
|
Subsidiary 1 (Tatooine) |
10.0.4.0 |
255.255.255.0 |
Firewalls:
|
Location/Name |
Firewall Distro |
Private IP (LAN) |
Public IP (WAN) |
|
Coruscant |
IPCop v1.4.21 |
10.0.2.94 |
10.0.0.94 |
|
Alderaan |
IPCop v1.4.21 |
10.0.3.95 |
10.0.0.95 |
|
Tatooine |
PFSense v1.2.3 |
10.0.4.96 |
10.0.0.96 |
I’ve skipped PFSense installation process to focus on a ready new installed PFSense machine named Tatooine, let me know if you need an article on it.
My Goal
I’d like to achieve an IPSec connection between two static machines (Tatooine and Coruscant), no firewalls or other port blocking rules on public WAN between these two firewalls, variations on this task may follow on following articles
PFSense Configuration
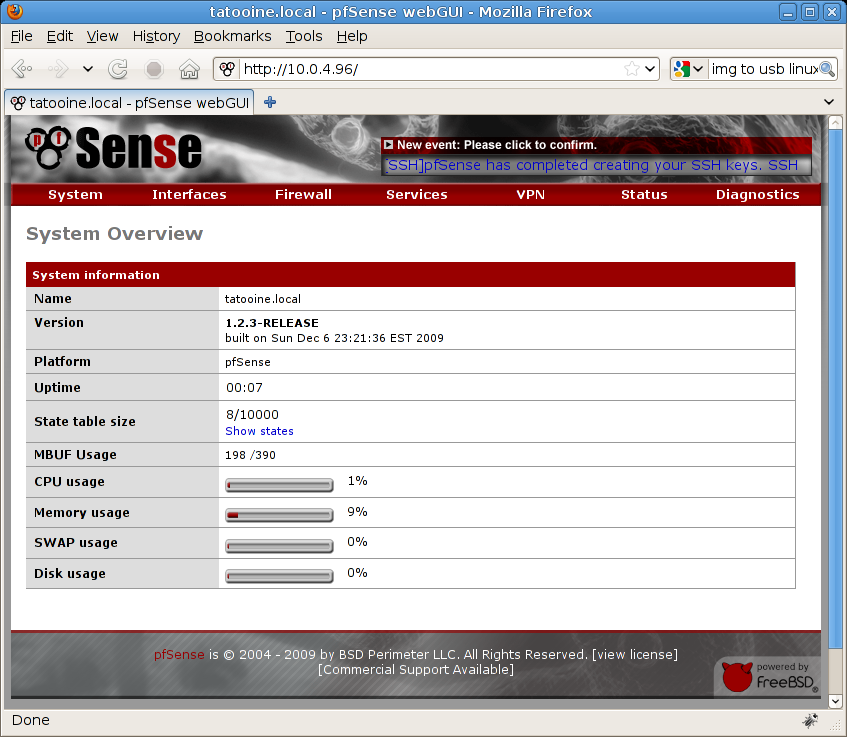
Here’s PFSense main GUI in the private network example:
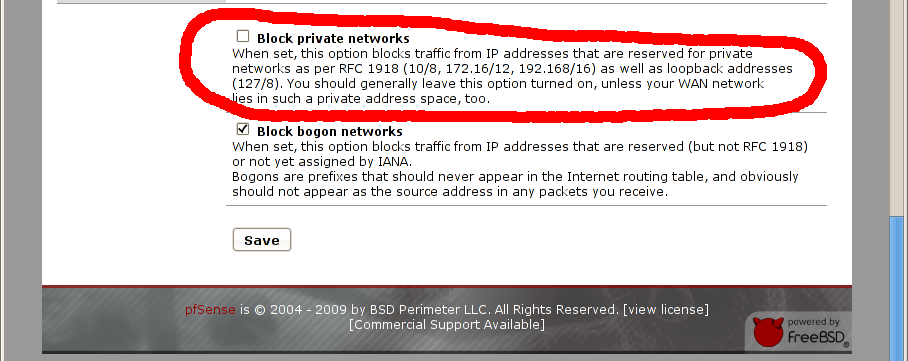
WARNING:
Before every configuration please consider we’re creating an example and we’re using private networks (10.0.0.0 Class A IPs on WAN), on PFSense there’s an option made for blocking private network traffic on WAN, before starting with our example you need to disable this rule ! Under Menu Interfaces / WAN there’s an option named “Block private networks”. Just forget it if you’re using a real network on public classes (on WAN), see screenshot and disable this rule if you’re in my case
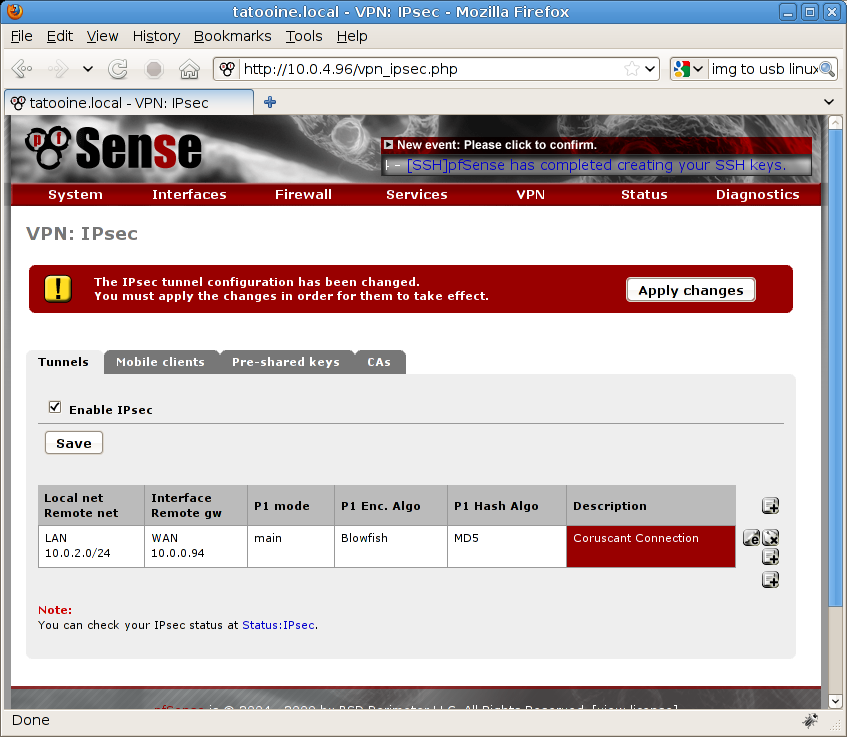
Now go under VPN menu, option IPSec
Enable “Enable IPSec” check box and hit “Save” button, see:
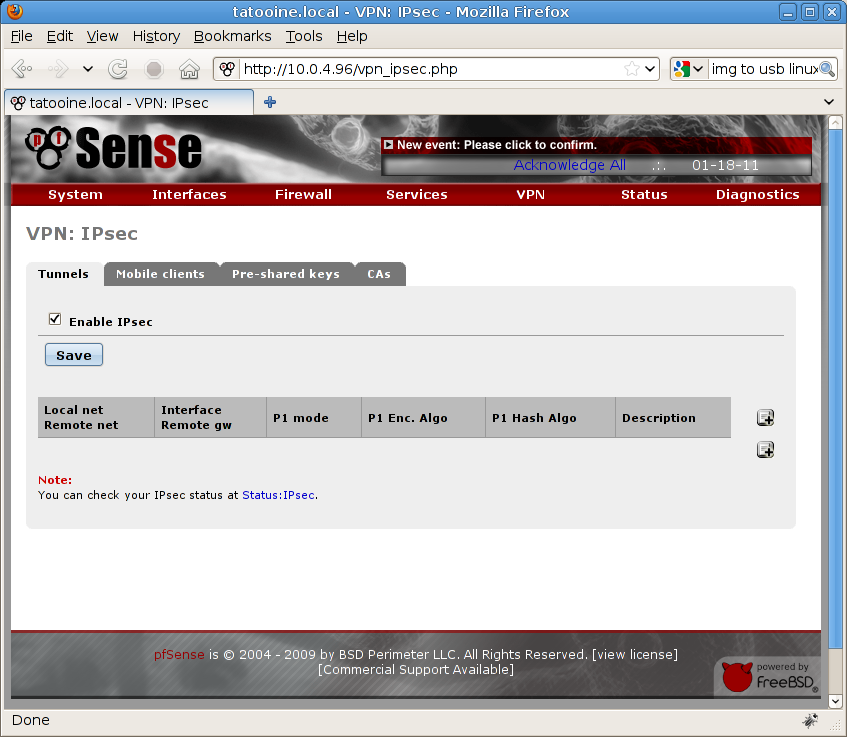
then click the “Add tunnel” icon on the right side of the page, now you’ve a new page where you can specify VPN tunnel options. Here’s what I’ve done:
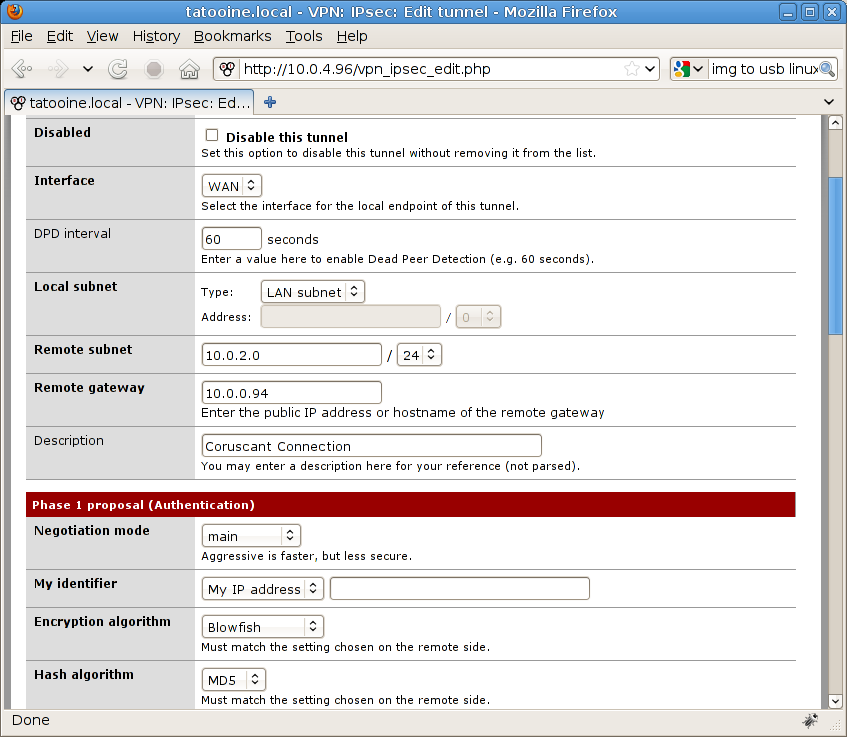
General parameters (PFSense related)
-
Tunnel enabled, so disable this tunnel check box is unchecked
-
Interface WAN, in my case I need to use WAN to reach remote subnet
-
DPD interval (dead peer detection), in my case 60 seconds (it should be enough for everyone)
-
Remote Subnet, in this example is 10.0.2.0 (Coruscant network) with a 24 bit mask (255.255.255.0)
-
Remote Gateway, in this example is 10.0.0.94 (Coruscant firewall on public network)
VPN Phase 1 Authentication (VPN Parameters for phase 1)
-
Negotiation Mode, set to “main”
-
My Identifier, left as it is (my IP address). In my case I’ve a quite easy network connection with two static IP addresses, no NAT traversal or other stuff around. We’ll see advanced configurations with NAT and dynamic IP addresses the next time
-
Encryption algorithm, I’m using Blowfish, much better than 3DES. Please remember all your parameters, they must match settings chosen on the remote side
-
Hash algorithm, MD5 for hashing, I’ve chosen MD5 here and on IPCop side
Let me show you first page with parameters from above
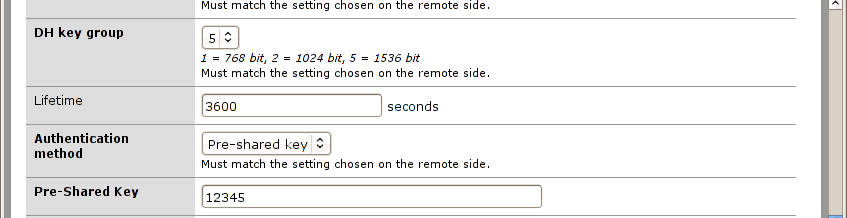
Let’s go on with:
-
DH key group, select option “5” (on IPCop I’ve chosen 1536 bits)
-
Lifetime, set it to 3600 seconds (1 hour)
-
Authentication Method, I’m now using “pre-shared key”, CA (Certification Authorities) are not available as native services on PFSense. Developers are focusing their software on firewall features and I respect their ideas related on keeping CAs outside even if it would be great to have something inside (like IPCop and other Linux distros). Creating a CA from scratch on an another PC requires a lot of time and it’s out of this article tasks, I’ll write down some notes on it if you need it. To keep things as simple as I can I’ve chosen to use Pre Shared Key, this is not a roadwarrior connection but a connection between two offices so it’s something a common user never see
-
Pre-Shared Key, I’m using “12345” (“I’ve got the same combination on my luggage” cit.: http://en.wikiquote.org/wiki/Spaceballs )
And here’s another shot:
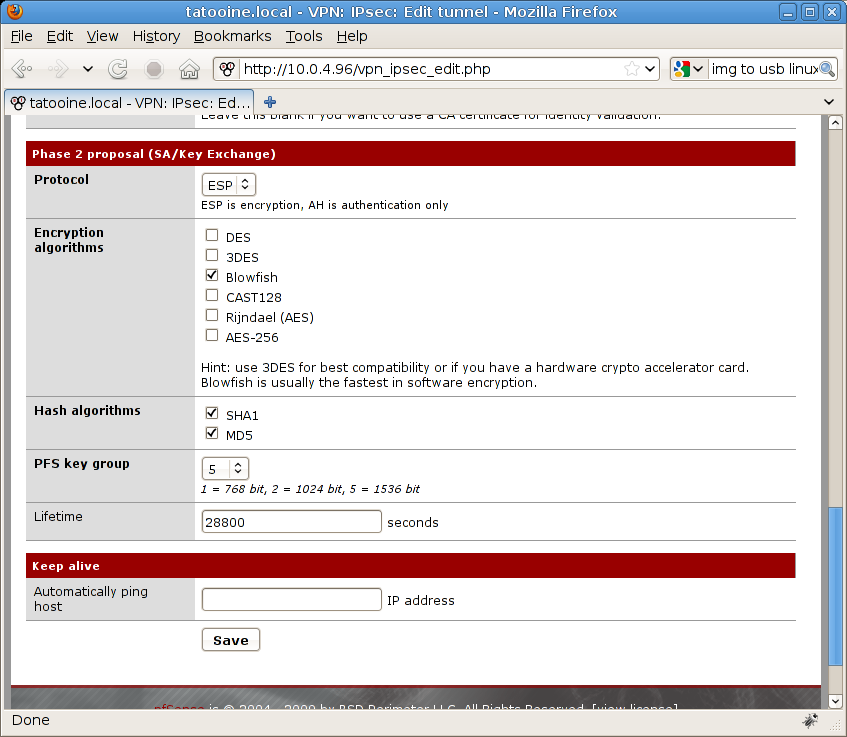
VPN Phase 2 proposal (SA/Key Exchange)
Here’s the second round of a VPN connection: key proposal and exchange, here are my parameters:
-
Protocol: ESP, encryption
-
Encryption algorithms, I’m using Blowfish, I’ve disabled everything else to avoid confusion so VPN server avoids even their proposal
-
Hash algorithms, SHA1 and MD5, keep them as they are
-
PFS key group, we’re using 1536 bit so option “5” is the way to go
-
Lifetime, is 28800 (8 hours)
No keep alive host, use something if you detect drops on your line
Here’s my shot:
I’ll repeat it again, please keep in mind all these parameters are mandatory , you need to fill them even if PFSense tells you they’re optionals and even more important: write them to a notepad and report them as they are on the IPCop side.
Finally hit SAVE button to create your VPN connection, now on the VPN:IPSec page hit Apply Changes button to confirm your new VPN connection.
IPCop Configuration
Now it’s time to create the VPN connection on the IPCop side, back again on Coruscant, you’ll probably see past article information (http://www.linux.com/community/blogs/vpn-o-rama-ipcop-to-ipcop-with-ipsec.html) but we don’t care.
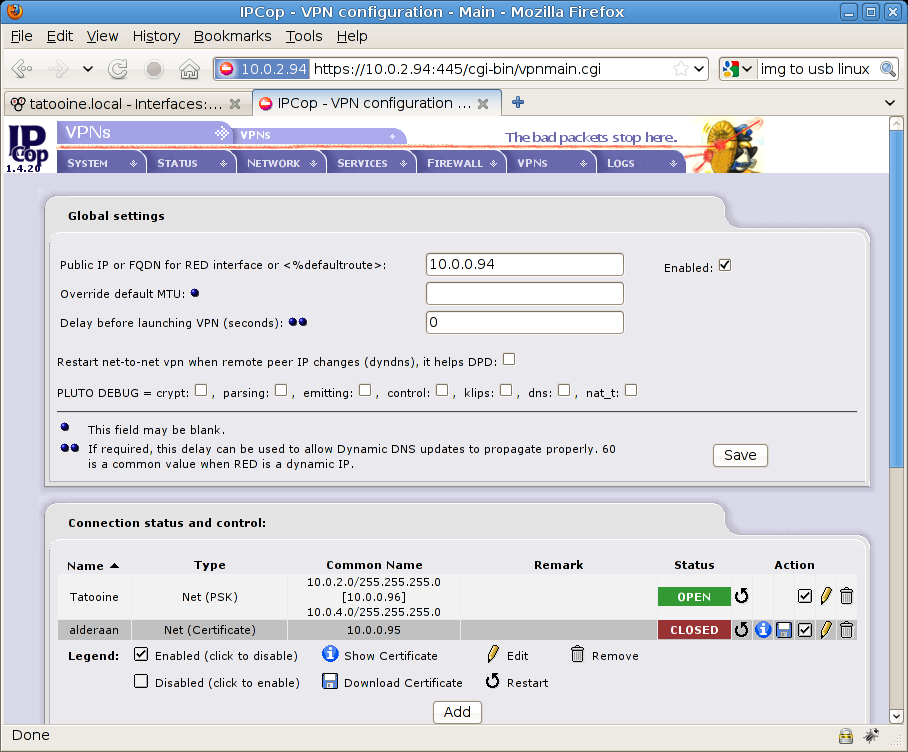
On VPNs menu, VPNs option here’s the situation:
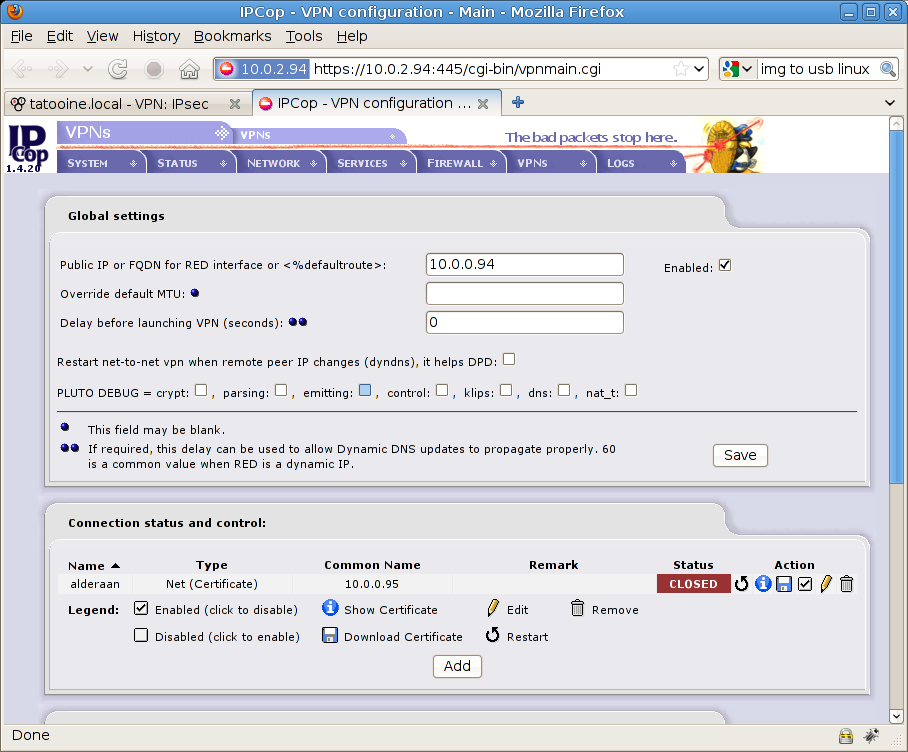
now press “Add” button in the middle of the screen to create a new PSK VPN connection with IPSec and select Net-to-Net Virtual Private Network to continue, we want to connect these two nets, then press Add to go on (see screenshot)

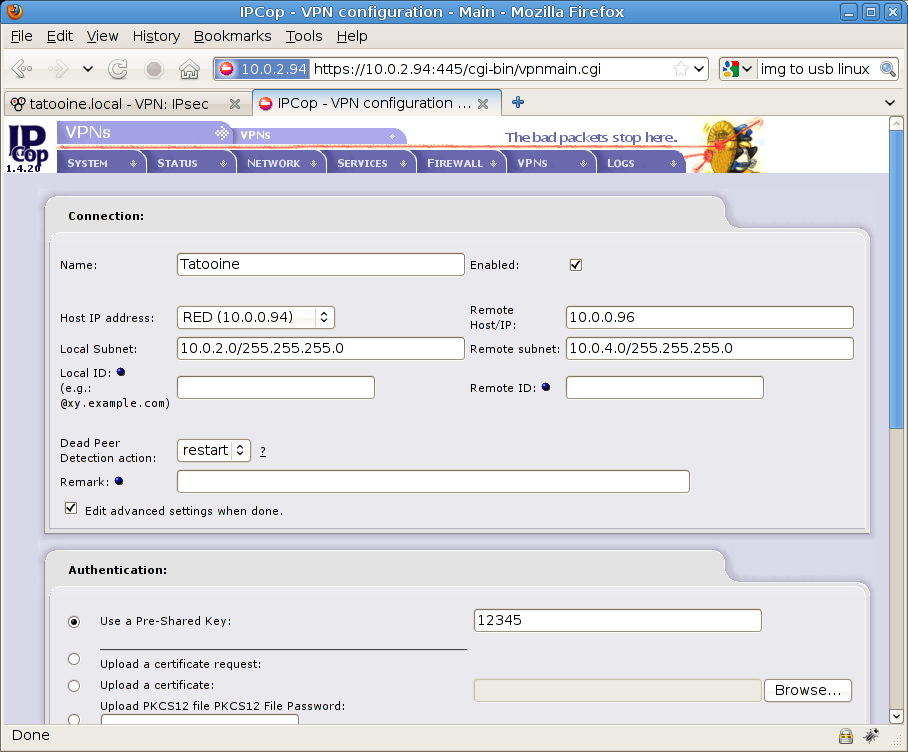
Here are the parameters for this VPN connection:
-
Name, Tatooine. The name of your VPN connection, choose the name you want, it really doesn’t matter
-
Host IP Address: 10.0.0.94. Where VPN starts: red interface, WAN (see previous information about it)
-
Remote Host/IP: 10.0.0.96. Where your remote firewall (Tatooine) is, static IP address in my case
-
Local Subnet: 10.0.2.0/255.255.255.0 It should be already set to your own subnet LAN on Coruscant network
-
Remote Subnet: 10.0.4.0/255.255.255.0 Tatooine network information for our example
-
Check “Edit advanced settings when done” check box because you need to deal with Phase 1 & 2 advanced parameters for VPN settings, important
-
In authentication window below select “Use a Pre-Shared key” and enter “12345” as the PSK password (please choose a different one on real cases, we already have Spaceballs http://en.wikiquote.org/wiki/Spaceballs)
Here’s another shot
Then hit Save on the bottom of the page to edit advanced settings.
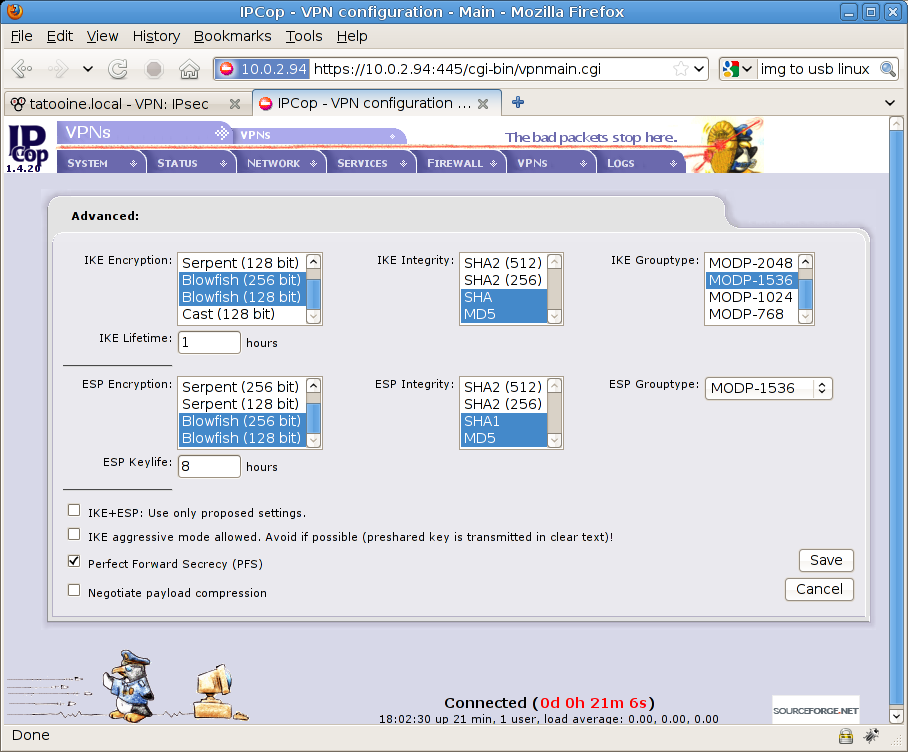
Now You’re in the advanced settings page where you can specify connection parameters for phase 1 & 2 (VPN)
Here you need to set:
Phase 1
-
IKE Encryption to Blowfish (both 256bit and 128bit)
-
IKE Integrity to SHA1 and MD5
-
IKE Grouptype to MODP-1536 (remember 1536 bit above ???)
-
IKE Lifetime to 1 hour
Phase 2
-
ESP Encryption to Blowfish (both 256bit and 128bit)
-
ESP Integrity to SHA1 and MD5
-
ESP Grouptype to MODP-1536
-
ESP Keylife to 8 hours
Keep additional parameters (checkboxes below) as they are, so everything unchecked except “Perfect Forward Secrecy (PFS)“
See screenshot for details
Now under main VPN menu on IPCop wait for a while (how much ? a while…) and you’ll probably see something like that (open status is green)
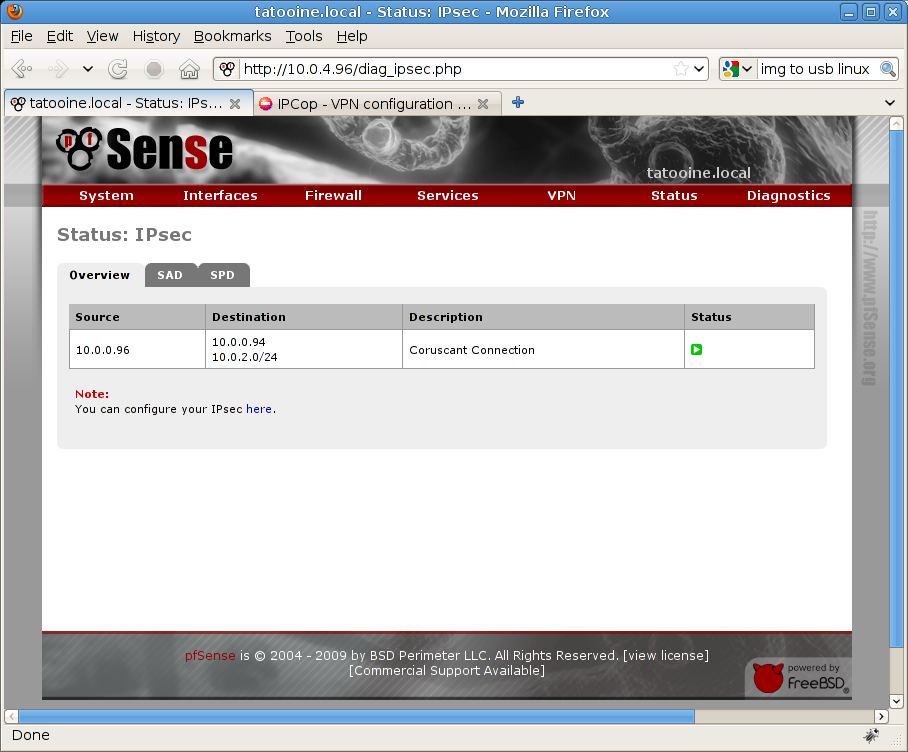
On PFSense side you need to go to Status menu, IPSec option and in the Overview tab you’ll see this (status with green arrow is for the on line link):
As you may see from this example all efforts are related to match proper VPN parameters, phase 1 and phase 2 settings needs to have same values on both sides, it’s also important to mention IKE lifetime and keylife, if they don’t match you don’t even have the connection.
I hope this guide could be pretty clear for anyone, I’ve tried to search something like that when I was dealing with my first connection but unlikely I didn’t found anything on the web.
Please let me know if you need further details on this connection, in the next episodes I’ll show you some variations of this Config and I’ll connect new distros as well, share your comments if any
Previous:
VPN-O-Rama: VPNs intro, practical HOWTOs
VPN-O-Rama: IPCop to IPCop with IPSec
Next:
IPSec connection between a static and dynamic IP Address
Regards
Andrea (Ben) Benini


