The Sphinx Python Documentation Generator was originally created to build Python documentation, and then it evolved into a good general-purpose documentation creator. It is especially well-suited to creating technical documentation, with support for images, cross-referencing, automatic indices, flexible tables of contents, citations, and footnotes. From a single source file you can create single- or multi-page HTML, PDF, epub, JSON, LaTeX, Texinfo, man pages, and plain text documents.
Sphinx’s native markup language is reStructuredText (RST), and parsing and translating are handled by Docutils. RST is easy to learn and fully-documented. When you build and preview your output pages, Sphinx automatically finds markup errors for you.
Installing Sphinx
On most Linux distributions the Sphinx package is python-sphinx. This should install a number of dependencies such as Python, Docutils, Pygments, LaTeX, and various extensions.
Sphinx has many extensions, and a good option for managing them that does not depend on distro packaging is using pip (PIP installs packages), the Python package management system, to install packages directly from PyPI, the Python Package Index. The Python Package Index is the official Python package repository. On most Linux distros pip comes in the python-pip package. Install Sphinx this way with pip:
$ sudo pip install sphinx
First Setup
Sphinx includes a script, sphinx-quickstart, to launch your new project and create its initial configuration. It asks you a series of questions such as project name, author, and directory structure, and stores your answers in the conf.py file. Create and enter a new directory for your project, and then run the script:
$ mkdir book1
$ cd book1
$ sphinx-quickstart
Welcome to the Sphinx 1.3.1 quickstart utility.
This asks you a series of questions. Answer yes to everything; it doesn’t hurt anything and ensures that you have full functionality, and you can always make changes later. When you’re finished it looks like this:
Creating file ./source/conf.py.
Creating file ./source/index.rst.
Creating file ./Makefile.
Creating file ./make.bat.
Finished: An initial directory structure has been created.
Your directory contents should look like this:
book1$ ls
build  make.bat  Makefile  source
Go ahead and run some build commands to see what happens, like make html to create Web pages:
book1$ make html
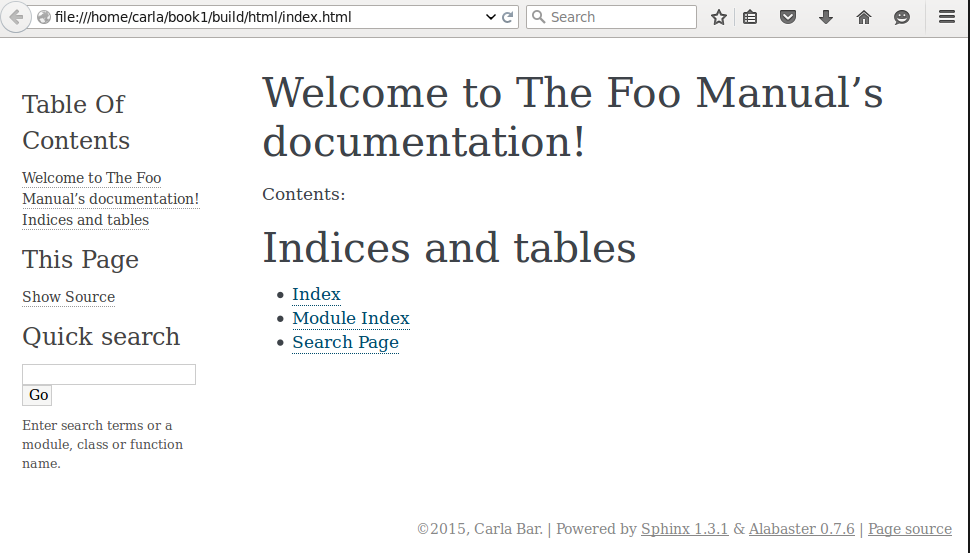
This creates a build directory; enter this to find and look at your new HTML page. Figure 1 (above) shows the result.
Run make help to see all of your build targets, or look in your project’s Makefile:
book1$ make help Please use `make' where is one of html to make standalone HTML files dirhtml to make HTML files named index.html in directories singlehtml to make a single large HTML file pickle to make pickle files json to make JSON files htmlhelp to make HTML files and a HTML help project qthelp to make HTML files and a qthelp project applehelp to make an Apple Help Book devhelp to make HTML files and a Devhelp project epub to make an epub latex to make LaTeX files, you can set PAPER=a4 or PAPER=letter [...]
Sphinx does not include viewers for your output files, so you’ll have to find your own. For example, open HTML files with a Web browser, epub files with an Epub reader, and read man pages with the man command:
book1$ man build/man/thefoomanual.1
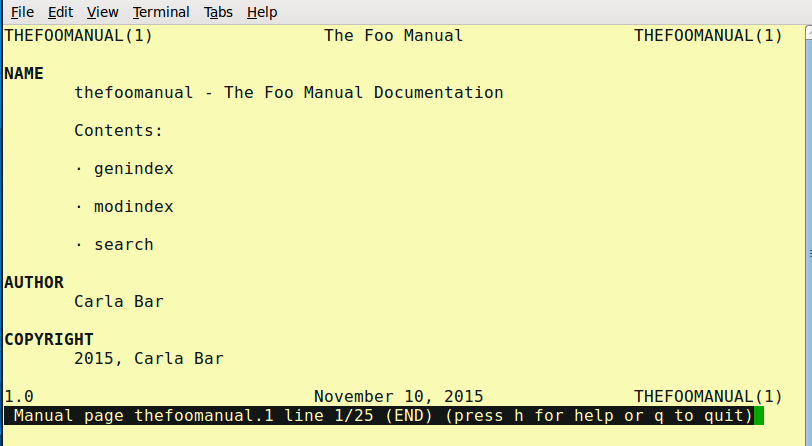
And behold, your new man page (figure 2).

Of course the example is empty, because we haven’t created any content yet.
Run make clean before running another build to ensure you’re starting with an empty build directory.
Sphinx relies on LaTeX, and you’ll probably see error messages about missing extensions when you build documents; for example, missing pdflatex when you try to build a PDF file:
book1$ make latexpdf
sphinx-build -b latex -d build/doctrees   source build/latex
Running Sphinx v1.3.1
making output directory...
[...]
make[1]: pdflatex: Command not found
make[1]: *** [TheFooManual.pdf] Error 127
make[1]: Leaving directory `/home/carla/book1/build/latex'
make: *** [latexpdf] Error 2
It is also common on a new Sphinx installation to see error messages about missing .sty files. The sure way to cure these errors is to install all texlive packages, which you can get on Debian with the metapackage texlive-full. This includes the language, science and math extensions, so it’s about 1.5 gigabytes, and installs to 3GB. Installing the following (Debian/Ubuntu/Mint) should give you everything you need without having to install the whole works:
- texlive
- texlive-base
- texlive-extra-utils
- texlive-font-utils
- texlive-fonts-recommended
- texlive-latex-extra
- texlive-latex-recommended
The base texlive package on CentOS is fairly comprehensive, and CentOS provides a large number of smaller Texlive packages so you can install what you want without having to install a giant blob of everything. Fedora offers a Three Bears meta-packaging scheme: texlive-scheme-full, texlive-scheme-medium, and texlive-scheme-basic, and, like CentOS, a large number of small packages.
You may avoid distro packaging drama by using TeX Live to install and manage your TeX packages directly from the source.
Controlling Project Options
The conf.py file in your project root directory controls all of your project’s options, and this is the file to edit to change any options you selected when you ran sphinx-quickstart. For example, if you answered Yes to “include links to the source code of documented Python objects”, then every time you run a build you have to wait for “loading intersphinx inventory from https://docs.python.org/objects.inv…“. Disable this by entering your conf.py and commenting out the sphinx.ext.intersphinx extension in the “General configuration” section.
Spend some time getting familiar with conf.py; it’s easy to change the values and then build your project to see what the changes look like. This is where you configure your project name, version, copyright, extensions, and output options for different formats.
Web Page Themes
Sphinx comes with a set of built-in themes:
- basic
- alabaster
- sphinx_rtd_theme
- classic
- sphinxdoc
- scrolls
- agogo
- nature
- pyramid
- haiku
- traditional
- epub
- bizstyle
You can see what any of these look like by entering the theme name in the “Options for HTML output” section of conf.py, and then running make html:
html_theme = 'pyramid'
The built-in themes have options that you can configure in conf.py, and these are documented in Sphinx’s HTML theming support page. For custom themes do not do this, for it is the path to madness, as this will make your conf.py cluttered and unwieldy. It is better to put your custom theme in its own directory, and then enter the relative directory path (relative to your project’s root directory) in conf.py:
html_theme_path = ['../custom_theme']
Now that you know how to install Sphinx and make your own builds, come back next week to learn how to create and format your content.


