
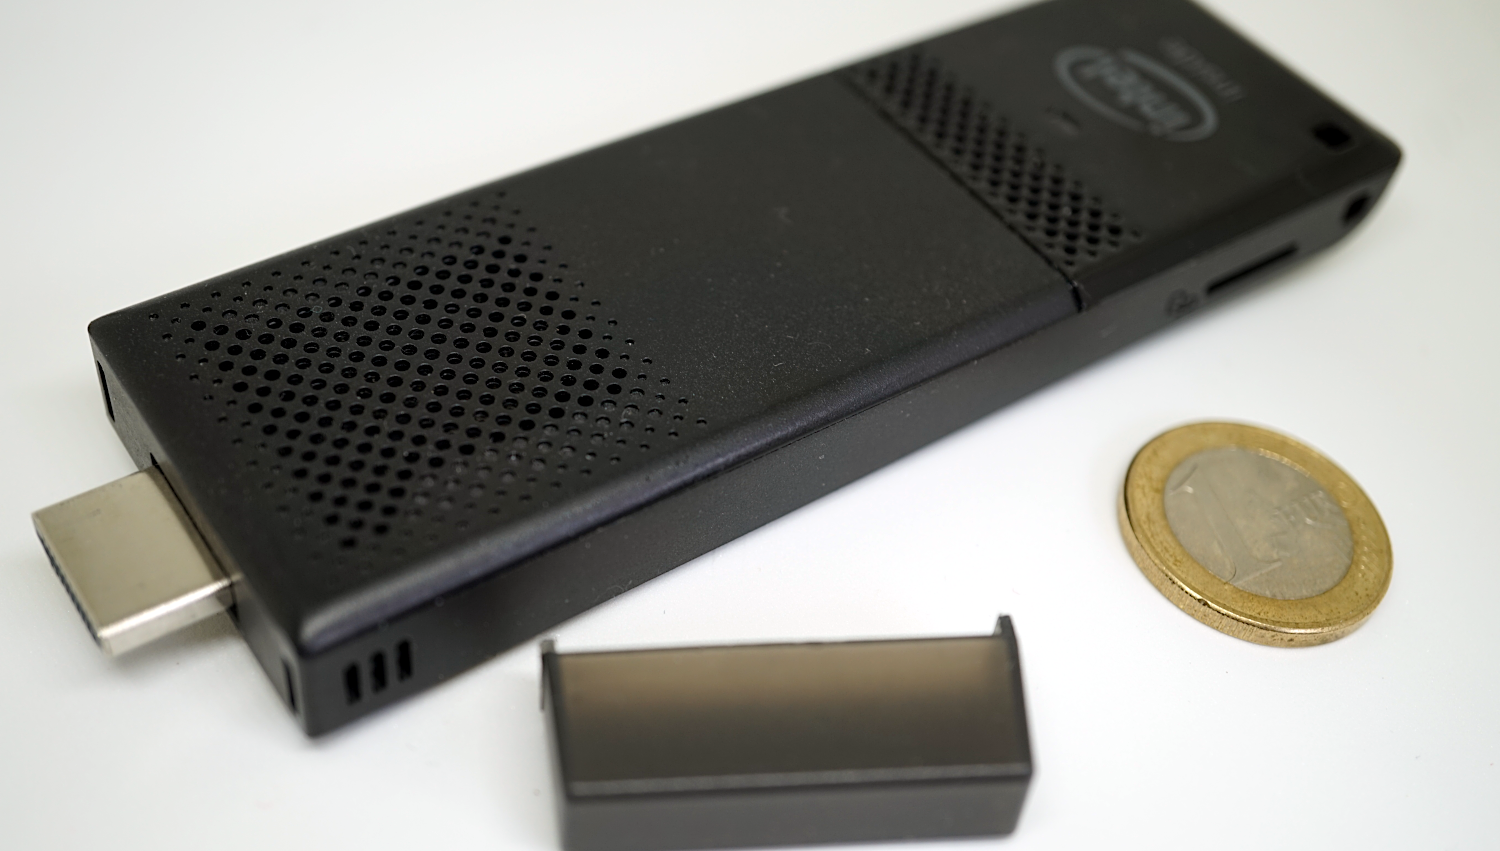
I have one of these Compute Sticks (Figure 1) and use it as an all-purpose server. It is inconspicuous and silent and, as it is built around an x86 architecture, I don’t have problems getting it to work with drivers for my printer, and that’s what it does most days: it interfaces with the shared printer and scanner in my living room.
Most of the time it is idle, especially when we are out, so I thought it would be good idea to use it as a surveillance system. The device doesn’t come with its own camera, and it wouldn’t need to be spying all the time. I also didn’t want to have to start the image capturing by hand because this would mean having to log into the Stick using SSH and fire up the process by writing commands in the shell before rushing out the door.
So I thought that the thing to do would be to grab a USB webcam and have the surveillance system fire up automatically just by plugging it in. Bonus points if the surveillance system fired up also after the Stick rebooted, and it found that the camera was connected.
In prior installments, we saw that systemd services can be started or stopped by hand or when certain conditions are met. Those conditions are not limited to when the OS reaches a certain state in the boot up or powerdown sequence but can also be when you plug in new hardware or when things change in the filesystem. You do that by combining a Udev rule with a systemd service.
Hotplugging with Udev
Udev rules live in the /etc/udev/rules directory and are usually a single line containing conditions and assignments that lead to an action.
That was a bit cryptic. Let’s try again:
Typically, in a Udev rule, you tell systemd what to look for when a device is connected. For example, you may want to check if the make and model of a device you just plugged in correspond to the make and model of the device you are telling Udev to wait for. Those are the conditions mentioned earlier.
Then you may want to change some stuff so you can use the device easily later. An example of that would be to change the read and write permissions to a device: if you plug in a USB printer, you’re going to want users to be able to read information from the printer (the user’s printing app would want to know the model, make, and whether it is ready to receive print jobs or not) and write to it, that is, send stuff to print. Changing the read and write permissions for a device is done using one of the assignments you read about earlier.
Finally, you will probably want the system to do something when the conditions mentioned above are met, like start a backup application to copy important files when a certain external hard disk drive is plugged in. That is an example of an action mentioned above.
With that in mind, ponder this:
ACTION=="add", SUBSYSTEM=="video4linux", ATTRS{idVendor}=="03f0", ATTRS{idProduct}=="e207",
SYMLINK+="mywebcam", TAG+="systemd", MODE="0666", ENV{SYSTEMD_WANTS}="webcam.service"
The first part of the rule,
ACTION=="add", SUBSYSTEM=="video4linux",  ATTRS{idVendor}=="03f0",
ATTRS{idProduct}=="e207" [etc... ]
shows the conditions that the device has to meet before doing any of the other stuff you want the system to do. The device has to be added (ACTION=="add") to the machine, it has to be integrated into the video4linux subsystem. To make sure the rule is applied only when the correct device is plugged in, you have to make sure Udev correctly identifies the manufacturer (ATTRS{idVendor}=="03f0") and a model (ATTRS{idProduct}=="e207") of the device.
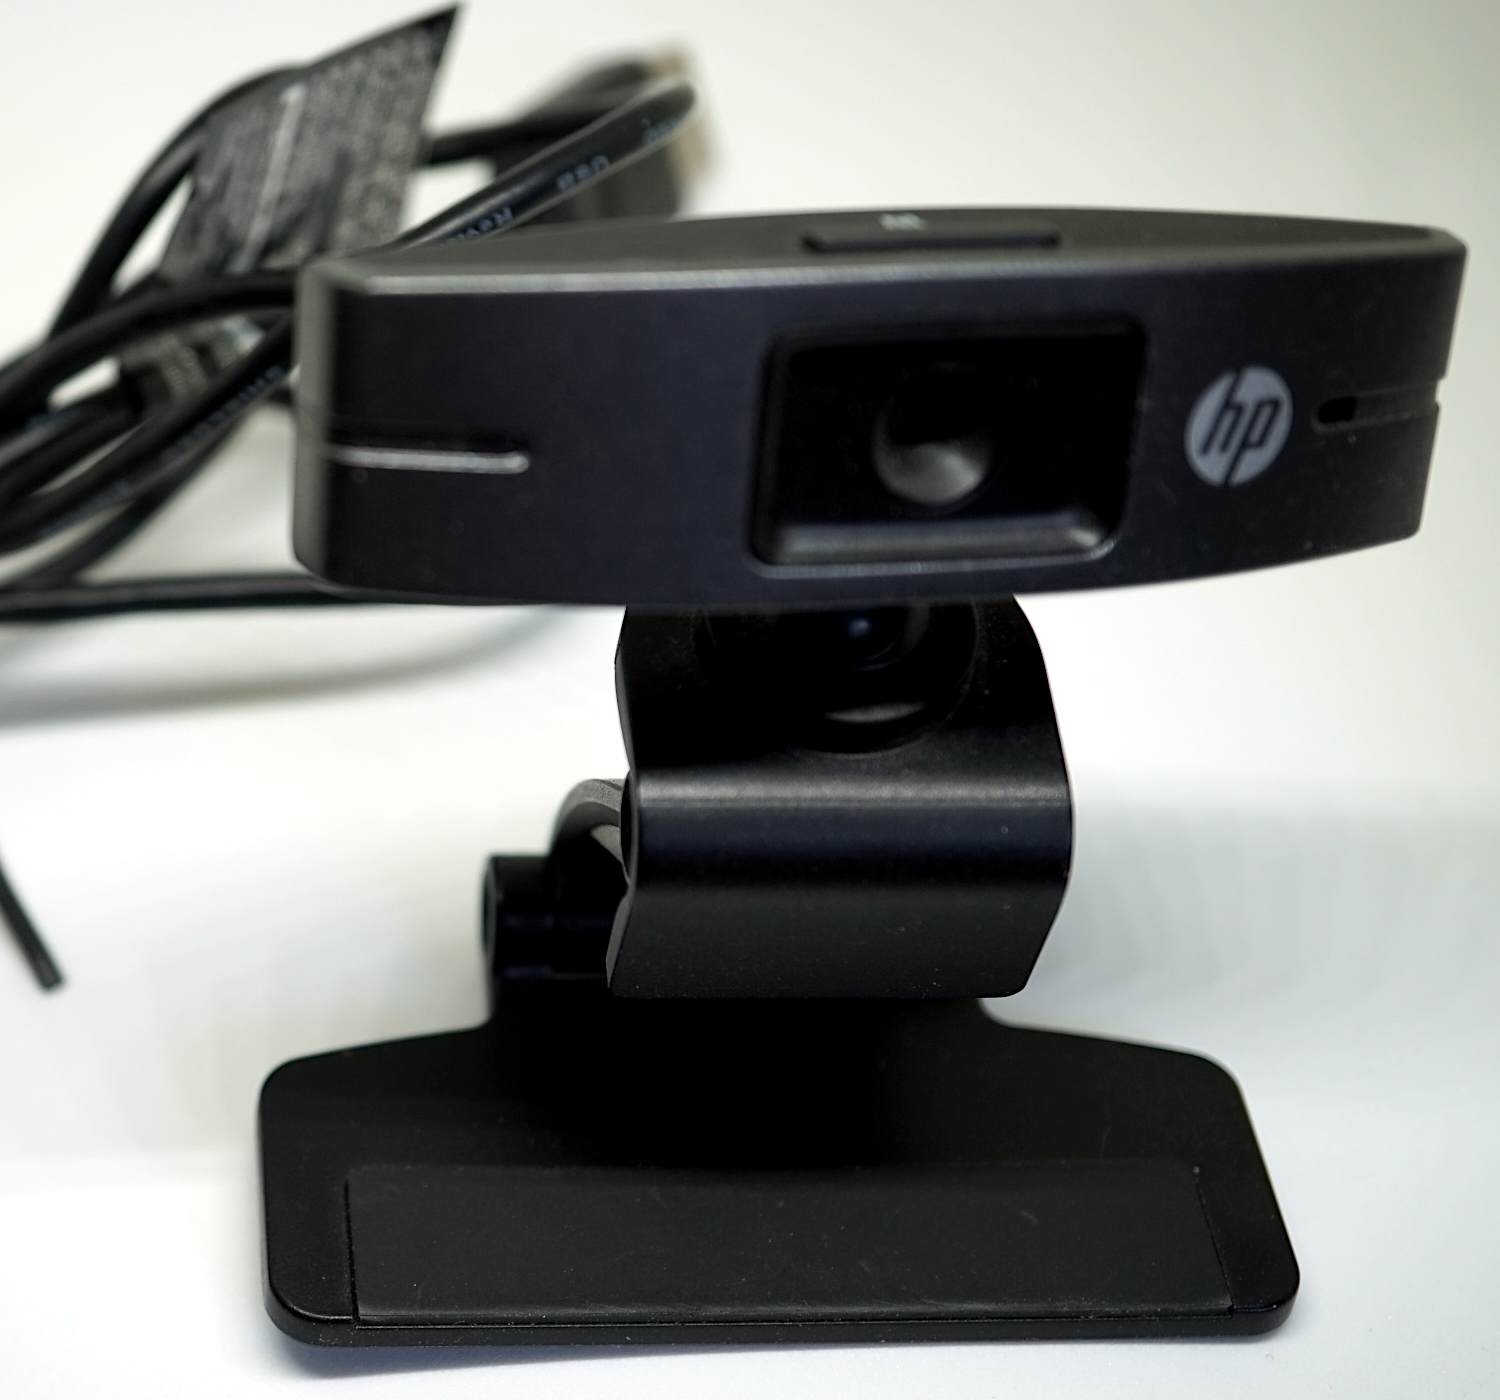
In this case, we’re talking about this device (Figure 2):
Notice how you use == to indicate that these are a logical operation. You would read the above snippet of the rule like this:
if the device is added and the device controlled by the video4linux subsystem
and the manufacturer of the device is 03f0 and the model is e207, then...
But where do you get all this information? Where do you find the action that triggers the event, the manufacturer, model, and so on? You will probably have to use several sources. The IdVendor and idProduct you can get by plugging the webcam into your machine and running lsusb:
lsusb
Bus 002 Device 002: ID 8087:0024 Intel Corp. Integrated Rate Matching Hub
Bus 002 Device 001: ID 1d6b:0002 Linux Foundation 2.0 root hub
Bus 004 Device 001: ID 1d6b:0003 Linux Foundation 3.0 root hub
Bus 003 Device 003: ID 03f0:e207 Hewlett-Packard
Bus 003 Device 001: ID 1d6b:0002 Linux Foundation 2.0 root hub
Bus 001 Device 003: ID 04f2:b1bb Chicony Electronics Co., Ltd
Bus 001 Device 002: ID 8087:0024 Intel Corp. Integrated Rate Matching Hub
Bus 001 Device 001: ID 1d6b:0002 Linux Foundation 2.0 root hub
The webcam I’m using is made by HP, and you can only see one HP device in the list above. The ID gives you the manufacturer and the model numbers separated by a colon (:). If you have more than one device by the same manufacturer and not sure which is which, unplug the webcam, run lsusb again and check what’s missing.
OR…
Unplug the webcam, wait a few seconds, run the command udevadmin monitor --environment and then plug the webcam back in again. When you do that with the HP webcam, you get:
udevadmin monitor --environment
UDEV  [35776.495221] add      /devices/pci0000:00/0000:00:1c.3/0000:04:00.0
    /usb3/3-1/3-1:1.0/input/input21/event11 (input)
.MM_USBIFNUM=00
ACTION=add
BACKSPACE=guess
DEVLINKS=/dev/input/by-path/pci-0000:04:00.0-usb-0:1:1.0-event
     /dev/input/by-id/usb-Hewlett_Packard_HP_Webcam_HD_2300-event-if00
DEVNAME=/dev/input/event11
DEVPATH=/devices/pci0000:00/0000:00:1c.3/0000:04:00.0/
     usb3/3-1/3-1:1.0/input/input21/event11
ID_BUS=usb
ID_INPUT=1
ID_INPUT_KEY=1
ID_MODEL=HP_Webcam_HD_2300
ID_MODEL_ENC=HPx20Webcamx20HDx202300
ID_MODEL_ID=e207
ID_PATH=pci-0000:04:00.0-usb-0:1:1.0
ID_PATH_TAG=pci-0000_04_00_0-usb-0_1_1_0
ID_REVISION=1020
ID_SERIAL=Hewlett_Packard_HP_Webcam_HD_2300
ID_TYPE=video
ID_USB_DRIVER=uvcvideo
ID_USB_INTERFACES=:0e0100:0e0200:010100:010200:030000:
ID_USB_INTERFACE_NUM=00
ID_VENDOR=Hewlett_Packard
ID_VENDOR_ENC=Hewlettx20Packard
ID_VENDOR_ID=03f0
LIBINPUT_DEVICE_GROUP=3/3f0/e207:usb-0000:04:00.0-1/button
MAJOR=13
MINOR=75
SEQNUM=3162
SUBSYSTEM=input
USEC_INITIALIZED=35776495065
XKBLAYOUT=es
XKBMODEL=pc105
XKBOPTIONS=
XKBVARIANT=
That may look like a lot to process, but, check this out: the ACTION field early in the list tells you what event just happened, i.e., that a device got added to the system. You can also see the name of the device spelled out on several of the lines, so you can be pretty sure that it is the device you are looking for. The output also shows the manufacturer’s ID number (ID_VENDOR_ID=03f0) and the model number (ID_VENDOR_ID=03f0).
This gives you three of the four values the condition part of the rule needs. You may be tempted to think that it a gives you the fourth, too, because there is also a line that says:
SUBSYSTEM=input
Be careful! Although it is true that a USB webcam is a device that provides input (as does a keyboard and a mouse), it is also belongs to the usb subsystem, and several others. This means that your webcam gets added to several subsystems and looks like several devices. If you pick the wrong subsystem, your rule may not work as you want it to, or, indeed, at all.
So, the third thing you have to check is all the subsystems the webcam has got added to and pick the correct one. To do that, unplug your webcam again and run:
ls /dev/video*
This will show you all the video devices connected to the machine. If you are using a laptop, most come with a built-in webcam and it will probably show up as /dev/video0. Plug your webcam back in and run ls /dev/video* again.
Now you should see one more video device (probably /dev/video1).
Now you can find out all the subsystems it belongs to by running udevadm info -a /dev/video1:
udevadm info -a /dev/video1

Udevadm info starts with the device specified by the devpath and then
walks up the chain of parent devices. It prints for every device
found, all possible attributes in the udev rules key format.
A rule to match, can be composed by the attributes of the device
and the attributes from one single parent device.

 looking at device '/devices/pci0000:00/0000:00:1c.3/0000:04:00.0
    /usb3/3-1/3-1:1.0/video4linux/video1':
   KERNEL=="video1"
   SUBSYSTEM=="video4linux"
   DRIVER==""
   ATTR{dev_debug}=="0"
   ATTR{index}=="0"
   ATTR{name}=="HP Webcam HD 2300: HP Webcam HD"

[etc...]
The output goes on for quite a while, but what you’re interested is right at the beginning: SUBSYSTEM=="video4linux". This is a line you can literally copy and paste right into your rule. The rest of the output (not shown for brevity) gives you a couple more nuggets, like the manufacturer and mode IDs, again in a format you can copy and paste into your rule.
Now you have a way of identifying the device and what event should trigger the action univocally, it is time to tinker with the device.
The next section in the rule, SYMLINK+="mywebcam", TAG+="systemd", MODE="0666" tells Udev to do three things: First, you want to create symbolic link from the device to (e.g. /dev/video1) to /dev/mywebcam. This is because you cannot predict what the system is going to call the device by default. When you have an in-built webcam and you hotplug a new one, the in-built webcam will usually be /dev/video0 while the external one will become /dev/video1. However, if you boot your computer with the external USB webcam plugged in, that could be reversed and the internal webcam can become /dev/video1 and the external one /dev/video0. What this is telling you is that, although your image-capturing script (which you will see later on) always needs to point to the external webcam device, you can’t rely on it being /dev/video0 or /dev/video1. To solve this problem, you tell Udev to create a symbolic link which will never change in the moment the device is added to the video4linux subsystem and you will make your script point to that.
The second thing you do is add "systemd" to the list of Udev tags associated with this rule. This tells Udev that the action that the rule will trigger will be managed by systemd, that is, it will be some sort of systemd service.
Notice how in both cases you use += operator. This adds the value to a list, which means you can add more than one value to SYMLINK and TAG.
The MODE values, on the other hand, can only contain one value (hence you use the simple = assignment operator). What MODE does is tell Udev who can read from or write to the device. If you are familiar with chmod (and, if you are reading this, you should be), you will also be familiar of how you can express permissions using numbers. That is what this is: 0666 means “give read and write privileges to the device to everybody“.
At last, ENV{SYSTEMD_WANTS}="webcam.service" tells Udev what systemd service to run.
Save this rule into file called 90-webcam.rules (or something like that) in /etc/udev/rules.d and you can load it either by rebooting your machine, or by running:
sudo udevadm control --reload-rules && udevadm trigger
Service at Last
The service the Udev rule triggers is ridiculously simple:
# webcam.service

[Service]
Type=simple
ExecStart=/home/[user name]/bin/checkimage.sh
Basically, it just runs the checkimage.sh script stored in your personal bin/ and pushes it the background. This is something you saw how to do in prior installments. It may seem something little, but just because it is called by a Udev rule, you have just created a special kind of systemd unit called a device unit. Congratulations.
As for the checkimage.sh script webcam.service calls, there are several ways of grabbing an image from a webcam and comparing it to a prior one to check for changes (which is what checkimage.sh does), but this is how I did it:
#!/bin/bash
# This is the checkimage.sh script

mplayer -vo png -frames 1 tv:// -tv driver=v4l2:width=640:height=480:device=
    /dev/mywebcam &>/dev/null
mv 00000001.png /home/[user name]/monitor/monitor.png

while true
do
   mplayer -vo png -frames 1 tv:// -tv driver=v4l2:width=640:height=480:device=/dev/mywebcam &>/dev/null
   mv 00000001.png /home/[user name]/monitor/temp.png

   imagediff=`compare -metric mae /home/[user name]/monitor/monitor.png /home/[user name]
       /monitor/temp.png /home/[user name]/monitor/diff.png 2>&1 > /dev/null | cut -f 1 -d " "`
   if [ `echo "$imagediff > 700.0" | bc` -eq 1 ]
       then
           mv /home/[user name]/monitor/temp.png /home/[user name]/monitor/monitor.png
       fi

   sleep 0.5
done
Start by using MPlayer to grab a frame (00000001.png) from the webcam. Notice how we point mplayer to the mywebcam symbolic link we created in our Udev rule, instead of to video0 or video1. Then you transfer the image to the monitor/ directory in your home directory. Then run an infinite loop that does the same thing again and again, but also uses Image Magick’s compare tool to see if there any differences between the last image captured and the one that is already in the monitor/ directory.
If the images are different, it means something has moved within the webcam’s frame. The script overwrites the original image with the new image and continues comparing waiting for some more movement.
Plugged
With all the bits and pieces in place, when you plug your webcam in, your Udev rule will be triggered and will start the webcam.service. The webcam.service will execute checkimage.sh in the background, and checkimage.sh will start taking pictures every half a second. You will know because your webcam’s LED will start flashing indicating every time it takes a snap.
As always, if something goes wrong, run
systemctl status webcam.service
to check what your service and script are up to.
Coming up
You may be wondering: Why overwrite the original image? Surely you would want to see what’s going on if the system detects any movement, right? You would be right, but as you will see in the next installment, leaving things as they are and processing the images using yet another type of systemd unit makes things nice, clean and easy.
Just wait and see.
Learn more about Linux through the free “Introduction to Linux” course from The Linux Foundation and edX.


