
Let’s face it, if you’re a Linux administrator, you’re going to work with the command line. To do that, you’ll be using a terminal emulator. Most likely, your distribution of choice came pre-installed with a default terminal emulator that gets the job done. But this is Linux, so you have a wealth of choices to pick from, and that ideology holds true for terminal emulators as well. In fact, if you open up your distribution’s GUI package manager (or search from the command line), you’ll find a trove of possible options. Of those, many are pretty straightforward tools; however, some are truly unique.
In this article, I’ll highlight four such terminal emulators, that will not only get the job done, but do so while making the job a bit more interesting or fun. So, let’s take a look at these terminals.
Tilda
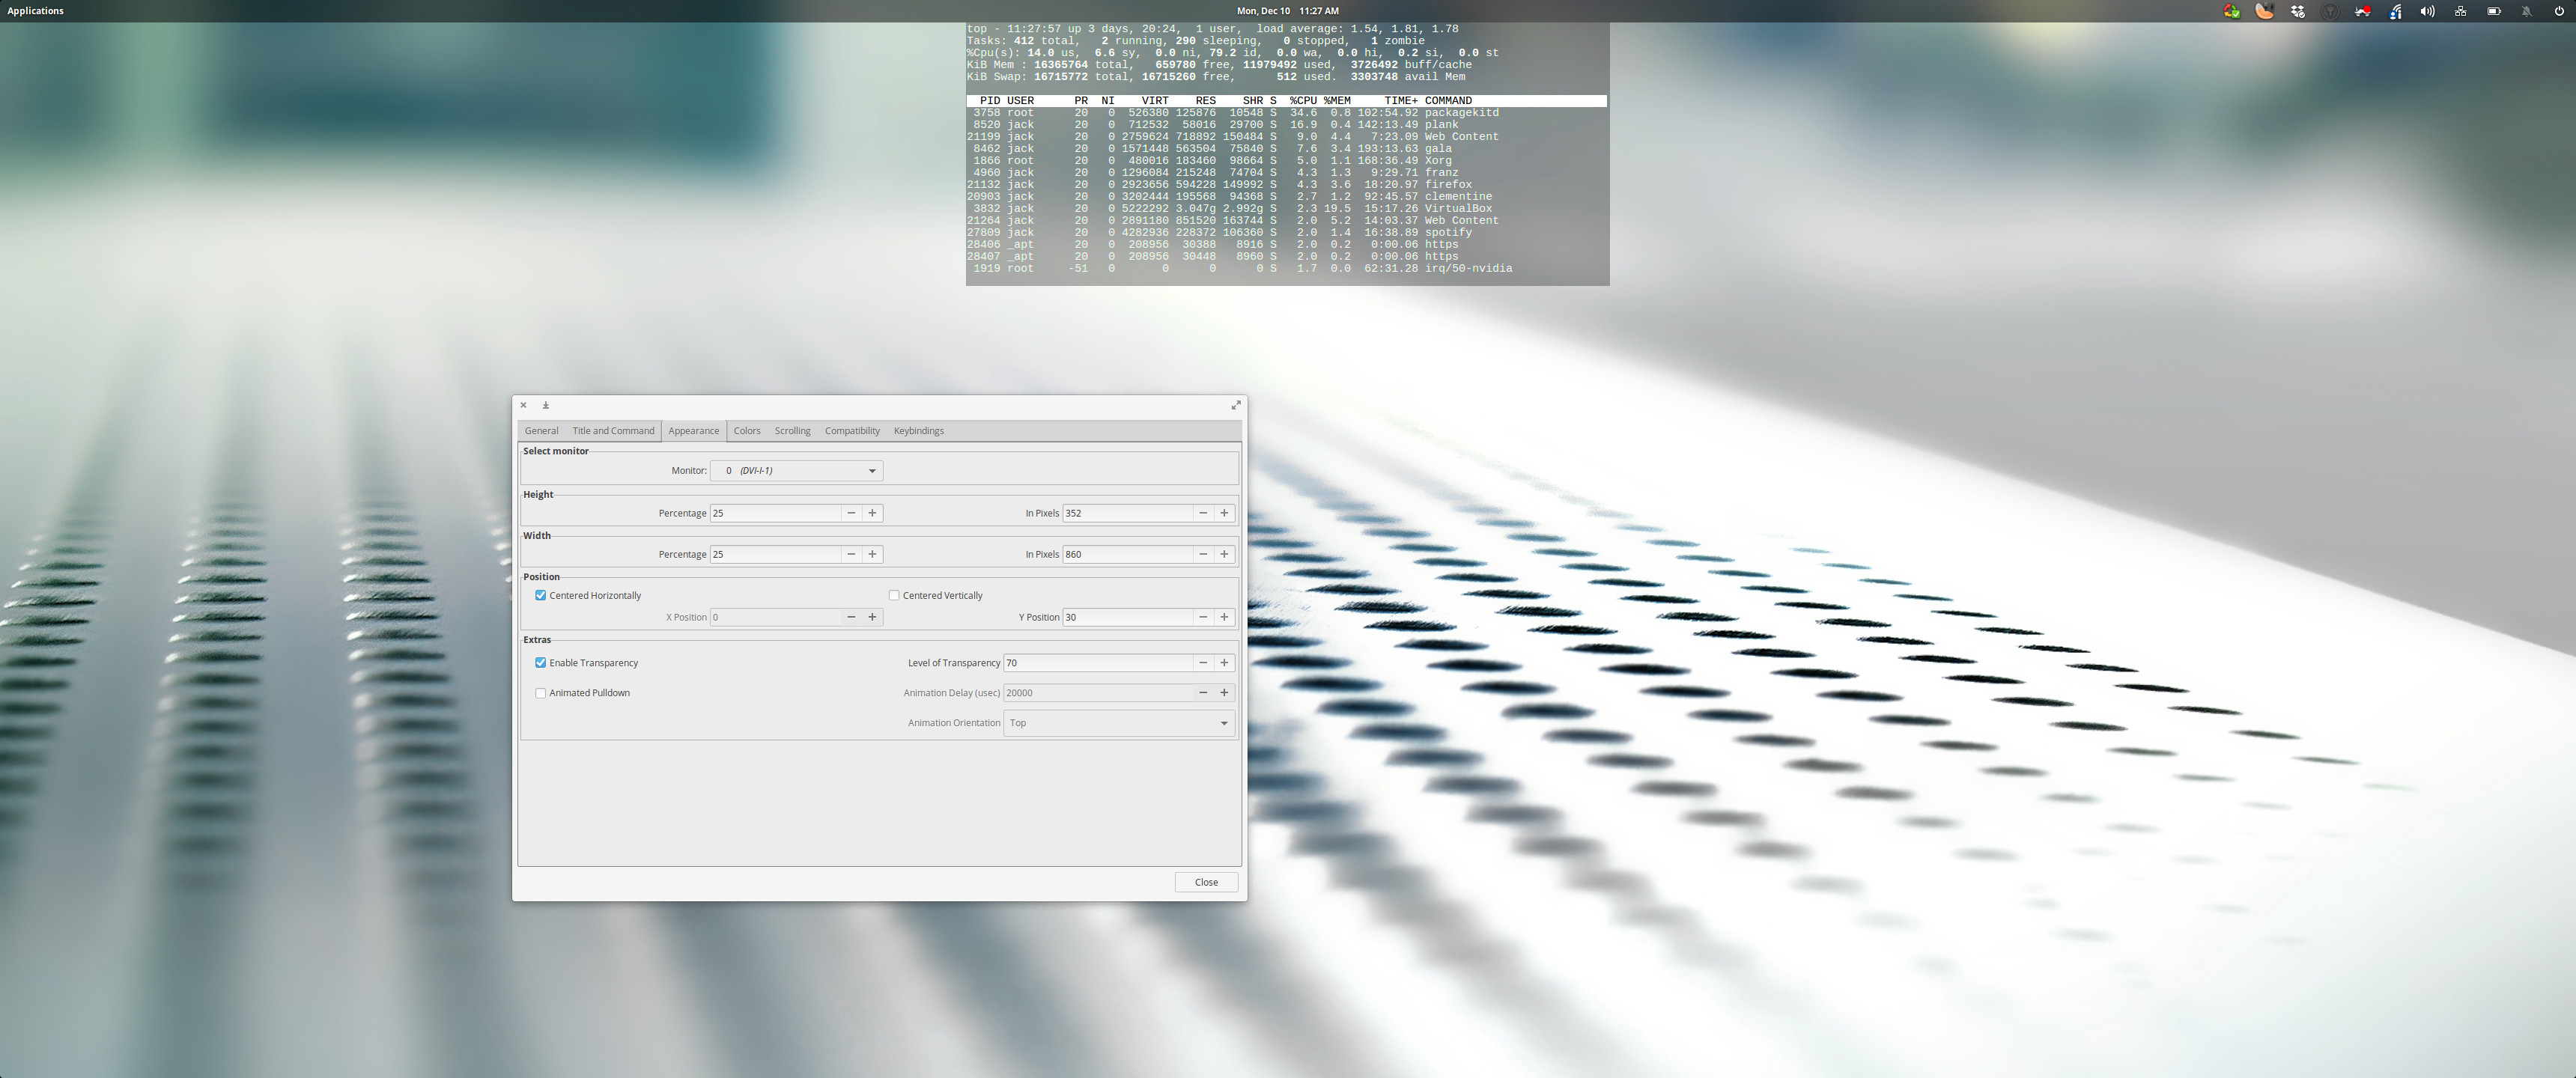
Tilda is designed for Gtk and is a member of the cool drop-down family of terminals. That means the terminal is always running in the background, ready to drop down from the top of your monitor (such as Guake and Yakuake). What makes Tilda rise above many of the others is the number of configuration options available for the terminal (Figure 1).
Tilda can be installed from the standard repositories. On a Ubuntu- (or Debian-) based distribution, the installation is as simple as:
sudo apt-get install tilda -y
Once installed, open Tilda from your desktop menu, which will also open the configuration window. Configure the app to suit your taste and then close the configuration window. You can then open and close Tilda by hitting the F1 hotkey. One caveat to using Tilda is that, after the first run, you won’t find any indication as to how to reach the configuration wizard. No worries. If you run the command tilda -C it will open the configuration window, while still retaining the options you’ve previously set.
Available options include:
-
Terminal size and location
-
Font and color configurations
-
Auto Hide
-
Title
-
Custom commands
-
URL Handling
-
Transparency
-
Animation
-
Scrolling
-
And more
What I like about these types of terminals is that they easily get out of the way when you don’t need them and are just a button click away when you do. For those that hop in and out of the terminal, a tool like Tilda is ideal.
Aterm
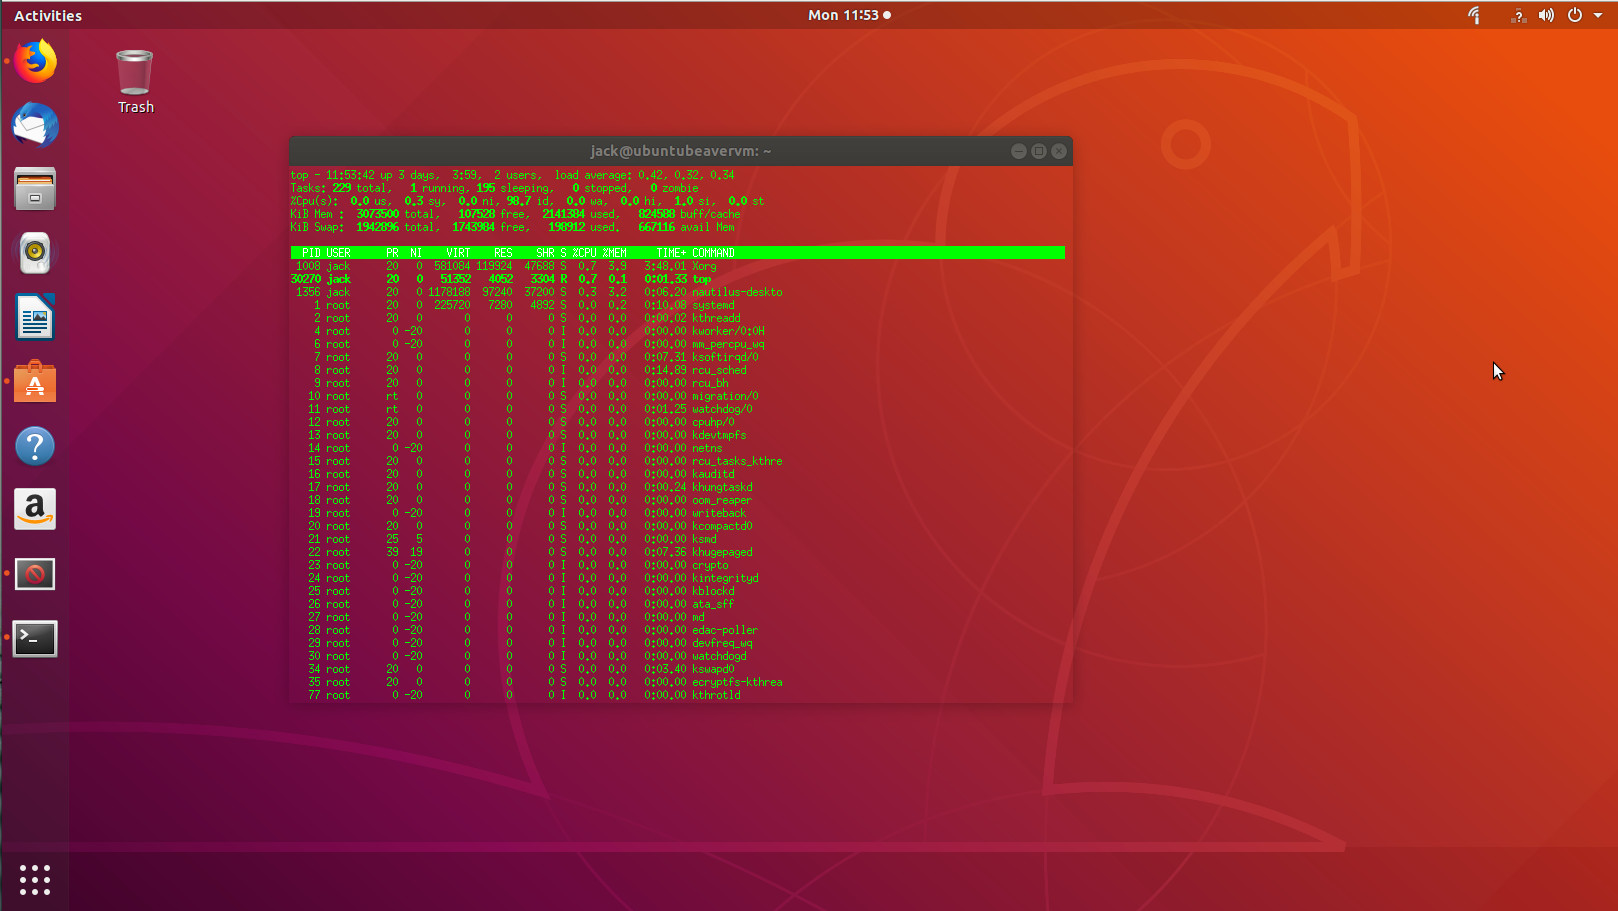
Aterm holds a special place in my heart, as it was one of the first terminals I used that made me realize how flexible Linux was. This was back when AfterStep was my window manager of choice (which dates me a bit) and I was new to the command line. What Aterm offered was a terminal emulator that was highly customizable, while helping me learn the ins and outs of using the terminal (how to add options and switches to a command). “How?” you ask. Because Aterm never had a GUI for customization. To run Aterm with any special options, it had to run as a command. For example, say you want to open Aterm with transparency enabled, green text, white highlights, and no scroll bar. To do this, issue the command:
aterm -tr -fg green -bg white +xb
The end result (with the top command running for illustration) would look like that shown in Figure 2.
Of course, you must first install Aterm. Fortunately, the application is still found in the standard repositories, so installing on the likes of Ubuntu is as simple as:
sudo apt-get install aterm -y
If you want to always open Aterm with those options, your best bet is to create an alias in your ~/.bashrc file like so:
alias=”aterm -tr -fg green -bg white +sb”
Save that file and, when you issue the command aterm, it will always open with those options. For more about creating aliases, check out this tutorial.
Eterm
Eterm is the second terminal that really showed me how much fun the Linux command line could be. Eterm is the default terminal emulator for the Enlightenment desktop. When I eventually migrated from AfterStep to Enlightenment (back in the early 2000s), I was afraid I’d lose out on all those cool aesthetic options. That turned out to not be the case. In fact, Eterm offered plenty of unique options, while making the task easier with a terminal toolbar. With Eterm, you can easily select from a large number of background images (should you want one – Figure 3) by selecting from the Background > Pixmap menu entry.

There are a number of other options to configure (such as font size, map alerts, toggle scrollbar, brightness, contrast, and gamma of background images, and more). The one thing you want to make sure is, after you’ve configured Eterm to suit your tastes, to click Eterm > Save User Settings (otherwise, all settings will be lost when you close the app).
Eterm can be installed from the standard repositories, with a command such as:
sudo apt-get install eterm
Extraterm
Extraterm should probably win a few awards for coolest feature set of any terminal window project available today. The most unique feature of Extraterm is the ability to wrap commands in color-coded frames (blue for successful commands and red for failed commands – Figure 4).
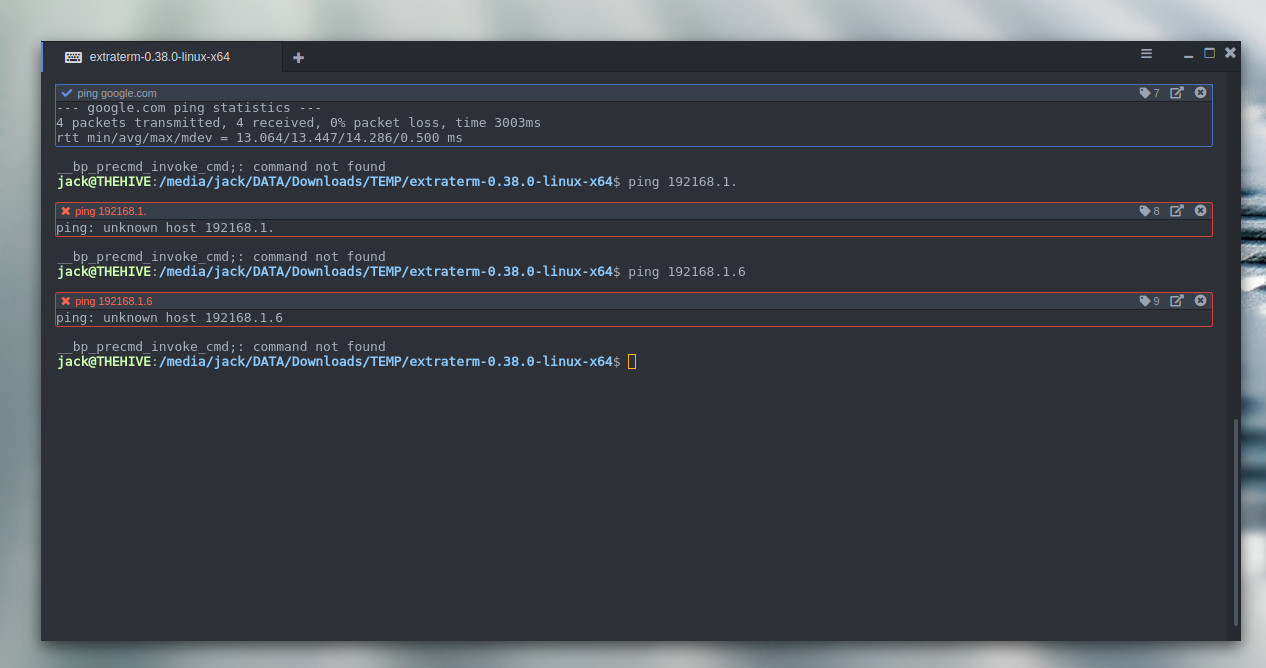
When you run a command, Extraterm will wrap the command in an isolated frame. If the command succeeds, the frame will be outlined in blue. Should the command fail, the frame will be outlined in red.
Extraterm cannot be installed via the standard repositories. In fact, the only way to run Extraterm on Linux (at the moment) is to download the precompiled binary from the project’s GitHub page, extract the file, change into the newly created directory, and issue the command ./extraterm.
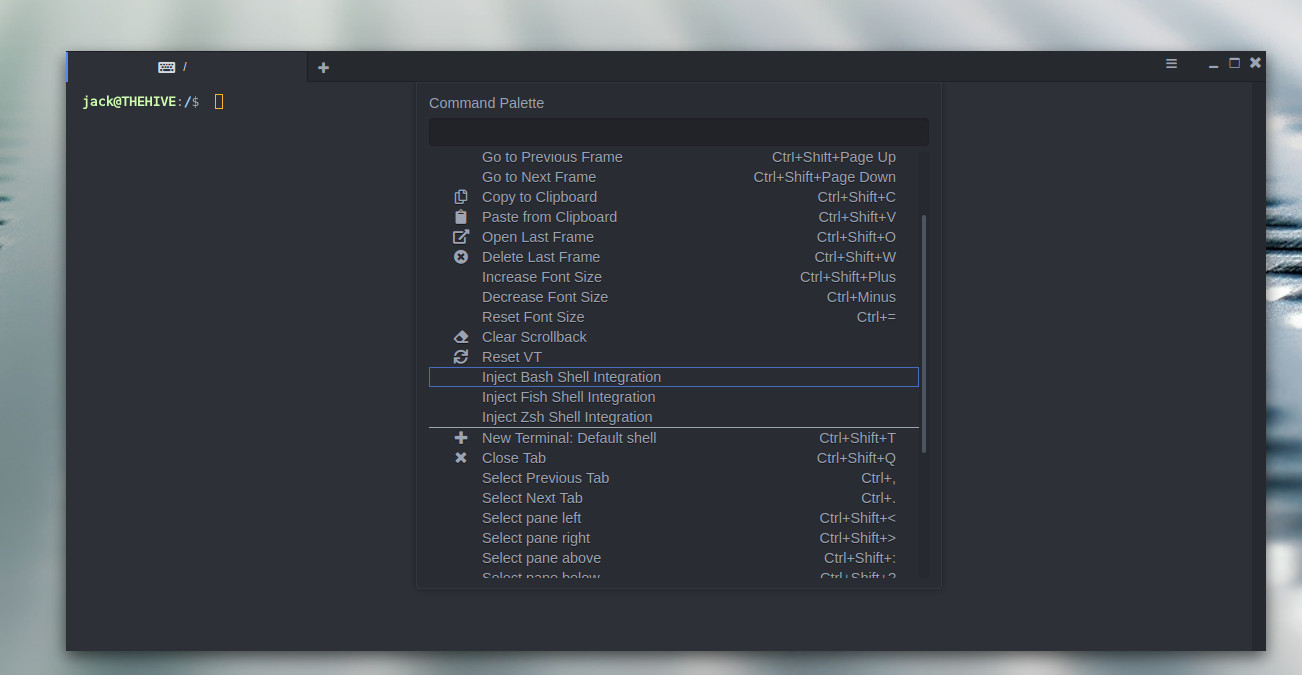
Once the app is running, to enable frames you must first enable bash integration. To do that, open Extraterm and then right-click anywhere in the window to reveal the popup menu. Scroll until you see the entry for Inject Bash shell Integration (Figure 5). Select that entry and you can then begin using the frames option.
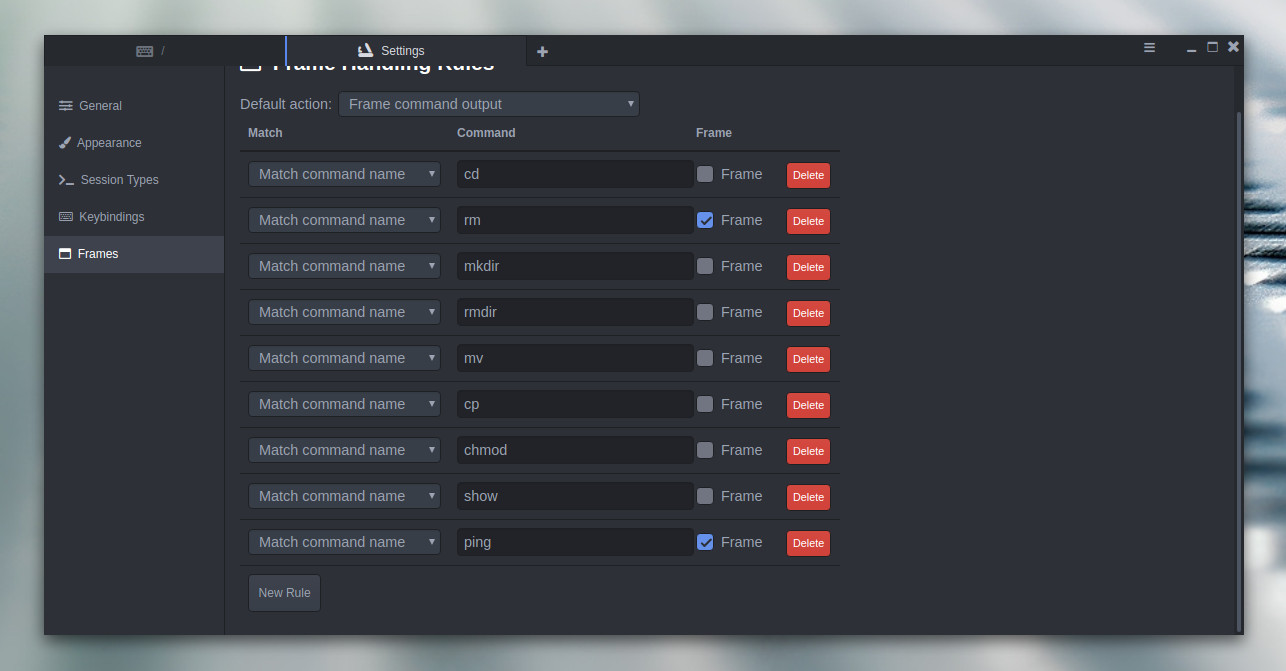
If you run a command, and don’t see a frame appear, you probably have to create a new frame for the command (as Extraterm only ships with a few default frames). To do that, click on the Extraterm menu button (three horizontal lines in the top right corner of the window), select Settings, and then click the Frames tab. In this window, scroll down and click the New Rule button. You can then add a command you want to work with the frames option (Figure 6).
If, after this, you still don’t see frames appearing, download the extraterm-commands file from the Download page, extract the file, change into the newly created directory, and issue the command sh setup_extraterm_bash.sh. That should enable frames for Extraterm.
There’s plenty more options available for Extraterm. I’m convinced, once you start playing around with this new take on the terminal window, you won’t want to go back to the standard terminal. Hopefully the developer will make this app available to the standard repositories soon (as it could easily become one of the most popular terminal windows in use).
And Many More
As you probably expected, there are quite a lot of terminals available for Linux. These four represent (at least for me) four unique takes on the task, each of which do a great job of helping you run the commands every Linux admin needs to run. If you aren’t satisfied with one of these, give your package manager a look to see what’s available. You are sure to find something that works perfectly for you.


