
Welcome back to this three-party journey to getting OpenLDAP up and running so that you can authenticate your Linux desktop machines to the LDAP server. In part one, we installed OpenLDAP on Ubuntu Server 18.04 and added our first LDAP entries to the directory tree via the Command Line Interface (CLI).
The process of manually adding data can be cumbersome and isn’t for everyone. If you have staff members that work better with a handy GUI tool, you’re in luck, as there is a very solid web-based tool that makes entering new users a snap. That tool is the LDAP Account Manager (LAM).
LAM features:
-
Support for 2-factor authentication
-
Schema and LDAP browser
-
Support for multiple LDAP servers
-
Support for account creation profiles
-
File system quotas
-
CSV file upload
-
Automatic creation/deletion of home directories
-
PDF output for all accounts
-
And much more
We’ll be installing LAM on the same server we installed OpenLDAP, so make sure you’ve walked through the process from the previous article. With that taken care of, let’s get LAM up and running, so you can more easily add users to your LDAP directory tree.
Installation
Fortunately, LAM is found in the standard Ubuntu repository, so installation is as simple as opening a terminal window and issuing the command:
sudo apt-get install ldap-account-manager -y
When the installation finishes, you can then limit connections to LAM to local IP addresses only (if needed), by opening a specific .conf file with the command:
sudo nano /etc/apache2/conf-enabled/ldap-account-manager.conf
In that file, look for the line:
Require all granted
Comment that line out (add a # character at the beginning of the line) and add the following entry below it:
Require ip 192.168.1.0/24
Make sure to substitute your network IP address scheme in place of the one above (should yours differ). Save and close that file, and restart the Apache web server with the command:
sudo systemctl restart apache2
You are now ready to access the LAM web interface.
Opening LAM
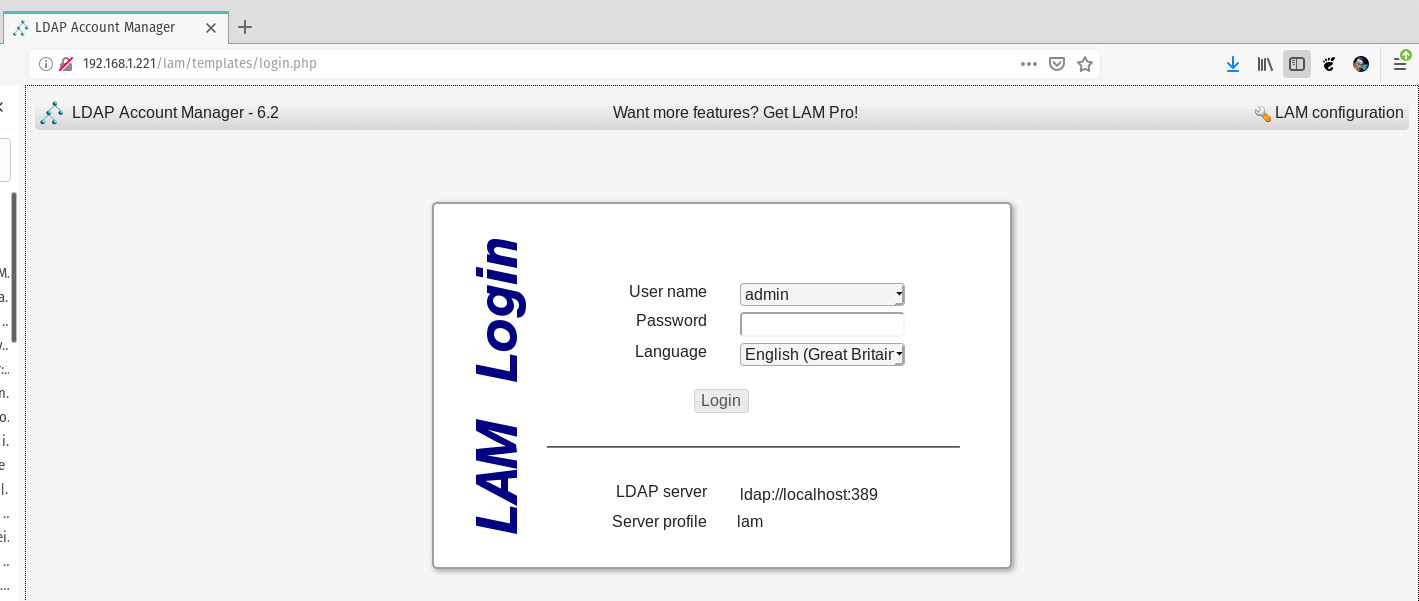
Point your web browser to http://SERVER_IP/lam (where SERVER_IP is the IP address of the server hosting LAM). In the resulting screen (Figure 1), click LAM configuration in the upper right corner of the window.
In the resulting window, click Edit server profiles (Figure 2).
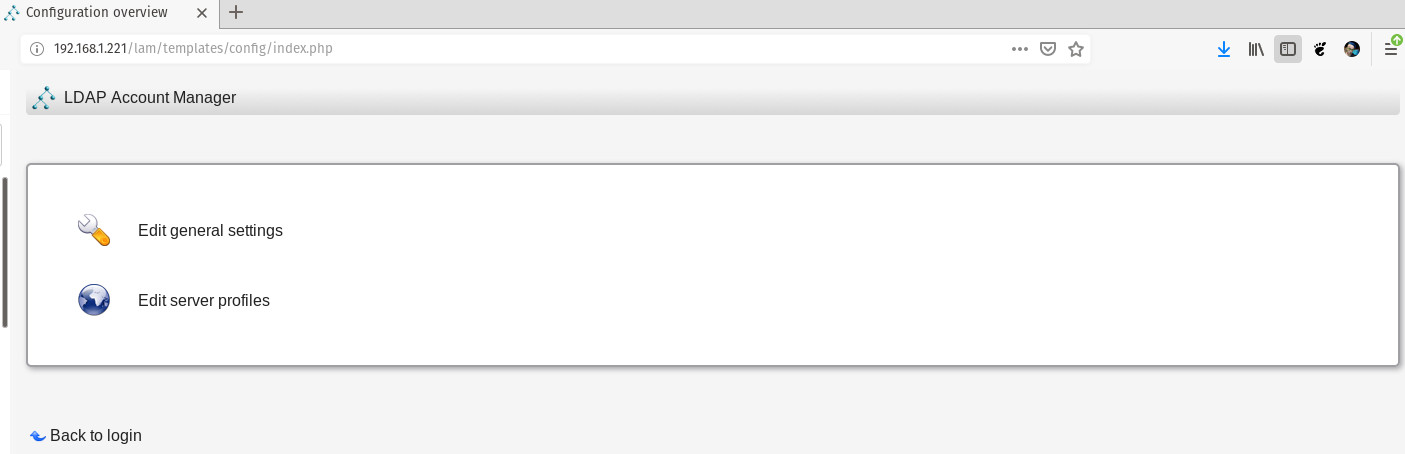
You will be prompted for the default profile password, so type lam and click OK. You will then be presented with the Server settings page (Figure 3).
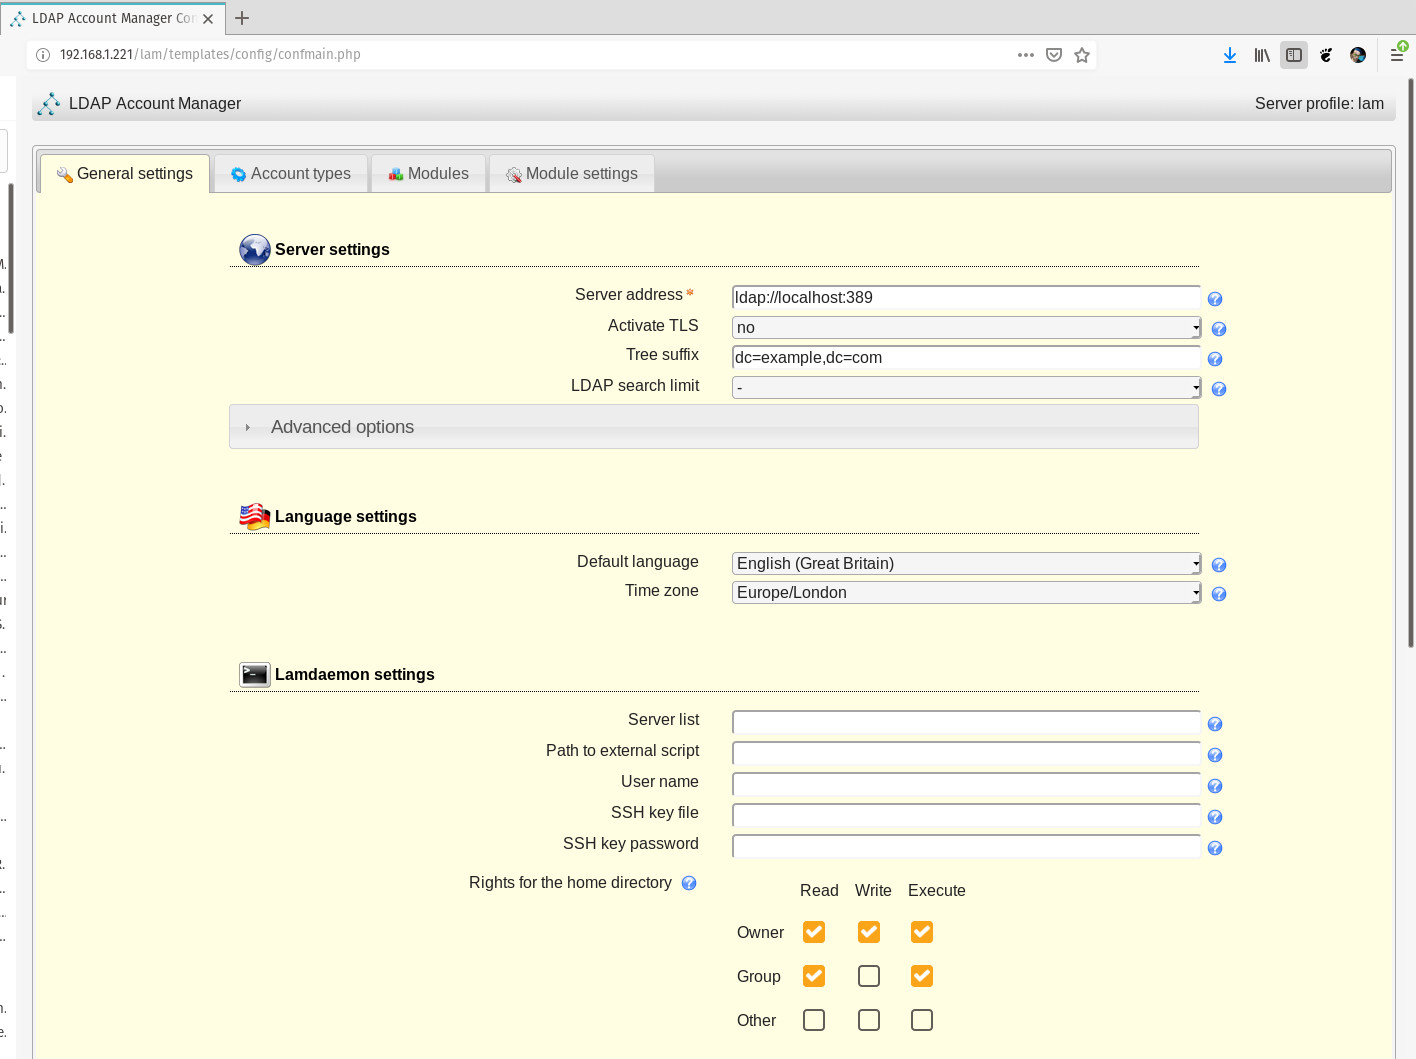
In the Server Settings section, enter the IP address of your LDAP server. Since we’re installing LAM on the same server as OpenLDAP, we’ll leave the default. If your OpenLDAP and LAM servers are not on the same machine, make sure to enter the correct IP address for the OpenLDAP server here. In the Tree suffix entry, add the domain components of your OpenLDAP server in the form dc=example,dc=com.
Next, take care of the following configurations:
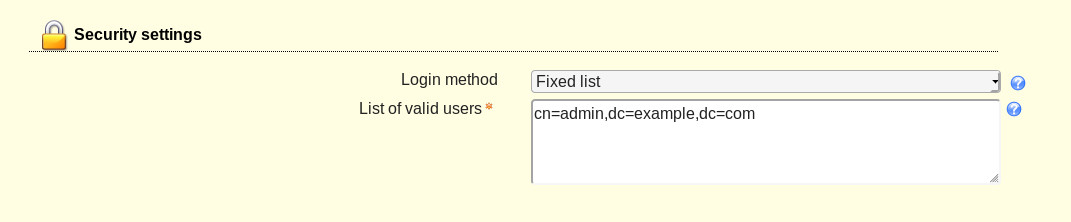
In the Security settings section (Figure 4), configure the list of valid users in the form cn=admin,dc=example,dc=com (make sure to use your LDAP admin user and domain components).
In the Account Types tab (Figure 5), configure the Active account types LDAP options. First, configure the LDAP suffix, which will be in the form ou=group,dc=example,dc=com. This is the suffix of the LDAP tree from where you will search for entries. Only entries in this subtree will be displayed in the account list. In other words, use the group attribute if you have created a group on your OpenLDAP server that all of your users (who will be authenticating against the LDAP directory tree) will be a member of. For example, if all of your users who will be allowed to log in on desktops machines are part of the group login, use that.
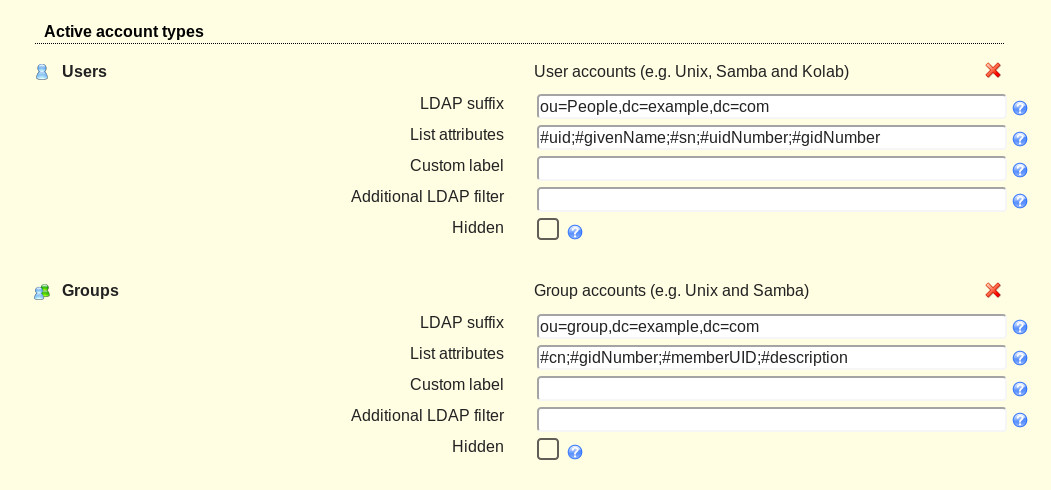
Next, configure the List attributes. These are the attributes that will be displayed in the account list, and are predefined values, such as #uid, #givenName, #sn, #uidNumber, etc. Fill out both the LDAP suffix and List attributes for both Users and groups.
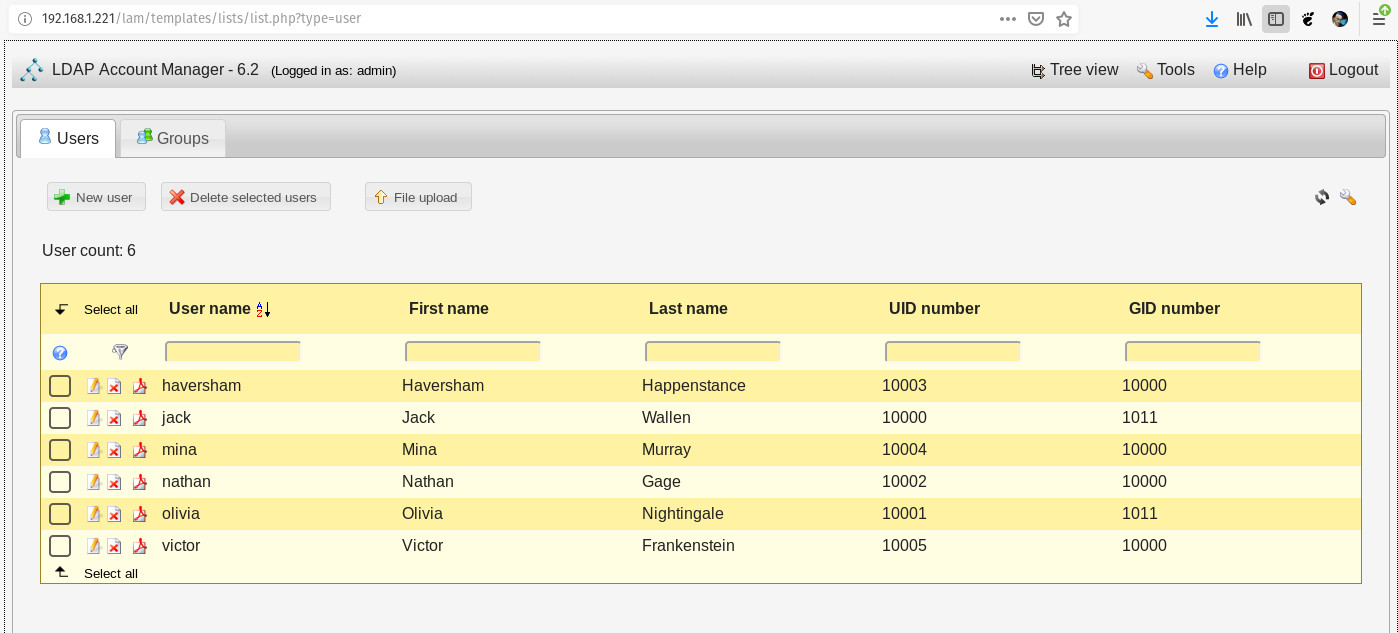
After configuring both users and groups, click Save. This will also log you out of the Server profile manager and take you back to the login screen. You can now log into LAM using your LDAP server admin credentials. Select the user from the User name drop-down, type your LDAP admin password, and click Login. This will take you to the LAM Users tab (Figure 6), where you can start adding new users to the LDAP directory tree.
Click New User and the New User window will open (Figure 7), where you can fill in the necessary blanks.
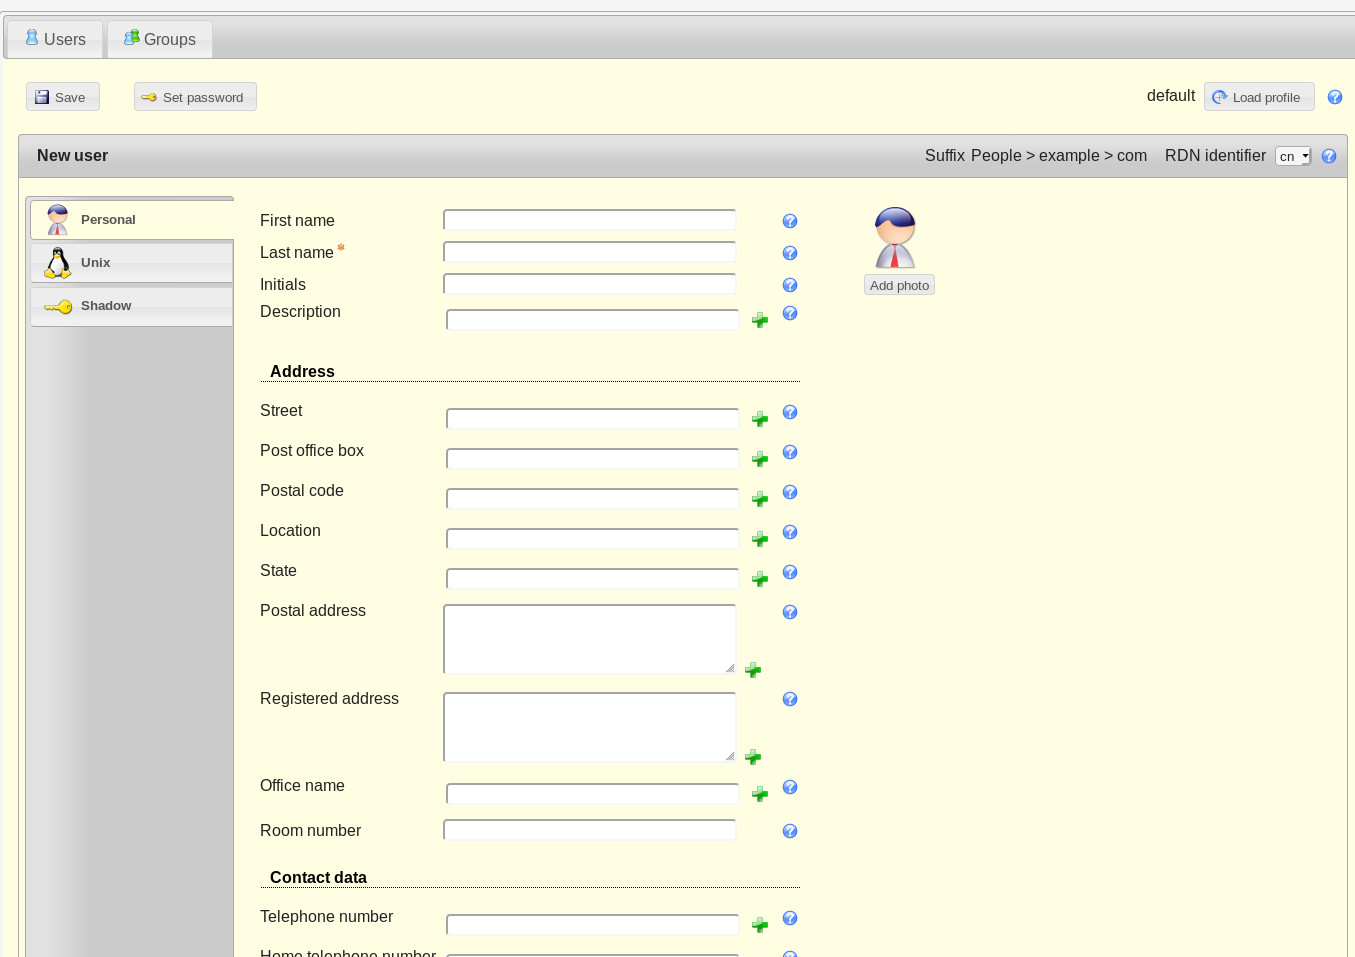
Make sure to click Set password, so you can create a password for the new user (otherwise the user won’t be able to log into their account). Also make sure to click on the Unix tab, where you can set the username, home directory, primary group, login shell, and more. Once you’ve entered the necessary information for the user, click Save and the user account can then be found in the LDAP directory tree.
Welcome to Simpler User Creation
The LDAP Account Manager makes working with OpenLDAP exponentially easier. Without using this tool, you’ll spend more time entering users to the LDAP tree than you probably would like. The last thing you need is to take more time than necessary out of your busy admin day to create and manage users in your LDAP tree via command line.
In the next (and final entry) in this three-part series, I will walk you through the process of configuring a Linux desktop machine, such that it can authenticate against the OpenLDAP server.


