
Previously, we saw how to enable and disable systemd services by hand, at boot time and on power down, when a certain device is activated, and when something changes in the filesystem.
Timers add yet another way of starting services, based on… well, time. Although similar to cron jobs, systemd timers are slightly more flexible. Let’s see how they work.
“Run when”
Let’s expand the Minetest service you set up in the first two articles of this series as our first example on how to use timer units. If you haven’t read those articles yet, you may want to go and give them a look now.
So you will “improve” your Minetest set up by creating a timer that will run the game’s server 1 minute after boot up has finished instead of right away. The reason for this could be that, as you want your service to do other stuff, like send emails to the players telling them the game is available, you will want to make sure other services (like the network) are fully up and running before doing anything fancy.
Jumping in at the deep end, your minetest.timer unit will look like this:
# minetest.timer
[Unit]
Description=Runs the minetest.service 1 minute after boot up

[Timer]
OnBootSec=1 m
Unit=minetest.service

[Install]
WantedBy=basic.target
Not hard at all.
As usual, you have a [Unit] section with a description of what the unit does. Nothing new there. The [Timer] section is new, but it is pretty self-explanatory: it contains information on when the service will be triggered and the service to trigger. In this case, the OnBootSec is the directive you need to tell systemd to run the service after boot has finished.
Other directives you could use are:
OnActiveSec=, which tells systemd how long to wait after the timer itself is activated before starting the service.OnStartupSec=, on the other hand, tells systemd how long to wait after systemd was started before starting the service.OnUnitActiveSec=tells systemd how long to wait after the service the timer is activating was last activated.OnUnitInactiveSec=tells systemd how long to wait after the service the timer is activating was last deactivated.
Continuing down the minetest.timer unit, the basic.target is usually used as a synchronization point for late boot services. This means it makes minetest.timer wait until local mount points and swap devices are mounted, sockets, timers, path units and other basic initialization processes are running before letting minetest.timer start. As we explained in the second article on systemd units, targets are like the old run levels and can be used to put your machine into one state or another, or, like here, to tell your service to wait until a certain state has been reached.
The minetest.service you developed in the first two articles ended up looking like this:
# minetest.service
[Unit]
Description= Minetest server
Documentation= https://wiki.minetest.net/Main_Page

[Service]
Type= simple
User=

ExecStart= /usr/games/minetest --server
ExecStartPost= /home//bin/mtsendmail.sh "Ready to rumble?" "Minetest Starting up"

TimeoutStopSec= 180
ExecStop= /home//bin/mtsendmail.sh "Off to bed. Nightie night!" "Minetest Stopping in 2 minutes"
ExecStop= /bin/sleep 120
ExecStop= /bin/kill -2 $MAINPID

[Install]
WantedBy= multi-user.target
There’s nothing you need to change here. But you do have to change mtsendmail.sh (your email sending script) from this:
#!/bin/bash
# mtsendmail
sleep 20
echo $1 | mutt -F /home/<username>/.muttrc -s "$2" my_minetest@mailing_list.com
sleep 10
to this:
#!/bin/bash
# mtsendmail.sh
echo $1 | mutt -F /home/paul/.muttrc -s "$2" pbrown@mykolab.com
What you are doing is stripping out those hacky pauses in the Bash script. Systemd does the waiting now.
Making it work
To make sure things work, disable minetest.service:
sudo systemctl disable minetest
so it doesn’t get started when the system starts; and, instead, enable minetest.timer:
sudo systemctl enable minetest.timer
Now you can reboot you server machine and, when you run sudo journalctl -u minetest.* you will see how, first the minetest.timer unit gets executed and then the minetest.service starts up after a minute… more or less.
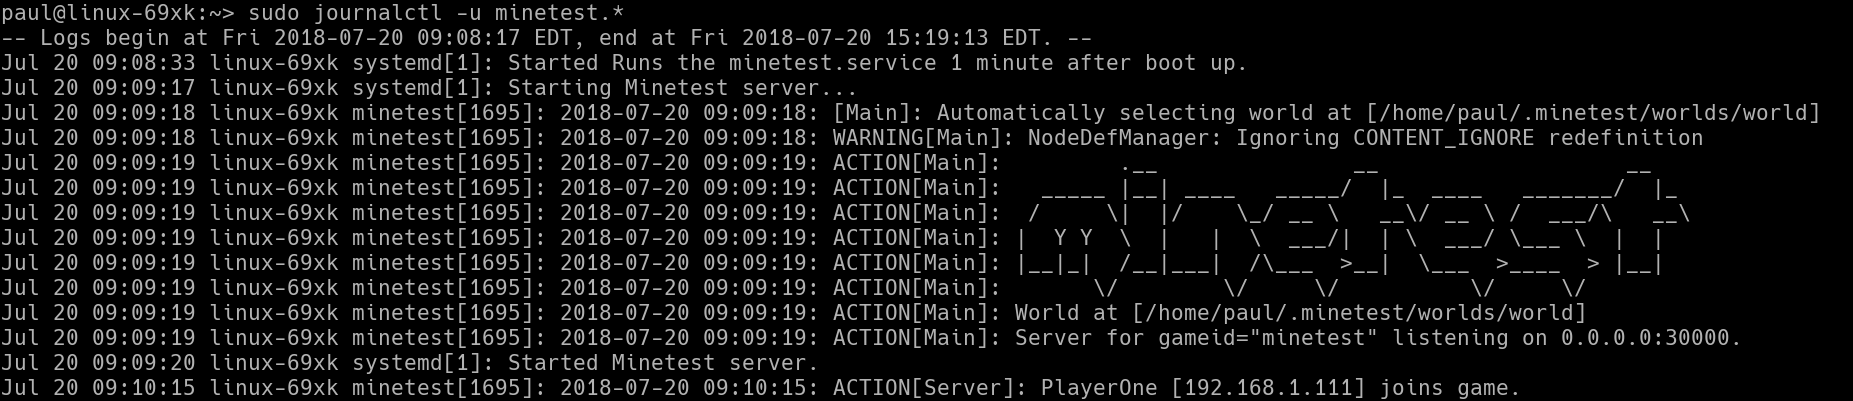
A Matter of Time
A couple of clarifications about why the minetest.timer entry in the systemd’s Journal shows its start time as 09:08:33, while the minetest.service starts at 09:09:18, that is less than a minute later: First, remember we said that the OnBootSec= directive calculates when to start a service from when boot is complete. By the time minetest.timer comes along, boot has finished a few seconds ago.
The other thing is that systemd gives itself a margin of error (by default, 1 minute) to run stuff. This helps distribute the load when several resource-intensive processes are running at the same time: by giving itself a minute, systemd can wait for some processes to power down. This also means that minetest.service will start somewhere between the 1 minute and 2 minute mark after boot is completed, but when exactly within that range is anybody’s guess.
For the record, you can change the margin of error with AccuracySec= directive.
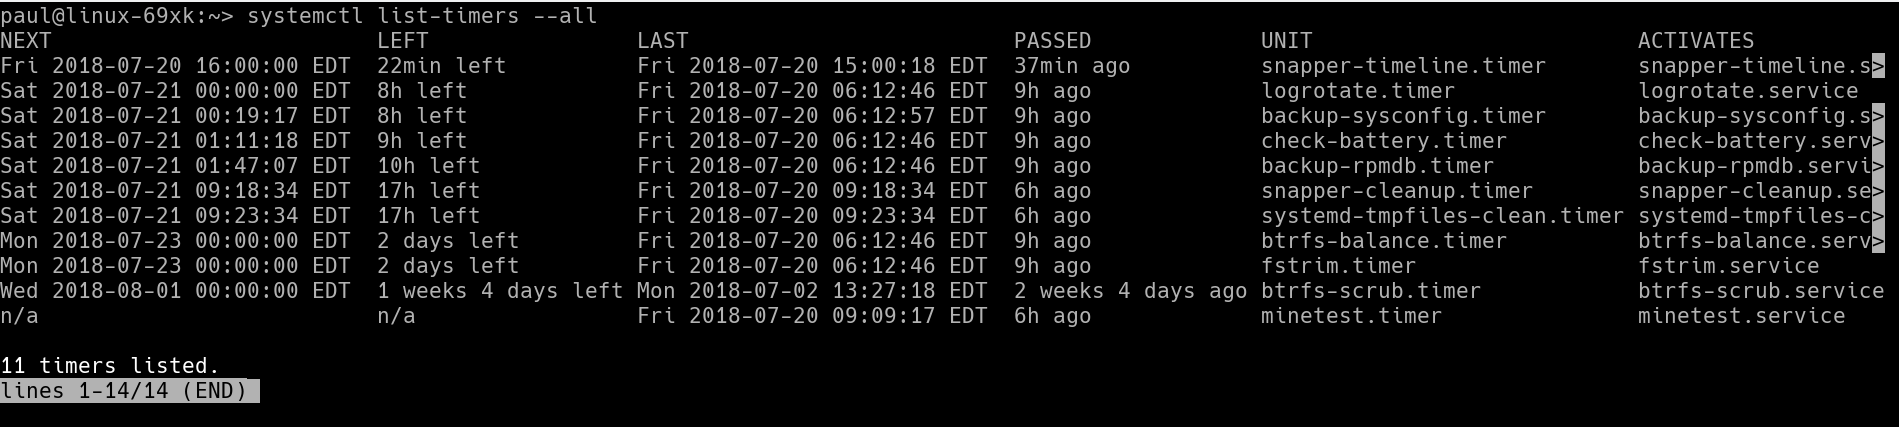
Another thing you can do is check when all the timers on your system are scheduled to run or the last time the ran:
systemctl list-timers --all
The final thing to take into consideration is the format you should use to express the periods of time. Systemd is very flexible in that respect: 2 h, 2 hours or 2hr will all work to express a 2 hour delay. For seconds, you can use seconds, second, sec, and s, the same way as for minutes you can use minutes, minute, min, and m. You can see a full list of time units systemd understands by checking man systemd.time.
Next Time
You’ll see how to use calendar dates and times to run services at regular intervals and how to combine timers and device units to run services at defined point in time after you plug in some hardware.
See you then!
Learn more about Linux through the free “Introduction to Linux” course from The Linux Foundation and edX.


