
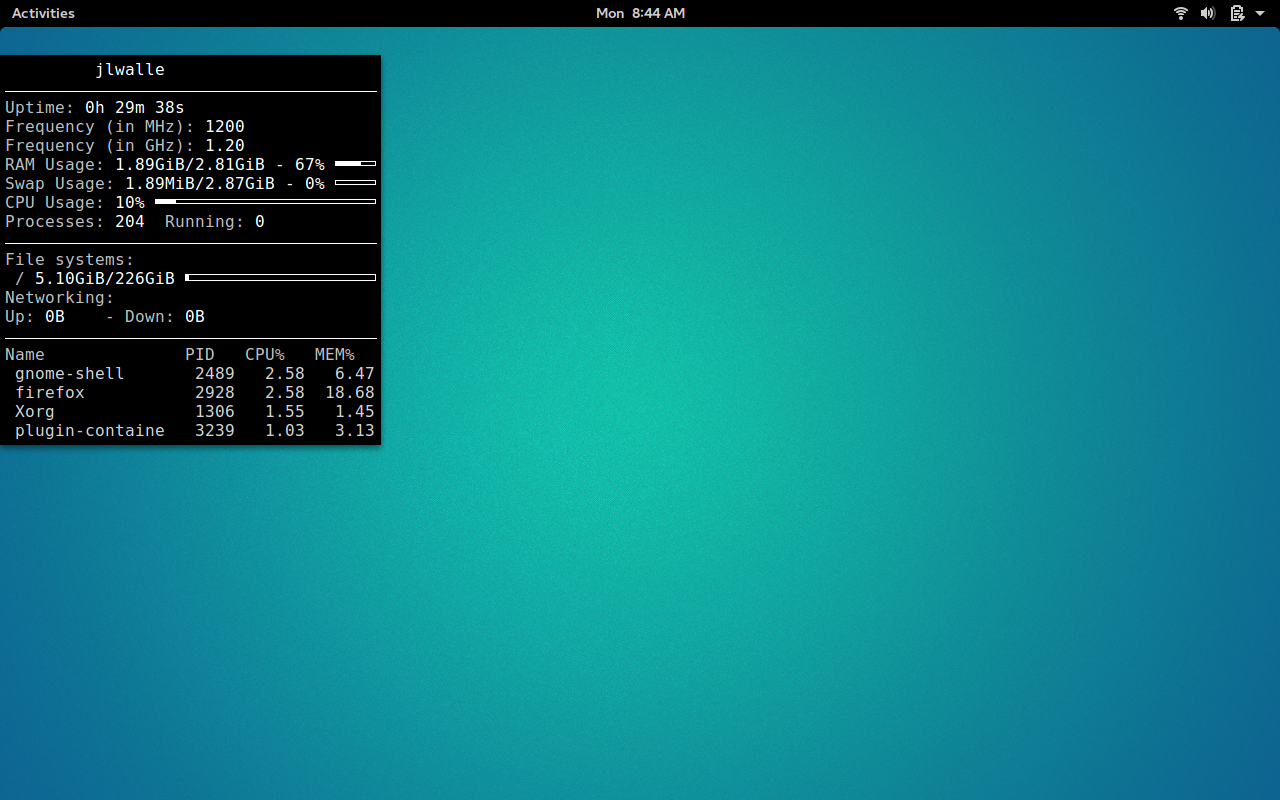
At first blush, Conky is a system monitor that will display pertinent information on your desktop. When you peel past the top layer, you will see Conky is actually much more than that. Not only can Conky display information about your CPU, memory, swap, disk space, temperature, top, upload, download, system messages… it can display things like world time, calendars, email notifications, weather, battery status… the list goes on and on.
Conky works in conjunction with themes. A theme instructs Conky what to display and how to display it. If you look around the Internet (e.g., Deviant Art), you’ll find tons of Conky themes to display just about any bit of information you need with many variations on the look and feel.
I will show you how to install Conky and then how to make use of one of the many themes to configure Conky to suit your needs. I’ll be installing Conky on Ubuntu GNOME.
Installation
Because we’re working with a Ubuntu-based distribution, the installation of Conky couldn’t be easier. Here are the steps for installation:
-
Open up a terminal window ([Ctrl]+[Alt]+[t] does the trick nicely)
-
Issue the command sudo apt-get install conky-all
-
Type your sudo password and hit Enter
-
When prompted, accepted the installation by typing y
-
Allow the installation to complete
Adding a Theme
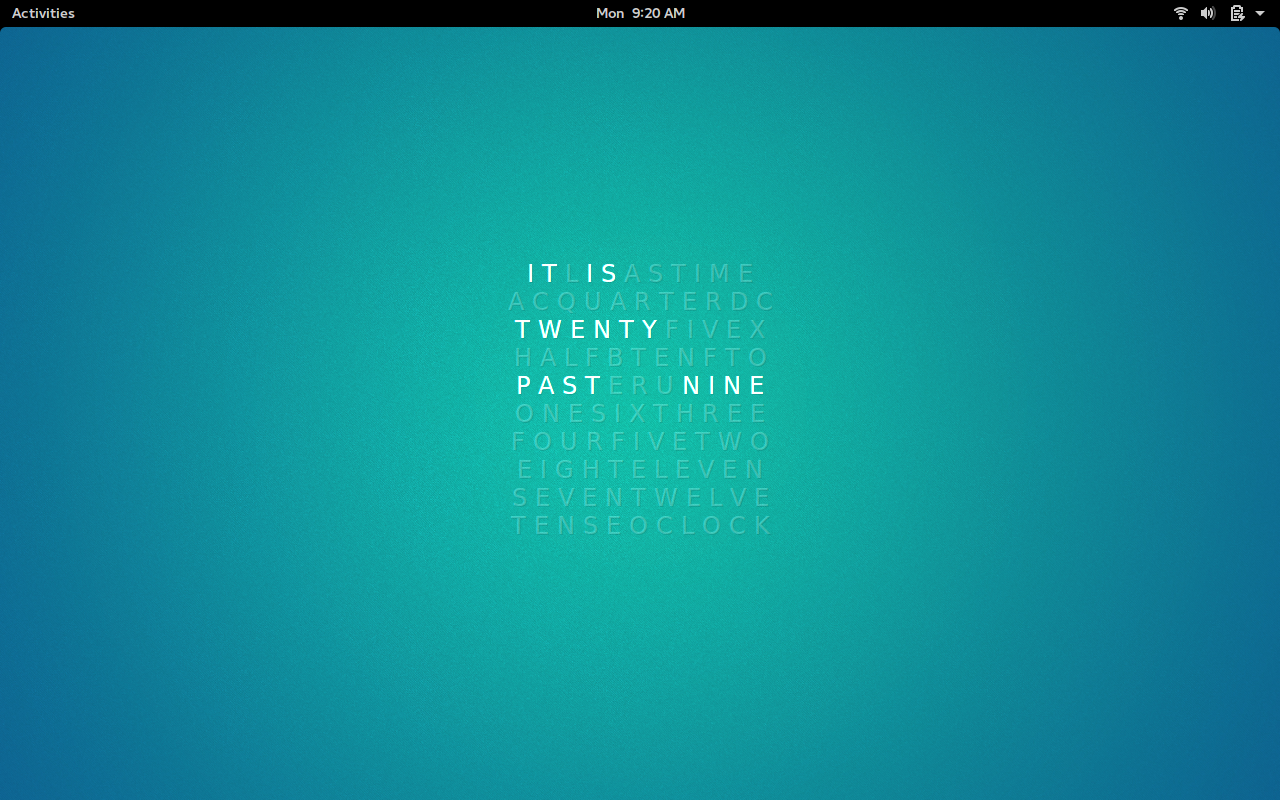
Naturally, you’re not going to want to stick with that generic out-of-the-box theme. I will demonstrate by showing how to add a clock theme to Conky. This isn’t just any old clock theme, however. As a writer, I love words, and this clock theme created by a Deviant Art user, mowgli-writes, displays world time in text. Let’s install that and then configure it to meet our needs.
To install the qlocktwo-conky theme, you need to follow these instructions:
-
Download the qlocktwo-conky file (from Deviant Art) into your ~/Downloads folder
-
Open your file manager and navigate to ~/Downloads
-
Right-click on the qlocktwoconky_mowglimod zip file and select Extract Here
-
In the ~/Downloads folder, you should now see a file called qlocktwo, right-click that folder, select Rename, and rename it .conkyrc
-
If you cannot see the .conkyrc file, hit [Ctrl]+[h] to show hidden files
-
Right-click the .conkyrc file and select Move to…
-
Select your home folder as the destination for the .conkyrc file
If you’d rather handle the above via the command line, the steps would be (after you’ve downloaded the file to ~/Downloads):
-
Open a terminal window
-
Change to your Downloads directory with the command cd Downloads
-
Unzip the file with the command unzip qlocktwoconky_mowglimod*.zip
-
Rename the qlocktwo file with the command mv qlocktwo .conkyrc
-
Move the .conkyrc file with the command mv .conkyrc ~/
With the .conkyrc file in place, run Conky with the command conky. Because I’m demonstrating on GNOME, you can hit the key combination [Alt]+[F2] and then enter conky in the run dialog. Conky will start up with the currently installed Theme (Figure 2).
Configuring Conky
Let’s continue with our usage of the Clocktwo-Conky theme (for simplicity’s sake). Out of the box, that theme is pretty sweet, but maybe you want to, for example, move the theme to the right-hand side of your screen. With Conky, you cannot simply click and drag a theme where you want it. Instead, you have to configure the placement of the theme on your desktop. Fortunately, Conky includes some standard variables that allow you to make various and sundry configuration changes to a theme.
With placement, Conky uses the alignment variable with the following options:
-
Top left: tl
-
Top right: tr
-
Top middle: tm
-
Bottom left: bl
-
Bottom right: br
-
Bottom middle: bm
-
Middle left: ml
-
Middle middle: mm
-
Middle right: mr
If you want to get more refined with your theme positioning, you can use the following variables:
-
gap_x: Gap, in pixels, from the left or right side of the screen
-
gap_y: Gay, in pixels, from the bottom or top of the screen
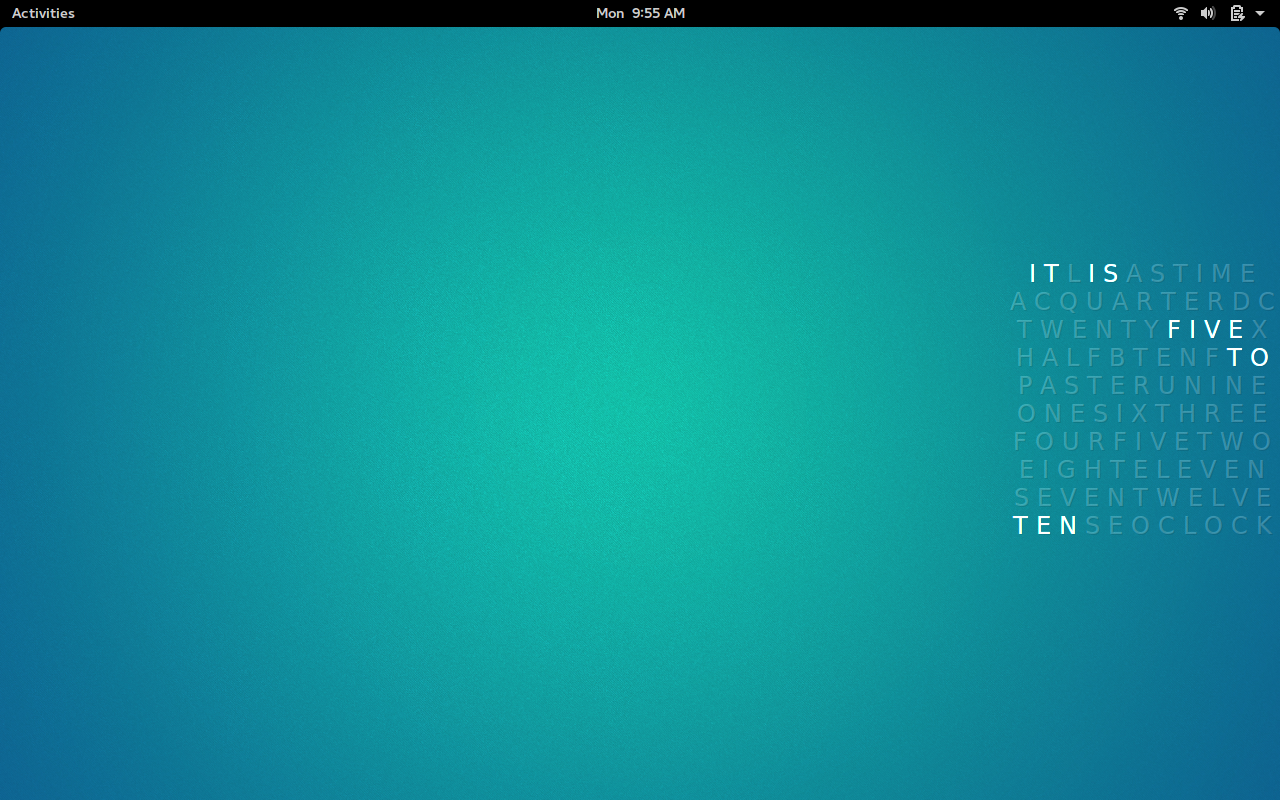
So, if you want the Qlocktwo Conky theme to reside on the right-hand side of your screen, open up the .conkyrc file, located the alignment mm line and change it to alignment mr. Save and close the file and restart Conky to place the theme on the right-hand side of your screen (Figure 3).
Get GUI
If you don’t much care for working from the command line, there is a GUI tool, called Conky Manager, that you can install and use. Here’s how to install this handy app:
-
Open up a terminal window
-
Add the necessary repository with the command sudo add-apt-repository ppa:teejee2008/ppa
-
Update apt with the command sudo apt-get update
-
Install Conky Manager by issuing the command sudo apt-get install conky-manager
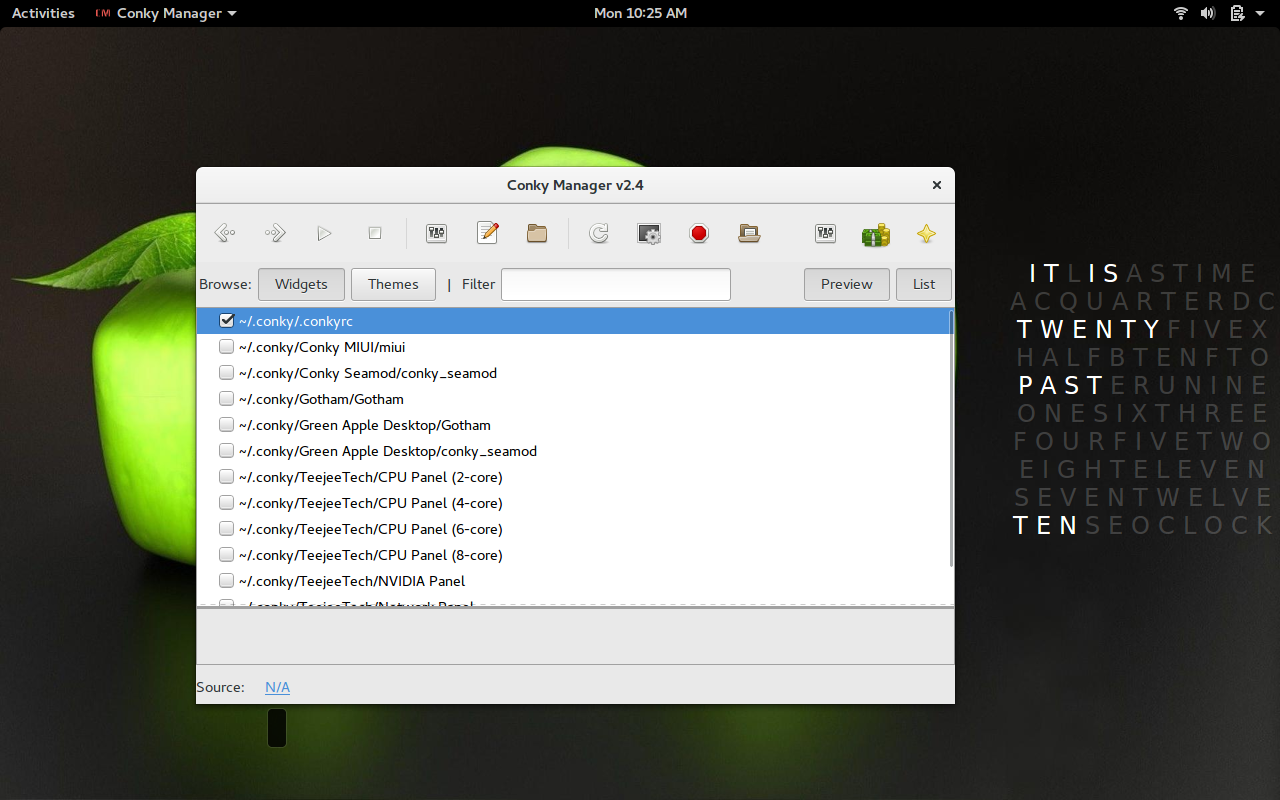
Run Conky Manager with the command conky-manager. When the app opens, you’ll see a simple-to-use window (Figure 4) that allows you to easily import theme packs, customize themes, and more. When you install the Conky Manager app, it will install several predefined themes that you can select from.
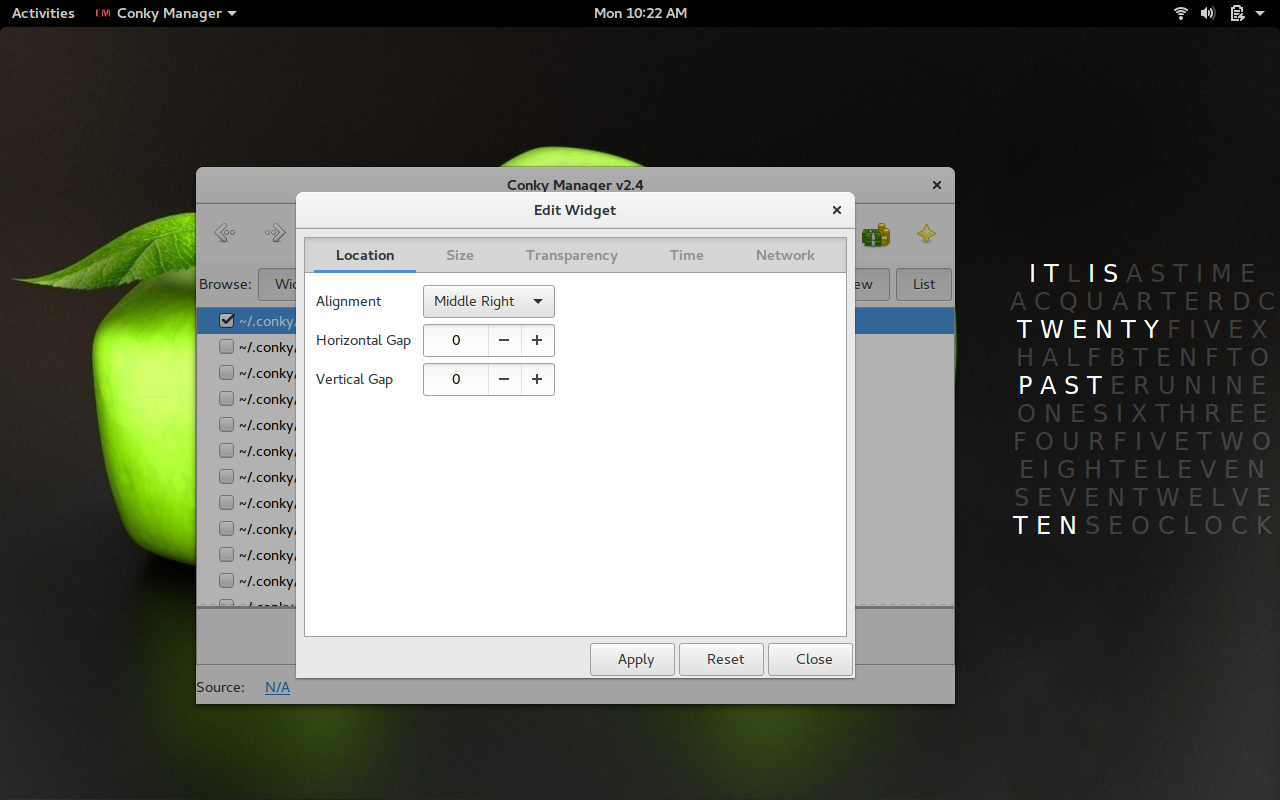
If you’ve installed a theme, prior to installing Conky Manager, you’ll need to move the ~/.conkyrc file into the newly created ~/.conky folder. When you do this, Conky Manager will recognize the theme and allow you to load it and work with it (Figure 5).
Conky Rocks
At this point, you’re ready to dive deeper into the waters of Conky. Do a search for Conky Themes, and you’ll find plenty to choose from. Play around with the various options, and you’ll soon have Conky rocking on your desktop, doing exactly what you need. Although some Conky configuration files can get a bit complex, with a little effort, you’ll soon be a master of Conky.


