
The Linux platform can do quite a lot of things; it can be just about anything need it to be and function in nearly any form. One of the many areas in which Linux excels is that of storage. With the help of a few constituent pieces, you can have a powerful NAS or cloud storage solution up and running.
But, what if you don’t want to take the time to piece these together for yourself? Or, what if you’d rather have a user-friendly, web-based GUI to make this process a bit easier. For that, there are a few distributions available to meet your needs. Once such platform is Rockstor. Rockstor is a Network Attached Storage (NAS) and cloud solution that can serve either your personal or small business needs with ease.
Rockstor got its start in 2014 and has quickly become a solid tool in the storage space. I was able to quickly get Rockstor up and running (after overcoming only one minor hurdle) and had SMB shares and users/groups created with just a few quick clicks. And, with the inclusion of add-ons (called Rockons), you can extend the feature set of your Rockstor to include new apps, servers, and services.
Let me walk you through that process (as well as how I solved one tiny hiccup), so you can decide if Rockstor is the solution for you.
A word on requirements
I managed to easily get Rockstor running as a VirtualBox VM. Whether you’re installing as a VM or on dedicated hardware, the minimal installation requirements are:
-
64-bit Intel or AMD processor
-
2GB RAM or more (recommended)
-
8GB hard disk space for the OS
-
One or more additional hard drives for data (recommended)
-
Ethernet interface (with Internet access – for updates)
-
Media drive or USB port (for installation on dedicated hardware)
Installation
Based on the Anaconda Installer, the installation of Rockstor is incredibly simple. In fact, once you start the installation process, the only thing you have to do is configure a root user password; there is no package selection, no set up of systems or servers. Once the installation completes, reboot, and you’re ready to go.
When the reboot completes, you will discover the biggest (and really only) caveat to Rockstor—the handling of the IP address. After logging into the Rockstor terminal window (the only GUI is the web interface), you will find it does not give you any indication what IP address to use. And, since you weren’t able to configure the networking interface during installation, what do you do?
The first thing would be to issue the command ip address. This will report to you the DHCP-assigned IP address of your server (Figure 1).
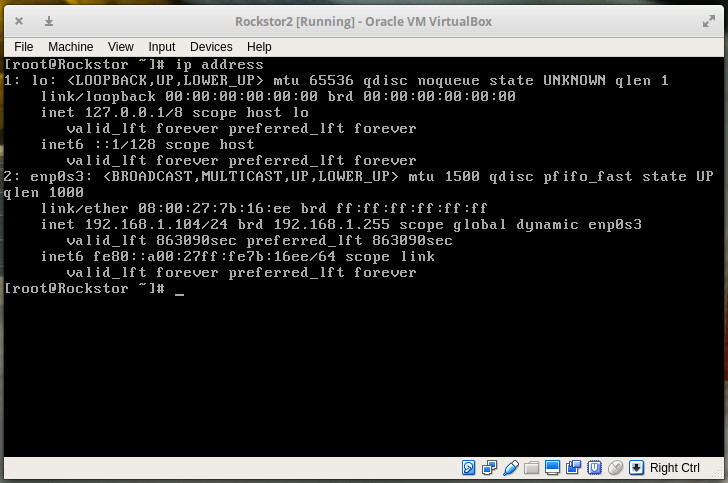
Point your browser to the IP address (using secure HTTPS, so https://SERVER_IP) listed. NOTE: You will have to okay the exception for the self-signed certificate, used by your Rockstor instance, in your browser.
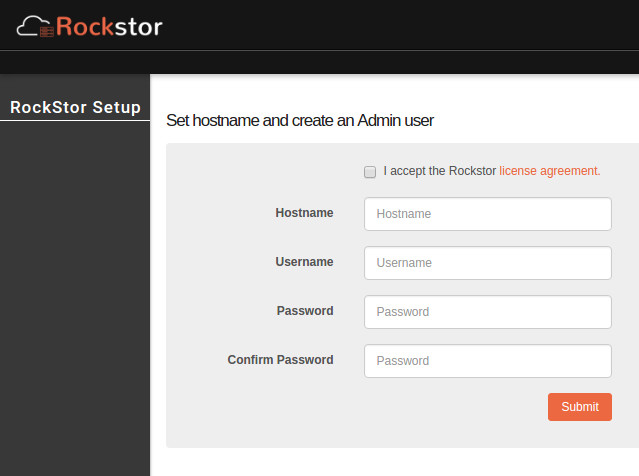
On the first page, you will be required to accept the license as well as create a hostname and admin user for your Rockstor instance (Figure 2).
Upon successful creation of the hostname/admin user, you will be greeted by the Rockstor Dashboard (and a popup asking if you want to update to the latest release). Do note that the update popup will take you to a page where you can sign up for either the stable or the testing releases. The Stable updates will cost you $40.00 for a three-year subscription and the Testing updates do not have an associated cost. If you do enable the Testing updates, make sure you read through each offered changelog before okaying the update.
Addressing the IP address caveat
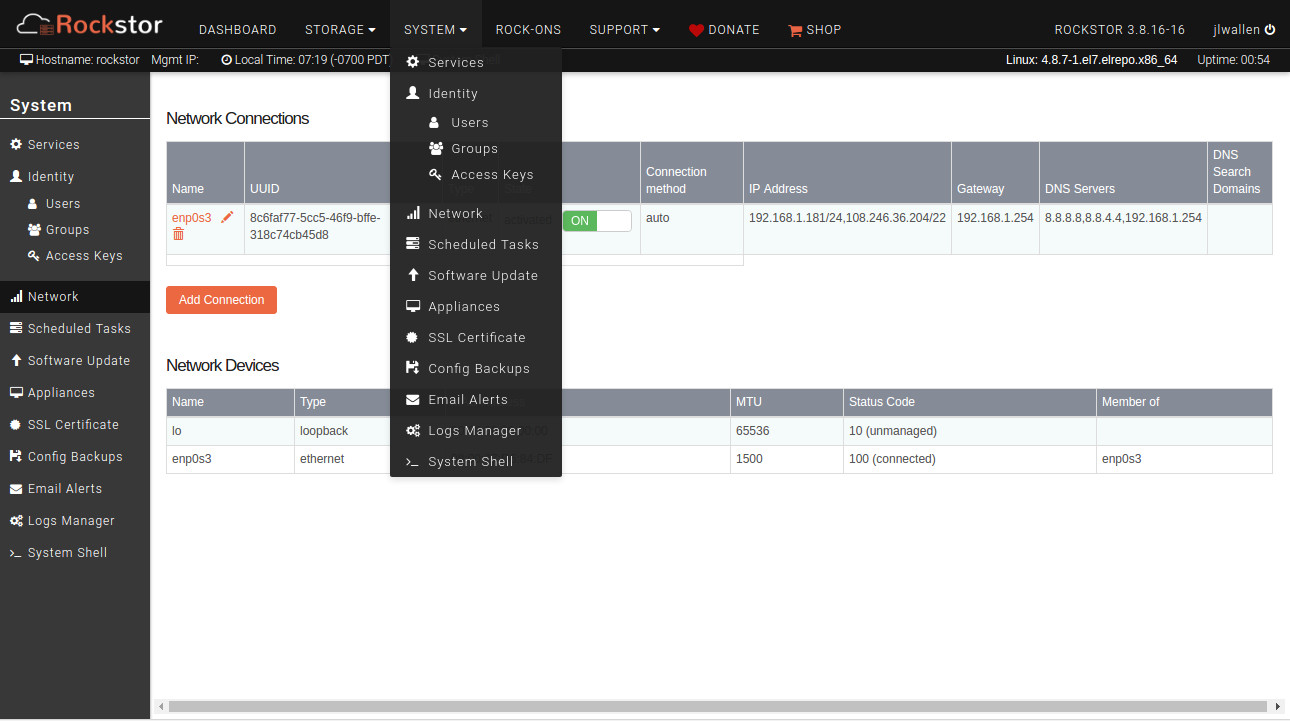
You don’t want to have to work with a DHCP-assigned IP address for your storage server. Once you’ve taken care of the final installation/update bits, you can then configure the network device for a manual (static) address through the Rockstor GUI. One method for setting up a static IP address is through the Rockstor web interface. To do this, log onto Rockstor as your admin user and then click on SYSTEM > Network (Figure 3).
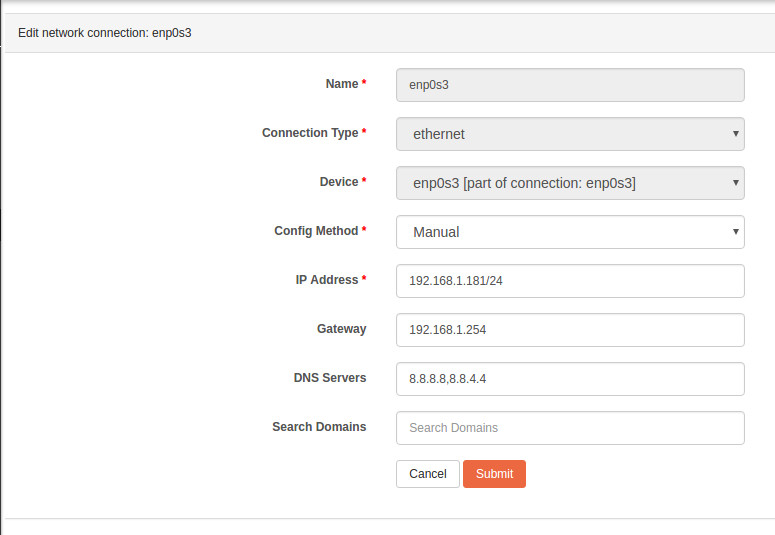
In the resulting window (Figure 4), configure the network interface as a manual connection and fill out the necessary information.
With that taken care of, you’re ready to start setting up your Rockstor storage server.
If the above method fails you (which it did me in one instance), I have found the best solution to be the old-fashioned method…configuring the network manually. For this, you need to log into the Rockstor server as root and then edit the networking file associated with your network adapter. As I was working with VirtualBox, the file was /etc/sysconfig/network-scripts/ifcfg-enp0s3. Open that file for editing and make sure the following options are configured properly:
ONBOOT=”yes”

BOOTPROTO=”static”

IPADDR=”IP address”

GATEWAY=”gateway”

DNS1=”DNS address”

DNS2=”DNS address”
where all options in bold are specific to your network.
There will be other options preconfigured in the file (e.g., NAME and DEVICE), leave them as-is. Once you’ve made these changes, save and close the file, and then issue the command:
systemctl restart network
Now, if you go back to SYSTEM > Network (on your Rockstor Dashboard), you should see the network configuration for your interface is set to Manual, with all of your necessary options.
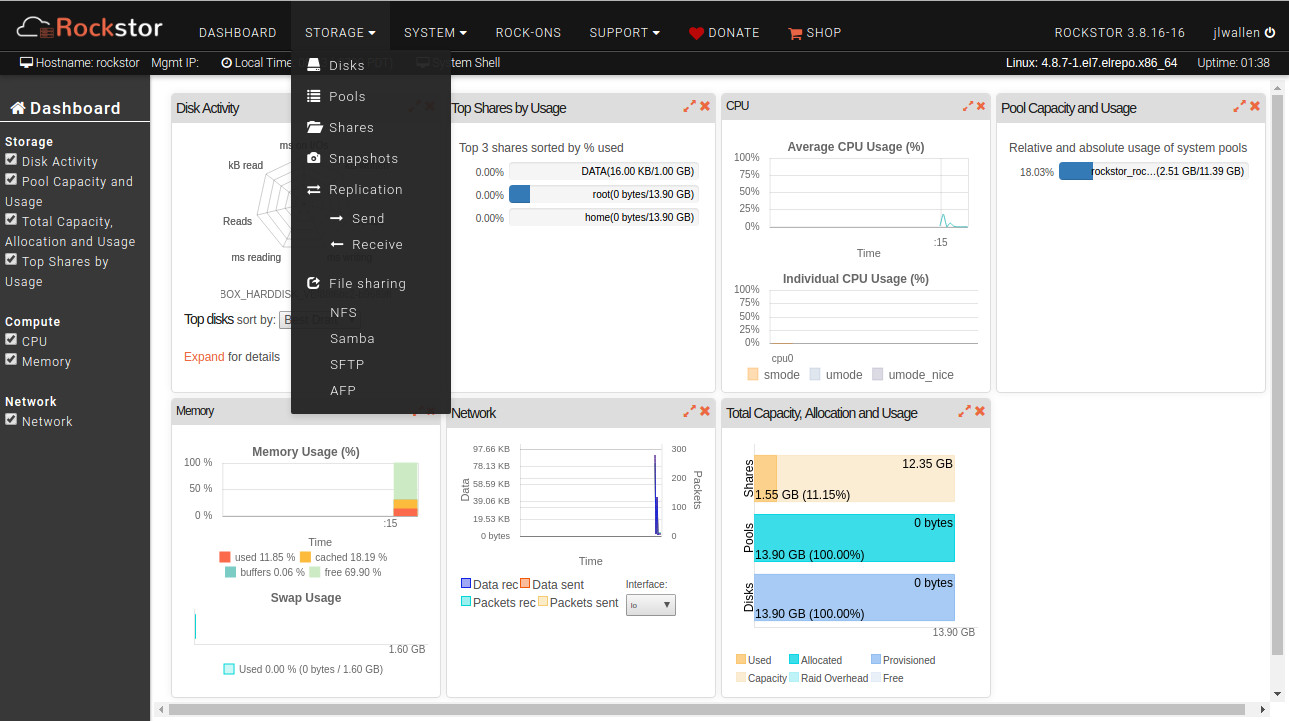
You are now ready to go back to your Rockstor Dashboard, click STORAGE and set up whatever storage type you need (Figure 5).
Quick Samba Share
Before you create your first share, you’ll want to head over to SYSTEM > Groups and SYSTEM > Users and make sure you have the necessary users/groups created, in order to make creating shares easier.
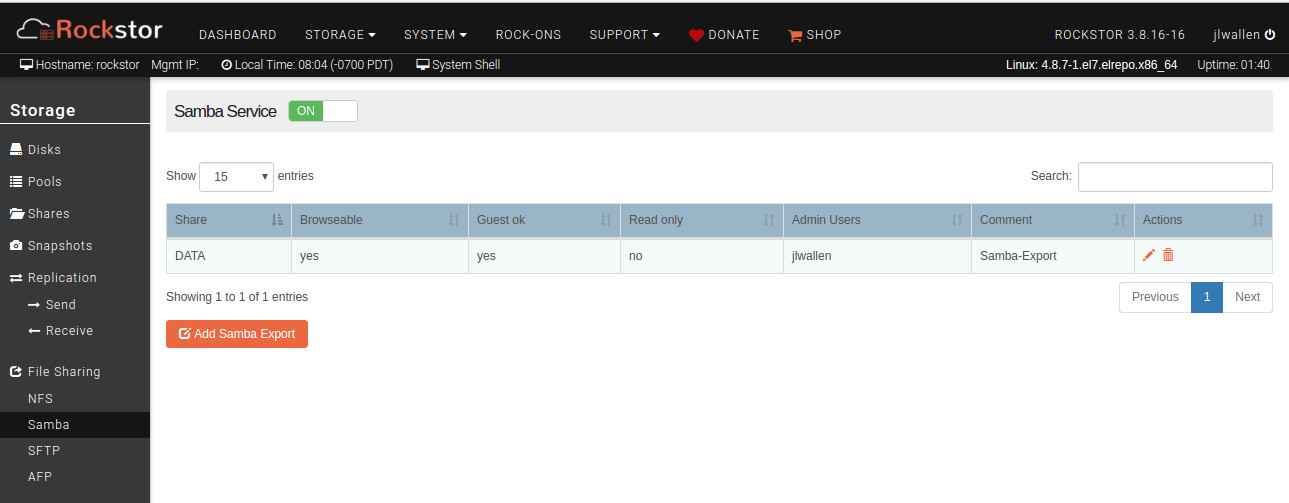
To set up your first Samba Share, click on STORAGE > Samba. In the resulting window (Figure 6), make sure that Samba Service is set to ON.
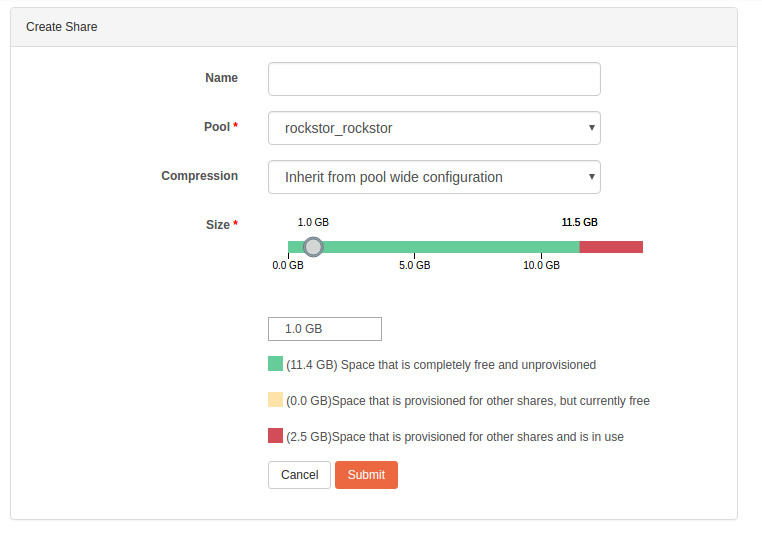
With the Samba Service running, go back to the Dashboard and click STORAGE > Shares. In this new window, click the Create Share button and fill out the necessary information (Figure 7).
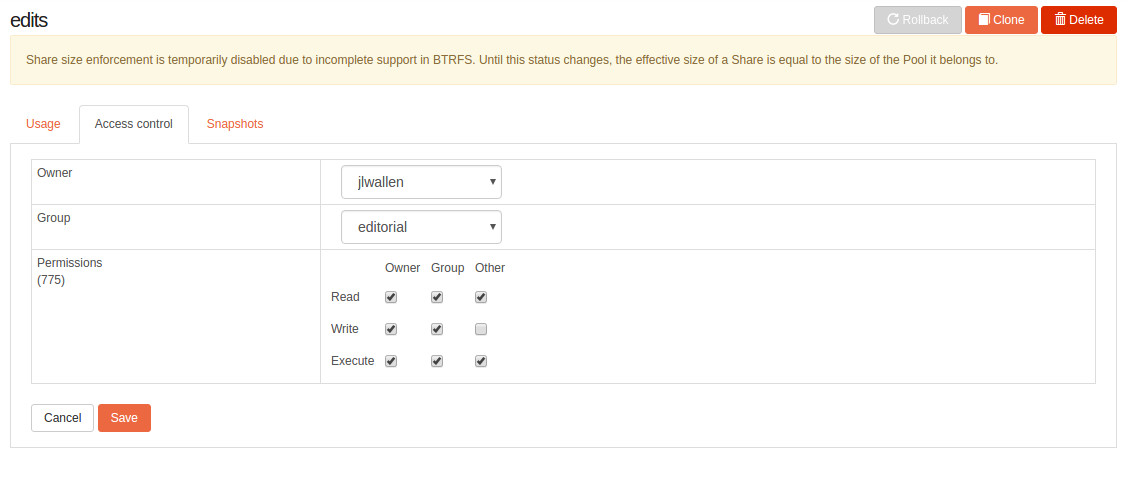
Click Submit and your share has been created. After the share has been saved, click on the new share from the listings and then click on the Access Control tab, where you can change the associated group for the share as well as the share permissions (Figure 8).
And that’s it to creating a Samba share with Rockstor.
A solid solution for SOHO and SMB
If you’re looking for a solid storage solution for your home office or small business, you’d certainly be remiss for skipping over the open source Rockstor solution. With one of the best storage GUIs I’ve used, Rockstor makes creating a powerful storage solution an experience nearly anyone can handle.
Learn more about Linux through the free “Introduction to Linux” course from The Linux Foundation and edX.


