
Not only do I write technical documentation, I write novels. And because I’m comfortable with tools like GIMP, I also create my own book covers (and do graphic design for a few clients). That artistic endeavor depends upon a lot of pieces falling into place, including fonts.
Although font rendering has come a long way over the past few years, it continues to be an issue in Linux. If you compare the look of the same fonts on Linux vs. macOS, the difference is stark. This is especially true when you’re staring at a screen all day. But even though the rendering of fonts has yet to find perfection in Linux, one thing that the open source platform does well is allow users to easily manage their fonts. From selecting, adding, scaling, and adjusting, you can work with fonts fairly easily in Linux.
Here, I’ll share some of the tips I’ve depended on over the years to help extend my “font-ability” in Linux. These tips will especially help those who undertake artistic endeavors on the open source platform. Because there are so many desktop interfaces available for Linux (each of which deal with fonts in a different way), when a desktop environment becomes central to the management of fonts, I’ll be focusing primarily on GNOME and KDE.
With that said, let’s get to work.
Adding new fonts
For the longest time, I have been a collector of fonts. Some might say I have a bit of an obsession. And since my early days of using Linux, I’ve always used the same process for adding fonts to my desktops. There are two ways to do this:
-
Make the fonts available on a per-user basis.
-
Make the fonts available system-wide.
Because my desktops never have other users (besides myself), I only ever work with fonts on a per-user basis. However, I will show you how to do both. First, let’s see how to add fonts on a per-user basis. The first thing you must do is find fonts. Both True Type Fonts (TTF) and Open Type Fonts (OTF) can be added. I add fonts manually. Do this is, I create a new hidden directory in ~/ called ~/.fonts. This can be done with the command:
mkdir ~/.fonts
With that folder created, I then move all of my TTF and OTF files into the directory. That’s it. Every font you add into that directory will now be available for use to your installed apps. But remember, those fonts will only be available to that one user.
If you want to make that collection of fonts available to all, here’s what you do:
-
Open up a terminal window.
-
Change into the directory housing all of your fonts.
-
Copy all of those fonts with the commands sudo cp *.ttf *.TTF /usr/share/fonts/truetype/ and sudo cp *.otf *.OTF /usr/share/fonts/opentype
The next time a user logs in, they’ll have access to all those glorious fonts.
GUI Font Managers
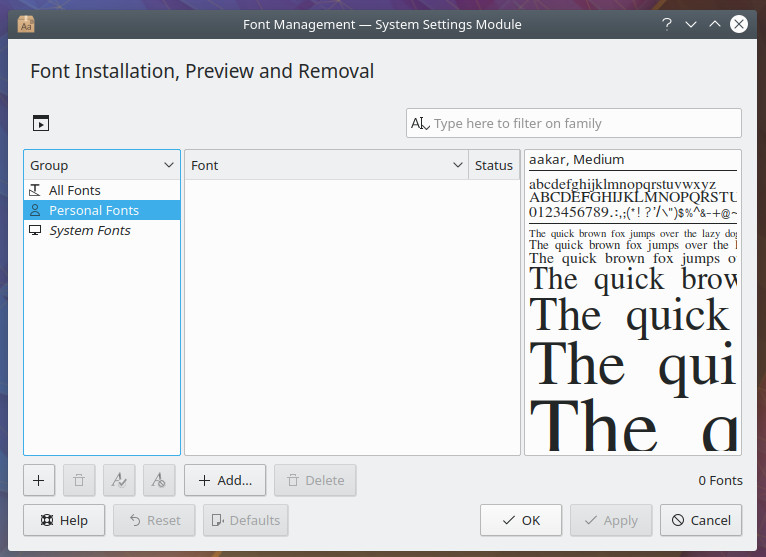
There are a few ways to manage your fonts in Linux, via GUI. How it’s done will depend on your desktop environment. Let’s examine KDE first. With the KDE that ships with Kubuntu 18.04, you’ll find a Font Management tool pre-installed. Open that tool and you can easily add, remove, enable, and disable fonts (as well as get information about all of the installed fonts. This tool also makes it easy for you to add and remove fonts for personal and system-wide use. Let’s say you want to add a particular font for personal usage. To do this, download your font and then open up the Font Management tool. In this tool (Figure 1), click on Personal Fonts and then click the + Add button.
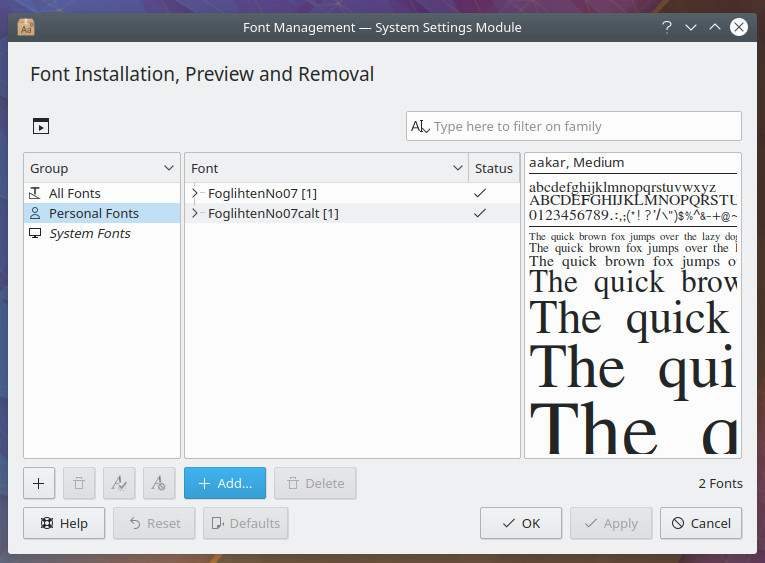
Navigate to the location of your fonts, select them, and click Open. Your fonts will then be added to the Personal section and are immediately available for you to use (Figure 2).
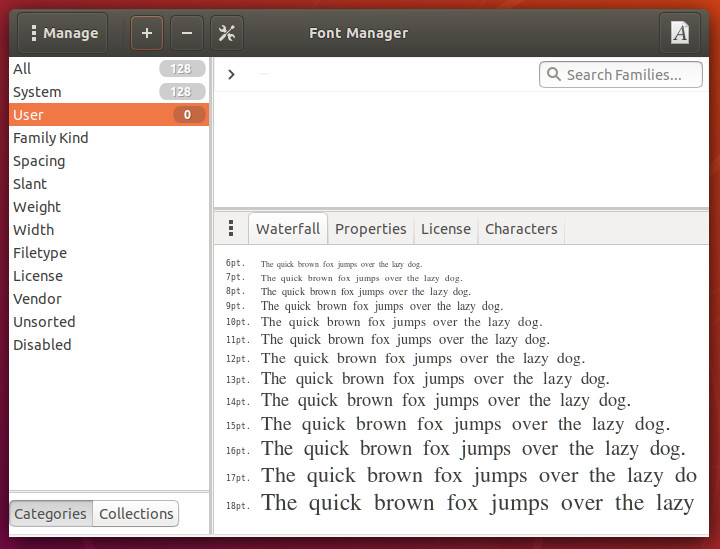
To do the same thing in GNOME requires the installation of an application. Open up either GNOME Software or Ubuntu Software (depending upon the distribution you’re using) and search for Font Manager. Select Font Manager and then click the Install button. Once the software is installed, launch it from the desktop menu. With the tool open, let’s install fonts on a per-user basis. Here’s how:
-
Select User from the left pane (Figure 3).
-
Click the + button at the top of the window.
-
Navigate to and select the downloaded fonts.
-
Click Open.
Tweaking fonts
There are three concepts you must first understand:
-
Font Hinting: The use of mathematical instructions to adjust the display of a font outline so that it lines up with a rasterized grid.
-
Anti-aliasing: The technique used to add greater realism to a digital image by smoothing jagged edges on curved lines and diagonals.
-
Scaling factor: A scalable unit that allows you to multiple the point size of a font. So if you’re font is 12pt and you have an scaling factor of 1, the font size will be 12pt. If your scaling factor is 2, the font size will be 24pt.
Let’s say you’ve installed your fonts, but they don’t look quite as good as you’d like. How do you tweak the appearance of fonts? In both the KDE and GNOME desktops, you can make a few adjustments. One thing to consider with the tweaking of fonts is that taste is very much subjective. You might find yourself having to continually tweak until you get the fonts looking exactly how you like (dictated by your needs and particular taste). Let’s first look at KDE.
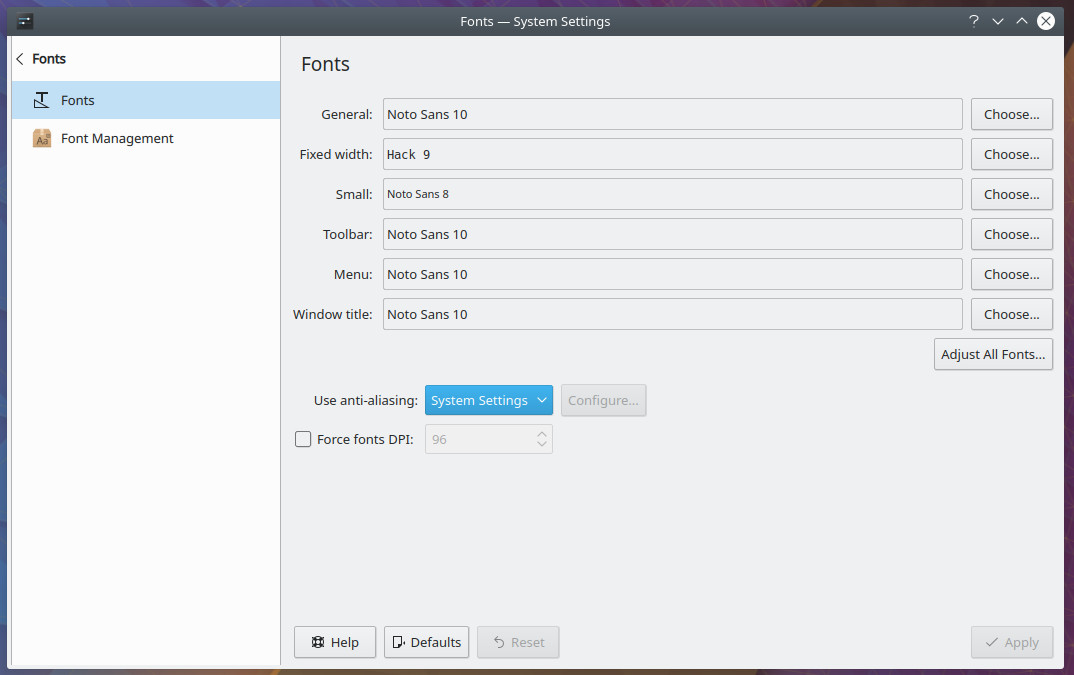
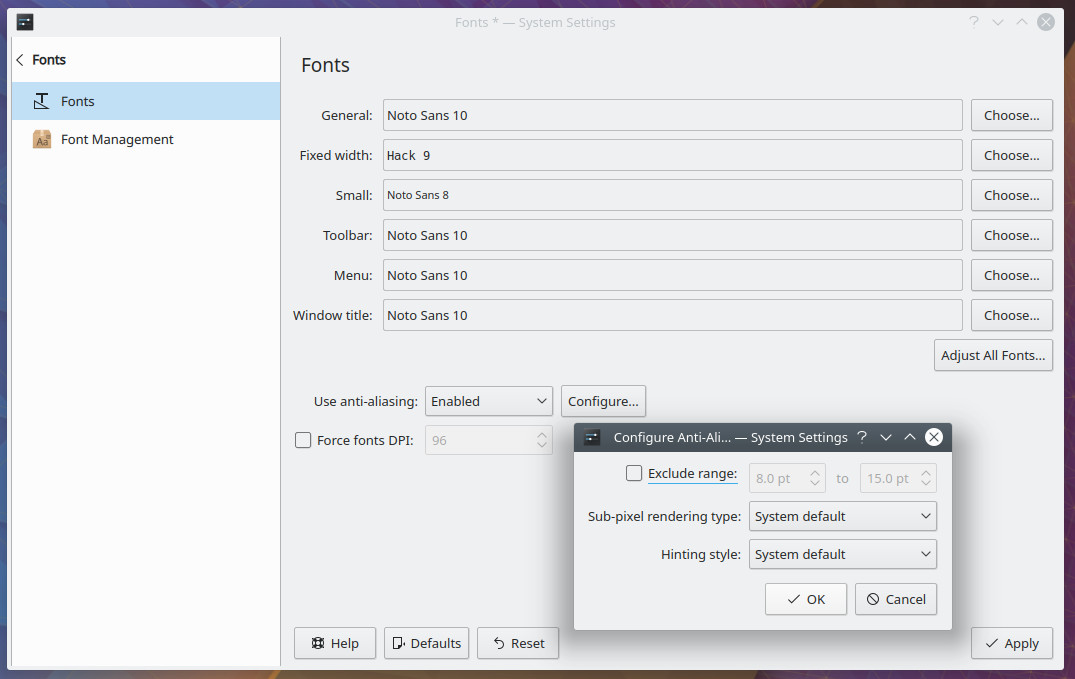
Open up the System Settings tool and clock on Fonts. In this section, you can not only change various fonts, you can also enable and configure both anti-aliasing and enable font scaling factor (Figure 4).
To configure anti-aliasing, select Enabled from the drop-down and then click Configure. In the resulting window (Figure 5), you can configure an exclude range, sub-pixel rendering type, and hinting style.
Once you’ve made your changes, click Apply. Restart any running applications and the new settings will take effect.
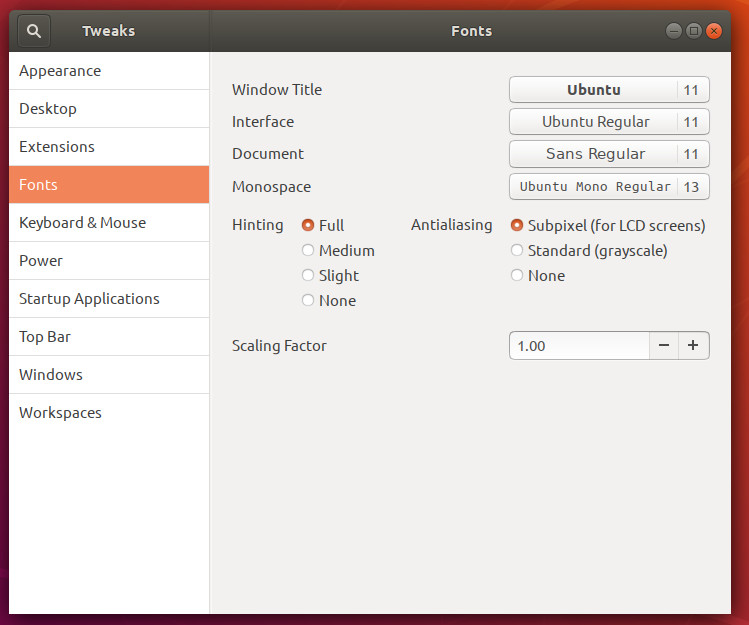
To do this in GNOME, you have to have either use Font Manager or GNOME Tweaks installed. For this, GNOME Tweaks is the better tool. If you open the GNOME Dash and cannot find Tweaks installed, open GNOME Software (or Ubuntu Software), and install GNOME Tweaks. Once installed, open it and click on the Fonts section. Here you can configure hinting, anti-aliasing, and scaling factor (Figure 6).
Make your fonts beautiful
And that’s the gist of making your fonts look as beautiful as possible in Linux. You may not see a macOS-like rendering of fonts, but you can certainly improve the look. Finally, the fonts you choose will have a large impact on how things look. Make sure you’re installing clean, well-designed fonts; otherwise, you’re fighting a losing battle.


