This is the first article in our OpenStack API tutorial series. If you’d like to learn more about how to use OpenStack, The Linux Foundation offers OpenStack training courses.
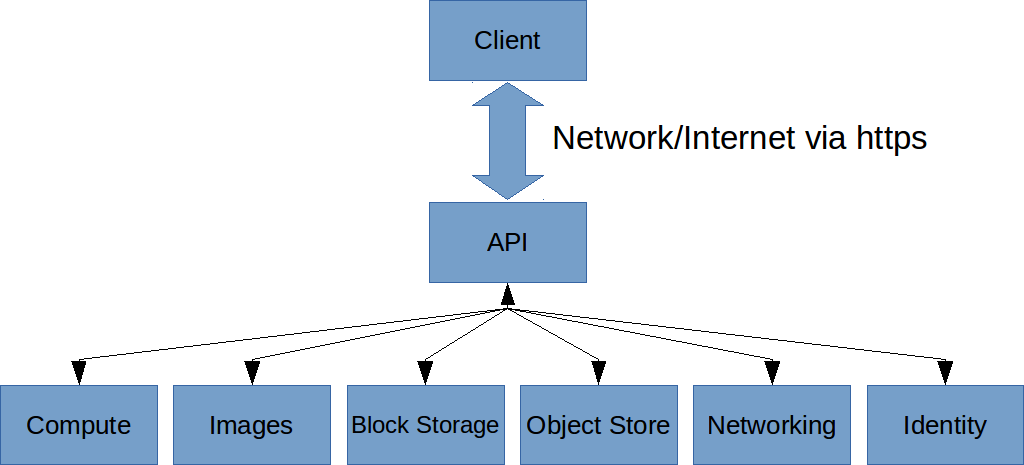
OpenStack is an open-source, standard cloud computing platform. Included with OpenStack is an API that you can use for writing software that manages a cloud. You can write scripts that run as jobs to automatically allocate servers, for example, or write applications that allow a user to manage their own cloud servers. The possibilities are endless. But in order to accomplish such tasks, your software needs to communicate with the OpenStack installation using the API. In this tutorial I get you up and running using the OpenStack API.
There are two ways you can use OpenStack–API and SDK–and I’ve found that some people get a bit confused about this, so I’ll try to clarify it. At the basic level, OpenStack services provide an API through which your software can communicate with the service. The API is a RESTful interface, which means you send URL requests to the service to issue your commands. The format of the path in the URL determines what command you’re issuing. These URLs use the same HTTP protocol that web browsers do. That means with some RESTful interfaces you could make some of the requests right from a browser’s address bar, but that will only work if there’s no custom information to include with the request. (And that’s not really the purpose of the browser, anyway.) Usually that’s not the case. Instead, you’ll make the requests right from your program code, or using a command-line utility such as one called cURL. cURL is one of the easiest ways to send requests to the services.
Much of what I’m describing here initially doesn’t only apply just to OpenStack. These concepts typically apply to many different RESTful interfaces. For example, Amazon has an entire API for sellers to manage their products on Amazon’s site. The API uses these same concepts, both with the RESTful API and SDKs.
Most such APIs, including OpenStack, are set up so that requests are built as URL paths, often with a portion that is a command name followed by a slash, followed by additional parameters separated by slashes. Then you send the request using an HTTP GET or an HTTP POST. (There are other possibilities besides GET and POST, but these are the most commonly used.) In addition to the URL itself, for a GET request you sometimes send additional data in the form of header requests, and for a POST you might specify data that gets sent along with the request in the form of POST data.
The first part of the URL is called an endpoint. Different services use different endpoints, and you can find out the endpoint from their online documentation.

The Rationale behind SDKs
While the API is the basic pipeline of communication to the service, using the API can be a bit cumbersome. Unless you’re just making a few requests occasionally, using cURL to call the API might be fine. But if you’re writing apps that need to make a lot of calls, you’ll find yourself having to repeat a lot of the same code over and over. Depending on the language you’re using, you’ll have to put together the data you want to send with the request, build the URL, and call into whatever libraries the language has available for making HTTP requests. Then you’ll get back an HTTP status code and a response, which you might have to decode into an object your programming language can understand.
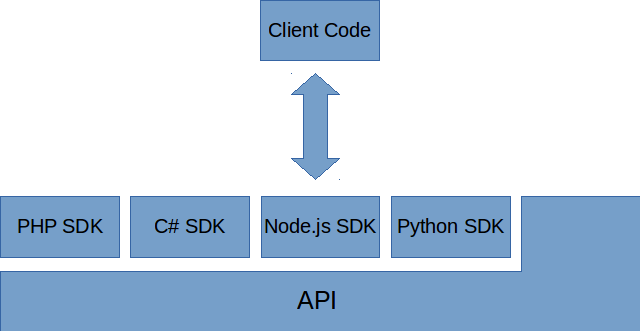
That’s where SDKs come in and make it a lot easier. Instead of putting together URLs and making HTTP requests, you’ll just make function calls. Behind the scenes, these functions are putting together the URLs and data and making the API calls for you. But from your end, it works just like any other code in the language.
Generally, you’ll use the SDK that’s available for your programming language, and you’ll only use the API if there isn’t an SDK available. In the case of OpenStack, there are SDKs for most popular languages. However, before diving into the SDK, I find it’s best to first study the documentation for the API itself so that you know exactly what the SDK is doing. And that way if the SDK is missing anything, you’ll know what you need to get around the shortcomings. Also, since we’re talking about open source here, if the SDK doesn’t meet your expecations, you could revise it or create a new SDK altogether.

Understanding the OpenStack API
To get started with OpenStack, let’s first explore the API itself. In order to use an OpenStack service, you need to get authenticated. How this works depends on the service you’re using. I decided to use Rackspace for these demonstrations, primarily because Rackspace has one of the most complete OpenStack implementations. (The reason for this is simply that OpenStack originated at RackSpace in conjunction with NASA.)
The process will work a bit differently with other providers; you can get information from the API documentation on the providers’ own websites.
For Rackspace, you send a request (either through cURL or in your code) to get what’s called an authentication token. You send along with your request the username and password you used to set up your account with the Rackspace Cloud Control Panel. Then you issue a request using this endpoint:
https://identity.api.rackspacecloud.com/v2.0
We’ll use this from the Linux command line using cURL. Now this is just the endpoint; you have to provide further information in the form of your username and password. To send the username and password, we put together a JSON object and pass it as POST data (which in turn means we use a POST request, not GET). The JSON must be formatted to comply with the JSON specification. That means the member names must be quoted, and we use double quotes, not single quotes. So let’s try it. First, here’s what the JSON object looks like:
{
    "auth": {
        "passwordCredentials": {
            "username": "MyRackspaceAcct",
            "password": "MyRackspacePwd"
        }
    }
}
where you replace MyRackspaceAcct and MyRackspacePwd with your username and password. To include this data in a cURL call as POST data, you use a -d command line option, and surround the JSON with single quotes so the Linux shell grabs it all as a single parameter. You also need to specify the endpoint, a content type, and tell cURL we’re doing a POST. Here’s what the complete command looks like:
curl -s https://identity.api.rackspacecloud.com/v2.0/tokens -X 'POST' -d '{"auth":{" passwordCredentials":{" username":"MyRackspaceAcct", "password":"MyRackspacePwd"}}} ' -H "Content-Type: application/json"
The cURL command will then make the HTTP request and print out the results of the request. Rackspace gives you back an authentication token that you can use for future requests (but it expires after 24 hours, after which you need to do this request again), along with the endpoints you’ll use for subsequent API calls.
When I ran this cURL command, I got back a huge object. For space reasons, I won’t list the whole thing here. But the important thing is at the top of the object is a member called access, which in turn contains a member called token. The token object contains a member called id, which is the token string you’ll use in future requests. There’s also a tenant member, which you’ll use in requests, as well as an expiration date and time so you know when you need to request another token:
{
    "access": {
        "token": {
            "id": "1234567890abcdef",
            "expires": "2015-01-13T21:48:11.877Z",
            "tenant": {
                "id": "1234",
                "name": "1234"
            },
            "RAX-AUTH:authenticatedBy": ["PASSWORD"]
        },
...
After the access object is an object called serviceCatalog, which contains all the endpoints. There’s an endpoint for each service you want to use, including cloudBlockStorage, cloudImages, autoscale, cloudDatabases, cloudBackup, cloudMonitoring, cloudDNS, cloudServers, cloudFilesCDN, cloudFiles, and more. Each of these is itself a JSON object with a member called publicURL that provides the endpoint. There’s also an internalURL that you can use if you’re running on servers within the Rackspace network. Additionally, there are separate URLs for each region: ORD (Chicago), SYD (Sydney), DFW (Dallas), HKG (Hong Kong), IAD (Northern Virginia). Note that these regions aren’t part of OpenStack, but rather are part of Rackspace, and are detailed in the Rackspace documentation.
Making an API Call
With the authentication token and the endpoints in hand, we’re ready to make an API call. Let’s list our servers. The URL we put together depends on the service we want to use. The entire list of services available are listed in the API documentation. We want to list our servers, which is in the Compute section of the API. You can see in the API that there’s a command called List Servers, and it looks like this:
/v2/{tenant_id}/servers
The tenant_id is found in the access section of the authentication response. Rackspace fills that in for us in its list of endpoints it gave us, like so:
https://iad.servers.api.rackspacecloud.com/v2/1234
So we construct our URL by adding the /servers word onto the end:
https://iad.servers.api.rackspacecloud.com/v2/1234/ servers
But we can’t just send this. We need to tack on our authentication information. Notice in the documentation for List Servers that you use a GET method. With GET methods, you specify the additional information as headers. For passing an authentication token, you use a header called X-Auth-Token. And with that, we’re finally ready.
Here’s the cURL command for listing our servers:
curl -s https://iad.servers.api.rackspacecloud.com/v2/1234/ servers -H 'X-Auth-Token: 1234567890abcdef'
When I issue this cURL command, I get back a list of my servers. I only have one running right now:
{
"servers": [{
"id": "abcdef123456",
"links": [{
"href": "https://iad.servers.api.
Included with each server are links for accessing information about the server itself. When I try that, including the same -H option I did a moment ago, I get a rather sizeable JSON object that includes much detail about the server, including its IP addresses (both v4 and v6), information on the image used to create the server, the name of the server, and more.
Now here’s where it gets important to know when to use GET and when to use POST. Normally GET is for requesting information, and POST is for sending information. To get information about the servers, we used a GET method. For creating a server, we use a very similar URL, but instead use a POST method.
Conclusion
That’s just scratching the surface of the API. In followup articles we’ll look at more API commands, including how to create or provision servers, and how to manage them. Then once we understand what we’re doing there, we’ll try out a couple SDKs. Stay tuned!


