Home Blog Page 470

Introduction to Ansible

Ansible kind of exploded into popularity almost immediately after its release in 2012, and has become a staple for network administrators. In today’s article, we’re just going to immediately dive in and give you a good idea of what Ansible does and how you can get the most out of it.

Ansible is an open source automation platform. What that means is that it lets you manage software installations, updates, configurations and tasks within your network environment. It’s especially handy in situations where you need to carry out sequential operations. It’s also comparably easy to use, when put against other similar solutions.

The good:

  • Low barrier for entry, and general ease of use.
  • Very helpful with scaling of homogenous environment.
  • Easy host management using Playbooks.
  • Very secure since it uses SSH to connect.
  • Allows sequential execution of scheduled tasks (ie, it won’t start a new taks before finishing another one).
  • Easy to install and configure.

The bad:

  • SSH connections can get slow in scaled environments.
  • As the platform continues to develop, it sometimes breaks backwards compatability.
  • No GUI to manage playbooks

Ansible is free and open-source remote server manager available for Linux, Mac and BSD. There is also an enterprise version called Ansible Tower, which is a web based solution and makes everything even easier. However, we’ll just stick to the free version for this article.

Installing Ansible is pretty simple. Using Ubuntu or Debian the command is easy:

# apt install ansible

If you’re running CentOS or Fedora, you can use EPEL to install it using this:

# yum install epel-release -y ; yum install ansible -y

Once you have Ansible installed, you’ll need to add your remote servers to its configuration file, located in /etc/ansible/hosts:

# vim /etc/ansible/hosts
[remote-hosts]
host1
host2
...
192.168.1.29

Then you’ll need to add an open SSH key from your Ansible server to your remote servers (/root/.ssh/authorized_keys):

# ssh-keygen
# cat /etc/ansible/hosts | xargs -i ssh-copy-id {}

Afterwards, it’s easy to check your connections through the ansible ping command, being sure to include the “all” tag to have go through every connected server :

# ansible -m ping all
host1 | success >> {
  "changed": false,
  "ping": "pong"
}
...
host2 | success >> {
  "changed": false,
  "ping": "pong"
}

The host file allows for a lot of flexibility in terms of how you manage servers, allowing you to group them, assig SSH ports and more. For instance, I have a setup with two backends running on Cent OS 7, a load balancer on Ubuntu and a database server also running on Ubuntu. So let’s group them together with Ansible: 


# cat /etc/ansible/hosts
[backend]
backend-node-1
backend-node-2

[balancer]
balancer-0

[dbs]
mysql-server-0

[ubuntu-hosts]
balancer-0
mysql-server-0

[centos-hosts]
backend-node-1
backend-node-2

We can also use Ansible to add services. Let’s add the “httpd” service to our backend:

# ansible backend -m service -a "name=httpd state=stopped"
backend-node-1 | success >> {
  "changed": true,
  "name": "httpd",
  "state": "stopped"
}
backend-node-2 | success >> {
  "changed": true,
  "name": "httpd",
  "state": "stopped"
}

But the real draw of using Ansible is their playbooks system. Like the sports reference of the name implies, a playbook is a set of instructions for Ansible to follow in sequential order. Playbooks are written in a script called YAML which is surprisingly intuitive to the point where you should be able to get used to it only after a few minutes of use. So writing and editing playbooks is relatively easy as well. 

Here, for instance, is what a playbook for installing NGinx will look like. First, we need to create a directory structure for the playbook:

# mkdir handlers 
# mkdir tasks
# mkdir templates
# mkdir vars

“Handlers” directory is used for processing periodical assignments, like restarting services and such. “Tasks” will have you executables. “Templates” will have your configuration templates, and “vars” are there to keep shared variables used by the playbook.

Now let’s fill in our handler:
 

# vim handlers/main.yml
---
- name: restart nginx
service: name=nginx state=restarted enabled=yes

Finally, let’s get Ansible installed:

# vim tasks/main.yml
---
- name: Install EPEL repo in CentOS
  yum: name=epel-release state=present
  when: ansible_os_family == "RedHat"

- name: Install nginx package
  apt: name=nginx state=present

- name: Create directory for configs
  file: dest=/srv/{{ s_name }} state=directory

- name: Copy virtualhost config
  template: src=default.conf dest=/etc/nginx/conf.d/{{ s_name }}.conf

- name: Copy index.html to directory
  template: src=index.html dest=/srv/{{ s_name}}/index.html
  notify: restart nginx

With this code, we’re installing the EPEL repository fpr RHEL-based distros as this repo contains the nginx packet. The code installs the nginx packet, creates a /srv/[host name here without brackets] to store configurations that are then copied to it along with the indexing template. 

Template for virtual hosts will look like this:

# vim templates/default.conf
server {
listen 80;
server_name {{ s_name }};
root /srv/{{ s_name }};
location / { index index.html index.htm; }
}

This is the index file template:

# vim templates/index.html
My name is {{ s_name }}

You might’ve noticed that the brackets in that code designate variables where Ansible stores your server names, which are stored in the vars directory:

# vim vars/main.yml
---
s_name: "{{ ansible_fqdn }}"

For our example, the variable server_name will correspond the server name, and will show up when you run the hostname -f command on our remote server.

You might’ve also noticed lines that look like this in the tasks/main.yml file:

when: ansible_os_family == "RedHat"

Ansible can identify the running OS on the host, and uses that information to make decisions as to how to proceed with the install. For instance, we don’t need to install the EPEL repository when putting NGinx on an Ubuntu platofrm, so some of these commands won’t be executed for hosts that aren’t RHEL-based.

All that’s left is creating the actual playbook file:

# vim nginx-install.yml
---
- name: Install nginx on remote hosts
hosts: backend
roles:
- nginx

Now to run the playbook:

# ansible-playbook nginx-install.yml
...
PLAY RECAP ********************************************************************
backend-node-1 : ok=6 changed=5 unreachable=0 failed=0
backend-node-2 : ok=6 changed=5 unreachable=0 failed=0

Alright, let’s check if our web-server works:

# curl backend-node-1
My name is backend-node-1
# curl backend-node-2
My name is backend-node-2

Hopefully, this guide gave you a good idea of how to setup Ansible. And if you got any questions, feel free to hit us up on Twitter and Facebook, and follow and like our pages to stay updated with releases and more articles!

Ansible itself is very modular, and you can check out what’s available here: Modules by category.

And full documentation of Ansible and how to use it can be found here: Documentation.

-Until next time!

Running Unikernels Under Linux

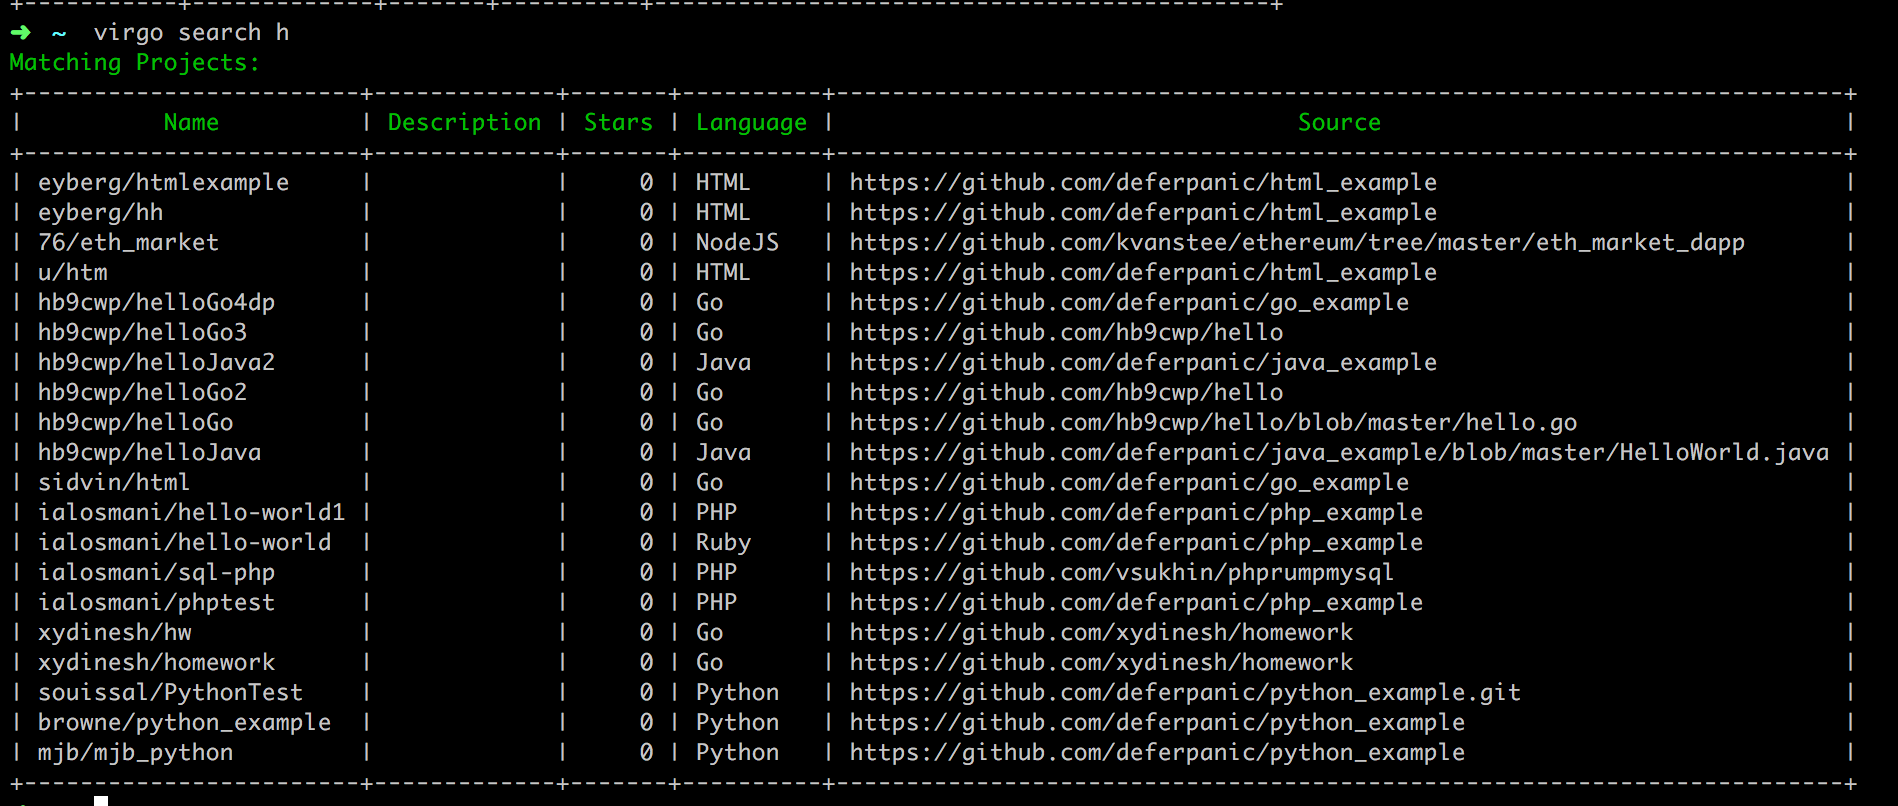
virgo – the linux unikernel runner

Everyone is talking about unikernels today and the magical things they can do.

Unikernels are ultra light-weight secure applications cross-compiled to virtual machines. That is – they don’t run linux, but they can run *on* linux. They are coupled with drivers to talk to the disk and network and that’s about it along with your app code.

They’re similar to RTOS’s like the one on the Mars Rover but they run ordinary web application software designed for intel x86 in the datacenter – it doesn’t need to run on a different planet.

But Why?

Beacuse of security and because of performance.

Unikernels are single process systems by design so they completely thwart shell code exploits and most remote code execution problems by design. They can also be faster than native software simply because they have less context switching. When you couple with PCI passthrough we’re talking about performance better than what you could get on ‘bare metal’.

There are tons of articles and presentations out there on what unikernels are but very little on how you can run them today on your very own laptop – no cloud required. So if you want to run unikernels but you don’t now how this article is for you. This article assumes you are running Linux (or at least some bastardized form of BSD :).

Quick Start:

Just to get a hello world example running download the local unikernel runner virgo and grab an account to get a pre-built unikernel.

  1. Install

  2. virgo signup my@email.com username mypassword

  3. ./virgo pull eyberg/go

Slightly Longer Web Start:

If you want to learn how to build your own unikernels you can take the longer route via this path.

  1. Sign up for a free account at https://deferpanic.com .

  2. Cut/Paste your token in ~/.dprc.

  3. Watch the demo video @ https://youtu.be/P8RUrx4jE5A .

  4. Fork/Compile/Run a unikernel on deferpanic and then run it locally.

Install:

To get going you just need to install the virgo unikernel runner:

go get github.com/deferpanic/dpcli/dpcli
go install github.com/deferpanic/dpcli/dpcli
go install

echo "mytoken" > ~/.dprc

Pull a Unikernel Project:

Pull will yank down unikernel projects from the only unikernel hub out there in use. This allows you to run existing unikernels with ease and not have to compile your own if you don’t want to. It also allows you to share unikernels you have built yourself and works with any unikernel implementation.

virgo pull html

Run a Unikernel Project:

This is the part you were looking for – run a unikernel on your own laptop. It’s literally this easy.

virgo run html

Kill a local Unikernel Project:

Want to stop running that unikernel? Kill it with one command.

virgo kill html

Fetch the log for the Unikernel Project:

Trying to figure out what is wrong with your unikernel? Grab the logs from this handy command.

virgo log html

List all Unikernels that are Installed:

You can easily build up a library of unikernels that you are working with locally. Grep for your favorites here.

virgo images

List the Running Unikernels:

Not sure what is running locally? Grab the process list of unikernels that are currently running.

virgo ps

Remove a local Unikernel Project:

Ready to delete that hello world project and move onto something better? Go ahead and reclaim that disk space with a simple ‘rm’ command.

virgo rm html


Secure Your Container Data With Ephemeral Docker Volumes

What with all the furor around containers and orchestrators, it can be easy to lose sight of some of their highly useful features. The portability and extensible nature of containers is a modern convenience to be cherished, but from my professional perspective it’s sometimes all too easy to get carried away and pay less attention to security.

There’s a lesser-known feature in the venerable Docker that I like using from a security perspective, which I’ll take a quick look at now.

Ye olde feature I have in mind has been around for a whopping 20 months at the time of writing. Believe me when I say that’s a millennium when it comes to containers, which have evolved their feature-sets at hyperspeed. From Docker version 1.10, it’s been possible to run your containers with a temporary storage, or temporary volume mount to be more precise. From the release notes of Docker v1.10, we can see the feature announcement as described below as follows:

“Temporary filesystems: It’s now really easy to create temporary filesystems by passing the –tmpfs flag to docker run. This is particularly useful for running a container with a read-only root filesystem when the piece of software inside the container expects to be able to write to certain locations on disk.”

In Figure 1, we can see the key difference between temporary and standard volumes. If you’re interested in some of the discussions around the naming of the temporary filesystem feature, then there’s some chatter available on one of Moby’s GitHub repositories.

7SusPX7HO-_EzAuwAklQyj8LiPSUfoMgCY1BNjVE

Figure 1: Temporary filesystems are written to RAM (or to your swap file if RAM is filling up) and not to the host or the container’s own filesystem layer at Docker.com: Docker tmpfs. (Image: Docker)

For the aforementioned versioning reason, I will caveat the following with a note that, even though the feature below might not work exactly as you expect it to, the concepts should help you to flex your lateral-thinking muscles nonetheless. In other words, check your Docker runtime version and its accompanying docs in case there’s a syntax change or the feature has been deprecated or enhanced in some way. We will see in a moment that there’s more than one way to mount a temporary volume, for example.

Let’s have a look at putting this feature to good use. Consider a scenario where you had a container ticking over nicely in read-only mode. You chose to do this because you were aware that for security reasons it helped prevent any successful attacks, which compromised your container, persisting after it had been stopped and then restarted. In other words, your container was quite happy to save any relevant session data internally but not commit any actual changes to its original files, because it used the –read-only option when it was started up.

That configuration is ideal for many purposes, but what if you need to save data of some sort that your container has captured? For simplicity, let’s imagine that your container was running a website and you captured visitor data through a form on the site. You know the sort I mean I’m sure: a few input HTML boxes, a pull-down menu, and a radio button here or there, all presented nicely with a sprinkling of CSS.

To store your captured data, you have a handful of options. We will leave databases, emails, and message brokers aside and aim more along the lines of writing our captured data to disk.

In standard Docker terms, there’s an obvious way of achieving this namely by creating a standard volume and mounting it to a directory on your host machine. For example, /home/chrisbinnie/storage on my host might be /storage inside my container.

However what if you were running a whole heap of similar containers and you didn’t want the data to get mixed up in the directory on the host? Or, you didn’t need the data to be available for long or even that you were worried that it could contain unwelcome, dangerous code because the big, bad Internet had submitted the data.

Thankfully, Docker thought about our quandary in advance and provides exactly what you need in the form of ephemeral, or short-lived, volumes. Incidentally, I’ve heard called this very option called volatile volumes too in the past.The best bit from a security standpoint is that when your container stops your ephemeral volume just automatically disappears into the ether along with your (un)saved data.

Let’s have a look at the command syntax required to get this working (my current runtime version is 17.06.2-cefor reference).

$ docker run -d --read-only -it --mount type=tmpfs,destination=/var/tmp nginx

In Figure 2, we can receive some welcome news having run a $ docker inspect d7c0c command (I have abbreviated the container’s hash, replace it with your container ID).

Ppjs2iWWQaVL-pMgj0VdQ6CKMclfcsh0FdEsYDgR

Figure 2: A temporary read/write volume pointing at our container’s innards.

Another way of running this command is the more concise –tmpfs option as shown below. This doesn’t allow additional options in quite the same way, however.

$ docker run -d --read-only -it --tmpfs /var/tmp nginx

We can also chuck in — sorry, I mean “enhance” — our useful feature with a few other sophisticated options by following the –mount option in the man pages as so:

type=tmpfs,tmpfs-size=512M,destination=/path/in/container

If you’re struggling to find the right detail within man pages, then simply use this command and search for “tmpfs” in lowercase:

$ man docker run

As we’ve seen, there’s a host of features which help pump Docker’s pistons and many are easy to forget or can be simply missed due to the vast number available. I hope you can put temporary volumes to good use in one form or another in the future. You can store a variety of different types of data to disk and even tiny files such as one-off, time-limited passwords which might be required to allow a container to instantiate an external service.

Learn more about essential sysadmin skills: Download the Future Proof Your SysAdmin Career ebook now.

Chris Binnie’s latest book, Linux Server Security: Hack and Defend, shows how hackers launch sophisticated attacks to compromise servers, steal data, and crack complex passwords, so you can learn how to defend against these attacks. In the book, he also talks you through making your servers invisible, performing penetration testing, and mitigating unwelcome attacks. You can find out more about DevSecOps and Linux security via his website (http://www.devsecops.cc).

Comcast: Open Source Program Success Depends on Business Strategy Alignment

Comcast’s involvement in open source was a gradual process that evolved over time. The company eventually created two open source program offices, one for the NBC business and another for the cable side of the business, which is the subject of this profile.

Comcast began contributing to open source around 2006 when Jon Moore, Chief Software Architect, made a patch contribution to Apache HTTP. He showed the management team that it was more cost effective to have the patch incorporated into the main project than it was to maintain it separately.

Working with an interdisciplinary team, Moore worked to set up an open source advisory council, which consisted of legal and technical subject matter experts. They reviewed contributions and created internal guidelines focused on good open source practices and community building. In 2013, when they started tracking these contributions, they had 13. This year, they plan to do almost 10x that.

“When companies establish open source practices they send a big message saying that we’re serious about open source and that we want to invest in it,” said Nithya Ruff, Senior Director of the Open Source Practice at Comcast (@nithyaruff).

Read more at The Linux Foundation

What You Missed at the Diversity Empowerment Summit

“If you’re not being actively inclusive then you’re being exclusive,” said Swarna Podila at the Diversity Empowerment Summit, a day of talks on increasing diversity, inclusion, and empowerment in the open source community. The event took place at Open Source Summit in Los Angeles and was produced by Angela Brown, VP of Events at The Linux Foundation, who helped me summarize the day’s highlights in this 5-minute video.

View on YouTube 

As a serial entrepreneur, I already care a great deal about building diverse and inclusive environments. However, the Diversity Empowerment Summit made me realize I honestly didn’t know the half of it. Here are the resources mentioned in the video:

  • Amy Chen created Ladies Storm Hackathons, a Facebook group dedicated to closing the gender gap in hackathons.
  • Tameika Reed created Women in Linux, a community supporting women in Linux-centric tech careers.
  • Emma Irwin and Larissa Shapiro spoke about the research they did at Mozilla and what they found to promote diversity and inclusion in Open Source.
  • Rupa Dachere created Codechix, dedicated to the education, advocacy, and mentoring of women engineers in industry and academia.
  • Nicole Huesman & Daniel Izquierdo led us through OpenStack’s Gender Diversity Report, which examines gender diversity and retention within the OpenStack community.
  • Marina Zhurakhinskaya from Red Hat taught us about Outreachy, which provides 3-month internships for people from groups traditionally underrepresented in tech.

It was an empowering day which left me with a bunch of new tools to help me play a part in creating a more diverse and inclusive tech community.

And, it’s not too late to participate in the next Diversity Empowerment Summit taking place in Prague, Czech Republic on Oct. 26 as part of Open Source Summit Europe.  Register now!

How FinTech Company Europace Is Modeling Its Corporate Structure on Open Source Principles

Concepts such as decentralizing strategy, delegating direction, and fierce transparency in communication are part of the backbone of successful open source projects. In my presentation at Open Source Summit EU in Prague, I will explore how these concepts are not only applicable to volunteer-run organizations but can also help growing corporations avoid some of the coordination overhead that often comes with growing teams and organizations.

We’ll look at some of the key aspects of how project members collaborate at The Apache Software Foundation (ASF). After that, we’ll take a closer look at German FinTech company Europace AG, which decided to move toward self-organization two years ago. We’ll highlight parallels between Europace AG’s organizing approaches and those of open source projects.

Let’s start with some of the core values of ASF projects.

Community over Code

One main principle is the concept of “community over code” — which means that without a diverse and healthy team of contributors to a project, there is no project. It puts the team front and center, as highlighted in the Apache project maturity model.

Read more at The Linux Foundation

Understanding the Open Virtual Network

In January of 2015, the Open vSwitch (OVS) team announced they planned to start a new project within OVS called OVN (Open Virtual Network).  The timing could not have been better for me as I was looking around for a new project.  I dove in with a goal of figuring out whether OVN could be a promising next generation of Open vSwitch integration for OpenStack and have been contributing to it ever since.

OVN has now had multiple releases.  As a community we have also built integration with OpenStackDocker, and Kubernetes.

OVN is a system to support virtual network abstraction. OVN complements the existing capabilities of OVS to add native support for virtual network abstractions, such as virtual L2 and L3 overlays and security groups. A recent videoexplains more about the inner workings of OVN.

Some high-level features of OVN include:

Read more at Red Hat

What’s the Difference Between the 5 Hyperledger Blockchain Projects?

The Linux Foundation’s Hyperledger project, which is focused on open source blockchain technology, divides its work into five sub projects. Hyperledger Executive Director Brian Behlendorf said Hyperledger’s technical steering committee must approve each new sub project, and it’s looking for projects that “represent different thinking.”

The first five projects are: Fabric, Sawtooth, Indy, Burrow, and Iroha.

“Every one of these projects started life outside of Hyperledger, first, by a team that had certain use cases in mind,” said Behlendorf. Each project must bring something unique to the open source group, and its technology must be applicable to other companies.

Fabric

Fabric is Hyperledger’s most active project to date. The Fabric 1.0 release was issued in July. IBM initiated the Fabric project. It’s intended as a foundation for developing blockchain distributed ledger applications with a modular architecture. It allows components, such as consensus and membership services, to be plug-and-play.

Read more at SDx Central

​Serious Linux Kernel Security Bug Fixed

Linux server administrators will want to patch their systems as soon as possible.

Sometimes old fixed bugs come back to bite us. That’s the case with CVE-2017-1000253, a Local Privilege Escalation Linux kernel bug. … The problem is that the bug lived on in long-term support (LTS) versions of Linux, which are often used in server Linux distributions.

If you’re running an up-to-date Linux desktop, you have nothing to worry about. These use modern kernels rather than LTS kernels.

Read more at ZDNet

A 3-Step Process for Making More Transparent Decisions

Your work as an open leader will be more transparent when you apply this decision-making technique..

One of the most powerful ways to make your work as a leader more transparent is to take an existing process, open it up for feedback from your team, and then change the process to account for this feedback. The following exercise makes transparency more tangible, and it helps develop the “muscle memory” needed for continually evaluating and adjusting your work with transparency in mind.

I would argue that you can undertake this activity this with any process—even processes that might seem “off limits,” like the promotion or salary adjustment processes.

Opening up processes and making them more transparent builds your credibility and enhances trust with team members.

Read more at OpenSource.com