Enterprise container users may see improved Docker container management tools in the cloud once the Docker containerd utility is open sourced next quarter. Access to Docker containerd, which includes methods to transfer container images, container execution and supervision, low-level local storage and network interfaces for both Linux and Windows, could allow cloud provider partners to improve container orchestration service products, analysts say.
“It may result in more options for customization,” said Jay Lyman, analyst with 451 Research. “It may make it easier for, say, AWS, to connect Docker and containers to some of its other services.”
DevOps is becoming the new gaga everywhere. According to Puppet 2014 State of DevOps Report DevOps organizations are implementing code frequently more than 30 times compared to their counterparts. This shows the increasing adoption of DevOps. However, mistakes and errors do take place while implementing DevOps. Especially new businesses and small sized companies are making mistakes. Nothing is easy to achieve and so challenges are a part and parcel of something new you wish to deploy.
Gradually, DevOps is becoming an effective and efficient way to deploy and develop cloud hosting applications, but as of now it is just the start of the adoption. DevOps implementation helps in eliminating the barrier between operational teams and development team, thereby reducing the backlogs of enterprise applications. Organizations deploying DevOps tools and processes frequently realize too late that they have committed mistakes. Many of them are such which require them to stop, take back up and then start again. So where are organizations going wrong? Mistakes vary between organizations to organization, however some mistakes are found to be common amongst organizations regarding DevOps failure.
Keeping Technology before People
Removing the barrier between operations staff and developers is the core purpose of deploying DevOps. One general mistake which companies make while deploying DevOps is concentrating on technology too soon instead on processes and people. With this, organizations choose DevOps tools which are do not have a longer life. Overlooking the fact of training the staff and changing IT processes can be lethal. Due investment should be made on training programs focusing on optimum utilization of technology, ways to adopt uninterrupted development, integration, testing, operations and deployment. At a point the DevOps tools will change but processes and people will not change.
Ignoring Security and Governance
Often organizations ignore in considering security and governance which is systematic to the applications. Now, security can no longer be separated from applications. Make sure to integrate security in every process carried out, even continuous examining and development. Gone are the days of erecting walls around applications. Government should be systematic for cloud application development and everything that is involved in each and every step of DevOps processes, even those policies that restricts the use of services or API’s, also service dependencies and service discovery.
Resistance to Change
Executing DevOps signifies changing in terms of development, testing, deployment and the way in which applications are operated. Technology, tools and processes should change for which the organizations should set metrics to measure the productivity of the changes so implemented. It is inevitable for DevOps to change evolve with the changing ideas and technology. The designing of DevOps process should be carried keeping in mind the change aspect.
Work Disruption
New workflows will take place when DevOps implemented which will bring a change throughout the organization. To take care of new workflows, investment is to be done in new tools as existing tools will become obsolete. Regulatory compliance and security issues will be implied on new and compound workflows. For that sake, it is important that the implementation team of DevOps has a broad skill set and interests of all stakeholders are put forward during planning. A holistic view is required for complete value chain for software delivery, starting from conception ranging to monitoring in production. DevOps implementation team will undergo a good exercise of performing value-stream mapping for existing as well as proposed processes and overlapping those maps for identifying areas causing friction.
DevOps is still WIP (Work in progress) no matter if you are an enterprise development workshop or vendor. While implementing DevOps, the lessons we learn in the coming years will enable us to enhance the process and thereby launch better applications.
There can be so many reasons when you need to record your screen. When I started using Linux, I used to record my screen whenever I had any problem and upload it to Linux communities. Today I sometimes record my screen for demonstration purposes in my tutorials. Similarly, you can record your screen in Linux. In this article, I’m going to mention 5 Best screen recording app for Linux. So let’s get started!
Most people assume that running your own webserver requires an incredible set of skills, something that only a cast member out of Mr. Robot would be capable of doing. Not true. It’s relatively straightforward; assuming you have the right equipment (and you don’t need much!), you can get your very own web server up and running in just a couple of hours.
While this is technically a ‘no experience in managing servers necessary’ tutorial, it is useful to know your way around your average Ubuntu OS already. The entire process falls into theintermediate category.
Ready to begin? The process is split up into three major parts:
System requirements (does your box have what it takes?)
Setting up the required web server software (MySQL, PHP, Apache)
Connecting your server to the world
System Requirements
The exact system requirements depend on which particular OS you decide to run. We’re going to recommend you go with Ubuntu OS, but to be honest, you can use any Linux distribution. However, we’ve found Ubuntu to be the most user-friendly and stable version out there – but it’s down to personal preference, as your installation will work fine regardless.
The beauty of using Linux is that it doesn’t require much when it comes to hardware. The official Ubuntu website recommends the following:
2 GHZ dual core processor
25 GB of (free) hard drive space
2 GB RAM
USB port or DVD drive for installation purposes
Internet access
To guarantee a smooth ride, we recommend going a little higher than the minimum requirements, but you don’t need to spend much to get something that more than fits the bill.
Setting Up Web Server Software
If you have any experience in setting up your development environment, you’ve probably heard of the LAMP (Linux, Apache, MySQL, PHP) stack – these are the set of applications that you’ll need to get your server up and running:
Linux: We’re going to assume you can get Ubuntu OS loaded on your own (if not, check out the official guide).
Apache2: The most popular HTTP server out there – and no surprise, it’s open-source! The Ubuntu website has an excellent installation tutorial.
MySQL: your data will be going into your run-of- the-mill MySQL database. If you need, you can install PHPMyAdmin to make it easier to manage your data.
PHP and PHP SQLite component: PHP is the server side language that will interact with your databases. Again, Ubuntu’s website comes in handy when installing PHP. Go for PHP 7, it’s easily the best option – if you want to run the latest open-source solutions such as WordPress or Drupal, it’s key. There are also various other reasons why PHP 7 is our recommended route.
Think you’ve cracked installing LAMP? If you’ve ticked all the boxes, it’s time to test your work. Create the following file:
/var/www/html/info.php
Within it, paste the following code:
<php
phpinfo();
?>
Restart apache, and then open the file in your web browser. You should see your standard PHP information page, giving you the specs of your installation. Get an error? Go back to the beginning and make sure you have followed all of the steps.
Connecting Your Server to the World
You’re almost there! It’s now time to connect your creation with the world. The first step you’ll need to cover is fixing the pesky changing IP issue. There are ways to do this that will have you pulling your hair out, but we can recommend an alternative route.
To ensure localhost is available online without interruption we’re going to use ngrok, a nifty little client you can download for free.Ngrok will allow you create a ‘tunnel’ to your web server, giving access to anyone who loads your unique URL. Going into the nitty gritty of how to achieve this with ngrok is beyond the scope of this tutorial, but you can find the exact steps on the client website.
Once you’ve done that, it’s time to crack open your favorite bottle. You’ve done it, congratulations!
Once you get familiar to using the Linux terminal, you wish to do everything on your system by simply typing commands including sending emails and one of the important aspects of sending emails is attachments.
Especially for Sysadmins, can attach a backup file, log file/system operation report or any related information, and send it to a remote machine or workmate.
In this post, we will learn ways of sending an email with attachment from the Linux terminal. Importantly, there are several command line email clients for Linux that you can use to process emails with simple features.
This presentation by kernel developer Mark Rutland at Embedded Linux Conference will cover hardening features available in the mainline Linux kernel, what they protect against, and their limitations.
In this presentation, Mike Goelzer will describe how Docker Clustering is evolving and what it means for developers and ops who need to orchestrate multi-container Applications. You will also see a live demo of Docker clustering and how it can be used to deploy and manage a microservice-style.
This week in open source and Linux news, The Linux Foundation’s Open Source Summit is dubbed a must-attend by Jono Bacon, Linux 4.9 is a “mammoth” release, and more! Read up on your open source news with the digest below!
1) Jono Bacon shares which 2017 open source events he will be attending in the new year, including The Linux Foundation’s newly named Open Source Summit.
5) “It’s free – like a puppy,” said Scott Gregory, deputy director of the Office of Digital Innovation for the State of California’s Department of Technology (CDT)
Have you ever wanted a combination of Arch Linux and KDE but always seemed to get stumped at the Arch Linux portion of the combination? If that’s you, your days of being left out in the Arch Linux/KDE cold are over. Why? Bluestar Linux.
This new(ish) kid on the block allows you to enjoy Arch Linux without having to jump through all the usual hoops of setting the distribution up manually, plus it offers a rather unique take on KDE, one that had me instantly nodding my head in agreement with their layout. In fact, what Bluestar did with KDE makes so much sense, it has me wondering why this isn’t the default layout of the “K” Desktop Environment (more on this in a bit).
The necessary specs
If you plan on running Bluestar Linux, the only specs you really need to be concerned about are the following:
Minimum of 6.5GB free hard space
Minimum of 1GB of working RAM
The RAM requirements seem a bit high, but this is really a KDE recommendation. If you glance at the KDE system requirements, you see the Bluestar minimum makes sense.
Hard drive capacity Minimum 4 GB Recommended 10 GB
NOTE: After a failed install on VirtualBox, having given 8GB to the hard drive and 2GB of RAM, I upped the system to 16GB of space and 3GB of RAM, and the installation succeeded. So these aren’t your grandfather’s Linux requirements.
First look
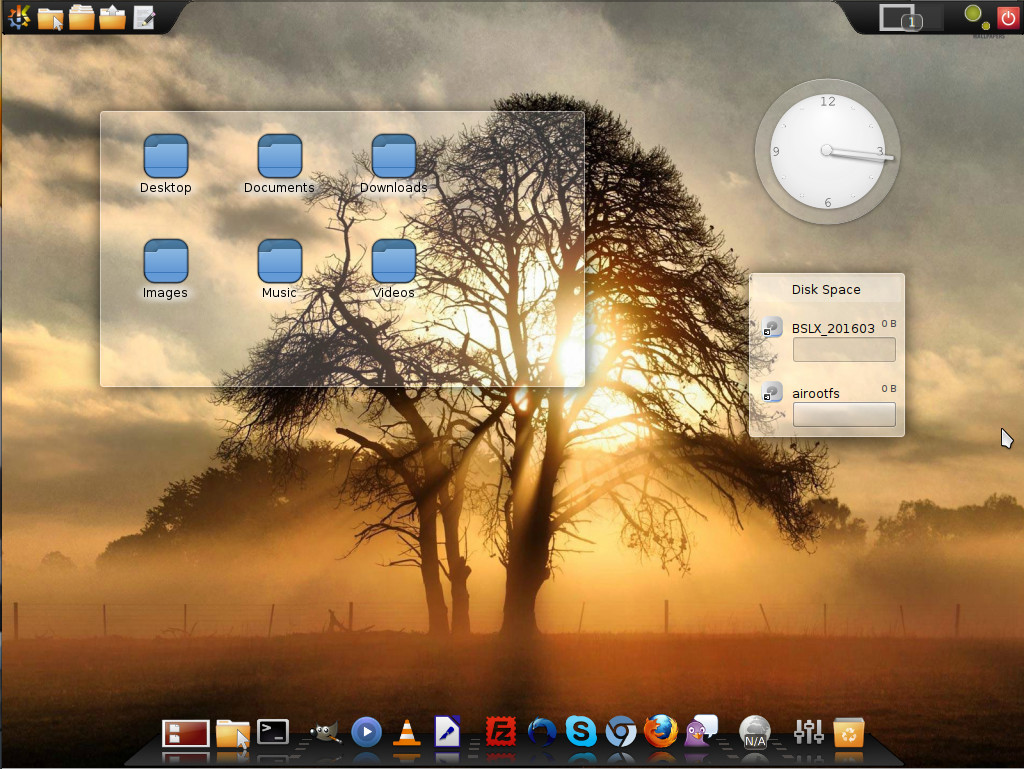
When you first boot up the live Bluestar image, what will immediately strike you is the layout of the KDE desktop (Figure 1).
Figure 1: The default Bluestar Linux take on KDE.
Instead of the usual bottom panel, the Bluestar desktop opts for a dock at the bottom of the screen and an upper panel. The dock is fairly a straightforward implementation of Cairo dock. The upper panel is a very nicely designed take on the standard KDE panel that is split into three parts. The first section of the panel resides in the upper left corner of the desktop, where you’ll find the applications menu, three different folder shortcuts (one for ~/, one for shortcuts, and one for stack…where you can drag and drop items for quick access).
The second section of the panel resides in the center of the top edge of your screen and is set to autohide. Hover your cursor over this area to reveal the hidden section that contains a few handy widgets and the system tray/notification area (Figure 2).
Figure 2: The hidden Bluestar system tray/notification area.
The items in the autohide section of the panel include (from left to right):
Clock
Virtual keyboard widget
Calculator widget
System load widget
Language selector
Clipboard
Networking widget
Notification area
Finally, the third section of the upper panel is dedicated to the pager, another system load widget, and the logout/shutdown button.
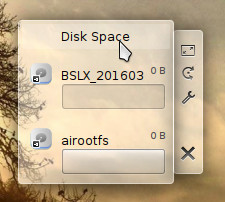
On the desktop proper, you’ll find three default widgets: A folder widget, a clock widget, and a disk space widget. These widgets are locked but can be removed by right-clicking one of them and selecting Default Desktop Options > Unlock Widgets. Once you’ve unlocked the widgets, you can then hover your mouse over one of the widgets to reveal the hidden bar that allows you to move, resize, customize, and delete each (Figure 3).
Figure 3: Unlocking the widgets gains you access to their settings and ability to delete them.
Finally, click on the Applications menu to reveal everything installed on your desktop. You’ll be surprised at how much is included. This isn’t your bare-bones distribution. Within Bluestar, you’ll find all the productivity tools you need (including KOrganizer, LibreOffice, Okular, Sieve Editor), Development tools (including GHex, KAppTemplate, KUIViewer, Qt Assistant, QT Designer), Graphics apps (including GIMP, Gwenview, and KolourPaint), more Internet tools than you thought you might need (including Akregator, Avahi SSH Server Browser, Blogilo, Chromium, Cloud Storage Manager, Dropbox, FileZilla, Firefox, KGet, MEGASync, Pidgin, and QTransmission), multimedia tools to please just about anyone (including AMZ Downloader, Amarok, Dragon Player, GNOME Alsa Mixer, JuK, Kdenlive, KsCD, SMPlayer, SMTube, VLC), and a very large collection of utilities (such as Ark, Caffeine, ClipIt, Disks, Filelight, Galculator, Jovie, KGpg, Kate, SuperKaramba, and Sweeper).
Another nice touch found in Bluestar is all the codecs you’ll need to play your favorite media formats. As well, streaming sites (such as Youtube and Netflix) work out of the box.
Installation
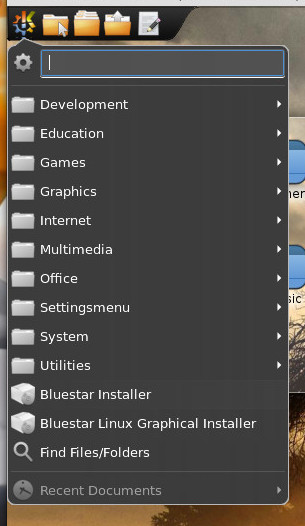
The first thing you must do is download the Bluestar ISO. Once you boot up the live disk, click on the Application menu and then select Bluestar Linux Graphical Installer (Figure 4). This will walk you through the fairly easy installation wizard.
Figure 4: Installing Bluestar starts in the Applications menu.
The installation of Bluestar Linux is a breath of fresh air for those who have wanted to give Arch Linux a try but had no desire to struggle through the challenge of setting up the system manually. Installing Bluestar is about as standard as installing any modern Linux distribution.
Post install
Once you’ve installed Bluestar Linux, you’ll be dealing with the pacman package management system. This means you’ll need to get up to speed with a few basics. First off, because this is a rolling release distribution, you’ll want to make sure your package databases are in sync. Do this by opening up Konsole (from Applications > System) and issuing the command sudo pacman -Sy. Type your sudo password, hit Enter, and your databases will sync.
Next, I recommend optimizing your pacman databases. Do this with the command sudo pacman-optimize && sync.
Finally, we’ll update the installed packages with the command sudo pacman -Su.
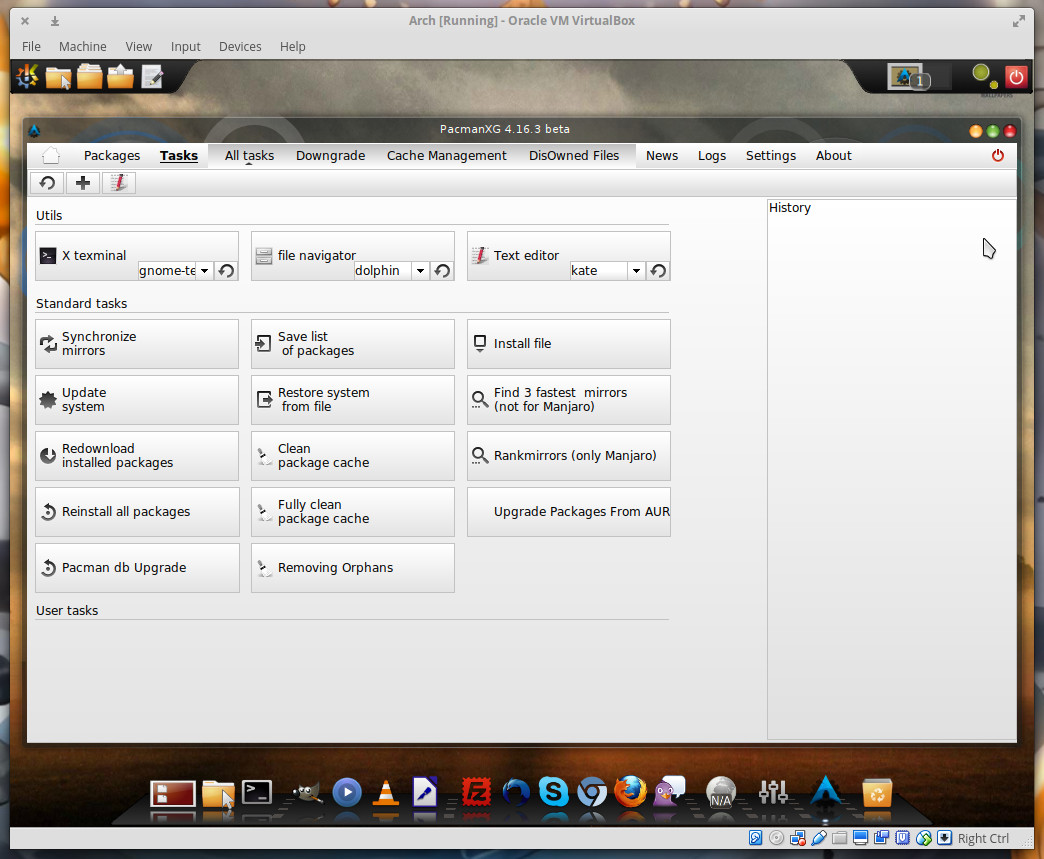
If you’re not a fan of the command line (which you should be if you’re running Arch Linux), you can always opt for the GUI front-end for pacman, PacmanXG. This is an incredibly powerful graphical tool that allows you to take on all the tasks associated with pacman (Figure 5).
Figure 5: The pacman front end, PacmanXG, in action.
Once all your packages are updated, you are ready to start playing around with Bluestar’s take on the KDE desktop and enjoying your Arch Linux-powered distribution.
Arch Linux the way it should be
I’ve played around with Arch Linux enough to recognize that Bluestar Linux has done something quite wonderful…made Arch accessible to anyone. This isn’t a distribution of Linux that you will struggle to get up to speed with. Bluestar is as user-friendly a take on Arch Linux as you will find. If you’ve been wanting to dive into the Arch waters, now is the time and Bluestar is your best bet.
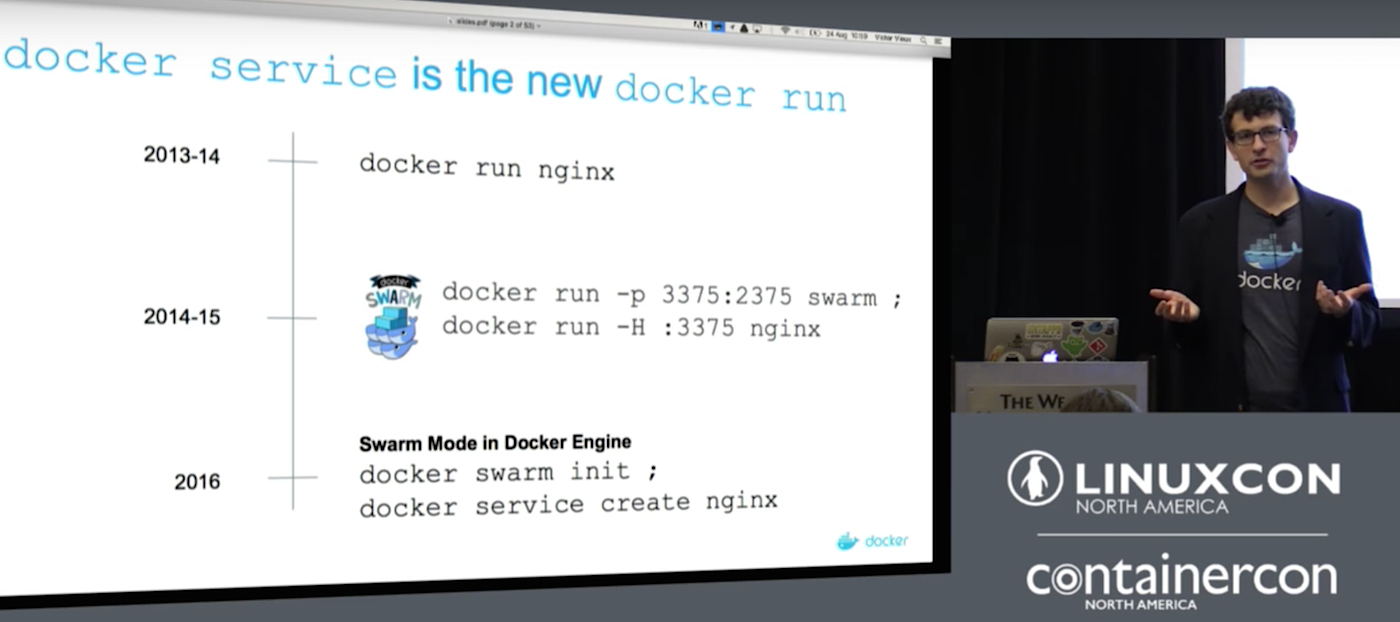
Why is this going to be an interesting talk and why should you care? asks Mike Goelzer of Docker in his LinuxCon North America presentation. The answer is that simple, robust, integrated container orchestration is key to successful containers management, and Goelzer believes that the native Docker orchestration, called Swarm, is the best orchestration. Goelzer gives a high-level overview of Swarm, and his colleague Victor Vieux goes into detail on the internals.
Let’s back up a little bit and review what orchestration is. You’re probably familiar with container clusters. Docker calls these swarms, and they’re all the same thing. Container orchestration is a distributed platform that operates independently of your infrastructure, and that stays online through hardware and software failures. Container orchestration manages complex multi-container applications on multiple machines. Goelzer says, “There are a lot of orchestration systems out there today, and I think that each one reflects different angles on orchestration, differing views about what’s important and what’s not. The philosophy that we have approached Docker orchestration with is one in which we focused a lot on ease of use, and providing modern orchestration features that you really need to run a real production system.”
Orchestration should provide features like “Declarative desired state for applications, strongly consistent internal store, a raft store, load balancing, service discovery, security; basically we’ve provided these features but we’ve tried to expose them in a really simple way.”
Swarm Setup
Goelzer shows how easy it is to install and run Docker Swarm. “It’s a separate set of binaries that you install on top of Docker. You install Docker on your machines and then you install these additional binaries which come in the form of containers. It makes many Docker hosts appear like a single Docker host. It’s sort of a proxy system. One host fronts many hosts and the result is that you have that one host that appears to have very large amount of resources, large amount of CPUs, large amount of RAM.”
The current Swarm release has a lot of new features, including better scalability, a simplified command set, and health checks. It is 100% backwards-compatible with older Swarm releases. Goelzer leads us through a demonstration that shows how fast and easy it is to create a new swarm: “The first thing you do is “Docker swarm init”. Now you’ve got a swarm of one machine that is functioning as a cluster manager. To join additional machines to that swarm, you’re going to do “Docker swarm join”. “Docker swarm join” simply is a command that you run on a second Docker host, you point it back to the first using the IP address of the first machine, and now you’ve got a two-machine cluster. You can keep doing “Docker swarm join” on as many hosts as you want.”
Goelzer goes on to demonstrate how to set up Docker services on your new swarm; launching containers, connecting them, performing functions such as load-balancing, and automatic failover. Then Vieux presents more detailed insights into Swarm internals, so that by the end of this presentation (below) you’re well on your way to knowing how to run Swarm on your own systems.