Apache web server is probably the most used web server across platforms including different Linux distributions and Windows. The web server is used to deliver web content and can serve many queries at once. It is…
[[ This is a content summary only. Visit my website for full links, other content, and more! ]]
The march toward open source is rapidly turning into an all-out race, with research projects and applications extending to new industry sectors, including communication providers. What started out in the software realm has moved into the hardware space, bringing with it significant changes for providers and vendors alike. Most recently, the Open Compute Project (OCP) and its spin-offs, including the Telecom Infra Project (TIP), have not only reinforced this shift toward open source, but have accelerated the trend.
The open source approach is about more than just lower costs. Improvements in innovation, reliability, security and flexibility are giving providers greater control of their development roadmap. Importantly, the current roster of projects indicates a strong relationship between the shift to open source and the trend toward virtualization. These projects and initiatives set the stage for communications providers to create new differentiated services and to deploy them quickly.
The list of cloud-related open source projects and organizations launched in recent years specifically focused on communication provider requirements is long and growing. Some of these projects focus on Software Defined Networking, such as ONOS, ODL, and OpenContrail. Other projects concentrate on operations, management and cloud orchestration, such as OpenStack or the Open Container Initiative. While certain projects look at the service layer (e.g. XOS), others attempt to bring together multiple groups through reference implementations (OPNFV or CORD). With new organizations vying to move the industry to a new paradigm (Cloud Native Computing Foundation), more open source projects and organizations are expected to develop.
Corsa Technology has been touting its programmable data-plane appliance as a way to implement SDN and OpenFlow. With the introduction of a smaller appliance today, the startup is talking more about a specific use case: virtualization for the metro and WAN networks.
Corsa is saying its hardware-based virtualization can slice the network into zones, separating traffic in order to preserve performance or maintain security. It can also be a first step toward automating on-demand services, says Carolyn Raab, Corsa’s vice president of product management.
If that sounds familiar, it’s because virtualization happens all day long in data centers. Corsa is hoping to apply the concept to the WAN and the metro edge.
A different approach is needed in those networks because their traffic is more varied than what you’d find in the data center, Raab says. The metro network faces a wider variety of protocols and bit rates, and video is a bigger factor there, especially in the age of content delivery networks (CDNs).
1) The Hyperledger Project will be the “open source programming project even bigger than bitcoin” to bolster a flexible blockchain system.
The Linux Foundation’s Jim Zemlin speaks to the importance of sharing the development of the blockchain; The Hyperledger Project will bolster the process with help from sponsoring industry heavyweights.Bitcoin Goes Corporate, Or At Least the Blockchain Does– Newsweek
2) Automotive Grade Linux’ membership base is growing and diversifying rapidly.
Security is all the rage—as it should be. We live in a world where data is an incredibly valuable currency, and you’re always at risk of loss. Because of this, you must do everything you can to ensure what you hold on your desktops and servers is safe. To that end, administrators and users will create incredibly complex passwords, employ password managers, and more. But, what if I told you could take the login to your Linux servers and desktops one step—nay, two steps—further? Thanks to the Google Authenticator, you can. On top of that, it’s incredibly easy to set up.
I am going to walk you through the process of setting up two-factor authentication for use on login and sudo. I will demonstrate this on a Ubuntu 16.04 desktop, but the process works for the server as well. To handle the two-factor side of things, I will be making use of the Google Authenticator.
There is one very important caveat to this: Once you’ve set this up, you will not be able to log into the account (or issue sudo commands) without a six-digit code from the authenticator. This also adds another step for you, so if having to pull out your smartphone every time you need to log into your Linux machine (or use sudo), this might not be for you. Remember, however, this added step brings with it an extra layer of security you wouldn’t have otherwise.
With that said, let’s set this up.
Installing the Necessary Components
There are two pieces of this puzzle that must be installed—both in the form of the Google Authenticator. The first is the smartphone app. Here’s how to install from the Google Play Store:
Open the Google Play Store on your Android device
Search for google authenticator
Locate and tap the entry by Google Inc.
Tap Install
Tap Accept
Allow the installation to complete
Now let’s move on to installing the authenticator on your Linux machine. Here’s how:
Open a terminal window
Issue the command sudo apt-get install libpam-google-authenticator
Type your sudo password and hit Enter
If prompted, typeyand hit Enter
Allow the installation to complete
It’s now time to configure the login process to work with the google-authenticator.
Configuration
Just one file must be edited to add two-step authentication for both login and sudo usage. The file is /etc/pam.d/common-auth. Open it and look for the line:
The next step is to set up google-authenticator for every user on the system (otherwise, they will not be able to log in). For example’s sake, we’ll assume there are two users on your system: jack and olivia. We’ll first set this up for jack (we’ll assume this is the account we’ve been working with all along).
Open up a terminal window and issue the command google-authenticator. You will be asked a series of questions (each of which you should answer with a y. The questions are:
Do you want me to update your “/home/jlwallen/.google_authenticator” file (y/n) y
Do you want to disallow multiple uses of the same authentication token? This restricts you to one login about every 30s, but it increases your chances to notice or even prevent man-in-the-middle attacks (y/n)
By default, tokens are good for 30 seconds, and to compensate for possible time-skew between the client and the server, we allow an extra token before and after the current time. If you experience problems with poor time synchronization, you can increase the window from its default size of 1:30min to about 4min. Do you want to do so (y/n)
If the computer that you are logging into isn’t hardened against brute-force login attempts, you can enable rate-limiting for the authentication module. By default, this limits attackers to no more than 3 login attempts every 30s. Do you want to enable rate-limiting (y/n)
Once you’ve answered these questions, you’ll be presented with your secret key, a verification code, and five emergency scratch codes. Print out the scratch codes and keep them with you. These codes can be used if you do not have your phone (each code is a one-time use only). The secret key is what you use to set up the account on the Google Authenticator app and the verification code is a one-time use code that you can use immediately (if needed).
Setting Up the App
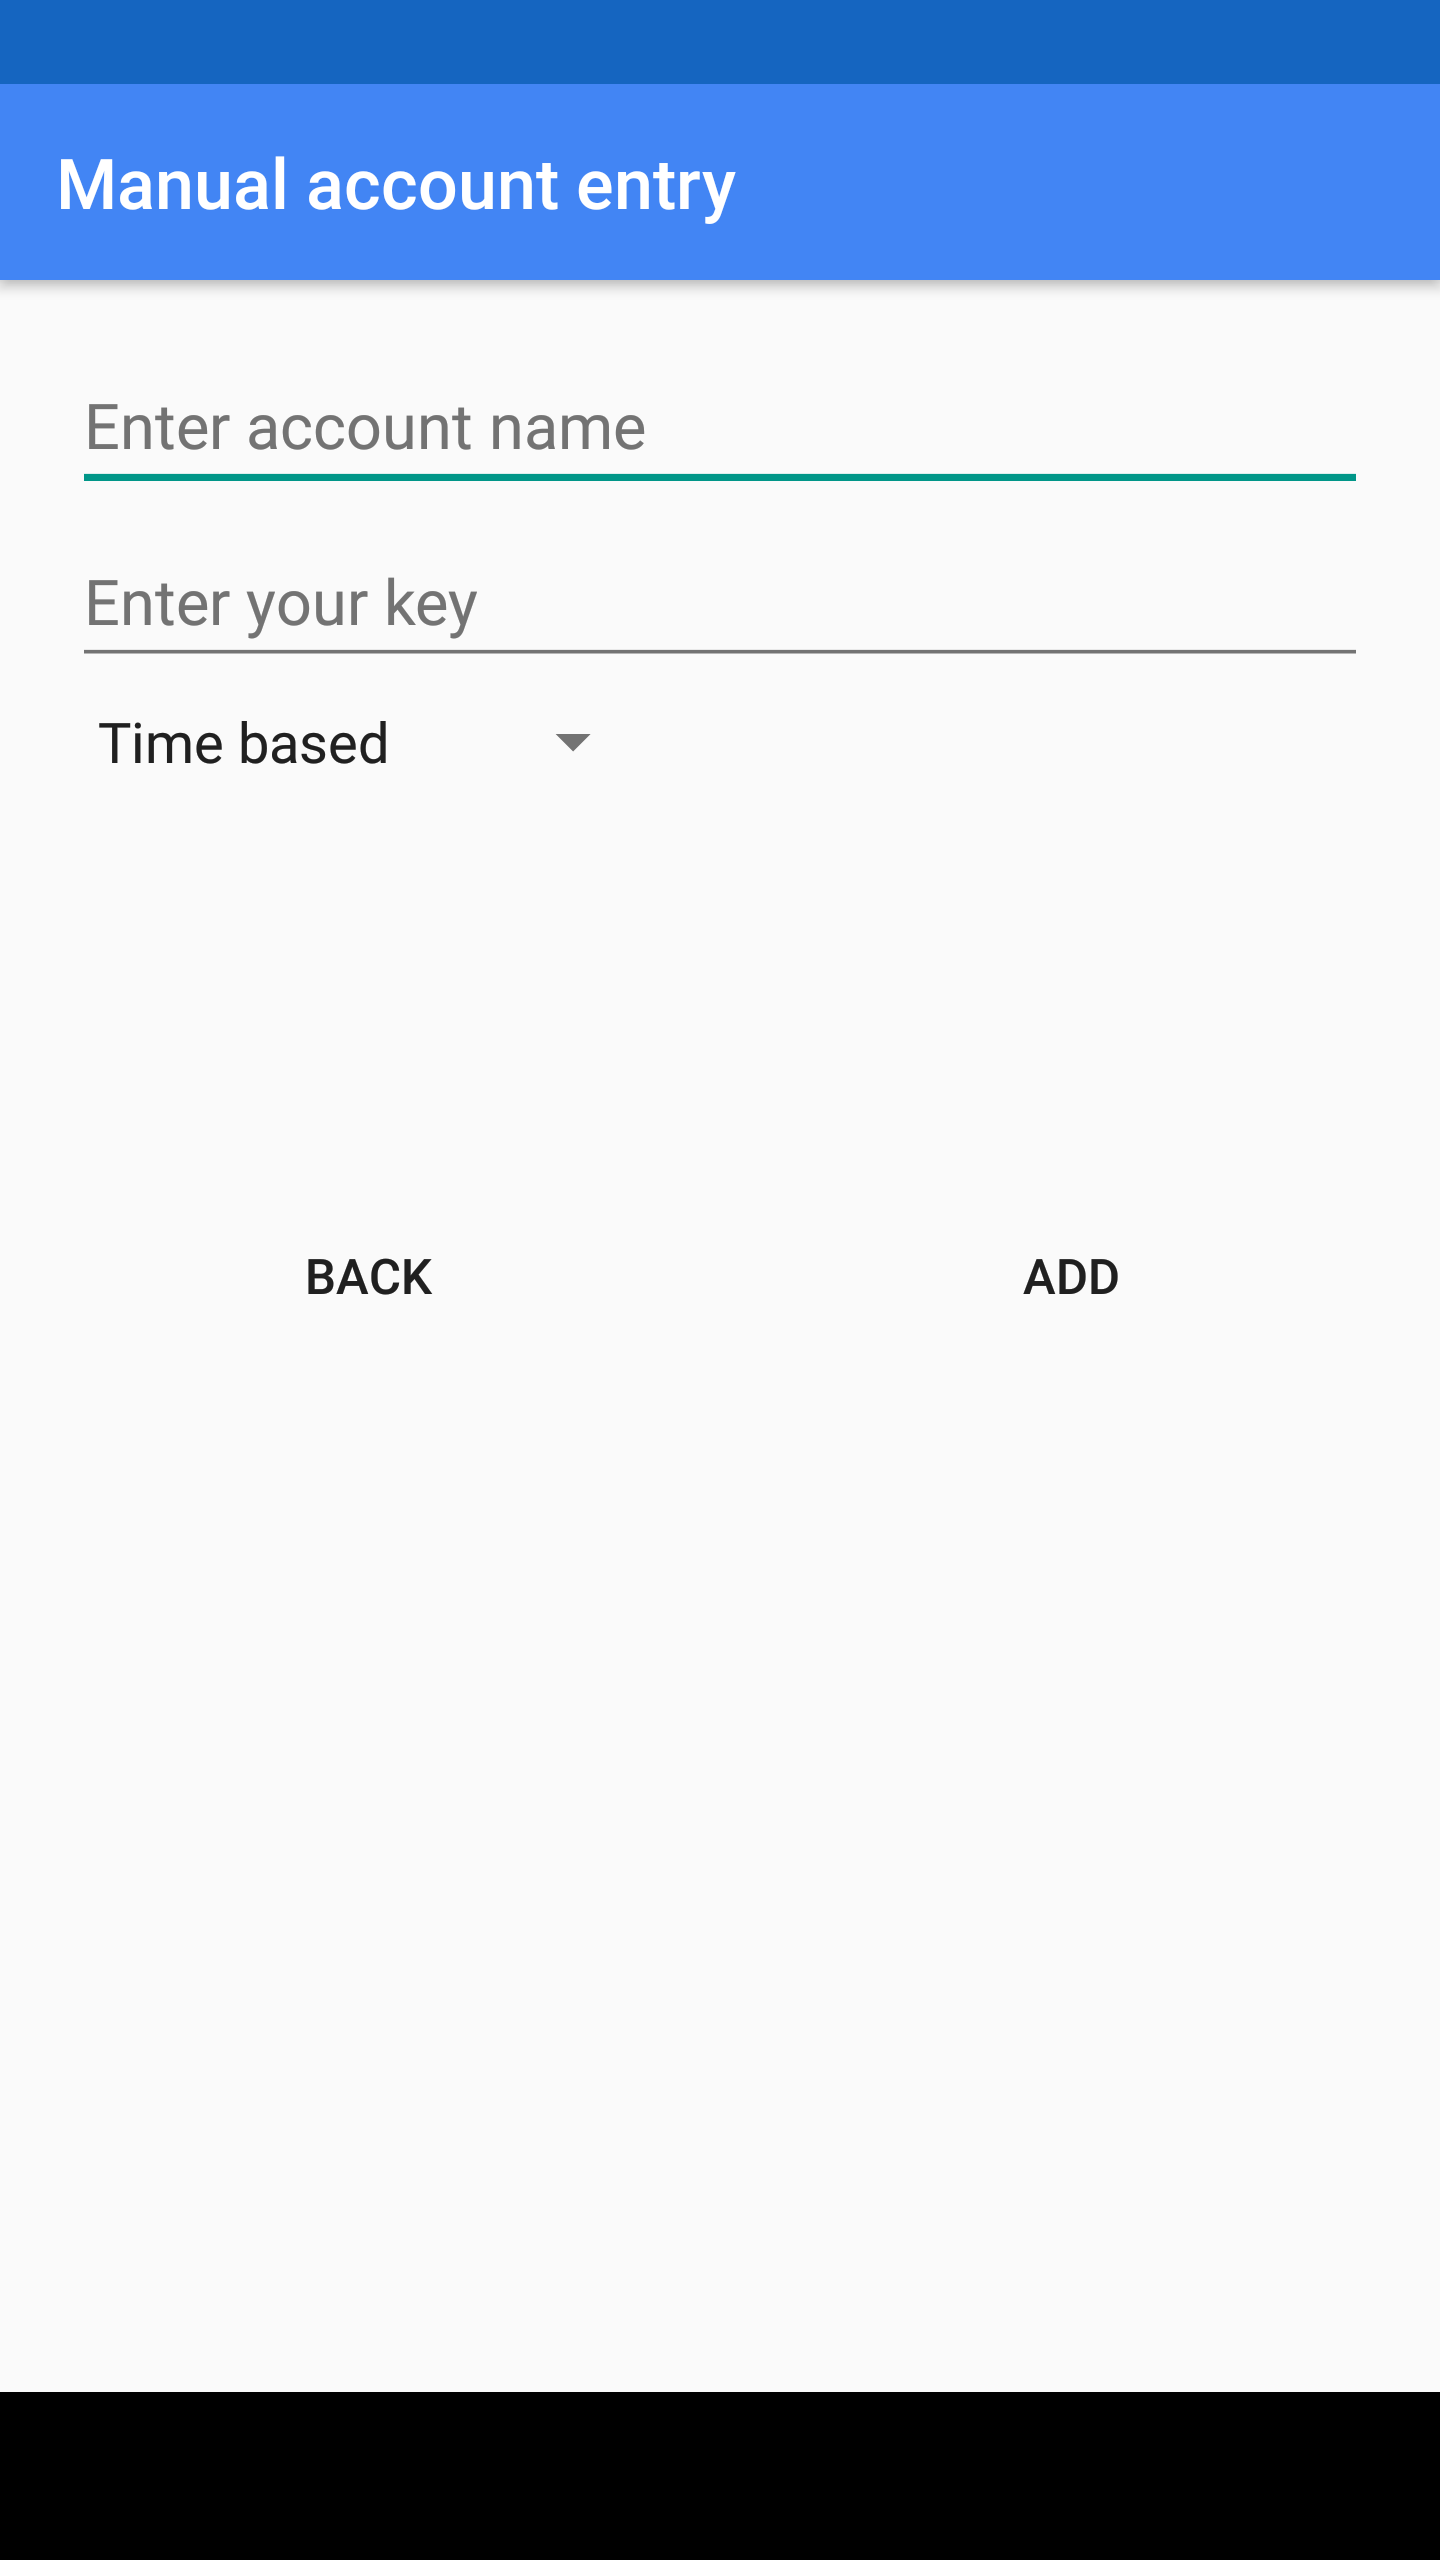
You now have the user jack set up. Before you can set up the user olivia, you need to add an account for jack on the Google Authenticator app. Open the app and the, from the main window, tap the menu button (three vertical dots in the upper right hand corner). Tap Set up account and then tap Enter provided key. In the next window (Figure 1), you will enter 16-digit secret key provided when you issued the google-authenticatorapp. Give the account a name (so you will remember which account this is to be used on) and tap ADD.
Figure 1: Adding a new account to the Google Authenticator app.
Now that you’ve added the account, you will be presented with six-digit keys that will be requested every time you log in or attempt to use sudo.
Finally, you have to set up the other accounts on the system. As I mentioned, we’re going to set up the account called olivia. Here’s how:
Open up a terminal window
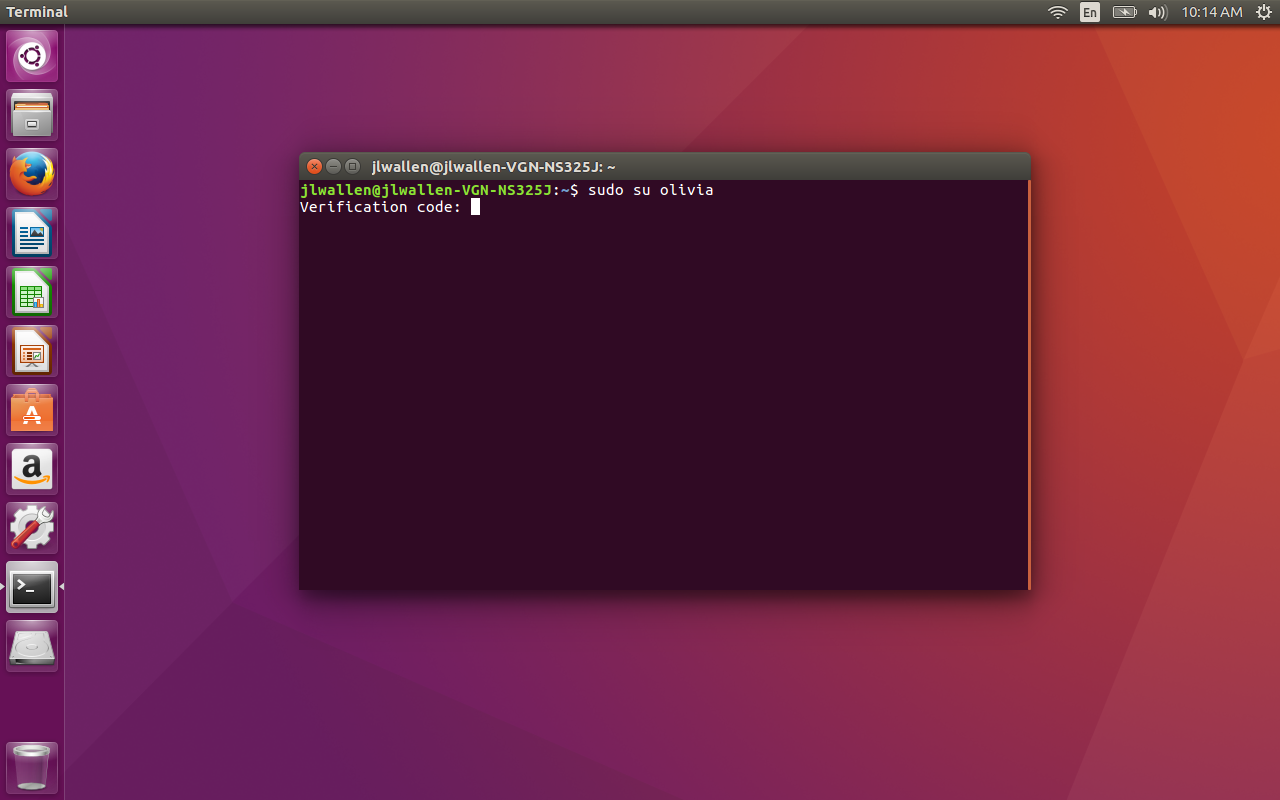
Issue the command sudo su olivia
Open the Google Authenticator on your smartphone
Type the six digit authentication code (provided by the app) in the terminal window (Figure 2) and hit Enter
Type your sudo password and hit Enter
As the new user, issue the google-authenticatorcommand, answer the questions, and record the keys and codes provided
After you’ve successfully set up the user olivia, with the google-authenticator command, add a new account on the Google Authenticator app with that user’s info (in the same manner you did for the initial user). You should now have accounts on the Google Authenticator app for both jack and olivia.
Figure 2: Entering the six-digit authentication code for sudo.
That’s it. Every time you attempt to log into your machine (or use sudo), you will be required to provide a six-digit authentication key, before you can enter your user password. Your Linux machine is now far more secure than it was before adding two-factor authentication. Although some might consider this process a hassle, I highly recommend setting it up…especially for machines that house sensitive data.
It’s ridiculously early in the existences of Open-O and Open Source MANO (OSM), two open source NFV management and network orchestration (MANO) efforts that emerged at almost the same time this year. But it’s not too early to spot differences between the two.
Specifically, each group hopes to solve different problems. OSM will focus on network service orchestration, which fits on the right-hand (MANO) side of the ETSI NFV MANO diagram (see below). Open-O will expand the scope of its work beyond MANO to include orchestration over the entire network.
This tutorial shows how to install and use FTP with ProFTPd securely. FTP without TLS is an insecure protocol because all passwords and all data are transferred in clear text. By using TLS, the whole communication can be encrypted, thus making FTP much more secure. This article explains how to set up ProFTPd with TLS on an Ubuntu 16.04 server, how to add an FTP user and to use FileZilla to connect securely with TLS.
While many federal agencies have begun adopting a DevOps approach to software development, some are still struggling to develop proper DevOps pipelines.
This is not surprising; getting a basic continuous integration (CI) and continuous delivery (CD) process to work correctly is difficult and takes time. Ideally, there is always some type of source control management (SCM) solution, build server and application platform for app deployment. Hooking these components together can be nontrivial.
So let’s take a look at a few simple strategies agency developers can employ to expedite their efforts by creating and maintaining sound DevOps pipelines.
Who can blame them? It comes not just with a top-flight Linux distribution but with the excellent RHEL support program, So, it’s good news for many business RHEL system administrators that RHEL 6.8, the latest version, is out now.
In this series of four tutorials, Ben Martin provides step-by-step instructions, code, and troubleshooting tips to take you through the process of building, powering, connecting, and controlling your own Mantis robot mounted with a Raspberry Pi.
Martin explains in detail how to attach motors, mount a RoboClaw motor controller, and then connect it to your Raspberry Pi through a USB port. He provides a program for controlling the robot with the keyboard and then extends the program so you can use a PS3 joystick to control your robotic creation.
Together, the tips and instructions found in these articles can help you build a powerful robot base that can be further modified to suit your needs.