The beauty of the Raspberry Pi 3 is that you can tinker and do fun stuff to your heart’s content. This tiny $35 computer lets you do anything.
The Pi I have runs Raspbian for other uses. I keep several micro SD cards, each with different applications and swap them to get more out of the same Pi.
In this tutorial, you’ll learn how to set up a Minecraft machine on the Pi 3 from scratch. Minecraft is a fun game that lets you build whole worlds however you want, by yourself or with friends. Having your own Minecraft server gives you full control over the game.
I set up a Minecraft server because we don’t watch TV, but we have one TV in the kids’ area, and I have hooked a Pi to it so my son can play Minecraft.
In the next two tutorials, you’ll learn how to transform your Pi 3 into your own custom Netflix/Pandora-like streaming service with Plex Media Server and then how to use the Pi as a Plex media player to stream content directly to your HDMI-enabled TV.
What you need:
-
Raspberry Pi 3
-
HDMI enabled monitor
-
Keyboard+mouse
-
HDMI cable
-
Power adapter for Pi
-
Micro SD card (I am using 32GB capacity)
-
Ethernet or Wireless connectivity
We are using the NOOBS distribution installer, just to make things easier for new users. Download NOOBS from the official site and extract the content. Next, plug in the micro SD card and format it as FAT32. Then copy all the extracted files to the root of the SD card. Note: Don’t copy the entire folder, copy the content of the folder.
Plug the card into the Raspberry Pi , connect the monitor via HDMI, connect the mouse/keyboard and plug in the power supply. If everything goes well, you will see the NOOBS window, where you can choose the OS that you want to install; I recommend Raspbian. Once installed, it will reboot and you are logged into your brand new Raspbian OS running on Raspberry Pi 3. Now connect the network (I recommend ethernet to get faster download speed) and update the system:
sudo apt-get update

sudo apt-get dist-upgrade
If you want you can also change the user password. The default username is pi and the password is raspberry. Change the password by typing the command, and then the new password at the prompt:
passwd pi
Now install these packages for OpenGL Driver for improved graphics:
sudo apt-get -y install xcompmgr libgl1-mesa-dri && sudo apt-get -y install libalut0 libalut-dev && sudo apt-get -y install mesa-utils
Now it’s time to enable OpenGL drivers:
sudo raspi-config
Here you will see the option to expand the file system and change the password. We don’t need either of those because NOOBS automatically expands the file system and we have already changed the password. Skip everything and go to the advanced option.
Scroll down to find AB GL Driver, hit enter and then select yes to enable. (note: the mouse won’t work, so use the arrow keys).
Reboot the system. Once rebooted, check if OpenGL is enabled, run ‘glxgears’ in the terminal and you should see gears turning.
Install Minecraft packages
First, we need to create directories for Minecraft:
mkdir -p ~/Minecraft/Natives
Change directory to Minecraft:
cd ~/Minecraft/
Now log into your Minecraft account and download the Minecraft.jar file for Linux to the Minecraft directory that we created. Install the launcher and log into your account:
java -jar Minecraft.jar
Click on the edit profile option and select version 1.8.9 from the list, save the profiles. If you get any error (there is a possibility of an error related to ‘execstack’), please close Minecraft and run these commands to patch some files:
cd ~/Minecraft/Natives

wget https://www.dropbox.com/s/4oxcvz3ky7a3x6f/liblwjgl.so

wget https://www.dropbox.com/s/m0r8e01jg2og36z/libopenal.so
Then update the libraries:
cd /home/pi/.minecraft/libraries/org/lwjgl/lwjgl/lwjgl/2.9.4-nightly-20150209

rm lwjgl-2.9.4-nightly-20150209.jar

wget https://www.dropbox.com/s/mj15sz3bub4dmr6/lwjgl-2.9.4-nightly-20150209.jar
Change directory to Minecraft folder:
cd ~/Minecraft/
And download the ‘run’ script:
wget https://www.dropbox.com/s/jkhr58apwa7pt1w/run.sh
Make it executable:
sudo chmod +x run.sh
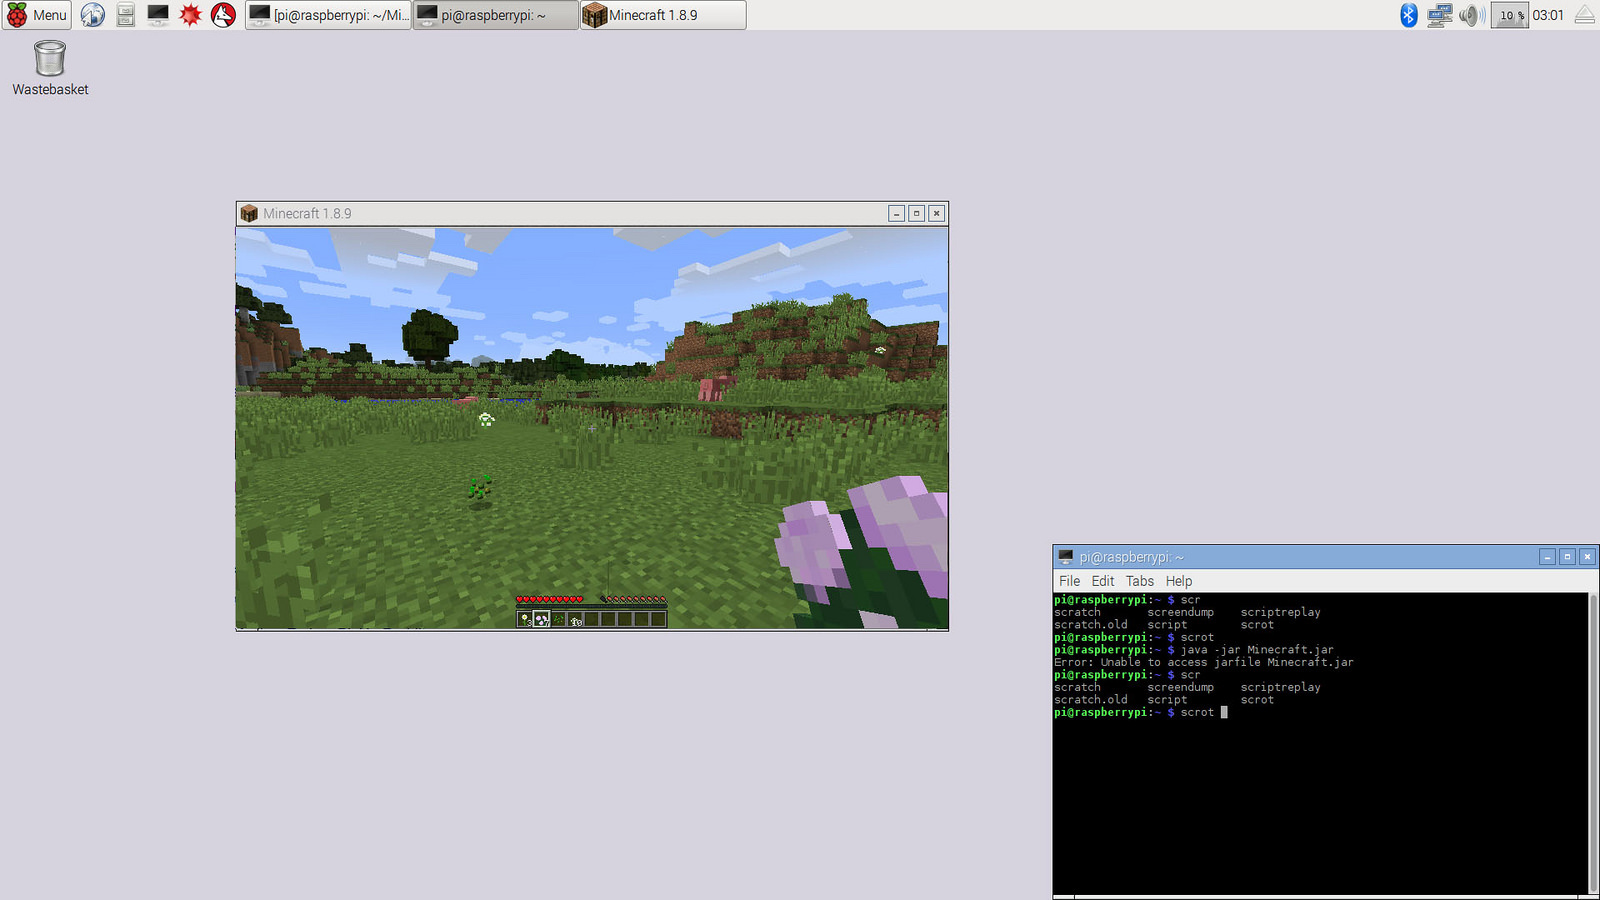
Now either browse to this script from the file manager and open it by clicking on it, or run it from the terminal, and you will have Minecraft running on your machine (image below)
cd ~/Minecraft/

./run.sh

That’s it! Once it’s installed, you can start playing Minecraft on your your system. Build new worlds, invite your friends to play on your server, and keep tinkering with your new Pi 3.
For 5 more fun projects for the Raspberry Pi 3, including a holiday light display and Minecraft Server, download the free E-book today!
Read the next articles in the series:
Build Your Own Netflix and Pandora With Raspberry Pi 3
Turn Raspberry Pi 3 Into a Powerful Media Player With RasPlex


