
We learned the basics of running the Apache HTTP server on the Debian/Ubuntu/etc. family of Linux distributions in Apache on Ubuntu Linux For Beginners and Apache on Ubuntu Linux For Beginners: Part 2. Now we’re going to tackle CentOS/Fedora/andtherest. It’s the same Apache; the differences are package names, configuration files, and that never-ending source of fun times, SELinux.
Install Apache in the usual way with Yum, set it to automatically start at boot, and then start it:
$ sudo yum -y install httpd
$ sudo systemctl enable httpd.service
$ sudo systemctl start httpd.service
Point a web browser to http://localhost, and you should see a test page (Figure 1).

It works! We are wonderful.
SELinux
CentOS installs with an active SELinux configuration set to SELINUX=enforcing in /etc/sysconfig/selinux, which will prevent your new virtual hosts from operating. There are two ways to handle this. One way is to disable SELinux by changing SELINUX=enforcing to SELINUX=permissive, and then rebooting. This keeps your rules active without enforcing them, and logs all SELinux messages so you can study how the rules are working, and if they are set correctly.
The other way is to leave SELinux in enforcing mode and create a ruleset for your new virtual host. In the following examples our virtual host root is /var/www/html/mysite.com:
$ sudo semanage fcontext -a -t httpd_sys_rw_content_t
  '/var/www/html/mysite.com(/.*)?'
restorecon -RF /var/www/html/mysite.com
While you’re testing and learning, you could make this ruleset apply to your entire web root by using '/var/www/html(/.*)?' instead of creating rules for each individual virtual host. Note that neither of these rulesets are very secure; they’re for making testing easier. A more secure SELinux configuration is more fine-grained and applied to individual directories; I leave it as your homework to study how to do this.
Configuration Files
CentOS/etc. use a different configuration file structure than the Debian Linux family. Apache configuration files are stored in /etc/httpd. The default CentOS 7 installation supplies these directories:
conf
conf.d
conf.modules.d
logs
modules
run
conf contains the main server configuration file, httpd.conf. You probably won’t edit this file very often. This contains global configurations such as the location of the configuration files, include files, the Apache user and group, document root, and log file location and format.
conf.d is where your virtual hosts and any other custom configurations go. It contains welcome.conf, which is is the default virtual host that displays the default welcome page. autoindex.conf enables directory listings, and php.conf controls how Apache interacts with PHP.
All files in conf.d must have a .conf extension. This is controlled in httpd.conf, so you have the option to change it to whatever you want. Really. Even something goofy, like .feedme or .hiapache.
conf.modules.d loads whatever installed modules you want to use.
logs, modules, and run are all symlinks to other directories. Take a little time to study your configuration files and see what is in them.
Create a new virtual host
Now that we have an inkling of what to do, let’s create a new virtual host and its welcome page. In this example it is mysite.com.
$ sudo mkdir -p /var/www/html/mysite.com
$ cd /var/www/html/test.com
$ sudo nano index.html
You are welcome to copy this fabulous custom welcome page:
<head>
<title>Mysite.com index page</title>
</head>
<h1>Hello, welcome to mysite.com! It works!</h1>
<h2>That is all I have to say. If you don't
see this then it doesn't work.</h2>
</body>
</html>
Test your new index page by opening it in a web browser (Figure 2), which in this example is file:///var/www/html/mysite.com/index.html.
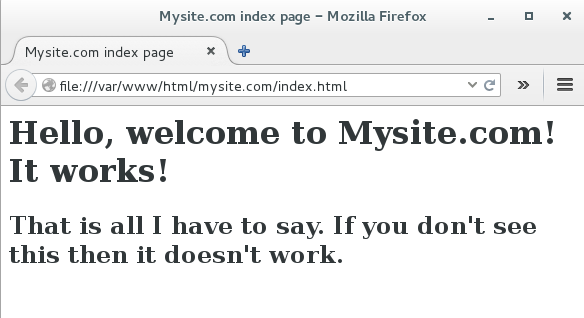
Excellent, the welcome page renders correctly. Now let’s configure a virtual host to serve it up, /etc/httpd/conf.d/mysite.conf.
$ cd /etc/httpd/conf.d/
$ sudo nano mysite.conf
This is a basic barebones virtual host:
<VirtualHost *:80>
    ServerAdmin carla@localhost
    DocumentRoot /var/www/html/mysite.com
    ServerName mysite.com
    ServerAlias mysite.com
</VirtualHost>
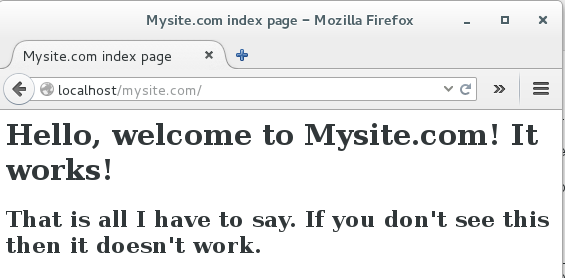
Now point a web browser to http://localhost/mysite.com to (Figure 3).
Shift+reload. After years of testing multiple setups and running Apache on all kinds of Linux distributions, I’m rather muddled on when you need to restart or reload the configuration without restarting, or when Apache picks up new configurations automatically. During your testing, you can restart it with gay abandon.
Multiple virtual hosts
For quick easy testing map your server’s IP address to your domain names in /etc/hosts:
192.168.1.25       mysite.com
192.168.1.25       www.mysite.com
Now you can access http://mysite.com and http://www.mysite.com without the localhost portion of the address. Copy these /etc/hosts entries to other hosts on your LAN, and they should also have access to your site.
To set up more sites repeat these steps, creating different document roots and domains for each one, and their corresponding entries in /etc/hosts. For example, adding second virtual host looks like this:
192.168.1.25       mysite.com
192.168.1.25       www.mysite.com
192.168.1.25       mycatpics.com
192.168.1.25       www.mycatpics.com
And beware of SELinux.
When you’re ready to roll out a production server refer to Dnsmasq For Easy LAN Name Services to learn how to set up DNS on your LAN with the excellent Dnsmasq name server.
Creating a publicly accessible Internet web server is a much bigger job that involves registering domain names, setting up careful and correct DNS, and building a good firewall. Do please study this with great care.
The fine Apache documentation is exhaustively thorough, and it makes more sense when you have a live server running, and have some idea of how things work.
Advance your career in system administration! Check out the Essentials of System Administration course from The Linux Foundation.


