
For the longest time, Enlightenment was my Linux desktop of choice. It was incredibly fast, highly configurable, and gorgeous. Since that time, I’ve migrated to desktops that veer toward being simpler, more efficient to work with… but I always consider my years with E16 and E17 with great fondness. Fortunately, at least two outstanding distributions focus on either Enlightenment E17 or a fork of E17. Bodhi Linux is a darling distribution (that I looked at previously) that uses a fork of E17, called Moksha Desktop. The developers of Bodhi have done some remarkable work with Enlightenment, but this article isn’t about Bodhi. Instead, I want to focus on a distribution that uses straight up Enlightenment E17. That distribution of Linux is Elive.
Elive Linux is developed by Samuel F. “Thanatermesis” Baggen, who has done an incredible job of creating this desktop distribution and has done so by relying on the donations of users. This donation-based distribution has frustrated some users (who have grown accustomed to getting their Linux for free). Although Elive is Mr. Baggen’s full-time job, he’ll be releasing version 3.0 for free (to expand the user-base). However, Elive Linux is still a distribution worthy of donation. So if you’re serious about keeping choice alive (especially one that focuses on Enlightenment), consider a donation for the cause.
With that said, let’s take a look at what makes Elive Linux a distribution you might want to make a part of your world.
What is Elive?
For those who are curious, Elive Linux marries Debian with the Enlightenment desktop. But wait, why not just install E17 on Ubuntu and be done with it? Many users don’t want to have to deal with installing such third-party software. On top of that, one of the biggest draws to Elive (besides E17 being a work of art) is that it does a great job of supporting older hardware (thanks to the combination of Debian and Enlightenment). For anyone looking either to support older hardware or to have modern hardware run faster than seems possible (while not sacrificing a gorgeous desktop), Elive is exactly the distribution to choose. Elive also does a great job of simplifying the first steps of using E17, which can be a bit daunting for new users.
Elive was first released on January 24, 2005. It can be installed via a live CD/USB and has a very minimal set of requirements:
-
Beta version: 500 MHz CPU with 256 MB of RAM
-
Stable version: 300 MHz CPU with 128 MB of RAM
-
Older versions: 100 MHz CPU with 64 MB of RAM
Not many modern distributions can top those requirements. But don’t worry, Elive can also be installed on the most modern of hardware. In fact, install Elive on something relatively new and you’ll be amazed at the speed you’ll experience.
Installation
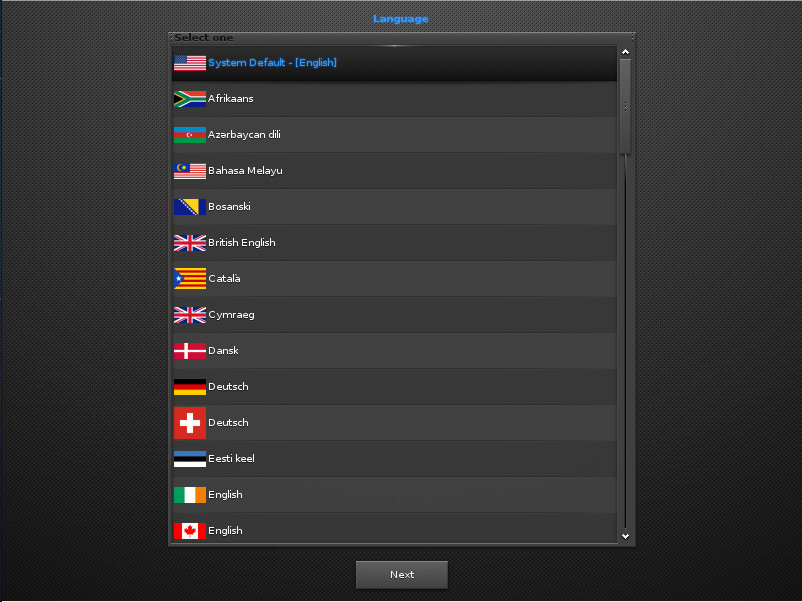
The installation of Elive is as simple as any other modern Linux distributions. You will, however, have to walk through the initial Enlightenment setup, even before reaching the live distribution desktop. This starts with selecting your system default language (Figure 1).
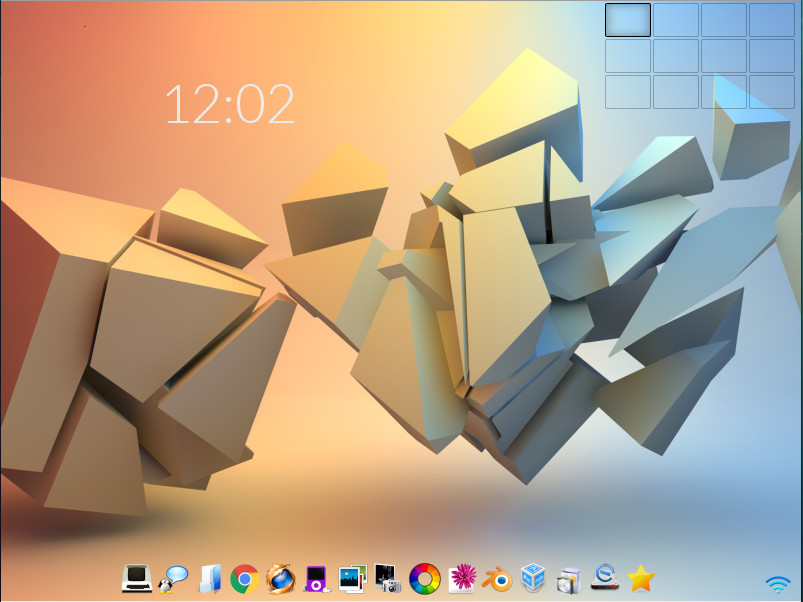
In the next screen, you’ll select the keyboard and Enlightenment. Once you’ve taken care of that, you’ll find yourself on the live desktop screen (Figure 2), where you can click the Install icon (on the bottom shelf) and begin the actual installation process.
After clicking the installation icon, you might find that you are prompted for the installer to be upgraded. OK that and a terminal window will open to take care of the process. After that upgrade, there might be other updates required before the installation can begin. Just make sure you allow all of these necessary updates (which depend on the version you have downloaded for installation). Once that completes, the installation of Elive will finally begin.

The installer is simple. Click OK from the main window (Figure 3) to begin the process.
Next, you’ll be prompted to select a hard disk partitioning option. Select Automatic for the easiest installation. After making the selection, click OK. When prompted, click Yes to erase your hard drive, so Elive can be installed. The next prompt (Figure 4), allows you to enable encryption for your disk.
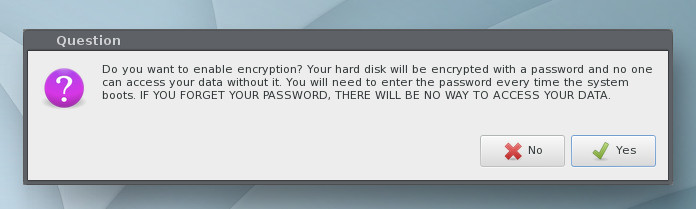
If you enable encryption, you’ll be prompted for an encryption password; type and verify that password to continue.
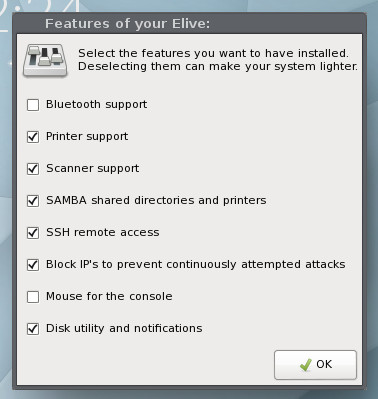
The installation will continue and end at a window allowing you to select features to be included in your desktop (Figure 5).
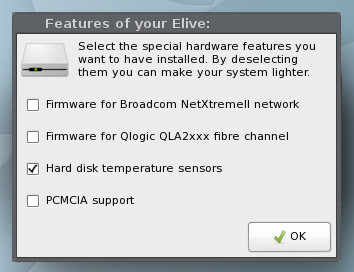
The next window allows you to select extra hardware support (Figure 6).
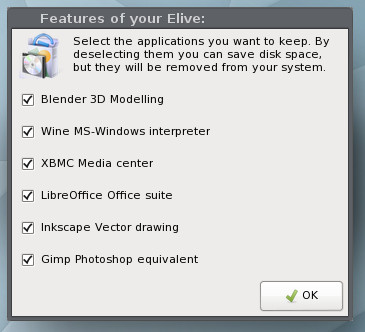
Next, you get to determine what third-party software will be added to the installation (Figure 7).
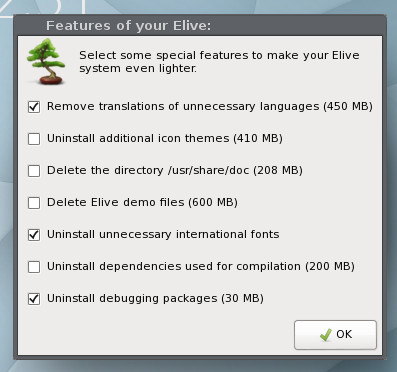
Finally, you can dictate what Elive will remove from the system, in order to make it even lighter (Figure 8).
You will then be prompted to create a user for the system and then set up sudo rights for that user. After you create that user, a terminal window will open and the system will be installed. During this installation, you may be prompted to answer Yes or No for a question or two.
Take the time to read through the questions carefully. During this segment of the installation, you’ll also be prompted to give the computer a hostname, and you will eventually be prompted for a reboot.
Upon reboot, you will be asked to select the services you want enabled on your desktop. Quite a few options are available, so look through them carefully and select only the ones you know you’ll need (Figure 9).

One of the nice aspects of Elive is that you don’t have to walk through the E17 first-run wizard, which can be somewhat confusing for new users. Elive makes getting Enlightenment up and running as easy as any desktop environment. On top of that, the default Elive desktop is just as gorgeous as the website proclaims (Figure 10).
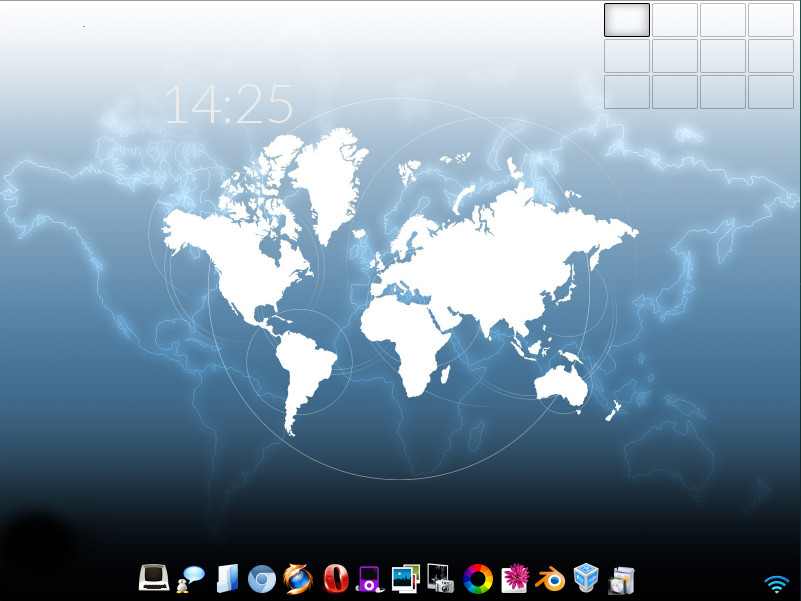
Out of the box, Elive includes an outstanding collection of wallpapers and a beautiful default theme (a vast improvement over the standard E17). And, if you include all the third-party applications, you’ll have absolutely everything you need to get your work done … all from within a screaming-fast desktop operating system that is as reliable as any Linux distribution and even more flexible than most.
I will give you a word of warning. Once you start toying with Elive (configuring and theming), making this desktop operating system even more beautiful might well become an obsession.
If you like a lightning fast distribution with a Debian base, you seriously cannot go wrong with Elive.
Learn more about Linux through the free “Introduction to Linux” course from The Linux Foundation and edX.


