
Debian 7.6 was released this weekend as the latest “Wheezy” release to mainly address security problems and other important bug fixes…
Read more at Phoronix
I do a good deal of promotion for my fiction. One means of promotion I have found incredibly effective is video promos. With these quick videos I can say things in ways a static ad or standard social networking post cannot. I can add music, effects, effect mood… you name it. But video editing isn’t always a skill that anyone can pick up as if they were using a WYSIWYG editor. In fact, with some tools, creating a short video can be downright challenging.
Unless you use OpenShot. Of all the editors I’ve worked with, OpenShot offers the easiest work flow, without compromising features. Even with this incredibly shallow learning curve, there are aspects of OpenShot that could trip up new users. With that in mind, I want to walk you through the process of creating a short promo video with the flagship, open source video editor.
OpenShot installed.
Blender installed (necessary for animated titles).
Video clips: You can’t create a quality video without these.
Sound clips: If you choose to add sounds (highly recommended).
Still images: It’s easy to integrate still images into OpenShot videos.
Creativity.
Before we get started, I want to make mention of using still images. Sometimes the titles offered with OpenShot (both standard and animated) aren’t enough. When I have a very specific need for an image (especially text), I defer to The Gimp. What I will do is create a 640×480 image with a transparent background and add the necessary text to that. With that image (saved as a .png) I can create much more flexible and powerful credits, intros, and such.
Still images can also be placed for a Picture In Picture effect. I’ll demonstrate that in a moment.
This is the easiest aspect of OpenShot. From the OpenShot main window (Figure 1), click on the + button, navigate to the files to be added, and then click Add.

By default, there are only two tracks in the time line. To really fine-tune your video, you will want to have multiple tracks. This makes moving clips, for effects like transition fades, much easier. In some cases, you won’t know how many tracks a project will require, so I tend to add them as needed. To add tracks to the timeline right-click the dark gray portion at the left edge of an existing track. Select either Add Track Below or Add Track Above to add an additional track. You can also rename tracks by right-clicking a track and selecting Rename Track.
Once you’ve added sufficient tracks to get you started, it’s time to drag clips to the timeline. This is where creativity comes into play. Starting with the intro clip, click and drag the clip from the project files to the time line. You’ll eventually find that clips will have to be dragged around on their track to get them in exactly the right moment in the video. With the clips in place, it’s time to adjust placement, add transitions, and much more.
Say, for example, you use images for an opening segment and want a non-standard placement for the images (or you want to add a Picture-In-Picture effect). This is actually really simple. If you right-click a clip in the timeline and select Properties, you can access the Layout tab (Figure 2). This tab allows you to adjust the position of the clip as well as the alpha (think “opacity”) of the clip.

You will notice an X and a Y slider. The X setting is the right-left position of the clip and the Y setting is the up-down position. You must adjust the Start of Clip and End of Clip positions (from the Key Frame dropdown). If you only adjust one, the clip will move either from or to the default X=0 and Y=0 position. If you’re looking ahead of the game, this does, in fact, mean you can make a clip move along the X and Y axis from start to end of the clip.
But say you want the clip to live on the left side of the frame. To accomplish this you’ll want to adjust the Start of Clip and End of Clip X position to a negative number. You’ll have to play with the number, according to the clip to be moved, to get it right. Once you make an adjustment, click Apply and test the position by clicking play in the preview window.
In this same tab, you can adjust the transparency of the clip by sliding the Alpha setting to the right or left. If the Alpha is set too 100% there will be no transparency.
One of the best transitions you can use is the fade. With each clip you can add:
Fade in (fast)
Fade out (fast)
Fade in/out (fast)
Fade in (slow)
Fade out (slow)
Fade in/out (slow)
To do this, right-click a clip and then click Fade and select the type of fade you want.
You can also animate a clip. If you right-click a clip, you’ll see the Animate menu that includes:
Various zooms
Various types of moves
The moves include:
Top to bottom
Bottom to top
Right to left
Left to right
Top to center
Bottom to center
You can also rotate a clip 90 degrees to the right or left of 180 degrees.
One of the best things about fades is that you can then have a clip fading in as the previous clip is fading out. This creates an amazingly seamless look for the video. If your cuts between clips seem jumpy, add fades.
There are a number of good effects you can use to really enhance your work. Click on the Effects tab and then scroll through the entire listing. To add an effect to a click, locate the effect you want, click on it, and then drag it down to a clip in the timeline to apply. My favorite effect combination is Gray Scale, Old Film, and Old Lines. This gives an outstanding old black and white movie feel.
Make sure, as you work, to save your project. When you first save the project, you are asked to name the project, select a folder to house the project, and select a project profile. The project profile is crucial to the end result. The profile defines:
Width
Height
Aspect Ratio
Frame Rate
Pixel Ratio
Progressive
Once you’ve saved a project, you cannot change the Profile, so make sure you chose this option wisely.
When the project is complete, it’s time to export. With the project open, click File > Export. In the resulting window (Figure 3) give the file a name and select the folder for the export.

The next section requires you to select a profile for the export. You have five format options:
Blueray/AVCHD
DVD
Device
Web
If you’re looking to upload the video to the likes of YouTube, you’ll want to select Web and then select:
Target: Youtube (or Youtube-HD)
Video Profile: Leave as default (auto selected by Target selection)
Quality: Low, Med, or High.
Click Export Video and allow the rendering process to work. Depending upon the length of your video, and the power of your machine, this can take a good amount of time.
OpenShot is an incredibly powerful video editing tool, that also happens to have one of the more shallow learning curves of all the video editors. Give OpenShot a try and see if you can’t whip up a professional-quality video with much less frustration than you thought possible.
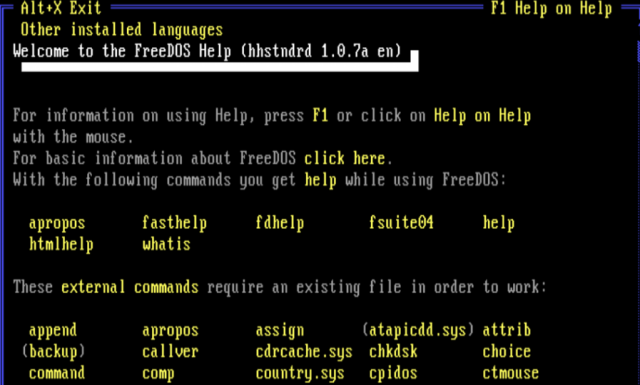
Earlier this month, I spent a day working in the throwback world of DOS. More specifically, it was FreeDOS version 1.1, the open source version of the long-defunct Microsoft MS-DOS operating system. It’s a platform that in the minds of many should’ve died a long time ago. But after 20 years, a few dozen core developers and a broader, much larger contributor community continue furthering the FreeDOS project by gradually adding utilities, accessories, compilers, and open-source applications.
All this labor of love begs one question: why? What is it about a single-tasking command-line driven operating system—one that is barely up to the most basic of network-driven tasks—that has kept people’s talents engaged for two decades? Haven’t most developers abandoned it for Windows (or, tragically, for IBM OS/2)? Who still uses DOS, and for what?
To find out, Ars reached out to two members of the FreeDOS core development team to learn more about who was behind this seemingly quixotic quest. These devs choose to keep an open-source DOS alive rather than working on something similar but more modern—like Linux. So, needless to say, the answers we got weren’t necessarily expected.
Read 22 remaining paragraphs | Comments

Every year, the Top 500 list of the world’s fastest supercomputers is released. A list filled with machines containing tens of thousands of nodes and capable of cranking out enough petaflops per second to make your head spin.
And, of course, this list is absolutely dominated by machines powered by Linux.
This is awesome. But, really, we all know this. Let’s dig a little deeper into these Goliath computers that will, someday, become sentient and rise up against their human creators.
Let’s start with the #2 ranked supercomputer – The Titan.
This Cray-built beast of a computer lives in Tennessee at the Oak Ridge National Laboratory and takes up 4,352 square feet. Which, for those of you who are curious, is roughly 6.8 times the size of my first apartment – and approximately infinity times larger than the kitchen in that apartment (give or take a foot).
Want to build this computer for yourself? No problem. It uses an off-the-shelf AMD Opteron 16 core, 2.2 GHz CPU. 35,040 of them. Which begs the question, what sort of actual performance do you get from more than 560,000 CPU cores? 17.5 million petaflops. That’s what you get.
So what does that actually mean? What can you do with 17.5 million petaflops that you can’t do with a fancy, quad core i7 desktop PC?
Well, for starters, it can run a particle simulator that can handle things way down at the quantum level (specifically the Large-scale Atomic/Molecular Massively Parallel Simulator, aka “LAMMPS”). OK. That’s cool I guess. Definitely produces some crazy–looking videos. But I just don’t run quantum level particle simulations all that often. I need to know how well this sucker runs Portal.
The AMD Phenom II (quad core), clocked at 3.40 GHz – a very respectable desktop CPU – can run Portal (at 1600×900) at roughly 59 frames per second. That particular CPU can crank out something in the ballpark of 39 gigaflops.
Now. Assuming the only factor that contributes to the frame-rate of a game is the number of Floating-point Operations Per Second (FLOPS) – that means that Portal, when running on the Titan, should be able to hit 26,474,358 frames per second.
“But, Bryan!” I hear you say. “They can’t possibly have a screen nice enough to showcase that sort of awesomeness!”
Au contraire, mon frère! Those crazy kids down in Tennessee have built EVEREST (the “Exploratory Visualization Environment for Research and Technology”) – which includes a 33-foot wide, 37 megapixel, stereoscopic 3D screen.
You know. For research. Wink, wink, nudge, nudge. Hold on a moment. I’m going to go let my wife know that I need a 60” 4K TV set. Because science and particles and stuff.
OK, let’s slam on the brakes and drop down the list a bit to the #21 ranking supercomputer in the world – NASA’s Pleiades.
Now, I say “slam on the brakes,” but this SGI-built, SUSE-powered beauty still manages to push through 1.5 petaflops like a hot knife through butter (we’re talking room temperature butter … not that stuff from the fridge that can’t be cut with a laser cannon and causes you to slaughter your poor, defenseless toast).
In other words, it probably runs Portal fairly well. But what, pray tell, is NASA using such a rig for?
To do amazing NASA space stuff. That’s what.
 The Pleiades is involved in the search for Earth-like planets (the Kepler Mission). For its role in that, most stellar, project the Pleiades receives high-resolution images of more than 200,000 stars. It then calculates the size and location of the planets orbiting those stars. It does this every half hour. No coffee break.
Every. Half. Hour. It takes me longer than that to drive to my closest Trader Joe’s.
To date, it has discovered 1,235 planets. Five of them possibly “Earth-like” (similar size and within a habitable orbit around their star). When it gets bored of being off-the-charts awesome, sometimes Pleiades likes to run simulations on the formation of the Milky Way Galaxy. You know, just to kinda … clear its head.
We’ve just talked (briefly) about two of the coolest computers on the planet. And there are 498 more on that mind-bending list. I’ll leave you with one final thought:
The total number of petaflops produced by all of the supercomputers on this list, combined, is roughly 274 – with roughly half of all the total speed being generated by the top 20 computers.
I’m sure there’s an allegory in there somewhere about class inequality and the French Revolution, but all I keep thinking about is the (obviously imminent) human-robot war.
Read more of Bryan Lunduke’s columns, here:
The Battle of the OpenStack Distros Begins (Bring Popcorn)
Why Linux Works for Government
Why Arguing That Windows is Better Than Linux Makes You Look Silly