Home Blog Page 2061

Professional Audio Production on Linux

And now we come to my favorite part of this series, high-end Linux audio production. Linux is a superior platform for professional audio production: stable, efficient, and you don’t get gouged for software licenses. You have to be careful to select audio hardware that is well-supported on Linux, but this is less of a problem than it used to be. Look for USB audio interfaces that don’t need custom proprietary drivers, but stick to the USB spec like they’re supposed to. The hardy FFADO developers toil away developing and improving drivers for Firewire audio interfaces. No, Firewire is not dead, and you can easily add a Firewire card to almost any PC if it doesn’t already have one. I use FFADO for my cherished old Saffire Pro 26 I/O, and neither have let me down.

Saffire Pro 26 I/O
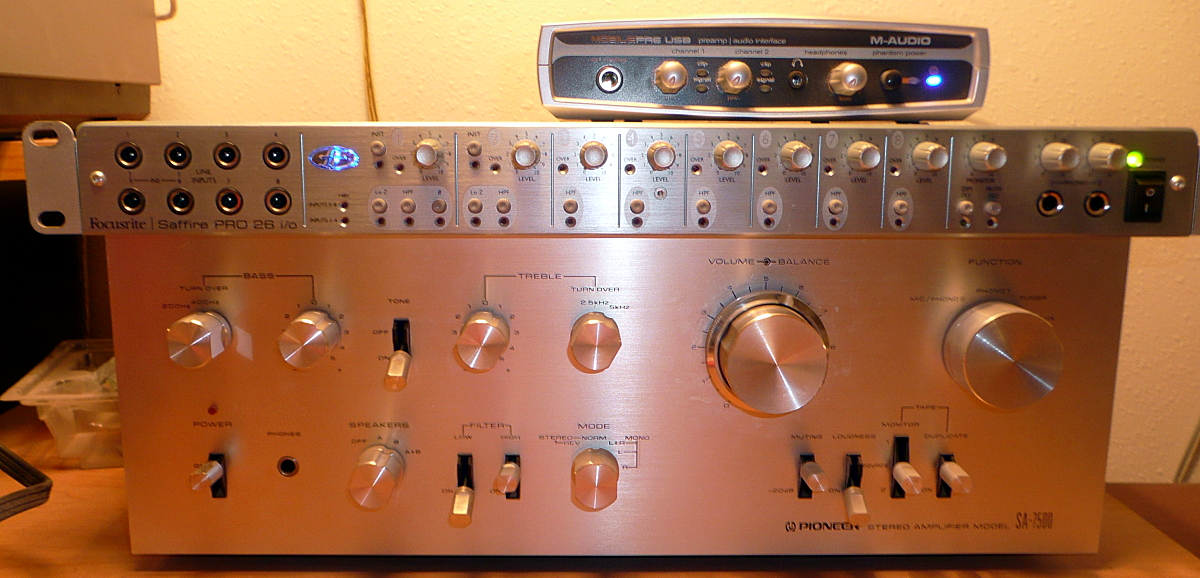
MobilePre USB, Saffire Pro 26 I/O, cherished old Pioneer stereo amp

Visit Linux Musicians and LinuxAudio.org to stay current on Linux audio, hardware, and to hang out with other musicians and studio nerds.

Making Good Recordings

I think the most important thing to keep in mind is giant bundles of special effects do not equal good audio software. Special effects are cheap and easy; they’re the Allen wrenches of audio software. You know those mechanic’s toolkits that boast of their hundreds of tools, and then most of them are Allen wrenches? It’s the same deal with special effects in audio. If you enjoy playing around with special effects, then enjoy the abundance and have a great time.

allen-wrench
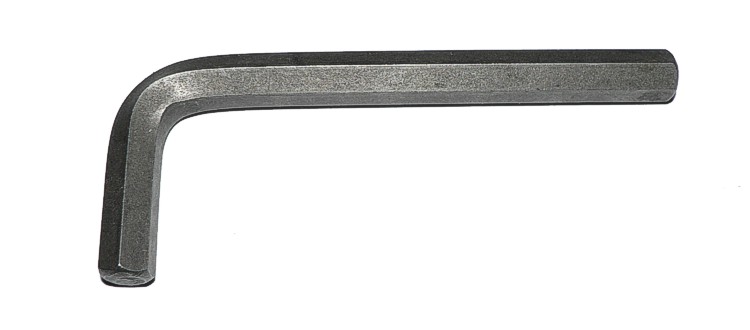
Hundreds of these may or may not be useful

But that’s not what makes great audio software. Great software is clean, and does not introduce noise or distortion, or add its own color. It is stable and fault-tolerant, so you don’t lose your hard work to a crash. It integrates nicely with other applications and audio routers like JACK. It does not introduce excess latency, or suck up too many CPU cycles. There is a reason professional recording studios are soundproofed and record multiple takes: it’s best to start with the most high-quality, faithful recording you can make. And there is one more factor, which is probably the most important one: your own skill and taste.

Your recordings are as good as the weakest link in your audio chain: microphones, instruments, mixers, analog-to-digital converters, and whatever else you like to use. Your recording studio can be as simple as a laptop and a good microphone, to a room full of fun electronics. Using a PC as the heart of your recording setup opens a world of possibilities for a low price. Me, I’d rather edit digital files on a computer than go back to the bad old days of faffing around with tape; it’s easier, a lot faster, and a lot more flexible.

Well that’s enough rambling on about hardware, so let’s take a look at some of the best audio software Linux has to offer.

Recording, Editing, Mastering

The Ardour digital audio workstation is a beautiful creation. You can group tracks arbitrarily (great for streamlining editing), it supports unlimited tracks (until your computer keels over), it has a soundcard picker if you have more than one, processes at 32-bits internally, supports very flexible signal routing, support networked audio, and a way lot more. It’s a bit of a learning curve, and it requires the JACK low-latency sound server and audio router on Linux, so this Crash Course in Audio Recording With Ardour DAW should help you get started.

The Audacity WAV recorder and editor is probably the most popular higher-end audio software for Linux. Audacity is easy to learn and chock-full of great features, and it is JACK-aware so you can combine it other audio software and hardware. It supports unlimited tracks, a multitude of effects and filters, and exports to a wide range of audio formats and quality levels. You can make your raw recordings in Audacity and then mix and edit them in Ardour, if Audacity doesn’t have the tools to do what you want. (If you buy my fabulous Audacity book from this link the Audacity team gets a percentage of the sale.)

3-multitracks
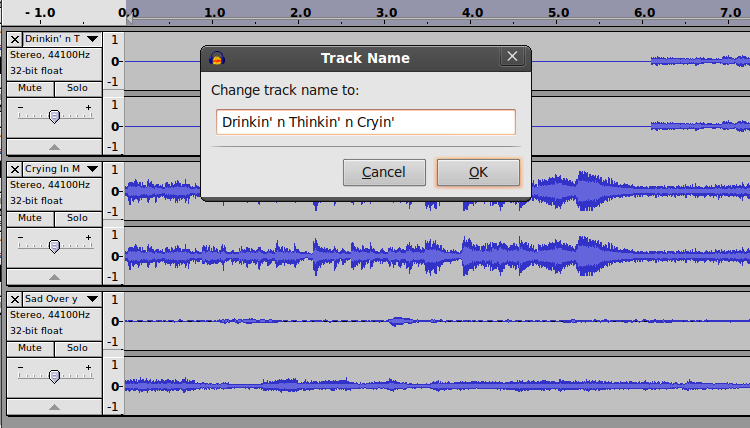
Multitrack recording in Audacity

MIDI and Synthesizer

The world of synthesizers is vast and fun, and MIDI (Musical Instrument Digital Interface) is the universal communications standard that lets MIDI hardware and software talk to each other. Rosegarden is an excellent MIDI sequencer, and it is also a composer and score editor. It is easy to learn, and full of advanced features.

FluidSynth is a great real-time software synthesizer and virtual MIDI device that doesn’t need a SoundFont-compatible soundcard, so all you need to be a literal one-person orchestra is FluidSynth and a Linux computer. If you want a prettier graphical interface get QSynth, a nice Qt front-end for FluidSynth. FluidSynth is the backend of a lot of other applications, for example VLC and MuseScore.

Score Writing

MuseScore is a sophisticated WYSIWYG music notation editor for writing and printing scores. It includes a mixer and synthesizer for instant previews of your work. It creates attractive-looking scores, and has extensive documentation.

What if you just want to create some nice sheet music with guitar chords and tablature? Then you want Chordii. It includes a database of nearly 400 chords, and of course you can add your own. It is fast to learn: your source files are plain text with the simple Chordii markup, and these are converted to nice-looking sheet music.

Drum Kit

The Hydrogen Drum Machine is still my favorite drum synth. It integrates nicely with Ardour, Audacity, and Rosegarden, it comes with a big batch of demos, and it will do whatever you want it to do because it is incredibly flexible. Check out More Cowbell with Hydrogen Drum Machine on Linux for a quick start with this excellent software.

Be a Radio Station

We still call it radio even though no radio waves are involved. Though they are, if you use a wireless Internet connection. At any rate, you can set up your own Internet broadcast with the excellent Airtime radio station management and automation software. You can schedule programming to run unattended, do live broadcasts, stream to Shoutcast and Icecast, and display program information for your eager listeners.

This is just a bare introduction to the wide world of Linux audio. Check out part 1 of this series for advice on best Linux distributions for multimedia production and best graphics software, and part 2 for a look at my favorite video production software.

Programming Android Motion Sensors

One of the really neat features of coding for a portable platform like a phone is that you can use its motion sensors to control the UI. How useful this is in a particular app varies from “neat gimmick” to “UI perfection” — admittedly the example here is more on the “gimmick” end of the spectrum, but it’ll get you started with using the Android motion sensors. We’ll carry on using the code from the previous three tutorials, but this time, we’re going to add a detector which enables you to start the timer by shaking the phone.

Accelerating…

Android has a whole raft of sensors, which are listed in the SensorEvent API, and which include the accelerometer, gyroscope, orientation, and some others. Not all devices will support all sensors. You can use SensorManager.getSensorList(Sensor.TYPE_ALL) to see a list of the available sensors.

However, all devices should include an accelerometer, and that’s what we’re going to use here. The regular accelerometer includes a contribution from gravity; so to establish the true acceleration of the device you need to apply a high-pass filter to the values returned (as described in the SensorEvent API docs). However, as of API level 9 (Android 2.3), there is also a linear accelerometer sensor type which has done this for you, and which just measures the acceleration of the device along each axis. We’re going to use this to save doing the hard work ourselves. (A gravity sensor type was also added in API level 9, should you happen to find yourself somewhere where gravity is non-Earth-standard.)

android axis deviceAndroid axes

A quick note about axes. The sensor X axis runs left-right across the screen (in its default orientation, so held in portrait mode for the average phone), the Y axis runs upwards along the screen, and the Z axis runs outwards from the screen (see the diagram in the SensorEvent API). These axes do NOT change direction when the device orientation changes, and more importantly, they are NOT the same as the co-ordinate system used by the Android 2D screen drawing APIs. We won’t need to deal with this issue in this code, but if you’re using the sensors for gameplay UI, it can be a bit of a headache, especially as the 3D co-ordinates are different again. Drawing things out on scraps of paper usually helps.

Sensing events

So, how do we set up our code to sense an accelerometer event? Easy: just make your Activity implement SensorEventListener:

public class CountdownActivity extends ListActivity 
                               implements SensorEventListener {
  ...
}

To implement SensorEventListener, we’ll need to override onAccuracyChanged() and onSensorChanged(), but first, let’s get a SensorManager and Sensor set up:

public class CountdownActivity extends ListActivity 
                               implements SensorEventListener {
	
  private SensorManager manager;
  private Sensor accel;
  public void onCreate(Bundle savedInstanceState) {
    super.onCreate(savedInstanceState);
    manager = (SensorManager)getSystemService(SENSOR_SERVICE);
    accel = manager.getDefaultSensor(Sensor.TYPE_LINEAR_ACCELERATION);
    // rest of onCreate code; see previous tutorials
  }
}

We now have an acceleration sensor to use, but currently it’s not actually been turned on. To do that, we need to implement onResume() and onPause():

protected void onResume() {
  super.onResume();
  manager.registerListener(this, accel, SensorManager.SENSOR_DELAY_GAME);
}
public void onPause() {
  super.onPause();
  manager.unregisterListener(this);
}

The EventListener will listen for events in the given sensor, with the given sensitivity. We’re using the GAME value for the sensor delay, which is sensitive enough for most games; you also have NORMAL, UI, and FASTEST. We can use this as the SensorEventListener to be registered, because we’ve implemented SensorEventListener in this Activity. Otherwise we’d have to write another class to handle this.

Note that we only have to register the Listener in onResume(); this is because onResume() is always run when onCreate() runs, so any code here will be run when the Activity is created, not just when it’s resumed. (There’s a diagram of the Android Activity lifecycle in the docs). It’s very important to remember to unregister your Listener when your Activity is paused. The system won’t do it automatically for you, and listening for events uses up a lot of battery. Draining the battery in the background tends to make you unpopular with users.

Android activity lifecycleAndroid activity lifecycle

Having set everything up and registered the Listener, we need to write the methods that define what happens if a SensorEvent is detected:

public void onAccuracyChanged(Sensor sensor, int accuracy) {
  // not going to do anything with this.
}
public void onSensorChanged(SensorEvent event) {
  showTimer(countdownSeconds * MILLIS_PER_SECOND);
}

We’re not going to bother doing anything in particular if the sensor accuracy changes, as it doesn’t really interest us here. However, if the sensor changes at all, we’re going to interpret that as a shake, and show the timer (remember from previous tutorials that showTimer()also starts it; you might want to improve the code by breaking different parts of this out into different methods).

Compile it, run it (you’ll need to run it on a phone, not on the emulator, as described in previous tutorials), and you should be able to start the timer by shaking the phone. However, you’ll notice that only a very tiny movement restarts the timer — this is a bit more sensitive than we want. To improve this, we can get the actual values of the sensor event and only act if they are above a certain amount. I found that a threshold of 3 worked well, and this code doesn’t distinguish between the direction of the shake:

public void onSensorChanged(SensorEvent event) {
  int xValue = event.values[0];
  int yValue = event.values[1];
  int zValue = event.values[2];
  if (xValue + yValue + zValue > 3 ) {
    showTimer(countdownSeconds * MILLIS_PER_SECOND);
  }

This code now provides a basic interaction between the accelerometer and the timer, but there’s plenty more you could do to improve it. For example, you could write a method to stop the timer if the phone is shaken again. In general, adding some more detailed stop/start/reset code is probably useful as the app becomes more complicated. You can also play around with the sensor code a bit to get a better grasp of how the sensor works — you could for example use log output to find out what the values look like, or try varying them in different directions and acting differently on a sideways shake than an up and down shake. The best way to get to grips with the options and to improve your Android coding chops is to get experimenting and rewriting!


Image Credits

Axis Image and Activity lifecyle diagram: Portions of this page are reproduced from work created and shared by the Android Open Source Project and used according to terms described in the Creative Commons 2.5 Attribution License.


Seigo: Plasma.next()?

LWN.net LogoAaron Seigo describes the development plans for the Plasma framework. “However, in Plasma Active we’ve made two purposeful decisions: do not expose the hierarchical file system (unless the use case dictates that as a requirement) and do not expose details that are not relevant to the usage of the device (e.g. I care that I can open that spreadsheet, it’s less important at that moment that the application is Calligra Sheets). Thus to open a spreadsheet one opens the file manager and goes to Documents, or simply searches for the document from the Launch area directly. No file system, no application launchers.

Read more at LWN

Google offers exploit bounties for Pwn2Own and Pwnium

Chrome logoAt the CanSecWest conference, Google is sponsoring the Pwn2Own challenge as well as putting up $3.14159 million for hackers who find exploits in Chrome OS for its own Pwnium competitionGoo

Read more at The H

Schulz: The meaning of the 4.0

LWN.net LogoCharles H. Schulz Looks forward to the LibreOffice 4.0 release, currently planned for early February. “On a more abstract level, these changes also mark a more radical departure from the OpenOffice.org codebase, and it is now becoming quite difficult to just assume that because OpenOffice.org, Apache OpenOffice behave in one specific way LibreOffice would do just the same. Of course the API changes do not make the whole work themselves, but the work we started with the 3.4 branch is paying off: LibreOffice 4.0 is becoming a different animal, and that comes with its own distinct advantages while clearly showing our ability as a community to innovate and move forward.”  Read more at LWN

House panel demands answers regarding Swartz prosecution

Saying they had “many questions” about the prosecution of Internet activist Aaron Swartz, who committed suicide earlier this month, two key members of the House Oversight and Government Reform Committee have requested a briefing with the Justice Department.

Committee Chairman Darrell Issa (R-Calif.) and ranking member Elijah Cummings (D-Md.) sent a letter (see below) today to Attorney General Eric Holder that outlines seven questions the lawmakers have for prosecutors concerning their prosecution of Swartz…Read more at CNET News

ITU signs off on H.265 video standard

The Register® — Biting the hand that feeds ITHigh Efficiency Video Coding said to need half the bit rate of H.264 The International Telecommunications Union (ITU) has signed off on High Efficiency Video Coding (HEVC), a video compression standard expected to succeed the wildly popular H.264.……

The International Telecommunications Union (ITU) has signed off on High Efficiency Video Coding (HEVC), a video compression standard expected to succeed the wildly popular H.264.

ITU-T H.265 / ISO/IEC 23008-2 HEVC, to give the new standard its full name, is seen by the ITU as “designed to take account of advancing screen resolutions” and “is expected to be phased in as high-end products and services outgrow the limits of current network and display technology.”

HEVC can handle resolutions up to 7680×4320…Read more at The Register

Development Release: Linux Deepin 12.12 Alpha

Linux DeepinA preview version of Linux Deepin 12.12, a popular Chinese community distribution, has been unleashed for testing. This is the first version that ships with the brand new Deepin Desktop Environment (DDE), which replaces GNOME Shell as the default desktop. DDE along with its Deepin System Settings (DSS)….Read more at DistroWatch

QEMU 1.3.1 Brings In A Bunch Of Fixes

The first (and only planned) point release to QEMU 1.3 is now available. The QEMU 1.3.1 release fixes just over two dozen bugs, including critical issues for OpenBSD guests…

Read more at Phoronix

Provision a New Linux Dev Environment in Nothing Flat with Puppet

In this two-part series we’ll learn how to automate setting a up new development environment on Linux using Puppet and Vagrant.

Setting up a development environment for a web application can seem simple—just use SQLite and WEBrick or a similar development server—but taking shortcuts can quickly lead to problems. What happens when you need to onboard new team members? What if your team members are geographically distributed? How do you prevent bugs from creeping in when the production environment’s configuration drifts away from the development environment? Even if you’ve managed to set up a picture-perfect development environment, what happens when a developer inevitably breaks its configuration?

In the last few years a huge number of DevOps tools have sprung up to help teams automate the provisioning and configuration of their infrastructure. These include Puppet, a configuration management tool, and Vagrant, a tool to automate the management and provisioning of development environments. While these tools are often thought of as being most useful for Ops staff, this tutorial will show how they can be used to manage a development environment for a team working on a web application.

By taking advantage of the infrastructure-as-code approach of these tools, the configuration of environments can be version controlled along with the source code for the application itself. This allows developers to work in extremely realistic environments, often identical to those managing a production application, while reducing the overhead involved in managing the environment. It also significantly decreases the onboarding cost for a new developer: all they have to do is clone a repository, run a few simple commands, and they have their own copy of the environment up and running. Most importantly, it means that any changes to the setup to the environment can be immediately reflected across all copies of the environment through the use of version control systems.

In the first part of this tutorial, we’ll be examining how to use Vagrant to automate away the pain of managing VMs on your local system. The next part of the tutorial will show how to use Puppet’s powerful declarative language to simply describe the elements of your environment and their relations to each other. By the end of the series, you’ll be able to define a powerful, reusable development environment with just a few simple configuration files. This tutorial is oriented towards web application development, and will show how to configure a VM to run apache on code shared from your local machine.

Using Vagrant to Manage VMs

Vagrant is a configuration-centric tool for managing VMs on your local machine. Using Vagrant, you only need to write a simple file specifying certain attributes you want your system to have, and Vagrant takes care of provisioning and managing the VM for you. It also provides an elegant command line interface for interacting with the VMs.

In order to get started with Vagrant, you’ll need to download the appropriate version of VirtualBox for your system, since that’s what Vagrant uses on the backend. You’ll also need to grab the Vagrant package for your distro and add /opt/vagrant/bin to your PATH. In the examples we’ll be using Debian 6.0, but all you should need to change is which packages you grab and install.

$ wget http://download.virtualbox.org/virtualbox/4.2.6/virtualbox-4.2_4.2.6-82870~Debian~squeeze_i386.deb
$ sudo dpkg -i virtualbox-4.2_4.2.6-82870~Debian~squeeze_i386.deb
$ wget http://files.vagrantup.com/packages/476b19a9e5f499b5d0b9d4aba5c0b16ebe434311/vagrant_i686.deb
$ sudo dpkg -i vagrant_i686.deb

We’ll also need to grab a boxfile. Boxfiles are the base images Vagrant builds its VMs on, specifying things like disk capacity and the installed operating system. For our environment we’ll grab a simple boxfile for a Lucid 32-bit system:

$ vagrant box add lucid32 http://files.vagrantup.com/lucid32.box

Creating our source controlled development environment

Now we can create a directory for our dev environment. We’ll also go ahead and initialize it as a git repository.

$ mkdir sample-dev-env
$ cd sample-dev-env 
$ touch Vagrantfile
$ git init
$ git add Vagrantfile 
$ git commit -m "Starting our new dev environment"

The Vagrantfile we’ve just created is the central configuration file that Vagrant uses to determine the configuration of the VMs it manages. You can automatically generate a sample Vagrantfile with lots of documentation in it by running vagrant init, but for now we’ll just set up our own Vagrantfile to configure one VM with the boxfile we’ve added, and set it up to forward port 80 on the VM to port 3000 on our local machine so we can access the webapp being run on the VM on our local machine:

Vagrant::Config.run do |config|
  config.vm.box = "lucid32"
  config.vm.forward_port 80, 3000
end

That’s it! Vagrant automatically shares any files in the project directory to a shared folder located at /vagrant on the VM, so if we just put our web app folder into the dev env directory and execute vagrant up, vagrant will bring up a virtual machine with our code on it. Accessing that virtual machine is simplified by the use of vagrant ssh, the ssh wrapper Vagrant provides for accessing your VMs.

$ vagrant up
$ vagrant ssh
$ ls /vagrant
 Vagrantfile your_webapp_here

Now that we have a Vagrantfile that defines our basic configuration, we can commit our changes to our dev env git repo:

$ git add Vagrantfile
$ git commit -m "Basic Vagrantfile"

Of course, that still leaves us with a lot of work to do: how do we make sure the necessary libraries and packages are installed? How do we ensure the webapp is running? How do we configure the system so that Apache can find our web application? In the next part of this tutorial, we’ll learn how to use Puppet to provision our Vagrant-managed virtual machines, so that developers can go from scratch to having a working VM serving your app just by cloning your repository and running vagrant up.

Continue the tutorial with part 2: How to Jumpstart Linux Development with Puppet and Vagrant.