If useful documentation is so important to the success of projects and developer well-being, why don’t all projects have it? The answer, I believe, is that like good code, good documentation is difficult and time consuming to write.
In my eyes, there are eight rules that we can follow to produce good documentation:
Write documentation that is inviting and clear
Write documentation that is comprehensive, detailing all aspects of the project
Write documentation that is skimmable
Write documentation that offers examples of how to use the software
Write documentation that has repetition, when useful
Developing and deploying applications that communicate in distributed systems, especially in cloud computing, is complex. Messaging has evolved to address the general needs of distributed applications but hasn’t gone far enough. We need a messaging system that takes the next steps to address cloud, edge, and IoT needs. These include ever-increasing scalability requirements in terms of millions, if not billions of endpoints, a new emphasis toward resiliency of the system as a whole over individual components, end-to-end security, and the ability to have a zero-trust system. In this post we’ll discuss the steps NATS is taking to address these needs, leading toward a securely connected world.
Let’s break down the challenges into scalability, resiliency at scale, and security.
Scalability
To support millions, or even billions of endpoints spanning the globe, most architectures would involve a federated approach with many layers filtering up to a control layer, driven by a required central authority for configuration and security. Instead, NATS is taking a distributed and decentralized approach.
A team of security researchers has discovered another serious side-channel vulnerability in Intel CPUs that could allow an attacker to sniff out sensitive protected data, like passwords and cryptographic keys, from other processes running in the same CPU core with simultaneous multi-threading feature enabled.
The vulnerability, codenamed PortSmash (CVE-2018-5407), has joined the list of other dangerous side-channel vulnerabilities discovered in the past year, including Meltdown and Spectre, TLBleed, and Foreshadow.
Mobile apps have been a boon for developers. With Android the most widely used platform on the planet, it makes perfect sense for developers to ply their trade in the mobile market. Not only do developers have the chance to get their work seen, they can make money from the Google Play Store or the iOS App Store. For those who have yet to delve into the mobile development market, however, the process may be a bit daunting. What tools are available? More importantly, what open source tools are available? After all, if you’re developing on the Linux platform, you probably don’t want to work with proprietary software.
So, to get started creating the greatest mobile app on the planet, you need to get the right tools. One such tool is a framework. In programming terms, a framework is an abstraction in which common code (that provides a generic or general functionality) can be used and rewritten to provide a specific functionality. Say you need Function X for your app, but you don’t want to write all the necessary code for that function. You can use a framework that offers Function X and modify that function so it perfectly fits your needs. In other words, a framework is a way to make development easier and more efficient.
Are there open source frameworks available for mobile development? There certainly are. Let’s take a look at two tools available for this particular task.
Ionic
Ionic is both 100 percent free and open source. This project, licensed under MIT, enables you to build fully cross-platform, progressive web and native mobile apps for every major app store… all from a single codebase. You can develop Ionic apps on any platform you like. Of course, our platform of choice is Linux. Fortunately, Ionic offers a simple command-line interface (CLI) that can be used to create, build, test, and deploy your apps to any platform. Ionic also features:
Ionic Native, which allows you to unlock native APIs (and other features), by wrapping Cordova plugins in TypeScript.
Live Reload, which allows you to compile and re-deploy an app at every development step.
Ionicons, which is an icon pack that includes hundreds of the most common app icons (all MIT licensed and ready to use).
Deeplinking, which allow you to start your app from a web link (and can even load a specific view out of the box).
AoT Compiling, which helps your apps to load faster.
Create a free Ionic account here and then install Ionic on your distribution. For example, if you’re using Ubuntu as your development platform, to install Ionic you must first install Node.js and npm like so:
Open a terminal window.
Issue the command sudo apt install curl
Add the necessary repository with the command curl -sL https://deb.nodesource.com/setup_10.x | sudo bash –
Install node.js and npm with the command sudo apt install nodejs
Install Ionic with the command:
sudo npm install -g ionic
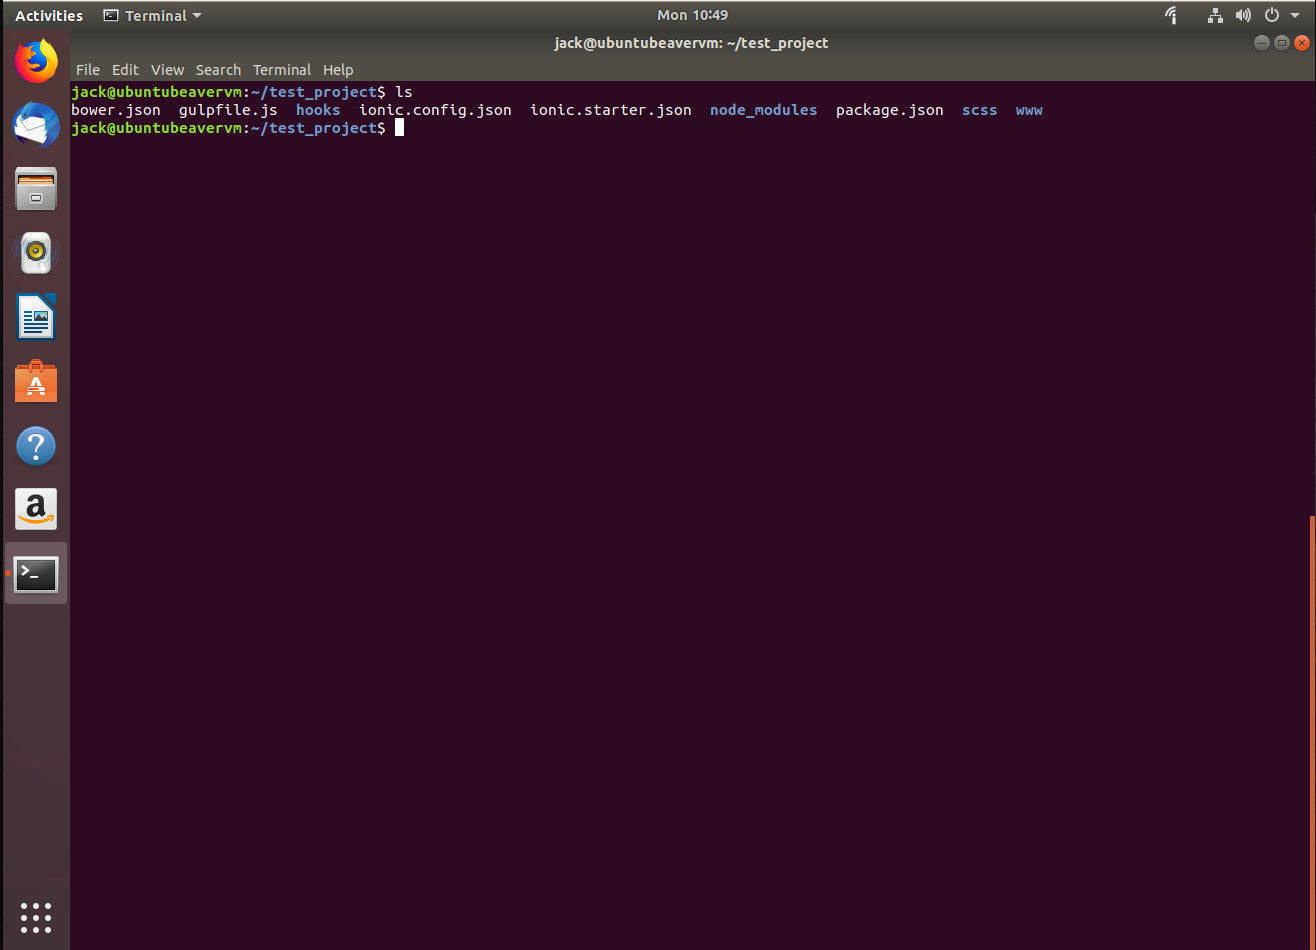
You can now begin creating and working with your project. To create a new project, issue the command:
ionic start PROJECT_NAME blank --type ionic1
where PROJECT_NAME is the name of your project. You should see a newly created folder (with the same name as your project), that includes a number of new files and folders (Figure 1).
Figure 1: Creating a new Ionic project.
For more information on using the Ionic CLI, check out the official Ionic Guide.
PhoneGap
PhoneGap is an open source distribution of Adobe Cordova that makes it possible to develop your mobile app using web development technologies (e.g., HTML, CSS, and JavaScript) in just a few minutes. If you don’t want to work from the command line, PhoneGap does offer a desktop app (which is only available for macOS and Windows). The desktop app uses the same libraries found in the CLI, but it makes it a bit less daunting for those who prefer a more point and click-friendly method of app development.
PhoneGap includes the following:
PhoneGap Developer is a mobile app to connect your devices to your development machine (to see changes you make instantly).
PhoneGap Build enables you get app-store ready apps without having to maintain native SDKs for each mobile environment.
Plugin Library gets you access to a robust library of plugins to extend the capability of your mobile apps.
Third party tools is where you can find additional tools, created by the PhoneGap community, to help test, debug, and manage apps.
Developer community allows you to connect to thousands of developers working with PhoneGap.
Mobile App helps you pair your mobile device to the desktop app, so you can preview your new app.
To install the PhoneGap CLI tool, you’ll need jode.js and npm installed (as described above). Once that is taken care of, you can install the PhoneGap CLI tool with the command:
sudo npm install -g phonegap@latest
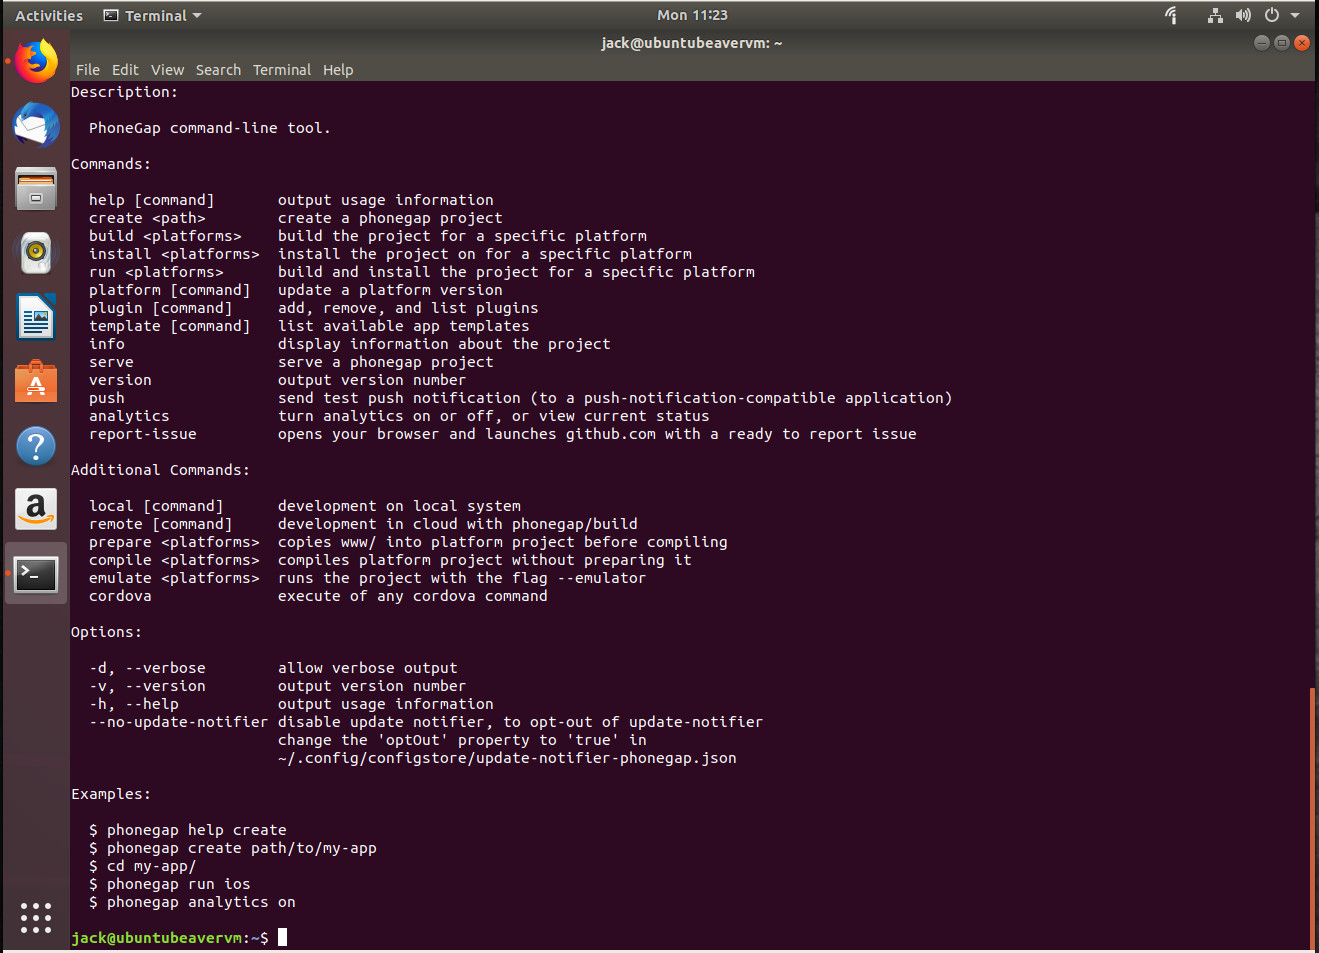
Once you’ve install the CLI, issue the command phonegapto see the help file (and show that the tool was successfully installed—Figure 2).
Figure 2: The PhoneGap CLI has been installed and is ready to work.
You might find you run into a permissions issue, when running the phonegap command. To resolve that, issue the command:
sudo chown -R USER:USER ~/.config/configstore
Where USER is your Linux username.
You should now be able to create your first project with the command:
phonegap create PROJECT_NAME
Where PROJECT_NAME is the name of your project.
To find out more on how to use the PhoneGap CLI, check out this reference.
There’s more to be found
There are plenty more open source mobile developer frameworks to be found. These two tools, however, can be thought of as a great launching point to help you get started with your mobile development journey. They are certainly not the only players on the field, but offer quite a lot in the way of power, flexibility, and feature sets. Give one of these tools a try and see if it doesn’t empower your mobile app development with the help of open source.
URLify: convert letter sequences into safe URLs with hex equivalents.
This is my 155th column. That means I’ve been writing for Linux Journal for:
$ echo "155/12" | bc
12
No, wait, that’s not right. Let’s try that again:
$ echo "scale=2;155/12" | bc
12.91
Yeah, that many years. Almost 13 years of writing about shell scripts and lightweight programming within the Linux environment. I’ve covered a lot of ground, but I want to go back to something that’s fairly basic and talk about filenames and the web. …
So purely as an exercise in scripting, let’s write a script that converts any string you hand it into a “web-safe” sequence. Before starting, however, pull out a piece of paper and jot down how you’d solve it.
Normalizing Filenames for the Web
My strategy is going to be easy: pull the string apart into individual characters, analyze each character to identify if it’s an alphanumeric, and if it’s not, convert it into its hexadecimal ASCII equivalent, prefacing it with a “%” as needed.
Kubernetes (pronounced koo-ber-NET-eez, from the Greek word for “helmsman” or “pilot”) is the most rapidly adopted open-source project in history since its release in mid-2014. According to 451 Research, it has already moved into more than 70 percent of organizations using the wildly popular software called containers, which Kubernetes manages. Containers make it simple to encapsulate applications in a form that’s easy to run on any computing environment in companies’ data centers or in public clouds. By some estimates, enterprise adoption rate of Kubernetes will reach 90 percent by next year.
The appeal goes beyond just faster software development, though. Kubernetes has been embraced by every major cloud and on-premises infrastructure provider, meaning that software written for it can run practically anywhere. That will put cloud on the fast track to become the default platform for nearly all new software development. It also lowers the barriers to moving software workloads across multiple public and private cloud platforms, giving organizations unprecedented operational flexibility. …
On its face, container orchestration is a topic that only a geek could love. Kubernetes basically automates the process of setting up and managing software containers at very large scale. To understand why that’s a big deal, it helps to know a bit about how software development has evolved.
Never heard of Colorado-based System76? Think of the company as the Linux alternative to boutique PC builders like Digital Storm, Maingear or Falcon Northwest. System76 specializes in preloading laptops, desktops and mini PCs with a Linux operating system, either Ubuntu or its own Pop!_OS distribution. But today marks a dramatic turning point for the company. Where before it traditionally customized systems inside a mass-produced chassis, the new Thelio PCs are a leap forward in originality, built from the ground up with an “open hardware” approach.
Learn how to use the find command in this tutorial from our archives.
It goes without saying that every good Linux desktop environment offers the ability to search your file system for files and folders. If your default desktop doesn’t — because this is Linux — you can always install an app to make searching your directory hierarchy a breeze.
But what about the command line? If you happen to frequently work in the command line or you administer GUI-less Linux servers, where do you turn when you need to locate a file? Fortunately, Linux has exactly what you need to locate the files in question, built right into the system.
The command in question is find. To make the understanding of this command even more enticing, once you know it, you can start working it into your Bash scripts. That’s not only convenience, that’s power.
Let’s get up to speed with the find command so you can take control of locating files on your Linux servers and desktops, without the need of a GUI.
How to use the find command
When I first glimpsed Linux, back in 1997, I didn’t quite understand how the find command worked; therefore, it never seemed to function as I expected. It seemed simple; issue the command find FILENAME (where FILENAME is the name of the file) and the command was supposed to locate the file and report back. Little did I know there was more to the command than that. Much more.
If you issue the command man find, you’ll see the syntax of the find command is:
Naturally, if you’re unfamiliar with how man works, you might be confused about or overwhelmed by that syntax. For ease of understanding, let’s simplify that. The most basic syntax of a basic find command would look like this:
find /path option filename
Now we’ll see it at work.
Find by name
Let’s break down that basic command to make it as clear as possible. The most simplistic structure of the find command should include a path for the file, an option, and the filename itself. You may be thinking, “If I know the path to the file, I’d already know where to find it!”. Well, the path for the file could be the root of your drive; so / would be a legitimate path. Entering that as your path would take find longer to process — because it has to start from scratch — but if you have no idea where the file is, you can start from there. In the name of efficiency, it is always best to have at least an idea where to start searching.
The next bit of the command is the option. As with most Linux commands, you have a number of available options. However, we are starting from the beginning, so let’s make it easy. Because we are attempting to find a file by name, we’ll use one of two options:
name – case sensitive
iname – case insensitive
Remember, Linux is very particular about case, so if you’re looking for a file named Linux.odt, the following command will return no results.
find / -name linux.odt
If, however, you were to alter the command by using the -iname option, the find command would locate your file, regardless of case. So the new command looks like:
find / -iname linux.odt
Find by type
What if you’re not so concerned with locating a file by name but would rather locate all files of a certain type? Some of the more common file descriptors are:
f – regular file
d – directory
l – symbolic link
c – character devices
b – block devices
Now, suppose you want to locate all block devices (a file that refers to a device) on your system. With the help of the -type option, we can do that like so:
find / -type c
The above command would result in quite a lot of output (much of it indicating permission denied), but would include output similar to:
We can use the same option to help us look for configuration files. Say, for instance, you want to locate all regular files that end in the .conf extension. This command would look something like:
find / -type f -name "*.conf"
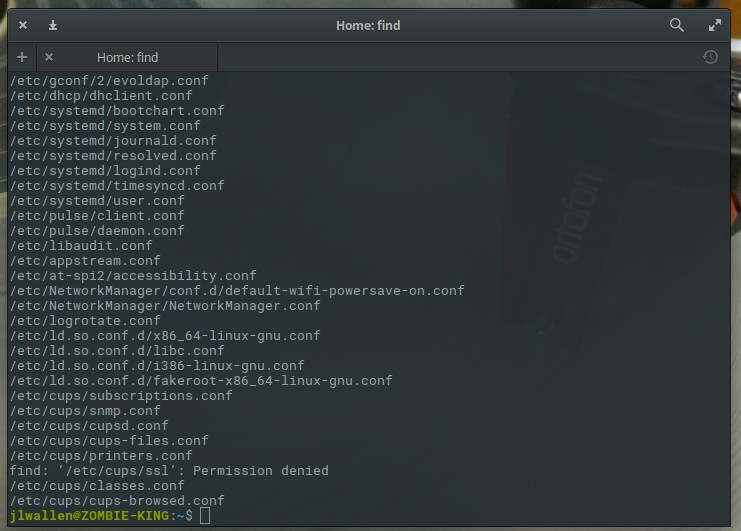
The above command would traverse the entire directory structure to locate all regular files ending in .conf. If you know most of your configuration files are housed in /etc, you could specify that like so:
find /etc -type f -name “*.conf”
The above command would list all of your .conf files from /etc (Figure 1).
Figure 1: Locating all of your configuration files in /etc.
Outputting results to a file
One really handy trick is to output the results of the search into a file. When you know the output might be extensive, or if you want to comb through the results later, this can be incredibly helpful. For this, we’ll use the same example as above and pipe the results into a file called conf_search. This new command would look like:
find /etc -type f -name “*.conf” > conf_search
You will now have a file (conf_search) that contains all of the results from the find command issued.
Finding files by size
Now we get to a moment where the find command becomes incredibly helpful. I’ve had instances where desktops or servers have found their drives mysteriously filled. To quickly make space (or help locate the problem), you can use the find command to locate files of a certain size. Say, for instance, you want to go large and locate files that are over 1000MB. The find command can be issued, with the help of the -size option, like so:
find / -size +1000MB
You might be surprised at how many files turn up. With the output from the command, you can comb through the directory structure and free up space or troubleshoot to find out what is mysteriously filling up your drive.
You can search with the following size descriptions:
c – bytes
k – Kilobytes
M – Megabytes
G – Gigabytes
b – 512-byte blocks
Keep learning
We’ve only scratched the surface of the find command, but you now have a fundamental understanding of how to locate files on your Linux systems. Make sure to issue the command man find to get a deeper, more complete, knowledge of how to make this powerful tool work for you.
Learn more about Linux through the free “Introduction to Linux” course from The Linux Foundation and edX.
With over 75 sessions, keynotes, hands-on technical workshops, social activities, evening events, and more, Hyperledger Global Forum gives you a unique opportunity to collaborate with the Hyperledger community, make new connections, learn about the latest production deployments, and further advance your blockchain skills. In addition to previously announcedkeynote speakers, new keynote speakers include:
Frank Yiannas, Vice President of Food Safety, Walmart
David Treat, Managing Director, Accenture
Session Highlights Include:
Technical Track:
Approaches to Consortia Governance and Access Control in Hyperledger Fabric Applications – Mark Rakhmilevich, Oracle
Chaincode Best Practices – Sheehan Anderson, State Street
Lessons Learned Creating a Usable, Real-world Web Application using Fabric/Composer – Waleed El Sayed & Markus Stauffiger, 4eyes GmbH
Secure your spot now and save up to $150 with the current registration rate, available through November 25. Register now >>
For years, Ansible has been a go-to choice for infrastructure automation. As Kubernetes adoption has skyrocketed, Ansible has continued to shine in the emerging container orchestration ecosystem.
Ansible fits naturally into a Kubernetes workflow, using YAML to describe the desired state of the world. Multiple projects, including the Automation Broker, are adapting Ansible for use behind specific APIs. This article will focus on a new technique, created through a joint effort by the Ansible core team and the developers of Automation Broker, that uses Ansible to create Operators with minimal effort.
An Operator is a Kubernetes controller that deploys and manages a service or application in a cluster. It automates human operation knowledge and best practices to keep services running and healthy.