Home Blog Page 364

How Security Can Bridge the Chasm with Development

Enhancing the relationships between security and engineering is crucial for improving software security. These six steps will bring your teams together.

There’s always been a troublesome rift between enterprise security teams and software developers. While the friction is understandable, it’s also a shame, because the chasm between these teams makes it all the more challenging to build quality applications that are both great to use and safe.

Why is the strife between security teams and software developers so acute? Essentially, it’s because both teams have, to a large degree, opposing goals. For security, it’s about ensuring that apps are not easily exploitable and reasonably secure versus, on the development side, creating new applications and features for existing ones.

The reality is that both software development and security are hard. The mindsets – breaker verses builder — are completely different. And we as security professionals need to take different approaches than we have in the past. Let’s take a deeper look at these challenges, and then how security teams can help close the gap.

Read more at Dark Reading

Free Resources for Securing Your Open Source Code

While the widespread adoption of open source continues at a healthy rate, the recent 2018 Open Source Security and Risk Analysis Report from  Black Duck and Synopsys reveals some common concerns and highlights the need for sound security practices. The report examines findings from the anonymized data of over 1,100 commercial codebases with represented Industries from automotive, Big Data, enterprise software, financial services, healthcare, IoT, manufacturing, and more.

The report highlights a massive uptick in open source adoption, with 96 percent of the applications scanned containing open source components.  However, the report also includes warnings about existing vulnerabilities. Among the findings:

  • What is worrisome is that 78 percent of the codebases examined contained at least one open source vulnerability, with an average 64 vulnerabilities per codebase.”

  • “Over 54 percent of the vulnerabilities found in audited codebases are considered high-risk vulnerabilities.”

  • Seventeen percent of the codebases contained a highly publicized vulnerability such as Heartbleed, Logjam, Freak, Drown, or Poodle.

“The report clearly demonstrates that with the growth in open source use, organizations need to ensure they have the tools to detect vulnerabilities in open source components and manage whatever license compliance their use of open source may require,” said Tim Mackey, technical evangelist at Black Duck by Synopsys.

Indeed, with ever more impactful security threats emerging,the need for fluency with security tools and practices has never been more pronounced. Most organizations are aware that network administrators and sysadmins need to have strong security skills, and, in many cases security certifications. In this article, we explored some of the tools, certifications and practices that many of them wisely embrace.

The Linux Foundation has also made available many informational and educational resources on security. Likewise, the Linux community offers many free resources for specific platforms and tools. For example, The Linux Foundation has published a Linux workstation security checklist that covers a lot of good ground. Online publications ranging from the Fedora security guide to the Securing Debian Manual can also help users protect against vulnerabilities within specific platforms.

The widespread use of cloud platforms such as OpenStack is also stepping up the need for cloud-centric security smarts. According to The Linux Foundation’s Guide to the Open Cloud: “Security is still a top concern among companies considering moving workloads to the public cloud, according to Gartner, despite a strong track record of security and increased transparency from cloud providers. Rather, security is still an issue largely due to companies’ inexperience and improper use of cloud services.”

For both organizations and individuals, the smallest holes in implementation of routers, firewalls, VPNs, and virtual machines can leave room for big security problems. Here is a collection of free tools that can plug these kinds of holes:

  • Wireshark, a packet analyzer

  • KeePass Password Safe, a free open source password manager

  • Malwarebytes, a free anti-malware and antivirus tool

  • NMAP, a powerful security scanner

  • NIKTO, an open source web server scanner

  • Ansible, a tool for automating secure IT provisioning

  • Metasploit, a tool for understanding attack vectors and doing penetration testing

Instructional videos abound for these tools. You’ll find a whole tutorial series for Metasploit, and video tutorials for Wireshark. Quite a few free ebooks provide good guidance on security as well. For example, one of the common ways for security threats to invade open source platforms occurs in M&A scenarios, where technology platforms are merged—often without proper open source audits. In an ebook titled Open Source Audits in Merger and Acquisition Transactions, from Ibrahim Haddad and The Linux Foundation, you’ll find an overview of the open source audit process and important considerations for code compliance, preparation, and documentation.

Meanwhile, we’ve previously covered a free ebook from the editors at The New Stack called Networking, Security & Storage with Docker & Containers. It covers the latest approaches to secure container networking, as well as native efforts by Docker to create efficient and secure networking practices. The ebook is loaded with best practices for locking down security at scale.

All of these tools and resources, and many more, can go a long way toward preventing security problems, and an ounce of prevention is, as they say, worth a pound of cure. With security breaches continuing, now is an excellent time to look into the many security and compliance resources for open source tools and platforms available. Learn more about security, compliance, and open source project health here.

Free Ebook Offers Insight on 16 Open Source AI Projects

Open source AI is flourishing, with companies developing and open sourcing new AI and machine learning tools at a rapid pace. To help you keep up with the changes and stay informed about the latest projects, The Linux Foundation has published a free ebook by Ibrahim Haddad examining popular open source AI projects, including Acumos AI, Apache Spark, Caffe, TensorFlow, and others.

“It is increasingly common to see AI as open source projects,” Haddad said. And, “as with any technology where talent premiums are high, the network effects of open source are very strong.”

Download the ebook now to learn more about the most successful open source AI projects and read what it takes to build your own successful community.

Read more at The Linux Foundation

Fortran and Docker: How to Combine Legacy Code with Cutting-Edge Components

When you think about Fortran, you might conjure up images of punch cards, mainframes, and engineers from the past. You might not think about fast-running web-based tools or modern architecture. But here at Urban, Fortran still has a place alongside cutting edge tools.

In this post, I’ll walk you behind the scenes to share the benefits of Fortran and how we combine it with other, “modern” technologies, such as containers, to provide greater flexibility, portability, and scaling without the pain of re-writing the model.

Why Fortran?

Organizations with long institutional memory, like Urban, often have many complex models in older programming languages that would be time-consuming to rewrite in a more “modern” language (e.g., Python). These models are frequently referred to as legacy systems. When these systems are stable, well-documented and still actively developed, there is no reason to read the word “legacy” as a pejorative.

Read more at Medium

OpenStack Spins Out Its Zuul Open Source CI/CD Platform

There are few open-source projects as complex as OpenStack, which essentially provides large companies with all the tools to run the equivalent of the core AWS services in their own data centers. To build OpenStack’s  various systems the team also had to develop some of its own DevOps tools, and, in 2012, that meant developing Zuul, an open-source continuous integration and delivery (CI/CD) platform. Now, with the release of Zuul v3, the team decided to decouple Zuul from OpenStack and run it as an independent project. It’s not quite leaving the OpenStack ecosystem, though, as it will still be hosted by the OpenStack Foundation.

Now all of that may seem a bit complicated, but at this point, the OpenStack Foundation  is simply the home of OpenStack and other related infrastructure projects. The first one of those was obviously OpenStack itself, followed by the Kata Containers project late last year. Zuul is simply the third of these projects.

Read more at TechCrunch

How to Run Your Own Git Server

Manage your code on your own server by running a bare, basic Git server or via the GitLab GUI tool.

Learn how to set up your own Git server in this tutorial from our archives.

Git is a versioning system developed by Linus Torvalds, that is used by millions of users around the globe. Companies like GitHub offer code hosting services based on Git. According to reports, GitHub, a code hosting site, is the world’s largest code hosting service. The company claims that there are 9.2M people collaborating right now across 21.8M repositories on GitHub. Big companies are now moving to GitHub. Even Google, the search engine giant, is shutting it’s own Google Code and moving to GitHub.

Run your own Git server

GitHub is a great service, however there are some limitations and restrictions, especially if you are an individual or a small player. One of the limitations of GitHub is that the free service doesn’t allow private hosting of the code. You have to pay a monthly fee of $7 to host 5 private repositories, and the expenses go up with more repos.

In cases like these or when you want more control, the best path is to run Git on your own server. Not only do you save costs, you also have more control over your server. In most cases a majority of advanced Linux users already have their own servers and pushing Git on those servers is like ‘free as in beer’.

In this tutorial we are going to talk about two methods of managing your code on your own server. One is running a bare, basic Git server and and the second one is via a GUI tool called GitLab. For this tutorial I used a fully patched Ubuntu 14.04 LTS server running on a VPS.

Install Git on your server

In this tutorial we are considering a use-case where we have a remote server and a local server and we will work between these machines. For the sake of simplicity we will call them remote-server and local-server.

First, install Git on both machines. You can install Git from the packages already available via the repos or your distros, or you can do it manually. In this article we will use the simpler method:

sudo apt-get install git-core

Then add a user for Git.

sudo useradd git
passwd git

In order to ease access to the server let’s set-up a password-less ssh login. First create ssh keys on your local machine:

ssh-keygen -t rsa

It will ask you to provide the location for storing the key, just hit Enter to use the default location. The second question will be to provide it with a pass phrase which will be needed to access the remote server. It generates two keys – a public key and a private key. Note down the location of the public key which you will need in the next step.

Now you have to copy these keys to the server so that the two machines can talk to each other. Run the following command on your local machine:

cat ~/.ssh/id_rsa.pub | ssh git@remote-server "mkdir -p ~/.ssh && cat >>  ~/.ssh/authorized_keys"

Now ssh into the server and create a project directory for Git. You can use the desired path for the repo.

git@server:~ $ mkdir -p /home/swapnil/project-1.git

Then change to this directory:

cd /home/swapnil/project-1.git

Then create an empty repo:

git init --bare
Initialized empty Git repository in /home/swapnil/project-1.git

We now need to create a Git repo on the local machine.

mkdir -p /home/swapnil/git/project

And change to this directory:

cd /home/swapnil/git/project

Now create the files that you need for the project in this directory. Stay in this directory and initiate git:

git init 
Initialized empty Git repository in /home/swapnil/git/project

Now add files to the repo:

git add .

Now every time you add a file or make changes you have to run the add command above. You also need to write a commit message with every change in a file. The commit message basically tells what changes were made.

git commit -m "message" -a
[master (root-commit) 57331ee] message
 2 files changed, 2 insertions(+)
 create mode 100644 GoT.txt
 create mode 100644 writing.txt

In this case I had a file called GoT (Game of Thrones review) and I made some changes, so when I ran the command it specified that changes were made to the file. In the above command ‘-a’ option means commits for all files in the repo. If you made changes to only one you can specify the name of that file instead of using ‘-a’.

An example:

git commit -m "message" GoT.txt
[master e517b10] message
 1 file changed, 1 insertion(+)

Until now we have been working on the local server. Now we have to push these changes to the server so the work is accessible over the Internet and you can collaborate with other team members.

git remote add origin ssh://git@remote-server/repo-<wbr< a="">>path-on-server..git

Now you can push or pull changes between the server and local machine using the ‘push’ or ‘pull’ option:

git push origin master

If there are other team members who want to work with the project they need to clone the repo on the server to their local machine:

git clone git@remote-server:/home/swapnil/project.git

Here /home/swapnil/project.git is the project path on the remote server, exchange the values for your own server.

Then change directory on the local machine (exchange project with the name of project on your server):

cd /project

Now they can edit files, write commit change messages and then push them to the server:

git commit -m 'corrections in GoT.txt story' -a
And then push changes:
git push origin master

I assume this is enough for a new user to get started with Git on their own servers. If you are looking for some GUI tools to manage changes on local machines, you can use GUI tools such as QGit or GitK for Linux.
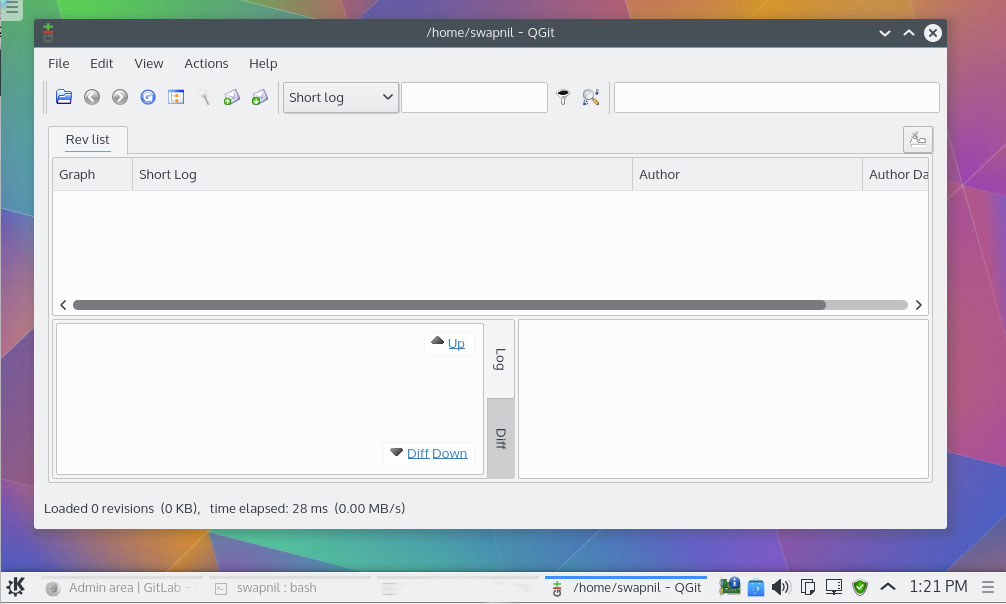
QGit

Using GitLab

This was a pure command line solution for project owner and collaborator. It’s certainly not as easy as using GitHub. Unfortunately, while GitHub is the world’s largest code hosting service; its own software is not available for others to use. It’s not open source so you can’t grab the source code and compile your own GitHub. Unlike WordPress or Drupal you can’t download GitHub and run it on your own servers.

As usual in the open source world there is no end to the options. GitLab is a nifty project which does exactly that. It’s an open source project which allows users to run a project management system similar to GitHub on their own servers.

You can use GitLab to run a service similar to GitHub for your team members or your company. You can use GitLab to work on private projects before releasing them for public contributions.

GitLab employs the traditional Open Source business model. They have two products: free of cost open source software, which users can install on their own servers, and a hosted service similar to GitHub.

The downloadable version has two editions – the free of cost community edition and the paid enterprise edition. The enterprise edition is based on the community edition but comes with additional features targeted at enterprise customers. It’s more or less similar to what WordPress.org or WordPress.com offer.

The community edition is highly scalable and can support 25,000 users on a single server or cluster. Some of the features of GitLab include: Git repository management, code reviews, issue tracking, activity feeds, and wikis. It comes with GitLab CI for continuous integration and delivery.

Many VPS providers such as Digital Ocean offer GitLab droplets for users. If you want to run it on your own server, you can install it manually. GitLab offers an Omnibus package for different operating systems. Before we install GitLab, you may want to configure an SMTP email server so that GitLab can push emails as and when needed. They recommend Postfix. So, install Postfix on your server:

sudo apt-get install postfix

During installation of Postfix it will ask you some questions; don’t skip them. If you did miss it you can always re-configure it using this command:

sudo dpkg-reconfigure postfix

When you run this command choose “Internet Site” and provide the email ID for the domain which will be used by Gitlab.

In my case I provided it with:

This e-mail address is being protected from spambots. You need JavaScript enabled to view it
 

Use Tab and create a username for postfix. The Next page will ask you to provide a destination for mail.

In the rest of the steps, use the default options. Once Postfix is installed and configured, let’s move on to install GitLab.

Download the packages using wget (replace the download link with the latest packages from here) :

wget https://downloads-packages.s3.amazonaws.com/ubuntu-14.04/gitlab_7.9.4-omnibus.1-1_amd64.deb

Then install the package:

sudo dpkg -i gitlab_7.9.4-omnibus.1-1_amd64.deb

Now it’s time to configure and start GitLabs.

sudo gitlab-ctl reconfigure

You now need to configure the domain name in the configuration file so you can access GitLab. Open the file.

nano /etc/gitlab/gitlab.rb

In this file edit the ‘external_url’ and give the server domain. Save the file and then open the newly created GitLab site from a web browser.
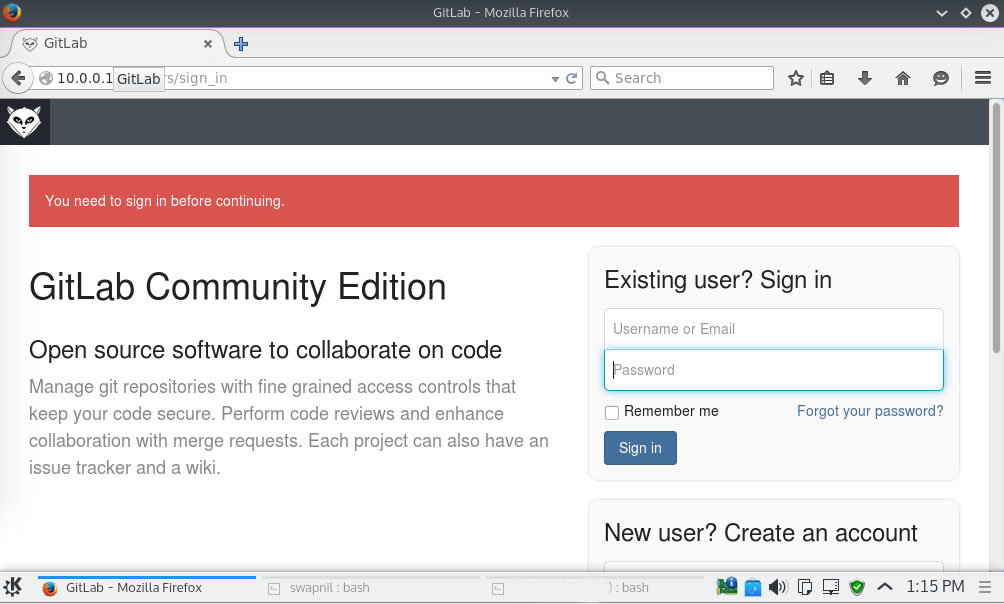
GitLab 1

By default it creates ‘root’ as the system admin and uses ‘5iveL!fe’ as the password. Log into the GitLab site and then change the password.
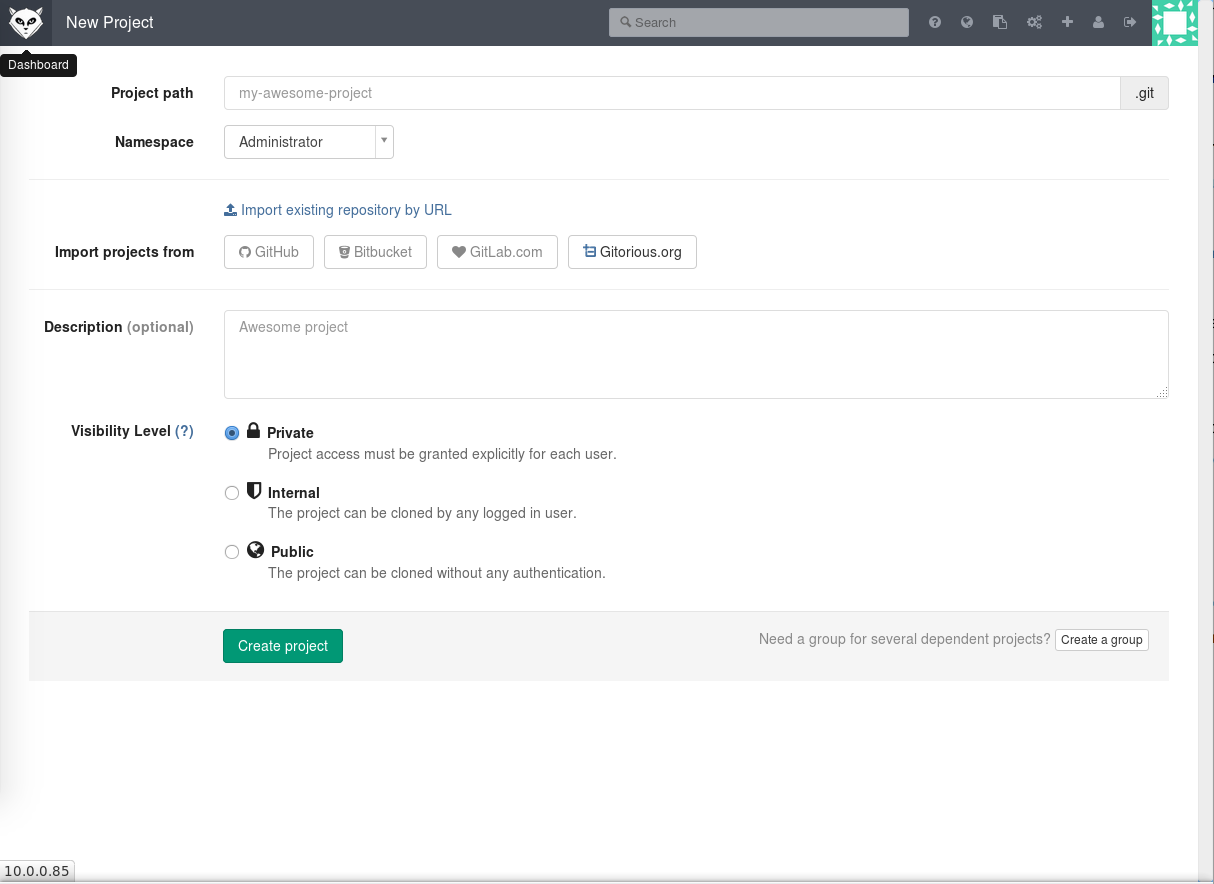
GitLab 2

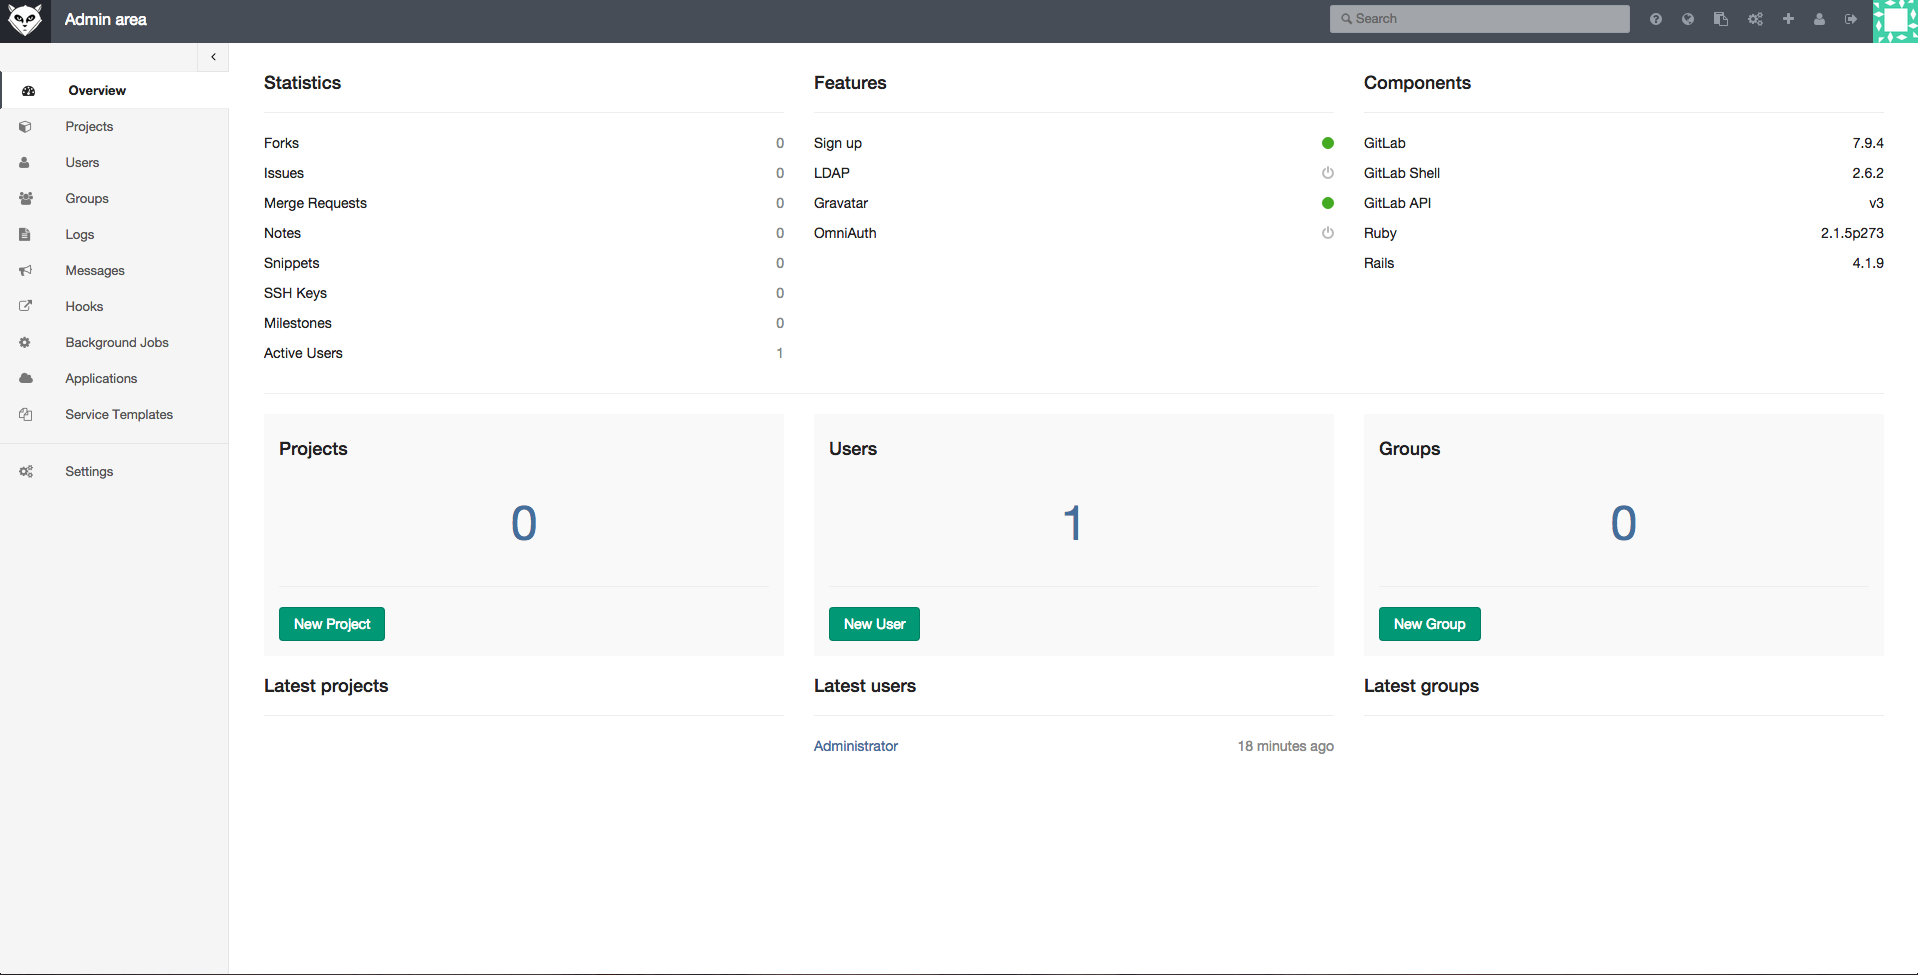
Once the password is changed, log into the site and start managing your project.

GitLab manage project page

GitLab is overflowing with features and options. I will borrow popular lines from the movie, The Matrix: “Unfortunately, no one can be told what all GitLab can do. You have to try it for yourself.”

How to Use logger on Linux

The logger command provides an easy way to add log files to /var/log/syslog — from the command line, from scripts, or from other files. In today’s post, we’ll take a look at how it works.

How easy is easy?

This easy. Just type logger <message> on the command line and your message will be added to the end of the /var/log/syslog file.

$ logger comment to be added to log
$ tail -1 /vvar/log/syslog
May 21 18:02:16 butterfly shs: comment to be added to log

Command output

You can also add the output from commands by enclosing the commands in backticks.

Read more at Network World

Which Programming Languages Use the Least Electricity?

Can energy usage data tell us anything about the quality of our programming languages?

Last year a team of six researchers in Portugal from three different universities decided to investigate this question, ultimately releasing a paper titled “Energy Efficiency Across Programming Languages.” They ran the solutions to 10 programming problems written in 27 different languages, while carefully monitoring how much electricity each one used — as well as its speed and memory usage.

It was important to run a variety of benchmark tests because ultimately their results varied depending on which test was being performed. For example, overall the C language turned out to be the fastest and also the most energy efficient. But in the benchmark test which involved scanning a DNA database for a particular genetic sequence, Rust was the most energy-efficient — while C came in third.

Read more at The New Stack

Hands-On with First Lubuntu 18.10 Build Featuring the LXQt Desktop by Default

The Lubuntu development team promised to finally switch from LXDE (Lightweight X11 Desktop Environment) to the more modern and actively maintained LXQt (Lightweight Qt Desktop Environment), and the switch is now official.

Lubuntu developer Simon Quigley approached us earlier today to inform that the latest Lubuntu 18.10 daily build is quite usable as he and his team did a lot of work in the past week to accommodate the LXQt desktop environment by default instead of the LXDE desktop environment.

The main difference between LXDE and LXQt is that the former is written with the GTK+ 2 technologies, which will eventually be phased out in favor of the more advanced GTK+ 3, and the latter is built using the Qt framework. However, it doesn’t look like there are any plans for LXDE to move to GTK+ 3.

Read more at Softpedia

Learn more about Linux distributions and find one that’s right for you with these picks from Jack Wallen.

Introducing Git Protocol Version 2

Today we announce Git protocol version 2, a major update of Git’s wire protocol (how clones, fetches and pushes are communicated between clients and servers). This update removes one of the most inefficient parts of the Git protocol and fixes an extensibility bottleneck, unblocking the path to more wire protocol improvements in the future.

The protocol version 2 spec can be found here. The main improvements are:

The main motivation for the new protocol was to enable server side filtering of references (branches and tags). Prior to protocol v2, servers responded to all fetch commands with an initial reference advertisement, listing all references in the repository. This complete listing is sent even when a client only cares about updating a single branch, e.g.: `git fetch origin master`.

Read more at Google open source blog