

We have previously discussed VPNs and Firejail here on Linux.com, but here’s a quick refresher to help you remember why you would want to use these tools:
-
VPNs help protect your Internet traffic from prying eyes — such as those of your ISP, the wi-fi provider you happen to be using, or any malicious attackers who may be in control of various pieces of routing equipment between you and the resource you are trying to access. VPNs may also enable you to gain access to online content that is for some reason unavailable via your current online provider.
-
Firejail is a tool that helps set up additional sandboxing around your desktop applications to help further reduce the impact of accessing potentially malicious content online. It is most commonly used in conjunction with Firefox.
I am very fond of combining both VPN and Firejail on my travel laptop (where I cannot use QubesOS), but I have recently discovered that I was leaving myself exposed to online tracking via so-called “WebRTC leaks.” My VPN provider offers a convenient testing page to see how well protected my connection is, and they very helpfully alerted me to this problem:
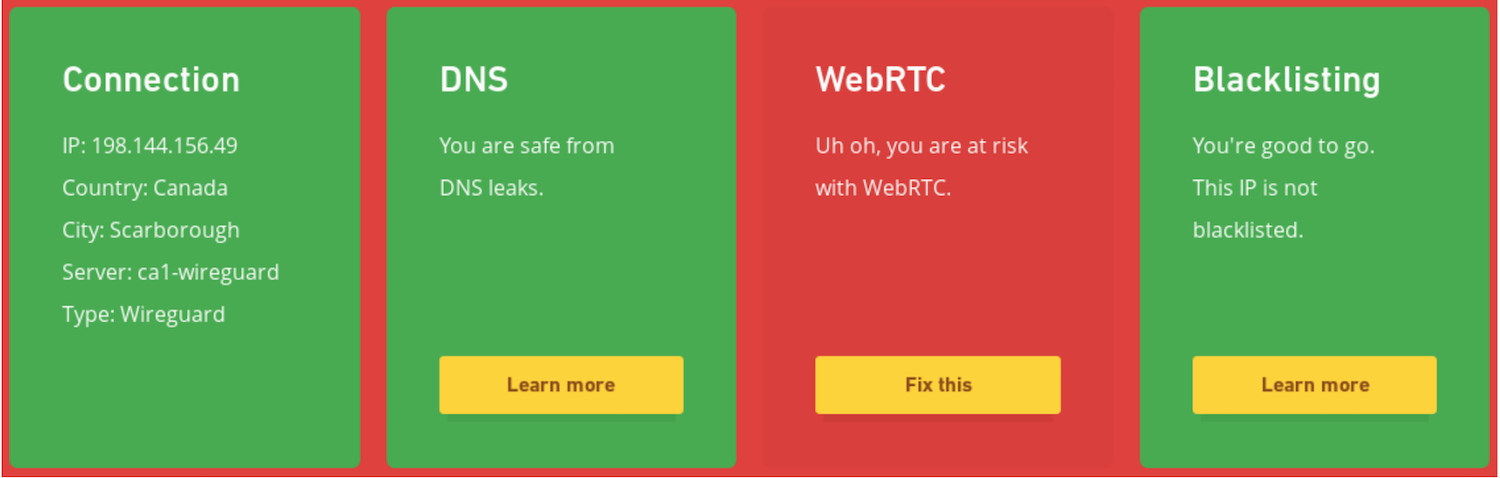
WebRTC is an open-source protocol that allows establishing peer-to-peer Real-Time Communication (RTC) via two browsers. It is normally used for native audio and video conferencing that does not require any additional plug-ins or extensions, and works across different browsers and different platforms. If you’ve ever used Google Hangouts, you’ve relied on WebRTC.
What makes WebRTC leak your real IP address? As part of establishing the communication channel, both parties exchange their networking information in order to find the network route that offers the least amount of latency. So, WebRTC will tell the remote party all of your local IP addresses, in hopes that it will help establish a better communication channel. Obviously, if exposing your local IP address is specifically something you do not want, then this is a problem.
One way to plug this leak is to turn off WebRTC entirely. However, if you do this, then you will no longer be able to use online conferencing — and depending on your needs, this may not be what you want. Thankfully, if you’re already using Firejail, then you can benefit from its support for network namespaces in order to hide your local networking information from WebRTC.
Setting up network namespaces manually is a bit of a chore, since in addition to the virtual interface, you will need to set up things like IP forwarding and DNS resolving (this script may help get you going, if you are interested). However, if you are using Fedora, then you should already have something you can use for this purpose: a virbr0 virtual bridge that is automatically available after the default workstation install.
Here’s what happens when you start Firefox inside a firejail and tell it to use virbr0 for its networking:
$ firejail --net=virbr0 firefox -no-remote

Interface     MAC             IP                         Mask                 Status

lo                                   127.0.0.1             255.0.0.0          UP

eth0          x:x:x:x:x:x    192.168.124.38   255.255.255.0  UP

Default gateway 192.168.124.1
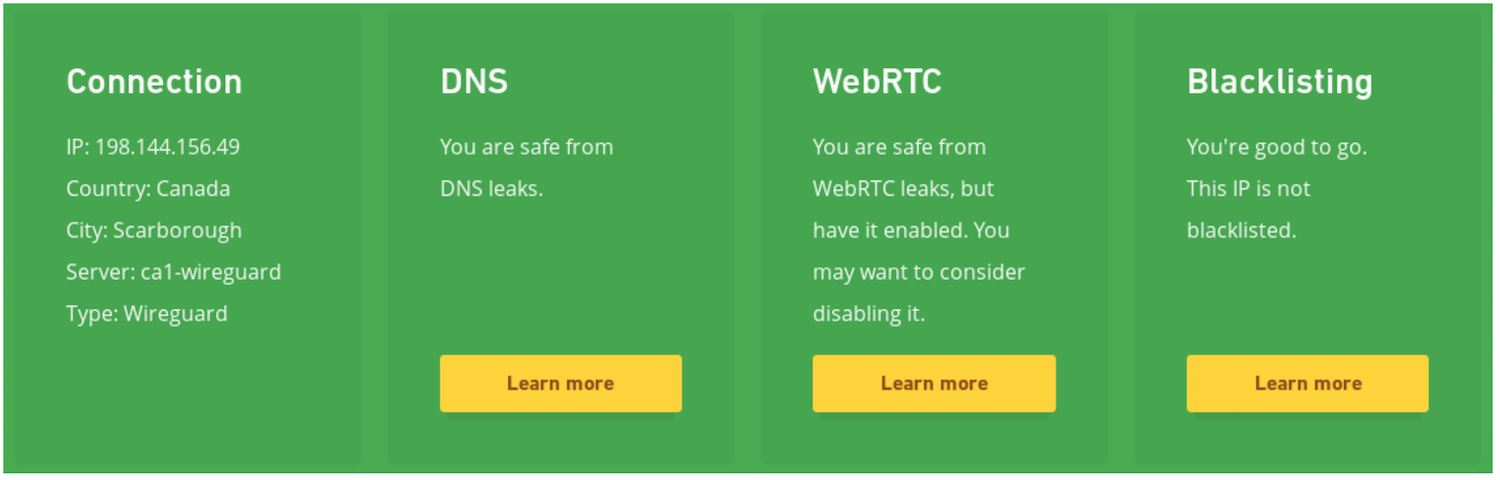
Firejail automatically obtains a private IP address inside the virtual networking range and sets up all the necessary routing information to be able to get online. And indeed, if I now look on my VPN provider’s verification page, they give me a clean bill of health:
I ended up writing a small wrapper that helps me bring up Firefox in various profiles — one I use for work, one I use for personal browsing, and one I bring up when I want a temporary junk profile for testing (a kind of “incognito mode” on steroids).
You can test if you are vulnerable to WebRTC leaks yourself on the browserleaks site. If there is anything showing up in the “Local IP Address” field, then you are potentially leaking your IP information online to people who can use it against you. Hopefully, you are now well-protected against this leak — but also against others that may use similar mechanisms of passing your local networking information to a remote adversary.

