This tutorial explains how to install pandom: a timing jitter true random number generator maintained by ncomputers.org. The built-in Linux kernel true random number generator provides low throughput under modern circumstances, as for example: personal computers with solid state drives (SSD) and virtual private servers (VPS). This problem is becoming popular in Linux implementations, because of the continuously increasing need for true random numbers, mainly by diverse cryptographic purposes.
This tutorial is for amd64 / x86_64 linux kernel versions greater and equal to 2.6.9. It explains how to install pandom: a timing jitter true random number generator maintained by ncomputers.org.
In one of our earlier articles, we discussed the ‘sudo’ command in detail. Towards the ends of that tutorial, there was a mention of another similar command ‘su’ in a small note.
In this article, we will discuss in detail the ‘su’ command as well as how it differs from the ‘sudo’ command. The main work of the su command is to let you switch to some other user during a login session. In other words, the tool lets you assume the identity of some other user without having to logout and then login (as that user).
The Nex Gen Media Server is a small-footprint shared library that allows users to easily build video media and telephony applications. It supports several popular streaming protocols such as RTMP, RTSP and Apple’s HTTP Live, and can capture live video streams and adapt them so they can be received by another type of device. For instance, using the NGMS you could capture a HD video feed and convert it so that it may be received by an iPhone over a 3G connection. This makes it a particularly useful tool for developers, so let’s take a closer look and see just how you can integrate the NGMS API to control streaming features directly in a C application:
1. Download and read the NGMS user guide
As always, the first step lies of any process lies in understanding its backbone. To that end, you’ll need to download and read the NGMS user guide from http://ngmsvid.com/ngms.php and its respective API reference guide from http://ngmsvid.com/develop.php before you begin coding. These cover the basics of the library and its main utilities. Then, proceed to download the NGMS package for Linux. Once you’ve done that, unzip its contents into the directory of your choice.
2. Set up the application
In order for NGMS to be directly integrated into an application, you’ll need to include ngms/include/ngmslib.h into your code. You’ll also have to include selected libraries such as ngms/lib/libngms.so and ngms/lib/libxcode.so. Be aware that libngms.so depends on libngms.so, so be sure to specify that in the linker options.
3. Create a simple makefile
Here is an example of what things should look like:
#Example Makefile CC=gcc CFLAGS=-ggdb INCLUDES+= -I ngms/include LDFLAGS+= -L ngms/lib -lngms -xlcode -crypto all: myapp %.o: %.c $(CC) $(CFLAGS) $(INCLUDES) -o $@ -c $< myapp: myapp.o $(CC) -fpic -o myapp myapp.o $(LDFLAGS)
It’s worth mentioning that the code uses the NGMSLIB_STREAM_PARAMS_T struct type in order to control the NGMS library. To that end, you’ll need to call to ngmslib_open so you can “preset” the struct. After that you can fill out whatever options you’d like in the struct, and then proceed to ngmslib_stream in order to create the output video.
Now you can stream a media file directly from your application. Since the ngmslib_stream function is what’s called as a blocking operation, you can actually interrupt the stream by doing ngmslib_close from another thread and the ngmslib_stream call will exit.
5. Add in the final touches
You can also add support for an embedded Flash player by adding the following lines of code:
ngmsConfig.rtmplive = “1935”;
ngmsConfig.live = “8080”;
Or, instead of playing a file, you might want to change the input so that it’s a live video stream. You can create two separate instances of the application, one of which will output the video to port 5006, while the other will capture video on port 5006 and output it to port 5004. It looks something like this:
//ngmsConfig.inputs[0] = “mediaTestFile.mp4”;
ngmsConfig.inputs[0] = “rtp://127.0.0.1:5006”;
ngmsConfig.strfilters[0] = “type=m2t”;
In conclusion, it is fairly easy to add video streaming support to your own application. The aforementioned code was done using C, but C++ developers can adapt it by wrapping all the calls to ngmslib using the “extern “C”” keyword. Java developers can also do it, but it will require building a JNI interface and wrapping each of the calls down to NGMS. Still, the NGMS library is quite useful, with potential applications that include building your own video streaming client as well.
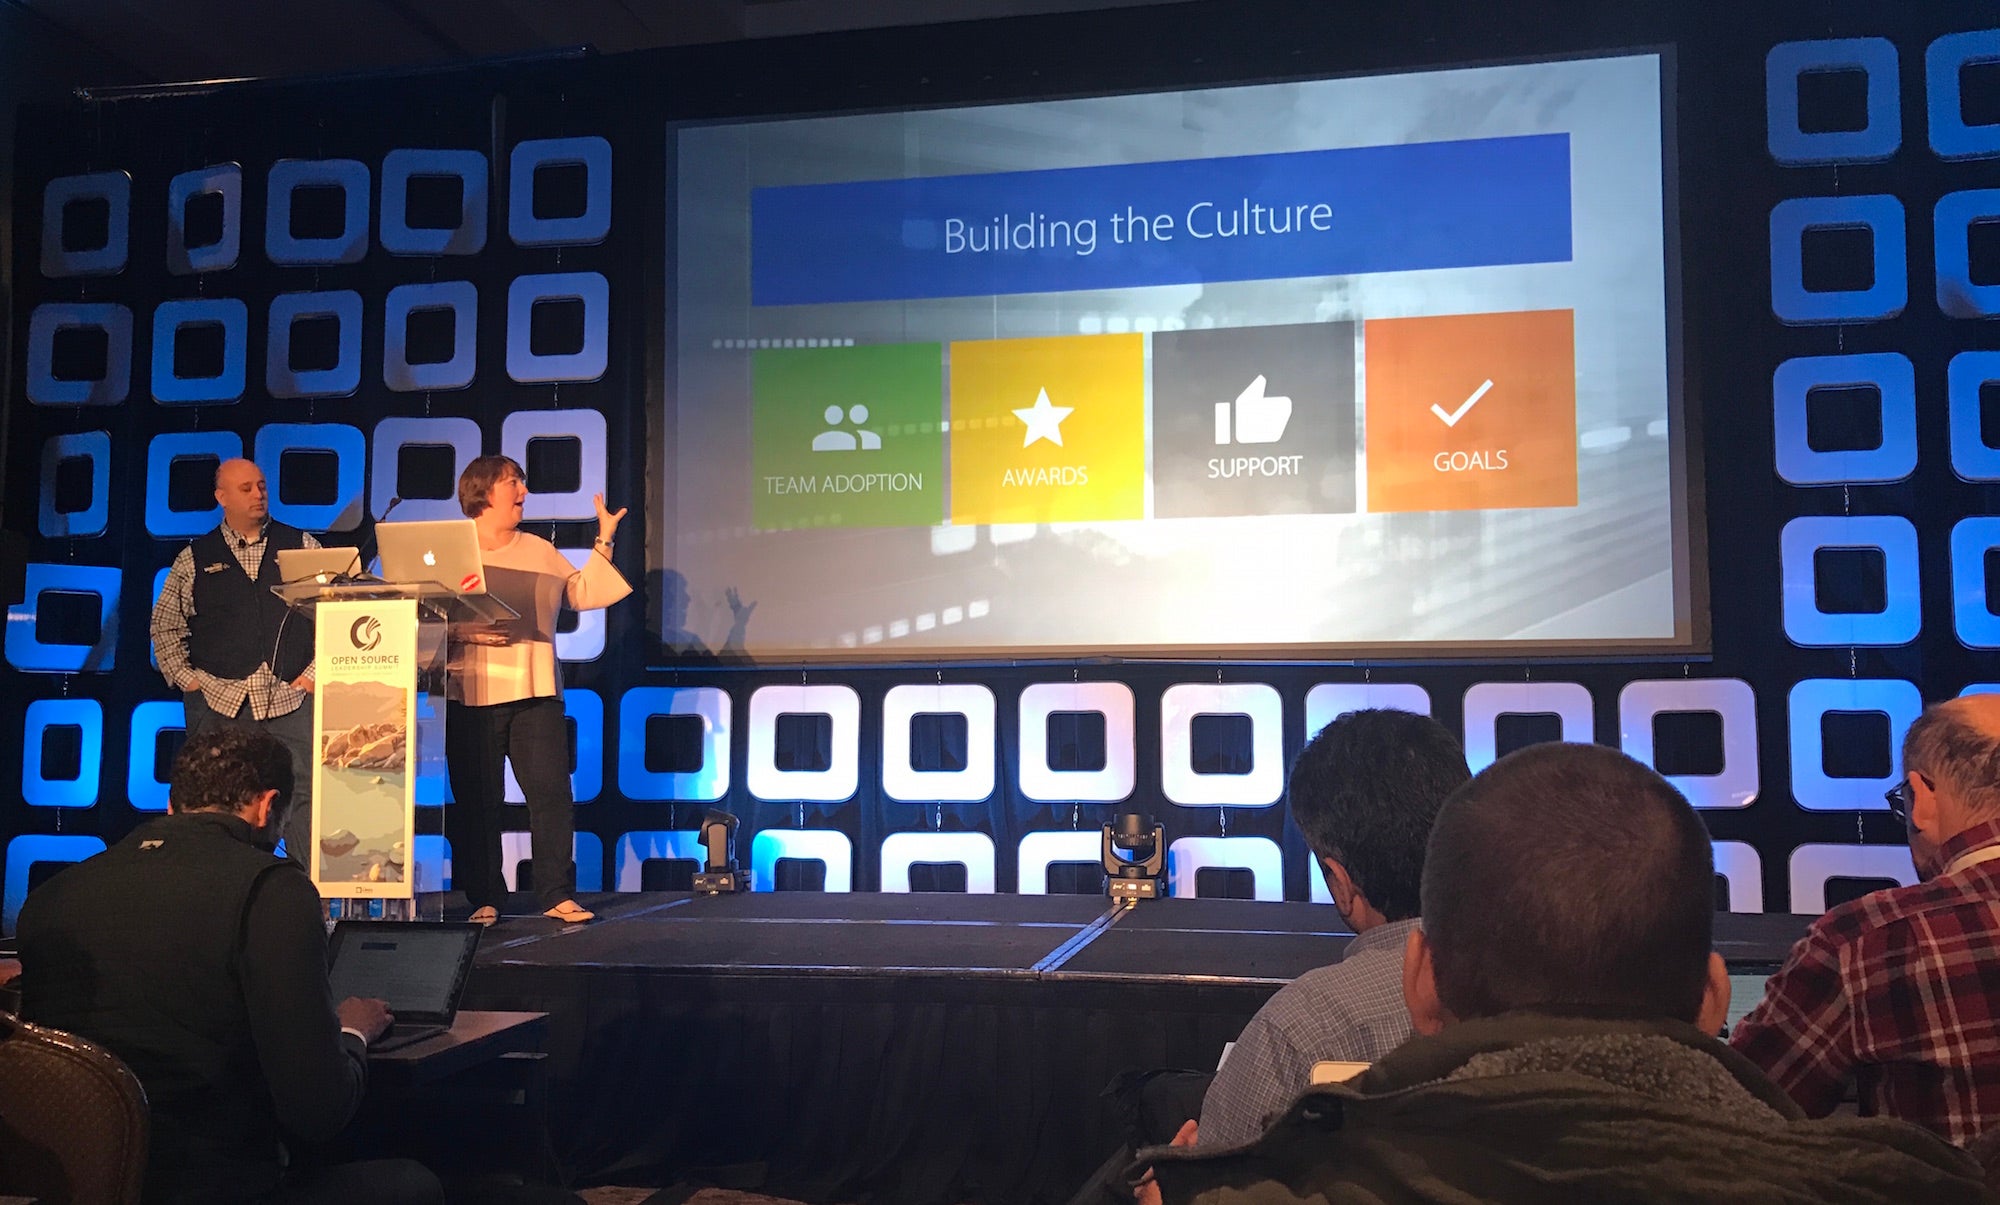
Some of the world’s largest and most successful companies gathered this week at Open Source Leadership Summit in Lake Tahoe to share best practices around open source use and participation. Companies from diverse industries — from healthcare and finance, to telecom and high tech — discussed the strategies and processes they have adopted to create business success with open source software.
Below, are five lessons learned, taken from a sampling of talks by engineers and community managers at Capital One, Google, and Walmart, which have all adopted a strategic approach to open source.
1. Give developers freedom to contribute
Walmart has worked hard to develop a culture that embraces open source. Key to this cultural transformation has been convincing managers that it’s beneficial to devote developer resources to open source contributions — and to give developers the freedom to contribute however they wish.
“We’ve found that the team members that have a choice of what (open source projects) to work on are the most passionate about really diving in,” said Megan Rossetti, senior engineer, cloud technology, at Walmart.
2. Always be evaluating open source options
Walmart has also created an open source management structure and process to help institutionalize and enable open source participation. The company has an internal open source team to find and shepherd new open source projects and contributions.
“As we onboard new projects, we are always evaluating where does it make sense to bring in open source and to contribute back to open source,” said Andrew Mitry, a senior distinguished engineer at Walmart.
3. Use the right license
Capital One has also made significant strides to become a good open source partner in a way that doesn’t compromise customers or violate financial industry regulations. The company sees a great benefit in releasing open source projects that encourage broad use and participation from other companies. They’ve learned that this means projects must be structured in a way that encourages openness.
“If you want to make sure your code can be used, you really should pick a license written by someone who knows what they’re doing, preferably one of the ones approved by the FSF (Free Software Foundation) or OSI (Open Source Initiative),” said Jonathan Bodner, lead software engineer, technology fellows at Capital One.
“Also, if you want to encourage companies to join the community for your software you probably should pick one of the permissive licenses.”
4. Lead from behind
Kubernetes, an open source project hosted by the Cloud Native Computing Foundation, is one of the fastest growing open source communities on GitHub. Despite massive participation, the project always needs good leaders – those willing to “chop wood and carry water,” said Sarah Novotny, head of the Kubernetes Community Program at Google.
“Being a leader in the open source community is not always about control and it is not always about making sure you have the most commits or the only viewpoint or the only direction,” Novotny said. “We need people willing to do work that is not as glamorous, that’s not as much in the fore. This is very much leadership from behind… It’s making sure that you have influence in the community that is longstanding and promotes the health of the project long term.”
5. Let go of IP
By releasing its Kubernetes container orchestration technology as open source and donating it to The Linux Foundation (under CNCF), Google opened up the project to outside contribution and increased enterprise participation. That, in turn, helped the technology become ubiquitous and profitable for Google which built cloud services on top of the project. Letting go of the project’s intellectual property was ultimately what created that success, said Craig McLuckie, CEO and founder of Heptio, and founder of Kubernetes at Google.
“Nothing poisons an ecosystem faster than playing heavy with trademark,” McLuckie said. “One of the first things we did with Kubernetes was donate it to the Linux Foundation to make it very clear that we were not going to play those games. And in many ways that actually opened up the community…
“It would have really held us back if we had held the IP. If we’d held that trademark and copyright on the project it would have hurt us.”
Want to learn more about open source in the enterprise? Recorded keynote talks from Open Source Leadership Summit 2017 are available now on YouTube. Watch now!
The Linux Foundation has announced keynote speakers and session highlights for Open Networking Summit, to be held April 3-6, 2017 in Santa Clara, CA.
ONS promises to be the largest, most comprehensive and most innovative networking and orchestration event of the year. The event brings enterprises, carriers, and cloud service providers together with the networking ecosystem to share learnings, highlight innovation and discuss the future of open source networking.
Speakers and attendees at Open Networking Summit represent the best and brightest in next-generation open source networking and orchestration technologies.
ONS keynote speakers
Martin Casado, a general partner at the venture capital firm Andreessen Horowitz and co-founder of Nicira (acquired by VMware in 2012) will give a keynote on the future of networking. (See our Q&A with Casado for a sneak preview.)
Other keynote speakers include:
John Donovan, Chief Strategy Officer and Group President – AT&T Technology and Operations with Andre Fuetsch, President AT&T Labs and Chief Technology Officer at AT&T
Justin Dustzadeh, VP, Head of Global Infrastructure Network Services, Visa
Dr. Hossein Eslambolchi, Technical Advisor to Facebook, Chairman & CEO, 2020 Venture Partners
Albert Greenberg, Corporate Vice President Azure Networking, Microsoft
Rashesh Jethi, SVP Engineering at Amadeus IT Group SA, the world’s leading online travel platform
Sandra Rivera, Vice President Datacenter Group, General Manager, Network Platforms Group, Intel Corporation
Amin Vahdat, Google Fellow and Technical Lead for Networking, Google
ONS session speakers
Summit sessions will cover the full scope of open networking across enterprise, cloud and service providers. Topics that will be explored at the event include container networking, software-defined data centers, cloud-native application development, security, network automation, microservices architecture, orchestration, SDN, NFV and so much more. Look forward to over 75 tutorials, workshops, and sessions led by networking innovators.
Session highlights include:
Accelerated SDN in Azure, Daniel Firestone, Microsoft
Troubleshooting for Intent-based Networking, Joon-Myung Kang, Hewlett Packard Labs
Beyond Micro-Services Architecture, Larry Peterson, Open Networking Lab
Combining AI and IoT. New Industrial Revolution in our houses and in the Universe, Karina Popova, LINK Mobility
Rethinking NFV: Where have we gone wrong, and how can we get it right?, Scott Shenker, UC Berkeley
Linux.com readers can register now with the discount code, LINUXRD5, for 5% off the registration price. Register to attend by February 19 and save more than $800 over late registration pricing.
It is often faster to use command-line apps to play audio files and preview images than to futz around launching and using a graphical application, and you can use them in scripts. Come along to learn about MOC and SoX for playing audio files, and feh for viewing image files from the Linux command line.
MOC, Music on Console
MOC plays audio files from an X terminal, and from a console with no X windows, such as a headless server with no graphical environment. MOC supports most audio file formats including OGG, WAV, FLAC, MIDI, MP4, and MP3. Note that the correct command is mocp and not moc. moc is a Qt command, the Meta Object Compiler, so if you run it you’ll get a “No relevant classes found” error. The simplest use is to start it and name a directory that contains audio files:
$ mocp sounds/ambient/
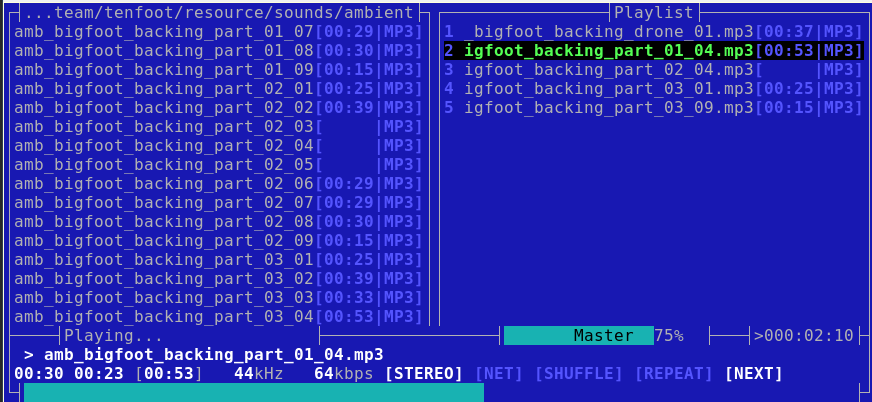
You’ll see something like Figure 1, a nice Midnight Commander-style two-pane file manager where you can navigate all over your filesystem and find audio files to play. Figure 1 has a playlist in the right pane; add files from the left pane to your playlist by highlighting them and pressing the a key. Press V to save your playlist in the current directory.
Figure 1: Moc
By default MOC plays all the files in the current directory. Use the Tab key to toggle between the file list and your playlist. Navigate up and down with the arrow keys, and press Enter to select a file to play. These are the basic commands, and note that they are case-sensitive:
< and > control the volume level
p or spacebar toggle pause/play
n plays the next file, b plays the previous file
S toggles shuffle
Right arrow key seeks forward and Left arrow key seeks backward
q detaches from the MOC interface and returns to your prompt, and your audio keeps playing
mocp returns to the MOC interface from your command line
Q from the MOC interface quits MOC
mocp -x from any command prompt closes MOC
MOC commands are different in the MOC interface than on your command line. man moc details the commands that you run on the command line, and press h to see a list of commands in the MOC interface.
Your personal MOC directory is ~/.moc. The example configuration file is in /usr/share/doc/moc/examples/config.example.gz. You can extract and copy this example file to ~/.moc/config, or just copy the bits you want to use. I use the MusicDir option to set my default playlist, and you may set a default directory instead. List your audio directories in the Fastdir options for fast switching:
Start MOC in your MusicDir with mocp -m, or press m in the MOC interface.
Press Shift+1, Shift+2 and so on to change to your various Fastdirs.
MOC has customizable theming and keymaps; see man mocp and the help in the MOC interface to see many more options and controls.
Play One Audio File with SoX
Good old SoX (Sound eXchange) has been around forever and contains a multitude of capabilities. If MOC has an easy way to play just one file I have not found it, so I use SoX for this. This example shows how to play a single file, and shows how to play a file with whitespace in the filename by enclosing it in quotation marks:
$ play "quake2/music/Sonic Mayhem - Quake II/11.ogg"
Just as I do with image files (see the next section), I use locate and grep to find audio files. Then it’s a quick select > middle-click paste to play the file with SoX.
feh X Terminal Image Viewer
I use feh to quickly preview images. You need to be in graphical session, that is, using an X terminal like GNOME Terminal or Konsole. I have over a thousand images on my main PC, and I rely on locate and grep to find what I want. It’s a lot faster to view the image with feh than to open a graphical app and wander through it until I find my my image. Like the photo of my little cat Molly in Figure 2:
$ locate -i molly|grep rock
/home/carla/Pictures/molly-on-rocks-small.jpeg
$ feh /home/carla/Pictures/molly-on-rocks-small.jpeg
Figure 2: Molly.
You can also open your images in editors like Inkscape and Gimp this way, for example inkscape /home/carla/Pictures/molly-on-rocks-small.jpeg. In feh, right-click on your image to open a menu full of useful options: rotate, set image as background, delete, image size and type, and several others.
Give feh a directory name to launch a slideshow of all images in the directory, and then click on each image to advance to the next image. feh displays them at their native resolutions, so right-click on any image and check Options > Fullscreen to shrink large images to fit your screen. Or pass in options in your command. This example stops the slideshow after displaying all images once, pauses for four seconds on each image, automatically scales large images to fit your screen, and prints the filename on each image:
Use the right-click menu to save your montage in your current directory (not your images directory).
Open all images in the directory in their own windows (don’t do this with a large number of images!):
$ feh -w image/directory
You can enter a list of filenames in a text file, one per line, and then pass this list to feh:
$ feh -f mylist
man feh is quite good; it’s well-organized and clear, and details all of feh’s operations which include keyboard shortcuts, mouse shortcuts, and randomizing background images.
Learn more about Linux through the free “Introduction to Linux” course from The Linux Foundation and edX.
Amid growing attacks on Linux devices, the 2016 Embedded LinuxConference demonstrated a renewed focus on security. One well-attended presentation at ELC Europe covered the topic of verified bootschemes. In this talk, Marc Kleine-Buddeof Pengutronix revealed the architecture and strategies of a recently developedverified boot scheme for a single-core, Cortex-A9 NXP i.MX6 running onthe RIoTboard SBC.
The stack works on most i.MX SoC models, and its structure and most ofits components are transferable to other ARM processors. “It’s easy todo this yourself using a number of open source stacks,” saidKleine-Budde, who is also the Linux kernel project’s CAN drivermaintainer.
Verified boot is “a complex Linux stack in userspace” designed todetect if any stage of the boot process has been tampered with, heexplained. Considering that embedded devices typically lack theadvanced security software and physical safeguards found in the serverworld, it’s one of the most effective — and cost-effective —security strategies available.
“If you can change the bootloader of an embedded system you can havecomplete control over it,” said Kleine-Budde, “If an attacker wants toroot your system, they first try to put in their own bootloader,usually from an unprotected source like SD, USB, or eMMC. For ourcustomers, we wanted to protect the bootloader, kernel, file system, andeven read-write data.”
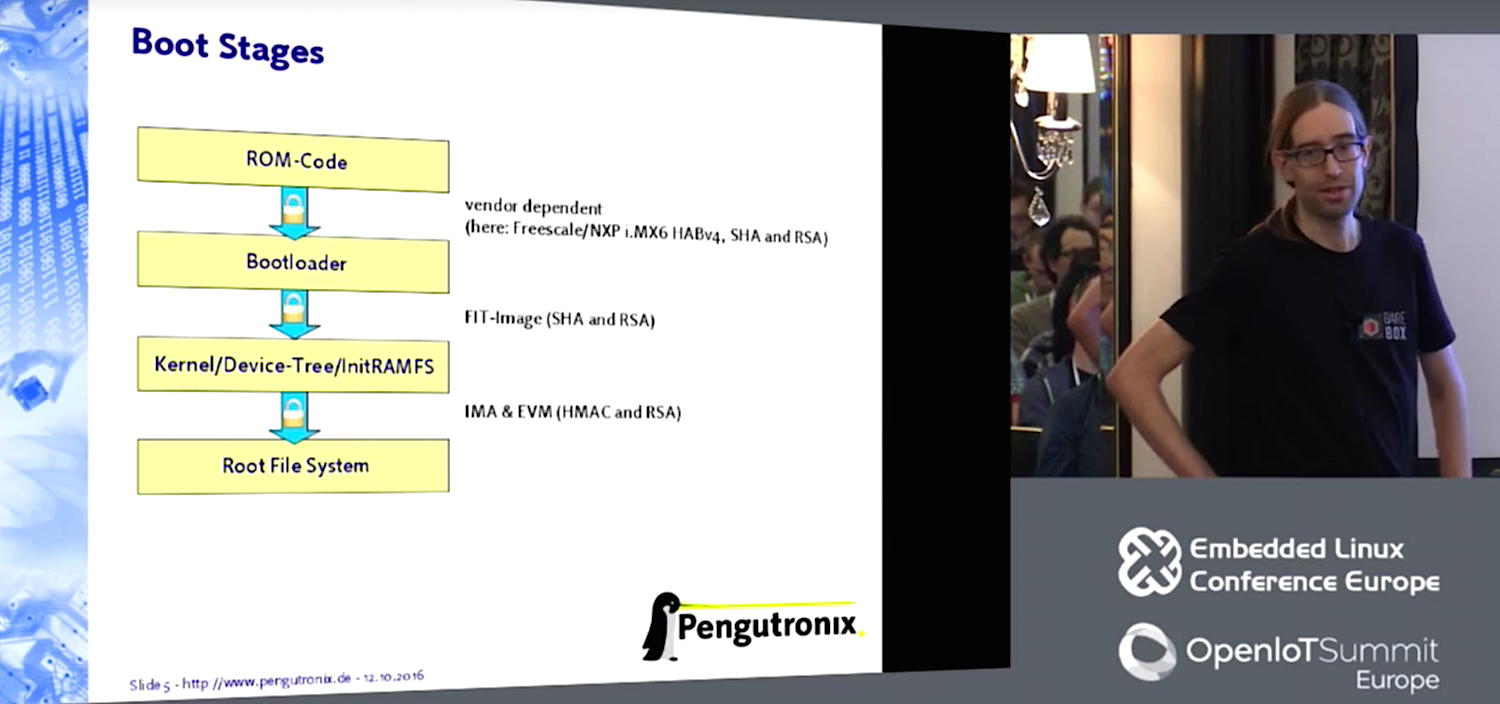
On these ARM systems, ROM code verifies the bootloader before it launchesit. On i.MX SoCs this is done by signing the bootloader with aproprietary tool and a public key. The corresponding certificate isburned into the i.MX itself to verify the bootloader. The ROM code decides where to boot from and then passes off to a bootloader, suchas U-boot or in this case barebox, which then loads the kernel device treesand root file system.
For the initial ROM stage, the i.MX SoCs use a proprietary extensionROM code called high assurance boot, or short HAB, which in turn tapsstandard cryptographic SHA and RSA algorithms. Barebox has another keythat verifies the image of the kernel and the InitRAMFS (initial RAMfile system).
“In the boot process, the ROM code runs first,” said Kleine-Budde. “Inproduction, you burn the fuses into your SoC, which verify the publickey that comes with the bootloader. ROM code verifies that the pubkeyis correct, and then the pubkey verifies the signature, which goesover the bootloader itself. A second pubkey is used to verify thekernel stage.”
FIT-Image, ext4, and UBIFS
For user space verification, Pengutronix used a FIT-Image, whichconsists of kernel, device-tree(s), and InitRAMFS. “This is allincluded in one image, and can be used in several configurations, soyou can use one FIT-Image on a variety of boards,” saidKleine-Budde. “If your bootloader knows which board you have, it canpick the right configuration from the FIT-Image, which can be storedon untrusted media.”
The bootloader checks against the bootloader’s public key to see ifthe FIT-Image configuration is valid. To do this, it checks thesignature, and then analyzes three hashes for kernel, device-tree, andInitRAMFS.
Once verified, the kernel then secures each file in the root filesystem, which must be able to support extended attributes. “We usedthe ext4 file system with extended attributes,” saidKleine-Budde. “You can use a flash chip or naked NAND chip with UBI andUBIFS, or you can use block media storage such as eMMC.”
To verify the file system, Pengutronix employed the mainline kernel’sIMA (Integrity Measurement Architecture), which uses a hash forevery file, thereby indicating if the file has been modified. Thecontent is hashed, and then stored as an extendedattribute, in this case security-ima.
“If attackers gain access to this system, they can modify a file,recalculate the hash and write it to the media,” saidKleine-Budde. “To avoid this, we make use of the kernel’s EVM(Extended Verification Module), and create a signature over theextended attributes. This is done on your development PC during imagecreation. You take a private key, create the root file system, and sign every file and extended attribute. It contains the hash, so youcan be sure the file and the checksum have not been modified. The EVM-signatureis then verified by the kernel’s public key.”
Protecting read/write storage with a SHA-HMAC Secret
Pengutronix’s customers also wanted to be able to verify read/writemedia. “For this, we used EVM with SHA-HMAC, a clever way of hashingthings that lets you guarantee integrity and authentication,” saidKleine-Budde. HMACs can be verified faster than RSA, thereby reducing boot time, he added.
“With SHA-HMAC, you need a different ’Shared Secret’ for each systembecause if an attacker opens one system and modifies it, and HMACgets used, he could transfer a modified file from one system toanother,” said Kleine-Budde. “Once the kernel touches every file, itwill recalculate the HMAC-based verification and write it down. Theattacker cannot recalculate the HMAC unless he has the EVM’s Secret.”
The Secret is generated on the i.MX SoC. “If you have created aproperly signed bootloader, you have access to a unique key, which isunique to every individual SoC,” said Kleine-Budde. “The SoC’s fusescontain certification hashes that correspond to the secret key used tosign the bootloader. You can only burn the fuses once, and there’seven a separate fuse that can disallow the burning of other fuses. Yousign the bootloader when you build your BSP.”
The unique key is used to encrypt a shared Secret for the EVM, storedon media. “You can decrypt only on the system you used to encrypt it,and only if you have a properly signed bootloader,” saidKleine-Budde. “You then use InitRAMFS to decrypt the blob and obtain access to its EVM-Secret, which is required if you want to doread/write. This checks to see if EVM, IMA, and contents are allcorrect.”
About 22 minutes into the video, Kleine-Budde answered about 10minutes of questions about whether the blob was properlysecured. Kleine-Budde stuck to his original answer: “The blob is encrypted with a unique key. You cannot decrypt the blob unless youhave a unique key.”
He then explained how he used eCryptfs for file system levelencryption. “eCryptfsworks works on both NAND and UBIFS,” hesaid. “Every file in the encrypted file system corresponds to a file in the unencrypted system. File names and content are encrypted, butthe directory layout and permissions are clear text. eCryptfs requiresa different shared Secret for each system. You do not need IMA/EVMbecause integrity is provided by GCM and AES within the i.MX cryptoengine.”
Finally, Kleine-Budde demonstrated the verified boot process runningLinux 4.0.9 with patches on the i.MX6-based RIoTboard. He also passedon some lessons learned for others attempting to create a similarARM-based trusted boot stack.
“Keep your packages in two configurations: one secure package withproduction keys and another that people can play with,” saidKleine-Budde. Similarly, one production bootloader and
Kernel/InitRAMFS configuration should reboot upon discovery of attackwhile another one simply displays a notification. He also noted thatthe combination of UBIFS with IMA/EVM is sensitive to sudden powerloss. This issue is fixed with the upcoming Linux v4.10 release.
Kleine-Budde acknowledged that verified boot extends your boot time,in this case by about 10 percent. The overhead is worth it, however,when you consider the alternative. “There are a lot of Linux targetson the Internet that are attractive for hacking,” said Kleine-Budde.
Embedded Linux Conference + OpenIoT Summit North America will be held on February 21 – 23, 2017 in Portland, Oregon. Check out over 130 sessions on the Linux kernel, embedded development & systems, and the latest on the open Internet of Things.
Linux.com readers can register now with the discount code, LINUXRD5, for 5% off the attendee registration price. Register now>>
NFV automation is the ability to transfer manual network configuration to technology; NFV orchestration creates the deployment and automation blueprint.
NFV automation and NFV orchestration have overlapping and interrelated capabilities, which are essential to the deployment of virtual network services. Both automation and orchestration are part of the critical management, automation and orchestration, or MANO, layer. The lack of MANO standards has hindered network functions virtualization deployments by many leading service providers.
A software environment’s attack surface is defined as the sum of points in which an unauthorized user or malicious adversary can enter or extract data. The smaller the attack surface, the better. We recently sat down with Doug Goldstein (https://github.com/cardoe or @doug_goldstein) to discuss how companies can use hypervisors to reduce attack surfaces and why the Xen Project hypervisor is a perfect choice for security-first environments. Doug is a principal software engineer at Star Lab, a company focused on providing software protection and integrity solutions for embedded systems.
Linux.com: Tell us a little bit about what your company does and your area of expertise?
Doug Goldstein: Star Lab is a software security provider dedicated to researching, developing, testing, and delivering embedded security solutions for both commercial and government customers. We address at-rest, boot, and runtime system protections even in the face of successful privilege escalation attacks. Star Lab maintains a Xen-based and security-focused virtualization product called Crucible that targets embedded markets.
As for me, I’ve been a Gentoo Linux developer for about 15 years, and have been interested in virtualization for some time. I started my foray into virtualization with KVM for test environments, and have contributed back to that community. I’m a contributor for the Xen Project and have worked to make a hypervisor modular at compile time through a project called Kconfig, which was borrowed from the Linux kernel. Kconfig allows developers to create a more lightweight hypervisor, which reduces attack surface and is beneficial in security-first environments, microservice architectures, IoT, and industries with heavy compliance and certification requirements (such as the automotive sector). Kconfig was released as part of Xen Project Hypervisor 4.7.
Recently, my coworkers and I have been looking more closely into IoT security. With an ever-increasing number of connected devices being brought to market, there are more vectors than ever for attackers to get into remote systems and access sensitive data—even with protective measures such as firewalls in place. For example, someone could attack your laptop through your smart TV. Given the current security landscape, the same types of software protections and system integrity solutions we’ve been creating for the government are now recognized as necessary for consumers and B2B.
Here are a few other technologies that started out in the military, but trickled to the consumer realm, if you like this type of stuff.
Linux.com: When it comes to securing devices, what is the approach that you use?
Goldstein: Using a multi-layered protection and detection approach is the only way to ensure systems stay secure. Many organizations approach security with a network-based intrusion detection system or a firewall and believe that is enough. We believe that security must take a more holistic, proactive approach. If you only have an intrusion detection system, you can only see attacks at a very high level. For example, you might be able see someone attempting to exploit a service, but what if they somehow got valid login credentials? To begin implementing truly secure architectures, you first need to lockdown and control capabilities in the edge systems. This is where the hypervisor comes into play.
A hypervisor is an important piece in the multi-layered security approach. By separating system components into different VMs, an attacker would have to compromise each VM to modify or access sensitive data, versus compromising one service and having access to all the data. It is also possible to use redundant VMs using technologies like COLO (Course Grain Lock Stepping). This allows two VMs to process the same input and ensure they agree on a valid response, thereby preventing an attacker from permanently modifying the data.
Also, hypervisors can provide multiple levels of privilege so that a service with sensitive data could run as a VM alongside a service with less sensitive information, and they would never be able to see or modify each other’s data. This is one way we are able to reduce costs in government projects that have data at different classification levels. We allow them to use a single system with one or more VMs, instead of two physical systems.
Finally, by using a hypervisor, you can prevent certain classes of persistent attacks because some of these attacks rely on direct access to hardware, flash storage, or BIOS memory. By running services inside constrained VMs, an attacker has no direct access to the system hardware without first defeating the hypervisor.
Linux.com: Why did you choose the Xen Project hypervisor, and how does it differ in terms of security compared to something like KVM?
Goldstein: One of the main reasons why we chose to focus on the Xen Project (and likely why many other security-first projects choose the Xen Project over KVM) is that its architecture allows for strong isolation and privilege separation. This means that the Xen Project hypervisor is able to live separately from the Linux Kernel and the Linux Kernel is able to be separated into less privileged pieces. For example, if there is an attack on the Linux Kernel, it is not going to impact Xen like it impacts KVM.
Another example of this is network card drivers that can be separated into their own driver domains, such as what OpenXT and Qubes do with Xen. The whole idea is, even if an attacker can exploit the driver, the attacker does not gain full access to the hypervisor. This isn’t the case with KVM, where a single kernel or driver compromise can undermine the entire system security posture.
Linux.com: The Xen Project serves a lot of different use cases. What can you do to make it better serve a security use case?
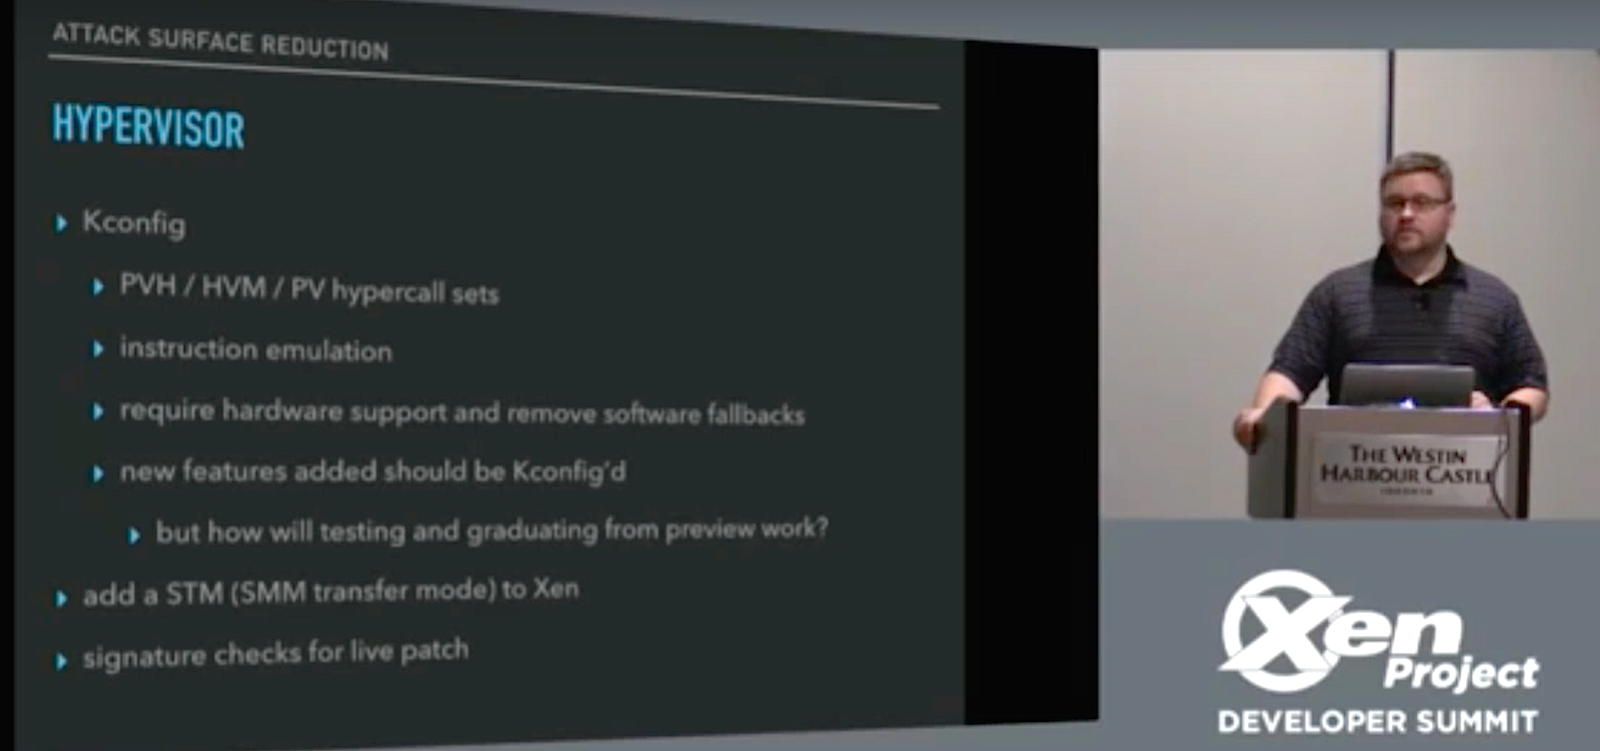
Goldstein: As mentioned above, Kconfig gives you the ability to make the Xen Project hypervisor more lightweight, thereby eliminating attack surfaces. For example, with Kconfig you can take out some of the migration features that might be essential in cloud environments, but don’t make sense for security-first environments.
Other examples include VM introspection and fine-grained access controls. VM introspection allows you to check the state of your VM in real time without having to run any code inside the VM. This allows you to ensure that no one has modified a critical piece of software running inside the VM. Fine-grained access controls that XSM FLASK provides allow or restrict communications between VMs or between the VM and the hypervisor. This provides a way to reduce the attack surface of the VMs and the hypervisor.
Linux.com: How about containers? How would containers fit into this?
Goldstein: Some of the people that we work with wanted to put containers into their infrastructure because they believed it was more secure. On one hand, it is a little better because the software is carved up into separate containers, making it easier to ship updates without affecting the other software running on the system. In this sense, containers can be good from a security standpoint.
In many cases, however, people don’t actually deliver these updates and fixes. People build up containers, but don’t update the software within the containers. For example, there could be multiple copies of OpenSSL in different containers that are all out of date. In this scenario, even though a system administrator updated packages in a server’s OS, the machine would still have vulnerabilities. Containers without good software management practices can actually reduce the system’s overall security posture.
It might be interesting to note at this point that containers do not address kernel-level attacks. Containers limit the attack surface of an individual service, preventing one service from affecting other services on the machine. However, containers are less secure than virtual machines since the kernel has a much larger attack surface than a hypervisor and is more vulnerable to privilege escalation attacks—possibly leading to an escape from the container. The smaller attack surface of the hypervisor decreases the probability that a privilege escalation attack will allow an attacker to break out of a virtual machine and affect other VMs on the system.
Linux.com: Which areas do you think could be improved from a security standpoint currently?
Goldstein: One area I would love to see more interest in, from a Xen Project perspective, is XSM FLASK. It is not the default access control mechanism in the Xen Project hypervisor at present. Many people within the community recognize the benefits of switching to XSM FLASK, but there is a lot of inertia around the existing model. There are issues in the current model that can be elegantly solved by creating the right policies using XSM FLASK. Focusing on using XSM FLASK and enhancing Xen’s default policy, rather than adding more knobs to the existing access control model, could potentially benefit the entire Xen Project community.
Additionally, a lot of maintainers in the security group have overlapping use cases that specifically focus on cloud hosting environments. It would be great to get more members from the security community to engage the Xen Project and even potentially become maintainers focused on use cases other than cloud-hosted environments. For example, virtualization is a great solution for addressing functional safety, multi-level access, system integrity, and cybersecurity problems in the embedded systems space. This broadening of the community would allow a larger set of use cases to be covered by the Xen Project, in a single open source project, rather than siloed within several separate projects.
If you want to learn more about this topic, check out Doug’s presentation at the Xen Project Developer Summit below:
In this talk from Embedded Linux Conference, Marc Kleine-Budde of Pengutronix describes the architecture and strategies of a recently developed verified boot scheme for a single-core, Cortex-A9 NXP i.MX6 running on the RIoTboard SBC.