Home Blog Page 702

Create an Open Source AWS S3 server

Amazon S3 (Simple Storage Service) is a very powerful online file storage web service provided by Amazon Web Services. Think of it as a remote drive where you can store files in directories, retrieve and delete them. Companies such as DropBox, Netflix, Pinterest, Slideshare, Tumblr and many more are relying on it.

While the service is great, it is not open source so you have to trust Amazon with your data and even though they provide a free-tier access for a year, one must enter credit card information to create an account. Because S3 is a must-know for any software engineer, I want my students to gain experience with it and use it in their web applications, yet I don’t want them to pay for it. Some Holberton School students are also working during commutes, meaning either slow Internet connections and expensive bandwidth or no Internet connection at all.

That’s why I started looking into open source solutions that would emulate the S3 API and that could run on any machine. As usual, the open source world did not disappoint me and provided several solutions, here are my favorites:

The first one that I ran into is Fake S3, written in Ruby and available as a gem, it requires only a few seconds to install and the library is very well maintained. It is a great tool to get started but does not implement all S3 commands and is not suited for production usage.

The second option is HPE Helion Eucalyptus which offers a wide spectrum of AWS services emulation (CloudFormation, Cloudwatch, ELB…) including support for S3. This is a very complete solution (only running on CentOS), oriented toward enterprises, and unfortunately too heavyweight for individuals or small businesses.

The last and my preferred option is Scality S3 server. Available via Docker image, making it super easy to start and distribute. The software is suited for individuals, one can get started in seconds without any complicated installation. But also for enterprises as it is production-ready and scalable. The best of both worlds.

Getting started with Scality S3 server

To illustrate how easy it is to emulate AWS S3 with Scality S3 server, let’s do it live!

Requirements:

Launch the Scality S3 server Docker container:

$ docker run -d --name s3server -p 8000:8000 scality/s3server
Unable to find image 'scality/s3server:latest' locally
latest: Pulling from scality/s3server
357ea8c3d80b: Pull complete
52befadefd24: Pull complete
3c0732d5313c: Pull complete
ceb711c7e301: Pull complete
868b1d0e2aad: Pull complete
3a438db159a5: Pull complete
38d1470647f9: Pull complete
4d005fb96ed5: Pull complete
a385ffd009d5: Pull complete
Digest: sha256:4fe4e10cdb88da8d3c57e2f674114423ce4fbc57755dc4490d72bc23fe27409e
Status: Downloaded newer image for scality/s3server:latest
7c61434e5223d614a0739aaa61edf21763354592ba3cc5267946e9995902dc18
$

Check that the Docker container is properly running:

$ docker ps
CONTAINER ID        IMAGE               COMMAND             CREATED             STATUS              PORTS                    NAMES
ed54e677b1b3        scality/s3server    "npm start"         5 days ago          Up 5 days           0.0.0.0:8000->8000/tcp   s3server

Install the Ruby gem AWS SDK v2 (documentation here):

$ gem install aws-sdk

Now let’s create a file that we will upload to our bucket (we will use it later):

$ touch myfavoritefile

Using your favorite text editor, create a file containing your Ruby script, let’s name it `s3_script.rb`:

#!/usr/bin/ruby
require 'aws-sdk'
s3 = Aws::S3::Client.new(
 :access_key_id => 'accessKey1',
 :secret_access_key => 'verySecretKey1',
 :region => 'us-west-2',
 :endpoint => 'http://0.0.0.0:8000/',
 :force_path_style => true
)
s3.create_bucket({bucket: "mybucket"})
File.open('myfavoritefile', 'rb') do |file|
 s3.put_object(bucket: 'mybucket', key: 'myfavoritefile', body: file)
end
resp = s3.list_objects_v2(bucket: 'mybucket')
puts resp.contents(&:key)

Run the script:

$ ruby s3_script.rb
$ myfavoritefile

Congratulations, you created your first S3 bucket and uploaded a file to it!


Let’s explain the code

Here we indicate that this script should be executed using Ruby and that we are including the AWS SDK library:

#!/usr/bin/ruby
require 'aws-sdk'

We initiate a connection to our S3 server running in our Docker container. Note that `accessKey1` and `verySecretKey1` are the default access key and secret access key defined by Scality S3 server.
s3 = Aws::S3::Client.new(
 :access_key_id => 'accessKey1',
 :secret_access_key => 'verySecretKey1',
 :region => 'us-west-2',
 :endpoint => 'http://127.0.0.1:8000/',
 :force_path_style => true
)

Let’s create a S3 bucket named `mybucket`:

s3.create_bucket({bucket: "mybucket"})

Here, we are uploading, the previously created file `myfavoritefile`, to our bucket `mybucket`:

File.open('myfavoritefile', 'rb') do |file|
 s3.put_object(bucket: 'mybucket', key: 'myfavoritefile', body: file)
end

Finally, this is collecting the content of `mybucket` and displaying it to standard output:

resp = s3.list_objects_v2(bucket: “mybucket”)
puts resp.contents(&:key)

Want to interact more with S3-compatible AWS apps? Join the hackathon co-organized by Scality and Seagate on October 21st to 23rd at Holberton School in San Francisco. No admission fee, food and drinks provided. The goal will be to write a S3Server to a Seagate Kinetic backend including using an erasure coding library and writing a data placement algorithm.


21 Open Source Projects for IoT

The Internet of Things market is fragmented, amorphous, and continually changing, and its very nature requires more than the usual attention to interoperability. It’s not surprising then, that open source has done quite well here — customers are hesitant to bet their IoT future on a proprietary platform that may fade or become difficult to customize and interconnect.

In this second entry in a four-part series about open source IoT, I have compiled a guide to major open source software projects, focusing on open source tech for home and industrial automation. I am omitting more vertical projects related to IoT, such as Automotive Grade Linux and Dronecode, and I’m also skipping open source, IoT-oriented OS distributions, such as Brillo, Contiki, Mbed, OpenWrt, Ostro, Riot, Ubuntu Snappy Core, UCLinux, and Zephyr. Next week, I’ll cover hardware projects — from smart home hubs to IoT-focused hacker boards — and in the final part of the series, I’ll look at distros and the future of IoT.

The list of 21 projects below includes two major Linux Foundation hosted projects — AllSeen (AllJoyn) and the OCF (IoTivity) — and many more end-to-end frameworks that link IoT sensor endpoints with gateways and cloud services. I have also included a smattering of smaller projects that address particular segments of the IoT ecosystem. We could list more, but it’s increasingly difficult to determine the difference between IoT software and just plain software. From the embedded world to the cloud, more and more projects have an IoT story to tell.

All 21 projects claim to be open source, although it’s beyond the scope of this article to ensure they fully live up to those claims. They all run Linux on at least one component in the ecosystem, and most support it throughout, from desktop development to cloud/server, gateway, and sensor endpoint components. The vast majority have components that can run on Linux hacker boards like the Raspberry Pi and BeagleBone, and many support Arduino.

There is still plenty of proprietary technology in IoT, especially among the top-down, enterprise platforms. Yet, even some of these offer partially open access. Verizon’s ThingSpace, for example, which targets 4G smart city applications, has a free development API that supports hacker boards, even if the core platform itself is proprietary. Somewhat similarly, Amazon’s AWS IoT suite has a partially open device SDK and open source starter kits.

Other major proprietary platforms include Apple’s HomeKit and Microsoft Azure IoT Suite. Then there’s the 230-member Thread Group, which oversees the peer to peer Thread networking protocol based on 6LoWPAN. Launched by Nest, which is owned by Alphabet, the umbrella organization over Google, The Thread Group does not offer a comprehensive open source framework like AllSeen and the OCF. However, it’s associated with Brillo, as well as the Weave IoT communication protocol. In May, Nest launched an open source version of Thread called OpenThread (see farther below).

Here are 21 open source software projects for the Internet of Things:

AllSeen Alliance (AllJoyn) — The AllJoyn interoperability framework overseen by the AllSeen Alliance (ASA) is probably the most widely adopted open source IoT platform around. 

Bug Labs dweet and freeboard — Bug Labs started out making modular, Linux-based Bug hardware gizmos, but it long ago morphed into a hardware-agnostic IoT platform for the enterprise. Bug Labs offers a “dweet” messaging and alerts platform and a “freeboard” IoT design app. Dweet helps publish and describe data using a HAPI web API and JSON. Freeboard is a drag-and-drop tool for designing IoT dashboards and visualizations.

DeviceHive — DataArt’s AllJoyn-based device management platform runs on cloud services such as Azure, AWS, Apache Mesos, and OpenStack. DeviceHive focuses on Big Data analytics using tools like ElasticSearch, Apache Spark, Cassandra, and Kafka. There’s also a gateway component that runs on any device that runs Ubuntu Snappy Core. The modular gateway software interacts with DeviceHive cloud software and IoT protocols, and is deployed as a Snappy Core service.

DSA — Distributed Services Architecture facilitates decentralized device inter-communication, logic, and applications. The DSA project is building a library of Distributed Service Links (DSLinks), which allow protocol translation and data integration with third party sources. DSA offers a scalable network topology consisting of multiple DSLinks running on IoT edge devices connected to a tiered hierarchy of brokers.

Eclipse IoT (Kura) — The Eclipse Foundation’s IoT efforts are built around its Java/OSGi-based Kura API container and aggregation platform for M2M applications running on service gateways. Kura, which is based on Eurotech’s Everywhere Cloud IoT framework, is often integrated with Apache Camel, a Java-based rules-based routing and mediation engine. Eclipse IoT sub-projects include the Paho messaging protocol framework, the Mosquitto MQTT stack for lightweight servers, and the Eclipse SmartHome framework. There’s also a Java-based implementation of Constrained Application Protocol (CoAP) called Californium, among others.

Kaa — The CyberVision-backed Kaa project offers a scalable, end-to-end IoT framework designed for large cloud-connected IoT networks. The platform includes a REST-enabled server function for services, analytics, and data management, typically deployed as a cluster of nodes coordinated by Apache Zookeeper. Kaa’s endpoint SDKs, which support Java, C++ and C development, handle client-server communications, authentication, encryption, persistence, and data marshalling. The SDKs contain server-specific, GUI-enabled schemas translated into IoT object bindings. The schemas govern semantics and abstract the functions of a diverse group of devices.

Macchina.io — Macchina.io provides a “web-enabled, modular and extensible” JavaScript and C++ runtime environment for developing IoT gateway applications running on Linux hacker boards. Macchina.io supports a wide variety of sensors and connection technologies including Tinkerforge bricklets, XBee ZB sensors, GPS/GNSS receivers, serial and GPIO connected devices, and accelerometers.

GE Predix — GE’s PaaS (Platform as a Service) software for industrial IoT is based on Cloud Foundry. It adds asset management, device security, and real-time, predictive analytics, and supports heterogeneous data acquisition, storage, and access. GE Predix, which GE developed for its own operations, has become one of the most successful of the enterprise IoT platforms, with about $6 billion in revenues. GE recently partnered with HPE, which will integrate Predix within its own services.

Home Assistant — This up and coming grassroots project offers a Python-oriented approach to home automation. See our recent profile on Home Assistant.

Mainspring — M2MLabs’ Java-based framework is aimed at M2M communications in applications such as remote monitoring, fleet management, and smart grids. Like many IoT frameworks, Mainspring relies heavily on a REST web-service, and offers device configuration and modeling tools.

Node-RED — This visual wiring tool for Node.js developers features a browser-based flow editor for designing flows among IoT nodes. The nodes can then be quickly deployed as runtimes, and stored and shared using JSON. Endpoints can run on Linux hacker boards, and cloud support includes Docker, IBM Bluemix, AWS, and Azure.

Open Connectivity Foundation (IoTivity) — This amalgamation of the Intel and Samsung backed Open Interconnect Consortium (OIC) organization and the UPnP Forum is working hard to become the leading open source standards group for IoT. The OCF’s open source IoTivity project depends on RESTful, JSON, and CoAP.

openHAB — This open source smart home framework can run on any device capable of running a JVM. The modular stack abstracts all IoT technologies and components into “items,” and offers rules, scripts, and support for persistence — the ability to store device states over time. OpenHAB offers a variety of web-based UIs, and is supported by major Linux hacker boards.

OpenIoT — The mostly Java-based OpenIoT middleware aims to facilitate open, large-scale IoT applications using a utility cloud computing delivery model. The platform includes sensor and sensor network middleware, as well as ontologies, semantic models, and annotations for representing IoT objects.

OpenRemote — Designed for home and building automation, OpenRemote is notable for its wide-ranging support for smart devices and networking specs such as 1-Wire, EnOcean, xPL, Insteon, and X10. Rules, scripts, and events are all supported, and there are cloud-based design tools for UI, installation, and configuration, and remote updates and diagnostics.

OpenThread — Nest’s recent open source spin-off of the 6LoWPAN-based Thread wireless networking standard for IoT is also backed by ARM, Microchip’s Atmel, Dialog, Qualcomm, and TI. OpenThread implements all Thread networking layers and implements Thread’s End Device, Router, Leader, and Border Router roles.

Physical Web/Eddystone — Google’s Physical Web enables Bluetooth Low Energy (BLE) beacons to transmit URLs to your smartphone. It’s optimized for Google’s Eddystone BLE beacon, which provides an open alternative to Apple’s iBeacon. The idea is that pedestrians can interact with any supporting BLE-enabled device such as parking meters, signage, or retail products.

PlatformIO — The Python-based PlatformIO comprises an IDE, a project generator, and a web-based library manager, and is designed for accessing data from microcontroller-based Arduino and ARM Mbed-based endpoints. It offers preconfigured settings for more than 200 boards and integrates with Eclipse, Qt Creator, and other IDEs.

The Thing System — This Node.js based smart home “steward” software claims to support true automation rather than simple notifications. Its self-learning AI software can handle many collaborative M2M actions without requiring human intervention. The lack of a cloud component provides greater security, privacy, and control.

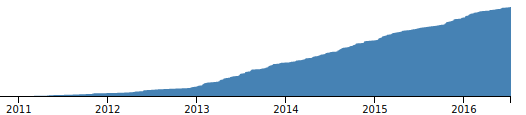
ThingSpeak — The five-year-old ThingSpeak project focuses on sensor logging, location tracking, triggers and alerts, and analysis. ThingSpeak users can tap a version of MATLAB for IoT analysis and visualizations without buying a license from Mathworks.

Zetta — Zetta is a server-oriented, IoT platform built around Node.js, REST, WebSockets, and a flow-based “reactive programming” development philosophy linked with Siren hypermedia APIs. Devices are abstracted as REST APIs and connected with cloud services that include visualization tools and support for machine analytics tools like Splunk. The platform connects end points such as Linux and Arduino hacker boards with cloud platforms such as Heroku in order to create geo-distributed networks.

Read the previous article in this series, Who Needs the Internet of Things? 

Read the next article in this series, Linux and Open Source Hardware for IoT

Interested in learning how to adapt Linux to an embedded system? Check out The Linux Foundation’s Embedded Linux Development course.

Get Started Writing Web Apps with Node.js: Using the All Powerful NPM

In a previous article, I provided a quick introduction to Node.js and explained what it is, what it does, and how you can get started using it. I mentioned a few modules that can help you get things done, and they all — pug, ejs, and express — are external modules that will need to be installed using Node.js’s npm tool.

It’s definitely worth your time to learn more about npm. It is mighty powerful and it doesn’t just install modules; it also helps you set up a whole environment for your application. But, let’s not jump the gun. First, let’s just use npm for what it’s used for most: installing modules.

In this article, I’ll show how to create a project around what’s called a “single-page web application.” In a traditional web application, each time you click on a link or fill in and submit a form, you are directed to another page that shows the result of your actions.

Not with a single-page application. In a single-page application, you only see one page but its content changes as you interact with it. In this example, you will have the main page present a form with a textbox and submit button (Figure 1). When you fill in the box and press Submit, you will be redirected back to the same page (or so it will seem) and the word you typed into the text box will show up below the form.

Figure 1: This is the single-page web app you’re going to build.

To get started, create a directory and call it, say, form. Then cd into it and create an empty text file called server.js. This is where the code for your web application will go.

Next, running npm init. npm will ask you for some information, such as the name of the project, the version, a description, the entry point (i.e., what file you are going to make Node execute), the Git repository where you’re going to store the project, and so on. When you’re done, npm generates a package.json file that looks something like this:

{
 "name": "form",
 "version": "1.0.0",
 "description": "Example of single-page web app.",
 "main": "server.js",
 "scripts": {
   "test": "echo "Error: no test specified" && exit 1",
   "start": "node server.js"
 },
 "repository": {
   "type": "git",
   "url": "git+ssh://git@github.com/yrgithubaccount/nodejsform.git"
 },
 "keywords": [
   "example",
   "form",
   "get",
   "post",
   "node.js"
 ],
 "author": "Your Name",
 "license": "GPL-3.0",
 "bugs": {
   "url": "https://github.com/yrgithubaccount/nodejsform/issues"
 },
 "homepage": "https://github.com/yrgithubaccount/nodejsform#readme"
}

Let’s install express and also body-parser. Run:

npm install express --save

inside your project’s directory, and you will see something like Figure 2.

Figure 2: Installing express with npm.
That is a tree view of all of express’s dependencies. If you list your directory now, you will also see a new subdirectory called node-modules. That’s where all the code for installed modules live. Notice how convenient this is. You could’ve install express globally with:

npm install express -g

But by installing by default locally and only in your project’s directory, npm makes sure you don’t clutter up your main module directory.

Next, install body_parser with:

npm install body-parser --save

This module makes sure you will be able to parse easily the data you get from your form.

The –save modifier in the install commands above tells npm to include the information about the modules you’re going to use with your project into the package.json file. Check it out:

{
 "name": "form",
 "version": "1.0.0",
 "description": "Example of single-page web app.",
 "main": "server.js",
 "scripts": {
   "test": "echo "Error: no test specified" && exit 1",
   "start": "node server.js"
 },
 "repository": {
   "type": "git",
   "url": "git+ssh://git@github.com/yrgithubaccount/nodejsform.git"
 },
 "keywords": [
   "example",
   "form",
   "get",
   "post",
   "node.js"
 ],
 "author": "Your Name",
 "license": "GPL-3.0",
 "bugs": {
   "url": "https://github.com/yrgithubaccount/nodejsform/issues"
 },
 "homepage": "https://github.com/yrgithubaccount/nodejsform#readme,
 "dependencies": {
   "body-parser": "^1.15.2",
   "express": "^4.14.0"
 }
}

With that, if you want to share your project or upload it to your Git repository, you don’t need to upload all the modules, too. As long as they have the package.json file, other users can clone your project. They can just run npm install, without any other arguments, and npm will download and install all the dependencies automatically. How useful is that?

Let’s write the code for server.js:

var express = require('express'),
   app = express(),
   bodyParser = require('body-parser'),
   fs= require('fs');

app.use(bodyParser.urlencoded({ extended: true }));

fs.readFile('./head.html', function (err, head) {
   if (err) {
       res.sendStatus(500).send('Couldn't read head!');
       res.end();
   }
   fs.readFile('./form.html', function (err, form) {
       if (err) {
           res.sendStatus(500).send('Couldn't read form!');
           res.end();
       }
       fs.readFile('./foot.html', function (err, foot) {
           if (err) {
               res.sendStatus(500).send('Couldn't read foot!');
        res.end();
           }

           app.get('/', function (req, res) {
               res.send(head + form + foot);
               res.end();

               console.log("Got a GET");
           });

           app.post('/', function (req, res) {
               res.send(head + form + '<p>' + req.body.name + '</p>n' + foot);
               res.end();

               console.log("Got a POST");
           });

           var server = app.listen(8081, function () {
           console.log("Example app listening at http://127.0.0.1:8081")
           });
           
       });
   });
});

Let’s see what this does step by step:

  • var express = require(‘express’), app = express() drags in express and then initiates an express application.

  • bodyParser = require(‘body-parser’), drags in body-parser and creates a body-parser object.

  • fs= require(‘fs’);, as in our first example, brings in Node.js’s in-built file-managing module.

  • app.use(bodyParser.urlencoded({ extended: true })); adds body-parsing superpowers for urlencoded data to our express app.

  • The block of chained fs.readFile(‘./some_HTML_file’, function (err, some_variable) {… instructions is similar to the one you saw previously. First, you try to open head.html; if that succeeds, you dump the content into the head variable, and then try and open form.html and dump its contents into the form variable. Finally, open the foot.html file and dump its contents into the foot variable.

  • If the server manages to open all three HTML files, you start listening for GET calls to your server. If you receive one (app.get(‘/’, function (req, res) {), you concatenate all the contents of the files together and send it out to the client (res.send(head + form + foot); res.end();). The server prints a message to the console for debugging purposes. (console.log(“Got a GET”);).

  • The moment you hit the Submit button, you’re sending a POST request to the server. The form is linked up to the same page (see form.html below) it is sent from. This is what app.post(‘/’, function (req, res) { picks up. This is probably the most interesting thing of this exercise. the fact that you can have the express app respond with a different virtual page at the same address, its content depending on the type of request the server receives.

  • res.send(head + form + ‘<p>’ + req.body.name + ‘</p>n’ + foot); grabs the data coming from the name text field in the form (again, see form.html below) and inserts it into the HTML text the server sends back to the web browser.

  • var server = app.listen(8081, function () { starts the server on port 8081.

For reference, the three HTML files look like this:

head.html

<html>
   <body>

form.html

<form action="http://127.0.0.1:8081/" method="POST">
   Name: <input type="text" name="name">  <br>
   <input type="submit" value="Submit">
</form>

foot.html

   </body>
</html>

Templating like this is of course very primitive, but you get the idea.

You could expand this into an app that stores the names in a database and then sets up a system for users with different privileges — and there are modules for that. Or, you could change the app to upload images or documents and have your server show them in a gallery dynamically as you upload them — there are also modules for that. Or any of the million other things Node.js and its army of modules lets you do in a few lines of code.

Conclusion

So, saying Node.js is merely a JavaScript interpreter is unfair. Node.js, just by itself may seem underwhelming at first glance. But, when you delve into it further, the possibilities seem just about endless.

What with all the modules, and the amazingly active community, the scope of projects that Node.js makes possible is staggering. It is little wonder that it powers complex web applications such as those used by Netflix, PayPal, LinkedIn, and many others.

Want to learn more about developing applications? Check out the “Developing Applications with Linux” course from The Linux Foundation. 

Cloud Foundry Launches New Docker-Compatible Container Management System

Cloud Foundry, the Pivotal- and VMware-incubated open source platform-as-a-service project, is going all in on its new Diego container management system. For a while now, the project used what it called Droplet Execution Agents (DEA) to manage application containers. After running in parallel for a while, though, the team has now decided to go all in on its new so-called “Diego” architecture. Thanks to this, Cloud Foundry says it can now scale to running up to 250,000 containers in a single cluster.

Few enterprises — if any — are currently using Cloud Foundry (or containers in general) at this scale. As anybody who has talked to enterprise developers recently can tell you, though, enterprise adoption of containers is growing quickly (and maybe faster than most people realize). Cloud Foundry’s own research shows that many enterprises are now evaluation containers, even as the number of broad container deployments has remained steady (and low) over the last few months.

Read more at TechCrunch

Dig into DNS: Part 3

In the first and second articles in this series, I introduced the powerful dig utility and its uses in performing DNS lookups along with a few time-saving examples of to put it into practice. In this part, I’ll look at my favorite dig utility feature — which is definitely the “trace” option. For those unfamiliar with this process, let’s slowly run through it.

Without a Trace

When a DNS query is made, the “chain” of events (for want of a better description) starts with the name server initiating the lookup speaking to one of the world’s “root” name servers. The root server knows, via a name server which acts as an authority for a top-level country code, which remote name server is responsible for responding to queries about that particular domain name (if that domain name exists).

Figure 1: A DNS lookup for “sample.org.”

Figure 1 shows the delegation from the root servers down into the key servers responsible for the delegation of the Top Level Domain (TLD) .org. Underneath those authoritative “afilias-nst” servers, we see (at the end of the output) the two name servers responsible for answering queries for the domain name sample.org. In this case ns1.mailbank.com and ns2.mailbank.com. The last salient link in the chain is:

sample.org.        300    IN    A    64.99.64.45

This is the “A Record” result for the non “www” record for “sample.org” (in other words, if you just typed sample.org into a web browser without a www, this is the IP address you would visit). This is ultimately the answer we’ve been waiting for, and you might be surprised how many servers we had to ask in order to receive it.

Now that we’ve come to grips with DNS delegation and traversed the lengthy chain required for a “.org” namespace lookup, let’s compare that output with a “.co.uk” DNS lookup. Figure 2 shouldn’t cause too many headaches to decipher.

Figure 2: Shows the “sample.co.uk” delegation during a DNS lookup.

The 10 “.nic.uk” name servers (geographically disparate for resilience, which you could confirm categorically with a “WHOIS” lookup on each of their IP addresses) shows that the .UK namespace is well protected from issues. For reference, Network Information Centre (or NIC) is common parlance throughout the name server world, and if you’re ever unsure which authoritative body is responsible for a country’s domain name space, trying something like http://www.nic.uk, in the case of the United Kingdom, might save the day.

Now, let’s compare that with a much more concise output using the +short option as follows. In Figure 3, you see that the NIC’s inclusion is not displayed but instead just the other salient parts of the chain. The command that used was:

# dig +short +trace @8.8.4.4 sample.co.uk

Figure 3: Shows root server delegation in short.

Tick Tock

The timing of DNS lookups are clearly of paramount importance. Your boss may have invested in the latest dynamic infrastructure for your killer application, but if you are delaying each connection to your application by two seconds because of poorly configured DNS, then your users will be far from pleased.

If you see very slow response times anywhere in the chain (you can see the lookup completion results at the foot of each section in Figures 1 and 2), my advice is to turn to one of the many online tools that assists in measuring performance. They can help isolate and then identify the bottlenecks and additionally  suggest improvements.

Hold on for a second. What if you needed to use the dig utility in a script and you foresaw connectivity issues or queries that wouldn’t have valid answers? You can set a timeout function as follows deviating from the default of five seconds using the +time= command switch:


# dig +time=2 chrisbinnie.tld mx

You can now be assured of running through multiple lookups, with or without lookup failures, in two-second increments.

Start of Authority

Those familiar with zone files will understand this next section. Imagine — and this almost certainly stems from the Internet of old — that you need to figure out who to contact about a domain name issue or discover certain parameters that help to control how a domain name runs its synchronisation of data between its name servers. You can discover much of this (not always entirely accurately because there can be other factors at play) by querying the start of authority (SOA) of a domain name.

Here is a “short” example, which I’ll explain in a second with its output following:


# dig +short @8.8.4.4 chrisbinnie.tld soa

toma550561.mars.orderbox-dns.com. transfer.active-domain.com. 2014102717 7200 7200 172800 38400

Let’s compare that slightly unusual numerical output to a default display of a SOA query using the dig utility in Figure 4.

To achieve a reasonable amount of detail but in a sensible way, the command line I used was:


# dig +multiline @8.8.8.8 chrisbinnie.tld SOA

The +multiline option tries its best to offer a formatted layout coupled with helpful comments. In the case of the SOA, I’m sure that you’ll agree it makes sense of an otherwise difficult to read output under the AUTHORITY SECTION.

Figure 4: Shows the use of the “multiline” parameter in the dig utility.

I, for one, think that’s much less cryptic. The “serial” number in an SOA is a simple measure of when a change to the domain name was last made. Request For Comments (RFCs), which are technical specifications for the Internet, most likely recommend the serial takes the form of a date format shown backward as seen in our example.

Apparently (but this may not be the case), that RFC 1035 holds fort for SOA recommendations, which can be found here https://www.ietf.org/rfc/rfc1035.txt if you would like some enlightening, bedtime reading.

Other name servers simply increment a long number such as 1000003 each time there’s a change. This process admittedly doesn’t help with when an update was made, but at least it lets you know which version of a zone file you are looking at. This is important because when sharing updates between many name servers, it’s imperative that they answer with the most up-to-date version of the DNS and do not respond with stale, potentially damaging information.

In case you’re wondering, we’re seeing the “root-servers.net” and “verisign-grs.com” domain names being mentioned because the domain name “chrisbinnie.tld” doesn’t exist (I’m just using it as an example). So Figure 4 is showing the SOA for “a.root-servers.net” instead, which is the first link in the chain for our non-existent DNS lookup.

The “refresh” field looks at how soon secondary name servers are to come back for new information (secondaries and tertiaries are name servers serving the same information for resilience in addition to the primary). Usually this value sits at 24 hours but it’s shorter for a root server. The “retry” is how quickly to try a “refresh” that failed again. On a name server that isn’t a root server, you would expect this to be 7200 seconds (two hours).

The “expire” field lets secondary name servers know when the answers it has been serving should be considered stale (or, in other words, how long the retrieved information remains valid).

Finally, the “minimum” field shows secondaries (also called “slaves”) how long the received information should be cached before checking again. This has been called the setting with the greatest importance thanks to the fact that, with frequent changes to your DNS, you need to keep secondaries frequently updated.

The tricky balance, however, is that if you don’t make frequent DNS updates, keeping this entry set to a matter of days is best to keep your DNS server load down. The rule of thumb is that to speed up a visitor’s connection time, you really don’t want to enforce a DNS lookup unless you’re making frequent changes. On today’s Internet, this is less critical because name server traffic is relatively cheap thanks to its tiny packet size and the efficiency of modern name servers. It’s still a design variable to consider however.

When You’re Ready

And, at the risk of sounding melodramatic, when it comes to DNS, every millisecond really does count.

Another quick note about Figure 4 is that “a.root-servers.net” is the authoritative name of the name server for that domain name’s zone. And, separately, the “nstld.verisign-grs.com” entry is the contact method of the domain name administrator, which I mentioned earlier. Although it’s a strange format if you haven’t seen it before — to avoid the use of the @ symbol I assume —  this field is actually translated as “nstld@verisign-grs.com” into a functioning email address.

Finally, the “1799” at the start of that line is the Time To Live — which means how many seconds (30 minutes in this case, minus a second) connecting client software should hold onto the retrieved data before asking for it again, in the event that it’s changed in the meantime.

In the fourth and final part of this series, I’ll take a quick look look at some security options and wrap up with more examples that I have found very useful.

Chris Binnie is a Technical Consultant with 20 years of Linux experience and a writer for Linux Magazine and Admin Magazine. His new book Linux Server Security: Hack and Defend teaches you how to launch sophisticated attacks, make your servers invisible and crack complex passwords.

Learn more about network and system management in the Essentials of System Administration training course from The Linux Foundation. 

How Blockchain Will Grow Beyond Bitcoin

Since its advent in 2009, bitcoin’s decentralized, broker-less and secure mechanism to send money across the world has steadily risen in popularity and adoption. Of equal — if not greater — importance is the blockchain, the technology that supports the cryptocurrency, the distributed ledger which enables trustless, peer-to-peer exchange of data.

Every day, new companies and organizations, including big names such as Microsoft and Tesla, take strides toward or show interest in using cryptocurrency and blockchain to support their business.

Read more at TechCrunch


Nextcloud Box: A Cloud for your Office or Living Room

Nextcloud, in partnership with Canonical and WDLabs, has released a Raspberry Pi and Ubuntu Linux powered cloud server for your home or office.

The Nextcloud Box is a secure, private, self-hosted cloud and Internet of Things (IoT) platform. It makes hosting a personal cloud simple and cost effective whilst maintaining a secure private environment that can be expanded with additional features via apps.

The Nextcloud Box consists of a WDLabs’s 1 TB USB3 hard drive powered by a Raspberry Pi 2 computer. It uses Snappy Ubuntu Core as its operating system on a microSD card. The mini server comes ready to run with the Apache web serverMySQL, and the latest Nextcloud 10.

Read more at ZDNet

Transforming Rigid Networks into Dynamic and Agile Infrastructure

For service providers with rigid network resources, physically assigned in metro and wide-area networking (WAN)networks, their complex networking structures aren’t easily manipulated into making dynamic changes. Another challenge is the ability to manage their existing network connections, while at the same time, build new agile platforms with on-demand, multi-tenant services.

The time has come for network operators to also enjoy the benefits that virtualization and programmatic control over network infrastructure can deliver. So today, IXPs and ISPs are ready to forge ahead and deploy software-defined networking (SDN) with at-scale network virtualization and spin up virtual network infrastructure to more flexibly, and cost-efficiently, meet their customer’s demands.

Read more at SDx Central

Cars Will Make Up 98% of Mobile-to-Mobile Traffic by 2021

Internet radio and information services will generate approximately 6,000 petabytes of data a year. In just five years, ever more sophisticated in-vehicle infotainment (IVI) systems that stream music and offer real-time navigation will generate up to 98% of mobile-to-mobile (M2M) data traffic, according to a new report.

The Juniper Research report indicates that ever-more popular applications such as Apple CarPlay and Android Auto that mirror your smartphone interface to your car’s IVI will generate massive amounts of cellular M2M data traffic.

Read more at ComputerWorld

Moving Toward a Services Based Architecture with Mesos

Over the past few years at Strava, server side development has transitioned from our monolithic Ruby on Rails app (The Monorail) to a service oriented architecture with services written in Scala, Ruby, and golang.

rails.png

repos.png

Top: Commits to our monolithic rails app. Bottom: Total private repositories at Strava as a proxy for the number of services.

Initially, services at Strava were reserved for things that were simply not possible to implement in Rails (for example, see my previous blog post on Routemaster). It was difficult to bring up a new service, and it required some combination of prior knowledge and trailblazing.

At some point, it became clear that services had become the preferred way of development at Strava. Service oriented architecture (SOA) had triumphed over the Monorail, however, all was not yet well. If done hastily, introducing dozens of services can cause havoc. We had figured out that we liked building services, but we didn’t really have a plan for scaling the number of them.

This post covers the infrastructure that has supported smooth adoption of services at Strava. Today we run over a hundred services deployed by over a dozen engineers. Engineers are able to fully implement and deploy new services quickly and with minimal guidance, having almost no prior infrastructure experience. Services are deployed extremely quickly (< 30 seconds) in a consistent and reliable way. They are monitored, logged, and always kept running.

Read more at Strava’s blog.