
Icinga 2 is a scalable OpenSource monitoring software. This tutorial describes the installation of Icinga 2 together with Icingaweb on a CentOS 7 server.
This Week in Linux News: Apache Foundation Founder Becomes Hyperledger Executive Director, Linux 4.6 Has Arrived, & More
1) Brian Behlendorf, developer of Apache web-server software, announced as the Hyperledger Project’s new executive director.
Internet Heavyweight Joins Open-Source Blockchain Consortium– Bloomberg

Linux 4.6 is a Major Release: Here’s What’s New & Improved– ZDNet
3) OpenDaylight executive director Neela Jacques explains the ubiquity of open source.
The Shift in Open Source: A New Kind of Platform War– NetworkWorld
4) Adam Jaffe testifies in the Oracle’s copyright infringement case against Google.
Economist: There Was No ‘Fair Use’ of Java APIs in Android– eWeek
5) Major security vulnerability in the Symantec Antivirus Engine has been uncovered and could compromise Linux, Mac and Windows PCs.
Security Hole in Symantec Antivirus Exposes Windows, Linux and Macs– SecurityBrief NZ
Get Desktop Access to Your OnlyOffice Account from Linux

OnlyOffice is yet another entry in a long line of cloud-based office suites. Because it is cloud-based, you can use it from any browser on any platform. However, if you prefer working with such applications in their own dedicated window (with their own features), you might be interested to know that you can also install the OnlyOffice Desktop Editors suite on Linux. Desktop Editors is quite a nice piece of work. With it, you can use your OnlyOffice account (either personal or business), work with local files, upload files, work with a team, and much more.
Yes, all of this can be done through your standard web browser, but if you want to ensure full compliance, there’s no better way than to use OnlyOffice’s official Desktop Editors. This is actually one application that gets you direct access to the word processor, spreadsheet, and presentation tools—all from one, well designed interface.
I am going to walk you through the process of setting this up on an Ubuntu 16.04 desktop. As of this writing, OnlyOffice only supports Debian-based Linux distributions. I also tested it on elementary OS Freya with equal success.
The system requirements for this installation are:
-
CPU: dual-core 2 GHz or better
-
RAM: 2 GB or more
-
HDD: at least 2 GB of free space
-
OS: 64-bit Debian-based distribution, running at least kernel 3.8
Installation
The installation requires the use of the command line. If you follow these simple instructions, however, it will go off without a hitch.
First, you must add the OnlyOffice GPG signing key:
-
Open a terminal window
-
Download the OnlyOffice key with the command sudo wget http://download.onlyoffice.com/repo/onlyoffice.key
-
Add the key with the command sudo apt-key add onlyoffice.key
Next, it’s time to add the OnlyOffice repo to apt. You’ll do this from the same terminal window you just worked in.
-
Open up /etc/apt/sources.list with the command sudo nano /etc/apt/sources.list
-
Add the line deb http://download.onlyoffice.com/repo/debian squeeze main to the end of the file
-
Press Ctrl+x to save the file
-
Press y when prompted
The next step is to update apt and install. You’ll do this in the same terminal window as before.
-
Issue the command sudo apt-get update
-
Install the software with sudo apt-get install onlyoffice-desktopeditors
-
Allow the installation to complete
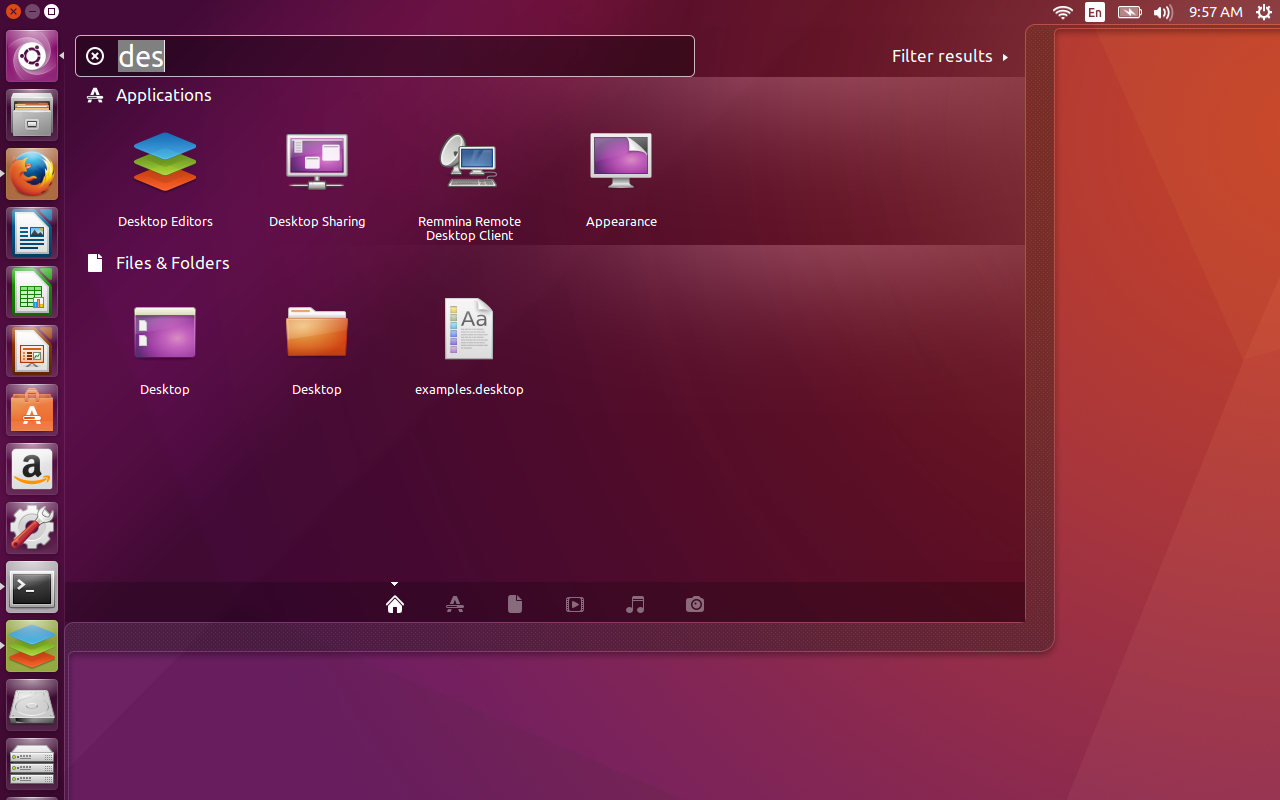
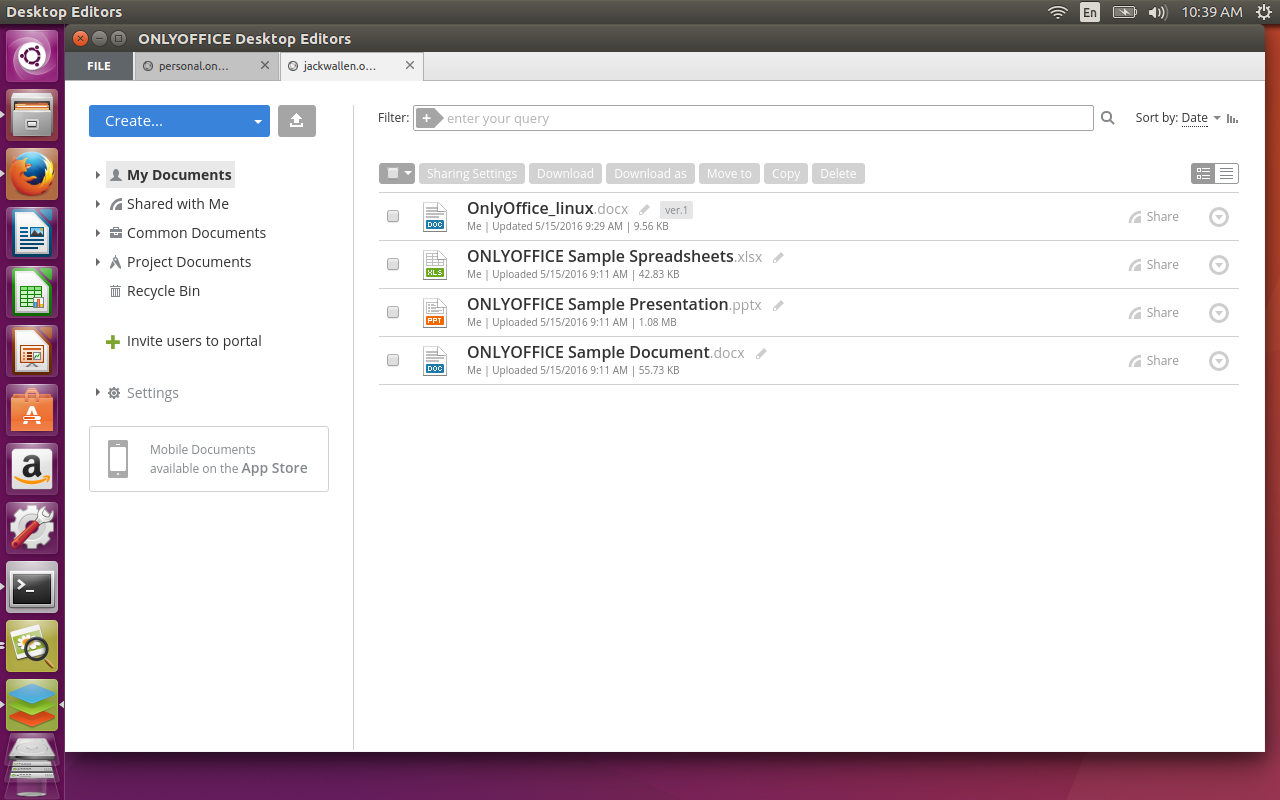
During the installation, you will be prompted to OK the installation of the Microsoft Core Fonts (if it is not already installed). Okay that and then accept the license to continue and complete the installation. Once the Desktop Editors is installed, open up the Unity Dash (or your desktop menu, whichever you are using), and do a search for desktop. You should see the launcher for Desktop Editors lists (Figure 1). Click the icon to start the application. NOTE: You can also start the application with the command desktopeditors.
Logging In to OnlyOffice
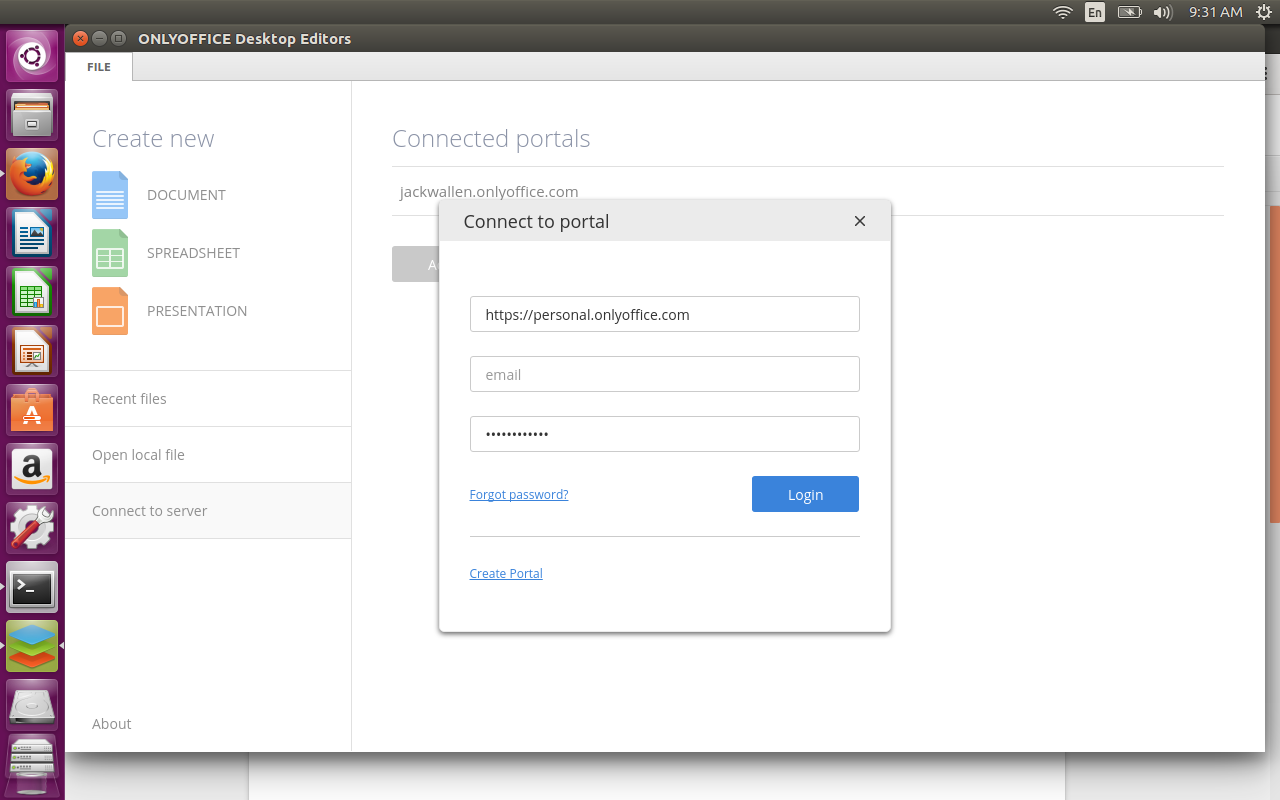
When the Desktop Editors application opens, click on the edition of OnlyOffice you will be using (Figure 2 — either Home or Commercial). If you’re using a free personal account, click on Home, otherwise click Commercial.

-
Open OnlyOffice Desktop Editors
-
Click on Connect to server
-
Click Add Portal
-
Enter the information for the new portal
-
Click Login
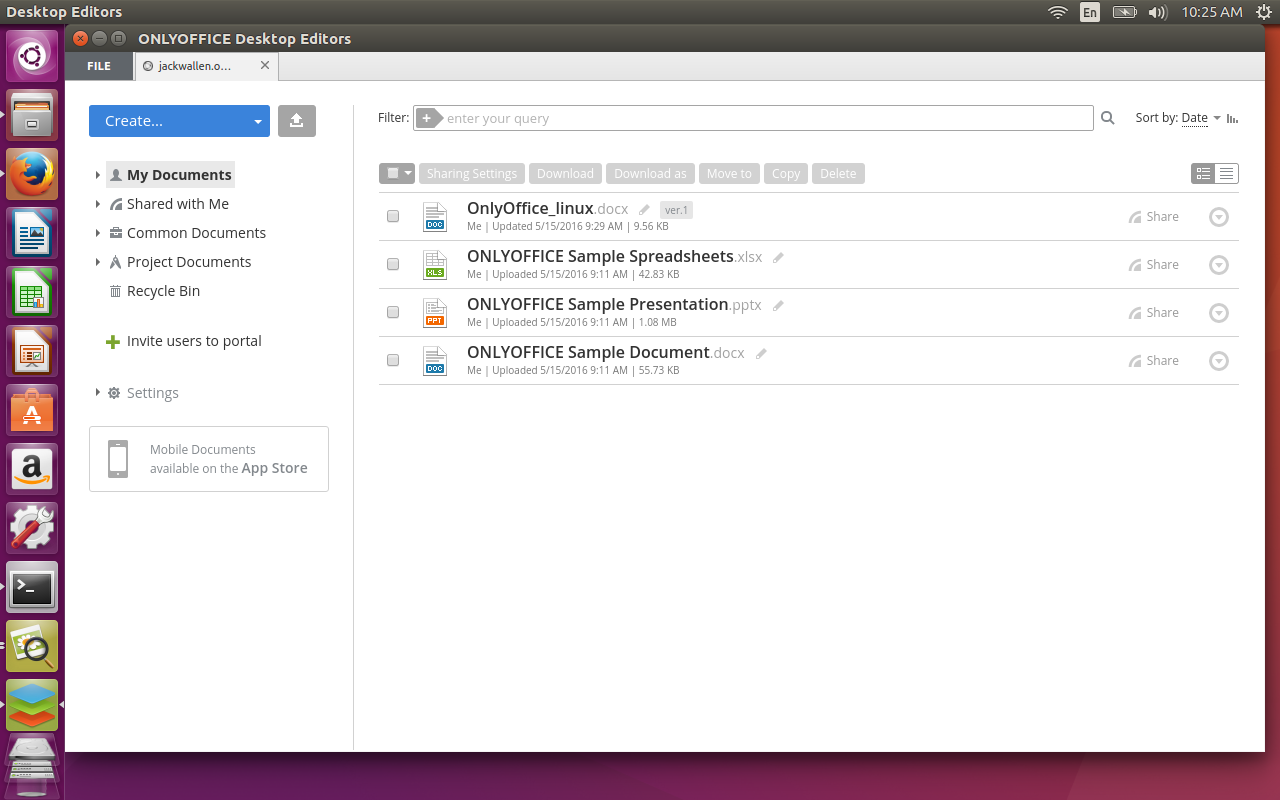
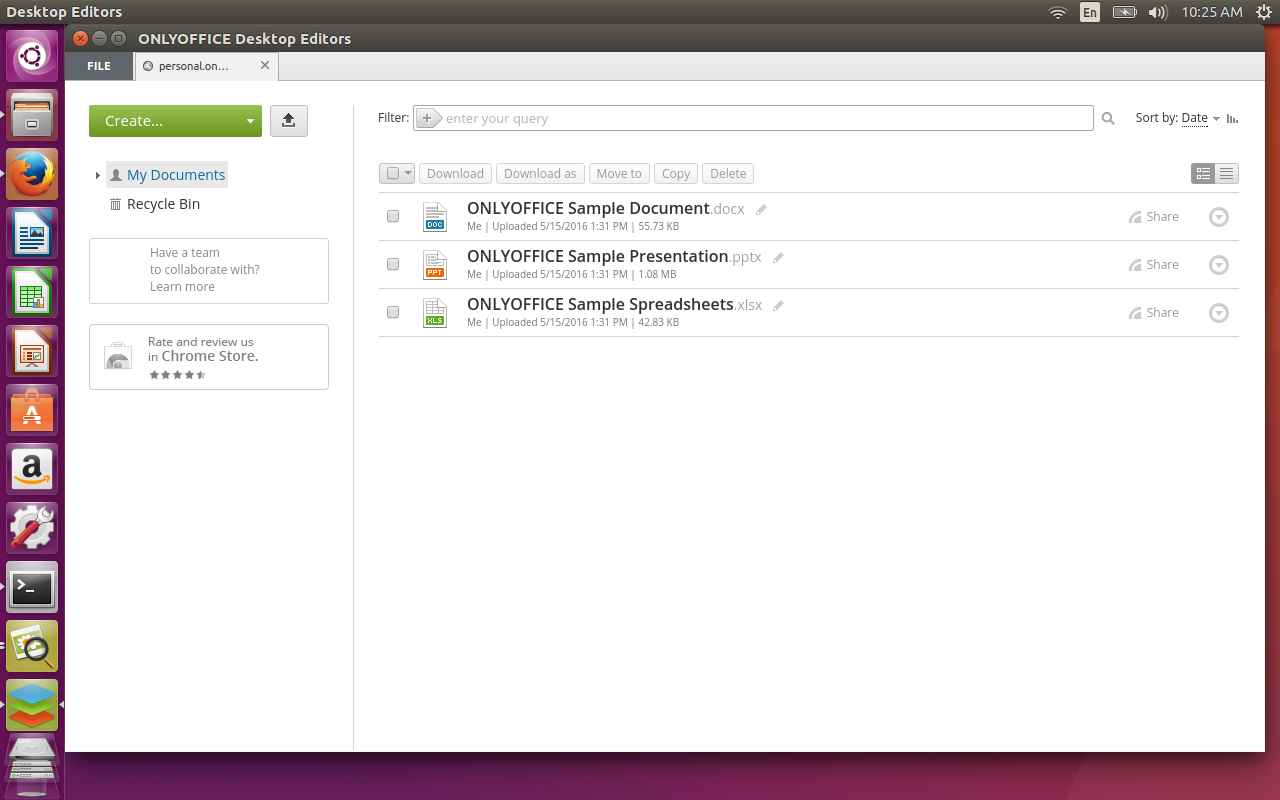
Each portal will open as a new tab (Figure 6).
Is It Worth It?
OnlyOffice Desktop Editors is actually a really nice addition to the office suite toolkit. No, it’s not open source (which will be a turnoff to some users), but it works on Linux and can serve as a solution that can easily serve as your main productivity tool. If you’re looking for an outstanding cloud-based office suite, and neither Google or Office365 appeal to you, OnlyOffice might very well be what you’ve been looking for.
Give OnlyOffice Desktop Editors a try and see if it doesn’t meet or exceed your needs.
Introducing Unik: Build and Run Unikernels with Ease
By Idit Levine (@Idit_Levine), Office of the CTO & CTO of Cloud Platform Team, EMC
Check out the Unik code today at https://github.com/emc-advanced-dev/unik/
Catch the announcement and live demo today at 11am PDT/2pm EDT: https://plus.google.com/events/c17rvgfd2cohnn5adaf5ov1drag
If you’re in Boston, come see us in person at today’s meetup.
Unikernels are lightweight, immutable operating systems compiled specifically to run a single application. Unikernel compilation combines source code with the specific device drivers and operating system libraries necessary to support the needs of the application. The result is a machine image that can run directly on a hypervisor or bare metal, eliminating the need for a host operating system (like Linux). The unikernel represents the smallest subset of code required to run the application, giving us portable applications with smaller footprints, less overhead, smaller attack surfaces, and faster boot times than traditional operating systems. Together, I believe unikernels have the potential to change the cloud-computing ecosystem as well as to dominate the emerging IoT market.
However, compiling a unikernel is a challenging assignment. It requires rare expertise often absent in application developer’s toolkit. The difficulty of compiling Unikernels may significantly hamper their widespread adoption. I believe that the community will benefit from a straightforward way to build and manage unikernels.
This is why UniK was developed.
UniK (pronounced you-neek) is a tool for compiling application sources into unikernels — lightweight bootable disk images — rather than binaries. UniK runs and manages instances of compiled images across a variety of cloud providers as well as locally on Virtualbox. UniK utilizes a simple docker-like command line interface, making building unikernels as easy as building containers. UniK is built to be easily extensible, allowing – and encouraging – adding support for unikernel compilers and cloud providers.
UniK is fully controllable through a REST API to allow for seamless integration between UniK and orchestration tools such as Kubernetes or Cloud Foundry.
Docker Integration: Recognizing the open source community’s popular adoption of the Docker API, we extend UniK’s REST API to serve some of the same endpoints as Docker, allowing some Docker commands such as docker run, docker rm, and docker ps to control UniK, which we hope will make UniK easier to adopt for those already familiar with Docker.
Kubernetes Integration: To demonstrate the value of cluster management of unikernels, we implemented a UniK runtime for Kubernetes, making Kubernetes the first cluster manager to support unikernels. This integration allows UniK to take advantage of core Kubernetes features like horizontal scaling, automated rollouts and rollbacks, storage orchestration, self-healing, service discovery, load balancing and batch execution.
Cloud Foundry Integration: To provide the user with a seamless PaaS experience, we added UniK as a backend to the Cloud Foundry runtime, positioning Cloud Foundry as the first platform to run applications as unikernels. This adds the lightweight scalability of unikernels with the security and sophistication of vms (lightweight, immutable, performant), persistent storage, and the ability to run on bare metal.
We believe the quintessential use case for unikernels is the advantage they give to smart devices in the Internet of Things. Their airtight security, immutable infrastructure, high performance and light footprint make them the ideal solution for deploying software on embedded devices. To demonstrate this vision for the future of unikernels, we implemented ARM processor support into UniK to run unikernels on the architecture used in most embedded devices such as the Raspberry Pi.
Today, we are thrilled to share the open source UniK under the Apache 2.0 license. We hope that the community will join us in making the Unikernel a first class citizen in the future cloud ecosystem and emerging market of IoT devices. Please visit our repository at https://github.com/emc-advanced-dev and try our Getting Started with UniK Tutorial https://github.com/emc-advanced-dev/unik/blob/master/docs/getting_started.md
By Idit Levine (@Idit_Levine), Office of the CTO & CTO of Cloud Platform Team, EMC
How to Set Up Virtual Domains and Virtual Users in Postfix
A previous tutorial covered how to install a Postfix mail server and test it with mailx. Now we’ll introduce email aliases, set up virtual domains and users, and do a little troubleshooting.
My first professional introduction to serving HTTP was via the clever Roxen Web Server when I worked for an ISP during early 1997 and one of the first elements of a Mail Transfer Agent (MTA) that I maintained (using the mighty “qmail”) was its E-mail Aliases. The premise of E-mail Forwarding (or Aliasing) is super simple but I remember that some customers couldn’t immediately get their heads around it, possibly because public e-mail was relatively new. For the sake of those new to the idea, here’s the basics. Apologies to those who aren’t.
Imagine you own a Domain Name, we’ll use “chrisbinnie.tld”, and you want to send and receive e-mail from your Gmail account using that Domain Name.
You’ll first want to change your “From” line or sender address inside Gmail’s settings to make sure that your e-mails look as if they come from the e-mail address held under your Domain Name, such as “chris@chrisbinnie.tld”.
The other element of getting this to work is obviously dealing with inbound e-mails when they are are sent to “chris@chrisbinnie.tld”. The Web Hosting company (or ISP) which looks after your Domain Name needs to forward your e-mails sent to “chris@chrisbinnie.tld” onto your Gmail address. I told you it was simple.
Without running an unwieldy mailing list you can also add lots of people to an E-mail Alias. Imagine you’ve got ten Sysadmins in a department and everyone wants a copy of the daily sarcasm-fueled humour sent to “admins-are-better-than-devs@company.tld”.
Postfix uses old-school Sendmail formatting to add a few simple aliases. This isn’t very effective for many aliases but in this case we need to add a line or two to the file “/etc/aliases”. Note that whenever we make a change to this file we need to run this command:
newaliases
Alternatively, run this command, Postfix-style to achieve exactly the same thing:
postalias /etc/aliases
Let’s make sure that all of the “root” user e-mail (the key system e-mails in other words) are forwarded to the user “chrisbinnie”. Simply edit the “/etc/aliases” file and alter the pertinent line so that it looks like this:
root: chrisbinnie
That line is commented out at the foot of the file in my version and thankfully it’s intuitively formatted so it shouldn’t present any issues. Remember to run “newaliases” or its equivalent afterwards.
The mighty “sendmail” uses “.forward” files to create e-mail aliasing possible and the venerable qmail uses this format: “.qmail-ALIASNAME”. If you have the basic premise of e-mail forwarding and aliasing covered then they’re easy to use.
With qmail for example if e-mail is routed to your home directory for the an e-mail address beginning “support@” then inside our “.qmail-support” file we could add a few e-mail addresses, something like this:
phillipe@chrisbinnie.tld
daniel@chrisbinnie.tld
christian@chrisbinnie.tld
roberto@chrisbinnie.tld
Postfix Aliases
Onto a more industrial approach to aliases now. As you would expect Postfix’s aliases are typically easy to get your head around. Let’s have a look at them now. Sometimes the extensive online Postfix documentation refers to the same aliasing or forwarding functionality with different names such as “address rewriting” in case it trips you up. Additionally “database” and “lookup table” are frequently interchangeable it seems.
You begin by declaring which Domain Name you want to add a list of “virtual users” to (e-mail aliases in other words), inside the main configuration file. If you’ve forgotten the file lives at “/etc/postfix/main.cf” and the line you need to append would look like this, where “chrisbinnie.tld” is your Domain Name obviously:
virtual_alias_domains = chrisbinnie.tld
Simply separate multiple Domain Names with a comma and a space for better readability. Incidentally Postfix makes a big deal about the “mydestination” variable (which Domain Names that it will accept e-mail for) and it’s important to never add a “virtual_alias_domain” as a entry to “mydestination” or (very) bad things, think along the lines of Ghostbusters crossing the streams, will happen.
Next we need to create our virtual users file which we’ll “hash” in order to make it much more efficient as it grows lengthy. Imagine that for some insane reason an ISP doesn’t use an external database server like MySQL to house all of its aliases for a shared Domain Name. That flat aliases file could grow to tens of thousands of lines so it has to be efficient. More on this subject in a moment.
Even though we haven’t got thousands of entries we can create the file “/etc/postfix/virtual” and merrily populate it with our e-mail forwarding information.
We’ll mention this again in a moment.
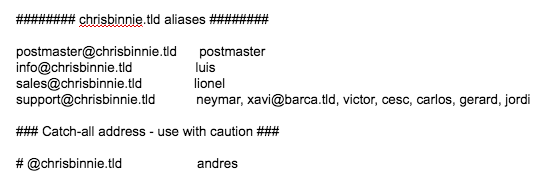
As we can see in Listing One we can forward one address to another with ease. Again with the comma separation we can add multiple entries to one alias. Let’s consider an external address to our Domain Name too. We can force address redirection, sorry “forward”, e-mail like so:
support@chrisbinnie.tld chrisbinnie@linux.tld
We now need to nip back to our main config file (“/etc/main.cf”) and add this line next to the Domain Name line we just added for clarity:
virtual_alias_maps = hash:/etc/postfix/virtual
We need to create an efficient “hash” file of our Postfix config. We’ve chosen “hash” because it’s used at length in the comprehensive Postfix documentation. I can tell that my current system will allow me to hash a file (which means that it supports Berkeley DB databases) and create a hashed version of my config file adding a “.db” extension to it but retaining the same name thanks to the results of this command:
# postconf -m
btree
cidr
environ
hash
ldap
mysql
nis
pcre
proxy
regexp
static
unix
What about using a non-local Database Server to store your aliases, where your Mail Server connects remotely to another machine? The machine which I’m working on can support lots of different database types so you can alter that easily if you have a preference, including network databases. You’re encouraged to get local config working before diving into serving network information back to Postfix. You can test if your remote, network config achieves the same results as your local files as so with this LDAP (Lightweight Directory Access Protocol) example:
# postmap -q support@chrisbinnie.tld ldap:/etc/postfix/virtual.cf
Incidentally when we’re updating our config files the clever Postfix used to make sure that conflicts are avoided by using file locking. Apparently however Berkeley DB has evolved into a more aggressive beast which utilises caching to a greater extent. To help get around this (infrequent issue) you are encouraged by the online documentation to follow a step similar to the one which follows:
# postmap access.in && mv access.in.db access.db
Before you do however the sophisticated Postfix realises that the typing of this command could lead to an unwelcome degree of tedium and to counter this issue introduced a “Makefile” to circumvent the pain. After editing your aliases config you now simply type “make” to skip, fast-footed past any conflicts.
# make

postmap access.in

mv access.in.db access.db
The addition of the “make” command means Postfix is also wise enough only to update files which have changed and it additionally includes some welcome error checking too.
Clarity
We mentioned the old-school “/etc/aliases” file earlier before looking at Postfix’s virtual users. In case you become rattled and perplexed by the differences between the two let’s have a quick look now.
Postfix makes a somewhat conciliatory attempt to include the otherwise directly accessible “/etc/aliases” file available within its configs like so in the “/etc/postfix/main.cf”:
alias_maps = hash:/etc/aliases
The main differences are that the “alias_maps” option only applies to local deliveries therefore as a result the Domain Name element of an email address is discarded and only the prepended part before the “@” sign, such as “chris@” is checked against. You might forward an e-mail received using this method or do some other filesystem-based work like filter it before a local mailbox delivery.
In contrast the “virtual_alias_maps” option does pay heed to Domain Names. This option is all about the processing of Internet-friendly addresses and not local ones. Valid recipients Domain Names will match “username@local_machine_name” when “local_machine_name” is equal to $myorigin in your config. Or if “local_machine_name” is present in $mydestination or when it is listed in $inet_interfaces or $proxy_interfaces. Think of it effectively overlapping with the “/etc/aliases” file functionality and being useful for more than a few local alias changes.
Error Checking
The final steps to set your altered virtual user files live are simply these, starting with:
# postmap /etc/postfix/virtual
This creates a “.db” hashed version of what is essentially a “.cf” config file (even if you haven’t explicitly named it as much). The clever Postfix just needs to know the root of the name and by prepending “hash:” to the “hash:/etc/postfix/virtual“ entry in your main config file it knows not to look for the “.cf” version but rather the “.db” equivalent for translation.
It’s useful to also know that when you update your file the “postmap” command will look for a “key: value” style of format, in two columns and complain if you’ve missed an entry. For example if a row contains an alias name but not a destination and only contains one column you’ll get a failure notification.
# postfix reload
You now have two guesses as to what we’re doing in the final step above, having made those changes to our config files.
There May Be Trouble Ahead
To assist with troubleshooting the magical Postfix offers a welcome degree of help. Firstly you can run a standard Unix-type command to look in its logs, by using syntax along these lines:
# cat /var/log/mail.log | grep '(warning|error|fatal|panic):' | less +G -n
In the table below we can see the common types of errors along with a description of what they refer to.
|
Error Type |
Description |
|
panic |
Consider this a critical fault which only a skilled coder can assist with. This is not a welcome error by any means and Postfix will halt having thrown all of its toys out of any nearby prams. |
|
fatal |
The common causes of a “fatal” error tend to be the result of missing files, broken permissions or some other config issue. Check your configuration and try starting up Postfix again. You will need to remedy the issue if you want Postfix to launch properly. |
|
error |
This indicates an error of varying types. Should a superstitious thirteen errors be encountered then Postfix will terminate and Skynet will take over. |
|
warning |
Any “warning” might be, as you would expect, an indication of an issue but not necessarily one which will cause you headaches in the immediate future. |
One Postfix troubleshooting tool is a command that displays the default Postfix config so you can reference how things were previously configured if something is broken.
# postconf -d
Be warned that you’ll have screeds of config options scroll up your screen after running this.
Now onto my favourite troubleshooting command. When debugging it’s highly useful to be able to display what changes you have made against prebuilt default values which are displayed with the above command. These are explicitly visible in the config file “/etc/postfix/main.cf” if I’m reading the docs correctly so you can hopefully correct mistakes there in the majority of cases. You can achieve this by running this exceptionally useful command as so:
# postconf -n
What about your queued e-mails? If you wanted to monitor any mails stuck in your queue then you can achieve this easily with this command:
# postqueue -p
An alternative is “mailq” (old-school sendmail style again) but I try to use the former to keep in with the other Postfix command names.
Running such a command might give you a response like this multiplied by the number of e-mails in your queue obviously:
-Queue ID-       --Size-- ----Arrival Time---- -Sender/Recipient-------
3ED1624E13    12512 Thu Nov 11 11:11:11  support@chrisbinnie.tld
(connect to alt1.gmail-smtp-in.l.google.com[2607:f8b0:4002:c03::1b]:25: Connection timed out)
                                          linux-rules@gmail.com
You can process your MTA’s queue there and then (or “flush” the queue) by running this command:
# postqueue -f
The sendmail equivalent of “sendmail -q” (or equally “postfix flush” or “postfix -f”) is very similar and forces the MTA to try and send the mails in the queue again. I mentioned that Postfix has lots of options and I wasn’t exaggerating, there’s even a way of only allowing certain users to flush the queue from within your main config file:
authorized_flush_users
A minor caveat contained in the docs in relation to flushing the queue too often reads as follows:
“Warning: flushing undeliverable mail frequently will result in poor delivery performance of all other mail.”
As a last resort if you ever (really, really) need to delete your entire mail queue then you can run this devastatingly destructive command as follows:
# postsuper -d ALL
A more suitable approach is to reference an e-mail’s unique ID in the column shown as “Queue ID” above and then delete individual problem mails that may never be delivered for some reason but are slowing down your Mail Server (they could have very large attachments for example).
# postsuper -d 3ED1624E13
Needless to say there’s also a plethora of queue purging, queue length and allowed inbound e-mail size options available in addition if you want to tweak away to your heart’s content.
Summary
From installation to old-school E-mail Aliases and Postfix’s address redirection we’ve covered how to get up and running with virtual domains and virtual users in Postfix.
Trust me when I say that we’ve only touched upon a tiny percentage of the excellent Postfix features, however.
In the next article, we’ll cover how to protect your users from spam with Postfix’s extensible postscreen functionality. It’s a little more complex than the ground we’ve covered here but is incredibly useful.
Chris Binnie is a Technical Consultant with 20 years of Linux experience and a writer for Linux Magazine and Admin Magazine. His new book Linux Server Security: Hack and Defend teaches you how to launch sophisticated attacks, make your servers invisible and crack complex passwords.