Home Blog Page 833

Give your Git Repository an Open Source Web Interface

Git is a very popular open source version control system. Many developers use Git on a desktop machine and push their updates to a central server running on a service like GitHub or GitLab. Although such services are great, this may lead some to think of Git as a client-server model with local checkout of code and updates that are always being pushed back to the single central server.

Git is a distributed version control system, and it happily allows you to have many repositories for the same software. You might have a complete functional repository running on a server on your LAN that developers are pushing their changes to. That local repository might also use Git to share changes to a repository on GitHub and grab contributions from remote developers. When you have such a local repository on your LAN, you might want to have web interfaces to allow exploration and discussion of the repository.

A major advantage to using a web interface to a Git repository is that you can share links to the page you are viewing with other developers. If you see an issue that needs to be addressed, the link can let another person see that exact line of code — at the version and branch of code that you are looking at. It can also perhaps be shown with blame information (discussed shortly) if it helps to see that lines of code were developed by different people who might have a different understanding of the intended goal of a function.

In contrast, when using the command-line Git tools, the person you are discussing things with has to check out the correct branch, open the correct file, and navigate to the right line. And, if a developer is part way through editing something already, it might even be simpler for them to create a fresh copy of the repository to see what you are talking about. A URL that can be seen in the browser needs no setup.

The Git repository on your LAN will probably have much lower network latency than a server on the Internet and also allow more expensive Git operations to be performed than might be enabled, or fully enabled, on a public server. An example of a more expensive operation is “git blame,” which lets you browse a file and see who committed each line of code to create the current version of that file. On a public repository, you might not be able to see git blame for a large file, because it’s very resource intensive to create such a page. On a local server, however, you are in control of what is too expensive for your computer resources.

If you are familiar with the web interfaces to Git, you might even want to install one on your laptop so that you can easily browse a repository, for example, when Internet is unavailable or expensive. Again, a collection of links to specific parts of code that you can see in the web interface might help you work through a list of tasks and jump between them without needing to check out code in your working directory to get a feel for what needs to be done.

If you have /etc under Git control, you are unlikely to want to make that Git repository publicly available. So, a local web interface to the /etc Git repository might be the most desirable solution. In this article, I’ll take a look at cgit, Gitweb, and GitList, which are all projects that provide web interfaces to Git repositories. You can get an idea of how cgit operates by looking at the instance running on kernel.org.

Cgit

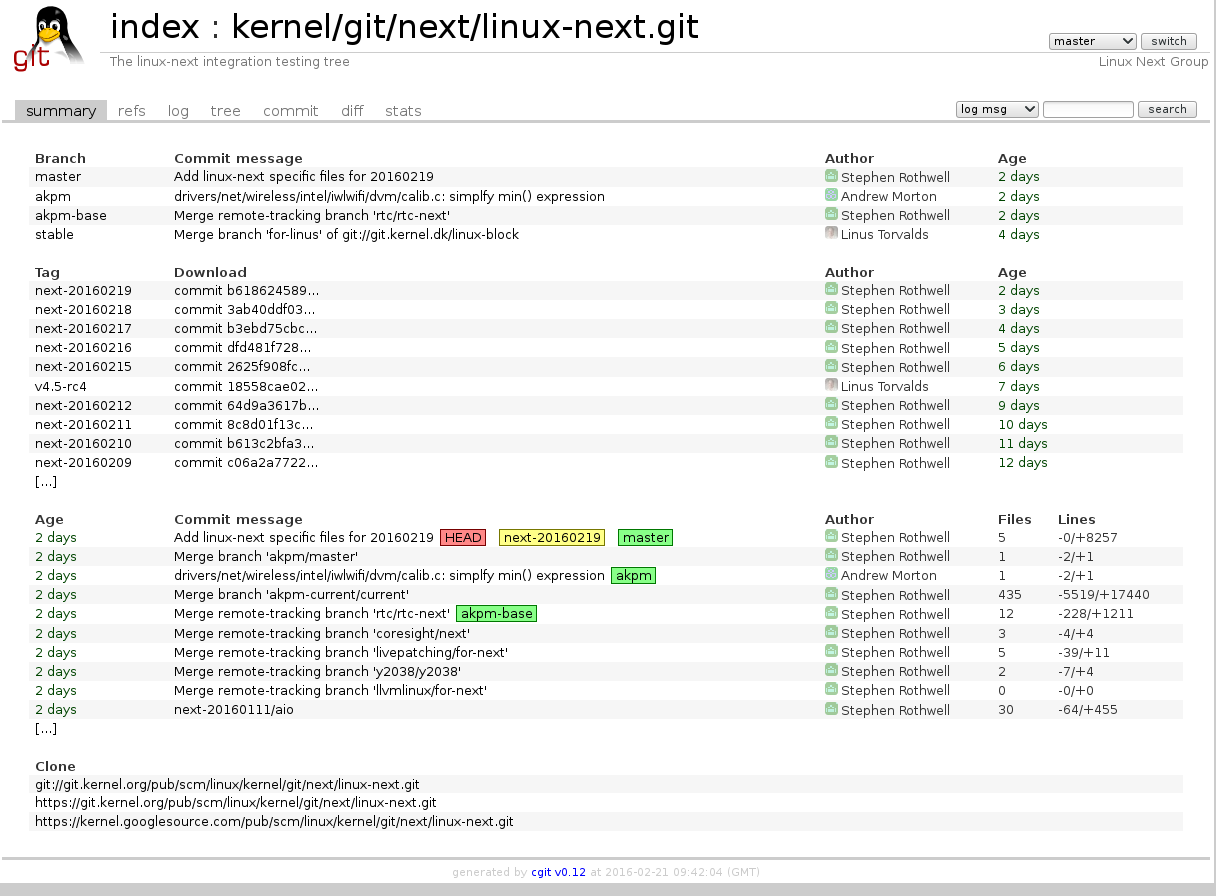
The cgit web front end (Figure 1) is written in C and runs as a CGI program from your web server. On Fedora, installing the cgit package also installs the support files to have Apache make cgit available at http://localhost/cgit. You shouldn’t see any Git repositories at that location yet. That is done by editing the /etc/cgitrc configuration file.

Figure1: Cgit

You can either have cgit look for Git repositories contained in a given path using the scan-path directive or list each repository explicitly using the later three directives which can be repeated to expose multiple repositories. Both of these approaches are shown below. Note that the repo.path lists the path for the “.git” directory for the repository.

scan-path=/var/lib/git

repo.url=test
repo.path=/opt/test/.git
repo.desc=Main Testing repo

If you are running Fedora and you try to expose a repository in /tmp for testing, you might not see what you had hoped. If you get an error message telling you that the repository can not be found, then you have probably run into the below configuration conflict.

If you look at the systemd startup file for Apache at /usr/lib/systemd/system/httpd.service, you see that the PrivateTmp directive is used. So, the /tmp that cgit is seeing is likely not the /tmp directory that you can see when running Bash. Although it stops quick testing using /tmp, continuing to use PrivateTmp is a good configuration. Thus, for temporary testing using another location — such as /var/lib/git-testing — will be more secure than sharing /tmp.

The web interface offered by cgit lets you see a log of all commits, the tree view of the repository so you can see how each file has evolved, as well as an overview of which users the commits have been coming from over time. You can also get the commit messages as an atom feed so you can see what is happening in your favorite news reader. The differences that a commit has made can be viewed in a unified diff format as well as in side-by-side mode showing the old and new files next to each other.

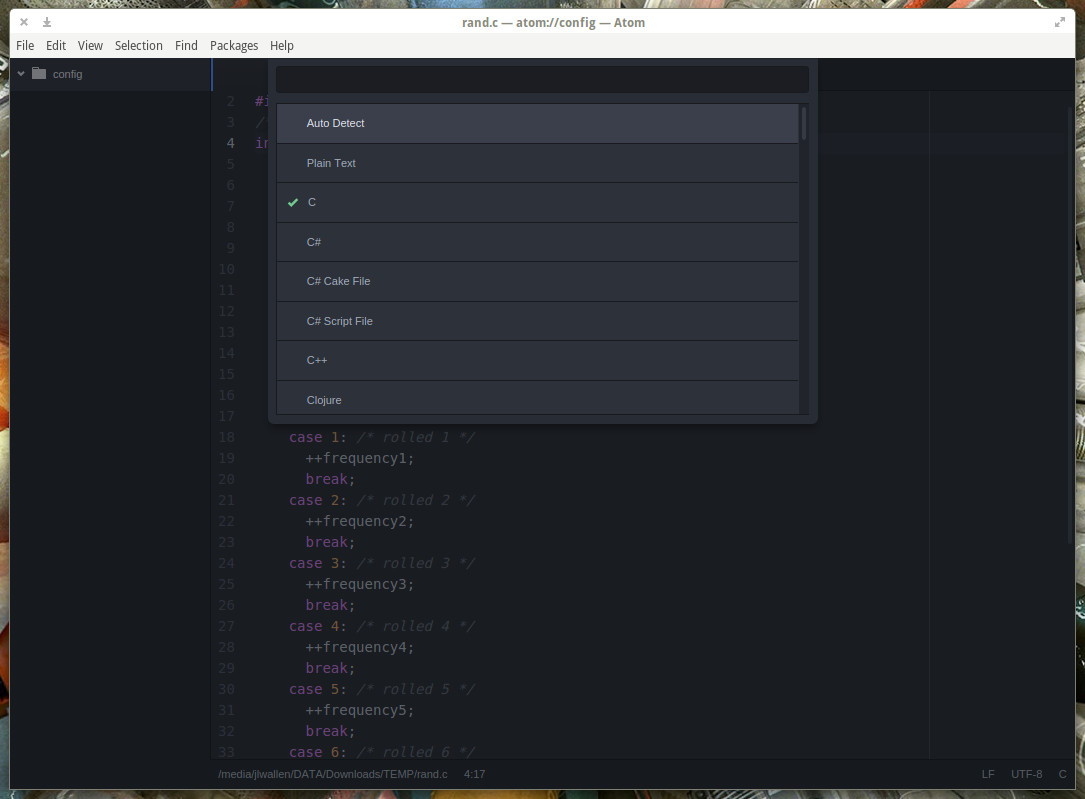
Two other options that you might want to enable in /etc/cgitrc allow you to download tar archives and to mark up your source code with colors. Here, the snapshots line tells cgit to include links to allow archives of commits to be downloaded. The source-filter line enables syntax highlighting using the syntax-highlighting.sh script, which is included in the cgit package.

snapshots=tar.gz tar.bz2 zip
source-filter=/usr/libexec/cgit/filters/syntax-highlighting.sh

Gitweb

Gitweb (Figure 2) is a CGI program written in Perl and uses Apache as its web server. Installing Gitweb on Fedora will also set things up so that Gitweb is accessible through http://localhost/git. The Gitweb configuration file at /etc/gitweb.conf should already be set up to find and expose Git repositories under /var/lib/git for you.

Gitweb is a CGI program written in Perl and uses Apache as its web server.

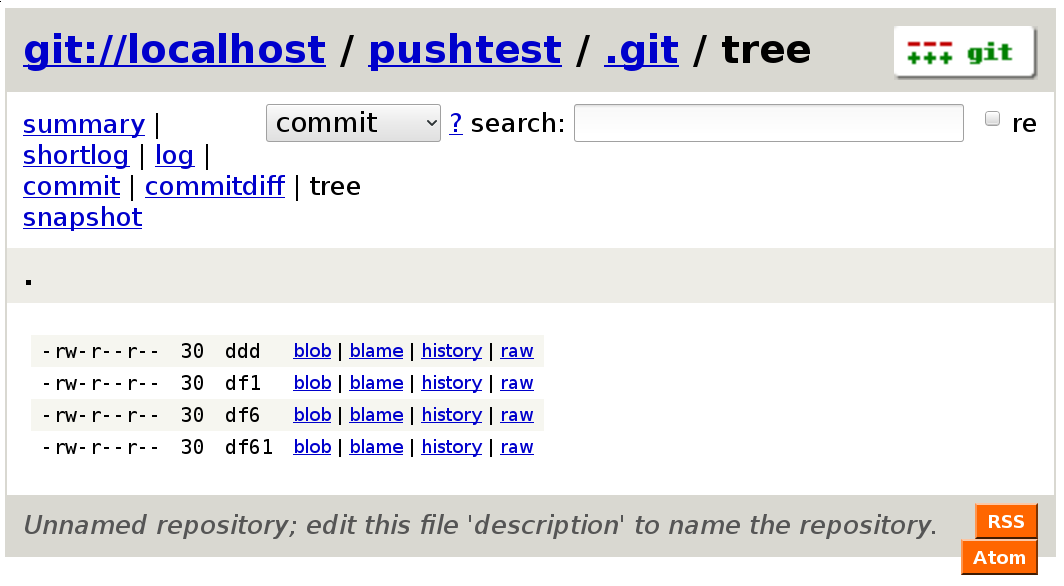
I found that a mixed bag of potentially CPU-intensive settings were disabled in /etc/gitweb.conf. For example, grep was enabled and blame was disabled. When viewing a repository in Gitweb, you’ll see that a text entry box is at the top right of the screen. Selecting grep from the drop-down next to it allows you to find a string or regular expression in any file in the repository. On the other hand, viewing “blame” information was disabled by default. As I mentioned previously, you might like to view blame information for a repository to see who committed each line in the file and which commit brought that line into its current state.

Gitweb uses the “projectroot” variable to declare the top-level path that all Git repositories should be stored under — as shown in the following line. If you need more than one top-level path for your Git repositories, the Apache RewriteEngine can be used to set up the environment variable GITWEB_PROJECTROOT depending on what top-level path you are looking for. See the Gitweb man page for details.

our $projectroot = "/var/lib/git";

GitList

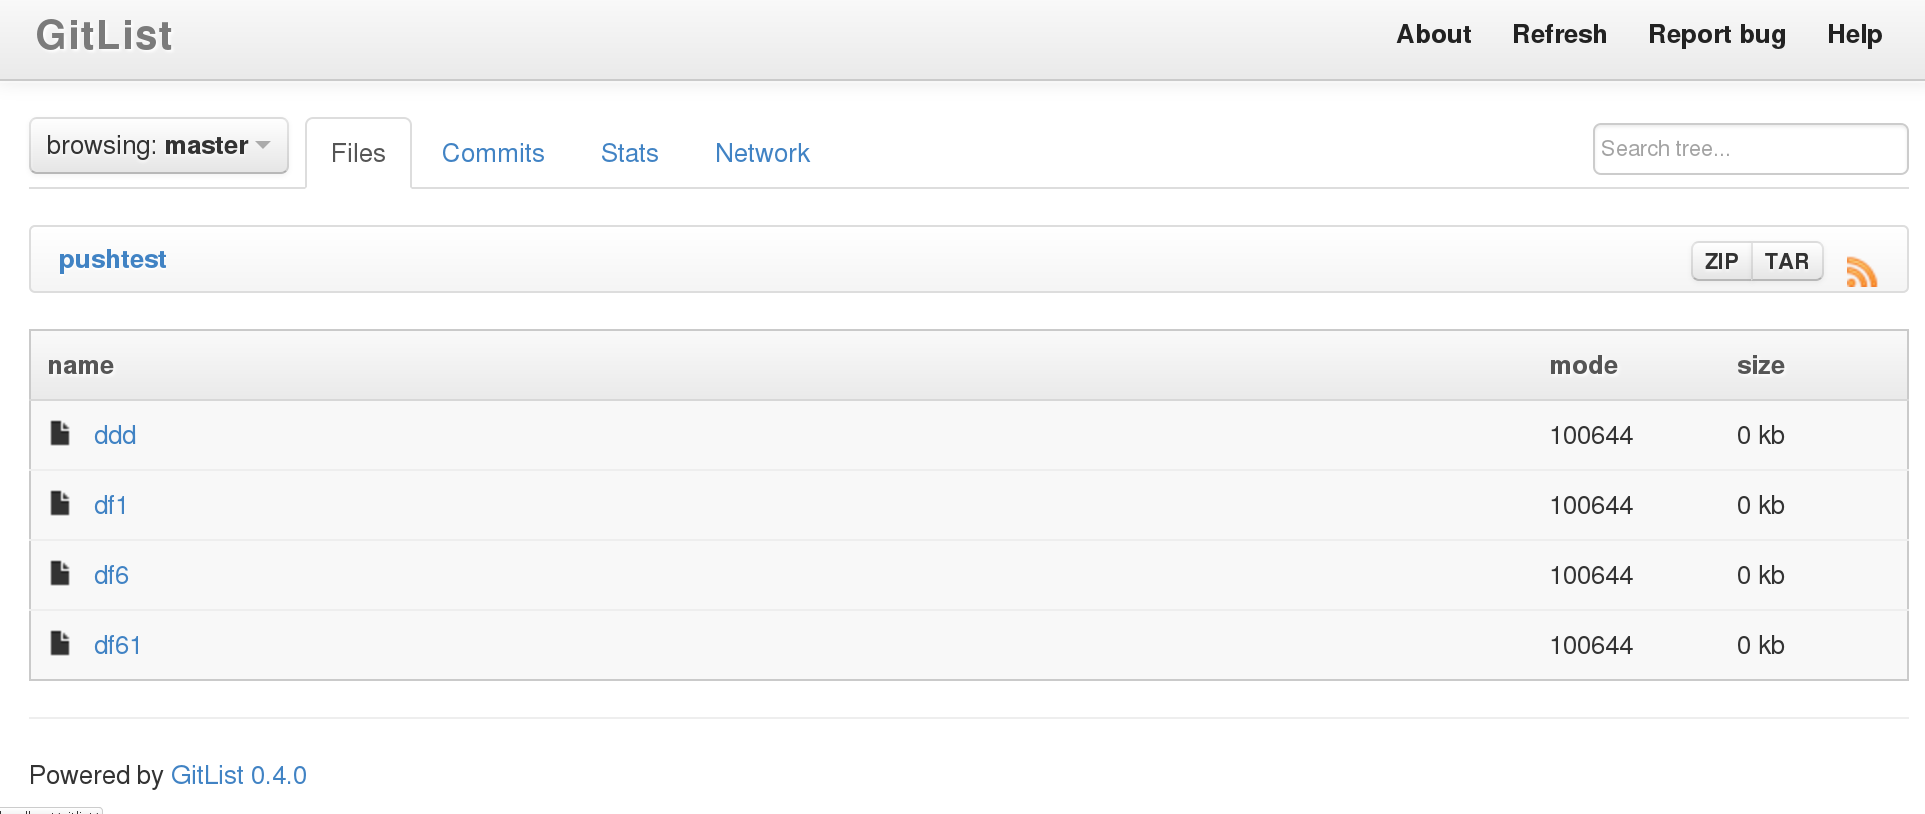
GitList (Figure 3) is written in PHP and uses the Bootstrap framework to create its web interface. At the time of writing, there was no package for GitList for Fedora. The installation instructions provide a good overview of what is needed to get up and running. On Fedora, you are likely to have to also create a config file to help Apache work with GitList.

Figure 3: GitList
To install GitList on Fedora, grab the download. The modified steps for Fedora are shown below. You should probably also move the cache directory to a location that cannot be directly accessed through an http request.

cd /var/www/html
tar xvf .../gitlist-0.5.0.tar.gz
cd ./gitlist
mkdir cache
chmod 777 cache
cp config.ini-example config.ini
vi config.ini
+repositories[] = '/home/git/repositories/' ; Path to your repositories

cd /etc/httpd/conf.d
cat ./gitlist.conf 
Alias /gitlist /var/www/html/gitlist/
<Directory /var/www/html/gitlist>
 Options FollowSymLinks
 AllowOverride All
</Directory>

GitList provides an RSS newsfeed for your repository, allows you to search for strings in the files in the repository, and allows you to see blame information for each file you are investigating.

Permissions and Updating Things

The examples I’ve shown here are mostly aimed at exposing one or more Git repositories from /var/lib/git to your web browser. The Git repositories under that directory all need to be readable by the web server. This leaves the sticky situation of handling the file system permissions.

For ease of discussion, let’s assume you are working on a repository in ~/src. Apache will work on a clone of your repository that is located in /var/lib/git.

An easy solution is to allow the user that the web server runs as to be able to read the .git subtree in the repository that you are working on. This way, the apache user can directly clone and pull from the repository in your ~/src directory. A downside to this is that the apache user will need to read each parent directory leading to the .git directory you want to clone.

For example, a working git directory at /tmp/gittest.git owned by the user “ben” can be made accessible this way with the following commands.

chgrp -R apache /tmp/gittest.git/.git
chmod +s        /tmp/gittest.git/.git

The following commands will then set up a copy of the git repository in /var/lib/git for the Git web interfaces to inspect and present.

sudo -u apache bash
cd /var/lib/git
git clone /tmp/gittest.git gittesttmp
cd ./gittesttmp
git pull

The above relies on performing the “git pull” step periodically to keep the repositories in /var/lib/git fresh.

Another way to do things is to set up the Git repository that you are working on to know the location of the Git repository in /var/lib/git so that you can keep pushing changes to /var/lib/git as you commit your changes.

The following creates a bare repository in the /var/lib/git file system, to which you can push your changes as they are made. A bare Git repository contains all the information about the files in the repository but does not have any current working set of files. This is why the bare repository is cloned into the .git subdirectory. If you look in /var/lib/git/pushtest, you should only see the .git directory.

Once the remote is added to your working Git repository, you should be able to keep using the last push command to send your local commits to the Git repository at /var/lib/git/pushtest so you can see them with the web interface.

# mkdir /var/lib/git/pushtest
# chown ben:apache /var/lib/git/pushtest
# chmod +s /var/lib/git/pushtest

$ cd /var/lib/git
$ git clone --bare ~/src/pushtest pushtest/.git 
$ cd ~/src/pushtest
$ git remote add gitweb /var/lib/git/pushtest
$ git push -u gitweb master

Final Words

These Git web interfaces are fairly easy to install and get up and running. Because Git is a distributed system, it shouldn’t affect your normal workflow to create a clone of a repository on a server machine and use the web interface to investigate the project. Paranoid users may also be happy to have another local copy of the current source repository around, possibly with changes that have not yet been pushed to a public server.

With a local web interface, you should also be able to perform tasks that web services might consider too expensive to allow. For example, looking at the blame information for a very large file or showing all the diffs between two commits.

Canonical Eases Ubuntu App Development with New Build Dependency Rules

The Ubuntu development team admits that the process of separating Ubuntu packages between the “main” and “universe” software repositories caused the Ubuntu development to be dragged down

21 Excellent Open Source Linux Text Editors

We previously published an article on the best open source editors in 2008. Given the length of time that has elapsed, and the new projects that have come forward, it’s prudent to update the article. Here’s our updated list of the finest open source editors available for Linux. Naturally, it’s largely a matter of preference, but it’s extremely likely you’ll find your ideal editor below.

Read more at LinuxLinks

Linus Torvalds Speaks Openly about Work and Code at TED2016 [Video]

Linus Torvalds, creator of the Linux operating system and the Git source code management system, opened the “Code Power” session at the recent TED2016 conference, speaking in an interview with TED Curator Chris Anderson.

In the talk, Torvalds, whose blunt approach in dealing with people is well known, stated, “I’m actually not a people person. I don’t really love other people, but I do love other people who get involved in my project.”  

Torvalds went on to discuss his belief that “code either works or it doesn’t.” He should know. The current Linux kernel is one of the largest collaborative projects ever attempted, with more than 20 million lines of code and more than 12,000 contributors so far. Additionally, an average of 185 changes are accepted into the kernel every day — nearly 1,300 per week — and Torvalds ultimately has the final say on what code is accepted.

In the TED talk, Torvalds admitted that he is sometimes “myopic, when it comes to other people’s feelings…” However, he said, “What I love about open source is that it really allows different people to work together.”

Torvalds was listed as one of the most influential people in the world by TIME magazine back in 2004. In that profile, Lawrence Lessig wrote, “there is no doubt that the open, collaborative model that produced GNU/Linux has changed the business of software development forever.”

Nonetheless, typically self-deprecating Torvalds doesn’t see himself as a visionary. Instead, he says: “I’m an engineer. I’m happy with the people who are wandering around looking at the stars but I am looking at the ground and I want to fix the pothole before I fall in.”

Watch the video at TED.com. 
 

Atom Editor: Your Next Go-To Text Editor

The text editor is a tool Linux users have either a casual or a very deep relation with. If you’re one of those users that only opens up the text editor on the rare occasion that a configuration file must be tweaked, then you’re probably good with the likes of Nano. Developers, on the other hand, need something much more powerful. On the Linux platform, you can easily turn to Vi or Emacs, but some developers prefer to have a GUI at their fingertips.

Figure 1: The Atom welcome guide is ready to help you get to know the text editor.
That’s where Atom comes in. Atom is a text editor of a different ilk. It has the power of hard-core editors with a user-friendly GUI. Atom offers all the features you’d need in a platform ready for developers:

  • Easy extensibility

  • Cross-platform editing

  • Built-in package manager

  • Smart autocompletion

  • Built-in file browser

  • Multi-pane viewing

  • Find and replace

  • Themable

  • Customize styling with your own CSS/LESS

  • And much more

In terms of available packages for Atom, you can browse among the nearly four thousand available extensions that can be added. If you’re looking for your next favorite text editor, look no further.

Let’s install Atom and use it.

Installation

I will be demonstrating Atom on Elementary OS Freya. From the Atom home page, you can download either an .rpm or .deb package for installation. To install Atom on the Debian-based platform, download the .deb package and save it in your ~/Downloads directory. Once the file has downloaded, follow these steps:

  1. Open up a terminal window

  2. Change into the ~/Downloads directory with the command cd ~/Downloads

  3. Issue the command sudo dpkg -i atom-XXX.deb (Where XXX is the architecture of the file downloaded…i.e. amd64)

  4. Type your sudo password and hit Enter

  5. Allow the installation to complete

The installation should go off without a hitch. However, I tested the same installation on Ubuntu Mate 16.04, and it installed with errors (meaning it wouldn’t run). If you find that is the case on your Ubuntu system, you can fix it with the following steps:

  1. Open up a terminal window (or remain in the one used for installing Atom)

  2. Issue the command sudo apt-get install -f

  3. Type your sudo command (if necessary) and hit Enter

  4. Allow apt-get to do its thing

That should fix the dependency issue. You’re ready to go.

First Launch

When you first launch atom (either from your desktop menu or from the command line…with the command atom), you will be greeted by the welcome guide (Figure 1 above).

This welcome guide will appear the first time you open Atom. Upon closing the editor, when you reopen, it will land on the editor window. To get back to the Welcome Guide, open Atom and then click Help > Welcome Guide.

From the Welcome Guide, you can easily open a project, install new packages, customize the styling, hack the Atom initscript, create snippets to be used later, learn keyboard shortcuts (memorize Shift+Ctrl+p, which is the command to open up the keyboard shortcut drop-down).

Installing Packages

Figure 2: Installing packages in Atom is quite simple.
This will probably be one of the first things you do with Atom. Out of the box, Atom offers quite a lot of features. Even so, you might find a feature you need added to Atom. Installing packages is quite simple. Here’s how:

  1. Open up Atom

  2. From the Welcome Guide, click Install a Package

  3. Click Open Installer

  4. From the newly opened pane (Figure 2) scroll through the listing of packages (or do a search for a keyword or name)

  5. When you find the package you want to install, click the associated Install button

  6. Allow the installation to complete

Once you’ve installed a package, you’ll find a newly-created sub-menu in the Packages menu. Click on that sub-menu to see what the package offers.

Let me show you a really cool example. Say you write in C or C++. Out of the box, Atom cannot run scripts written in those languages. However, there is an outstanding package, aptly named script, that can run C and C++. Here’s what you do:

  1. Open Atom

  2. Go to the Welcome Guide

  3. Click Install package

  4. Enter script in the search field

  5. Locate the package, script, by rgbkrk

  6. Click Install

Figure 3: A C++ script with proper color-coding.
Once the package has been installed, click File > New File and either enter your code or copy/paste it. Once you’ve added your code, click File > Save and make sure to give the file a proper extension (such as .c). Once the file saves, proper color-coding will appear (Figure 3) and you’re ready to run the script.

I’ve added a C++ script for random number generating. Click Packages > Script > Run Script and (if the code works) the results of the run will appear in a pane at the bottom of the window (Figure 4).

Figure 4: Running the random number generator.

It’s the Little Things

Atom is filled with some pretty amazing features and tools. There are also several little additions that make this text editor spectacular. For example, say you’re looking for a matching bracket in a large snippet of code. All you have to do is click on one of the brackets and then click Packages > Bracket Matcher > Go to matching bracket. The cursor will be immediately teleported to the matching bracket, so you won’t have to go on a hunt for that missing character.

Another nice feature exists in the bottom right corner of the window. After you save a file, the bottom right corner will display:

  • Line break type

  • Encoding

  • Syntax highlighting

Figure 5: Changing the syntax highlighting in Atom.
Say, for example, the syntax highlighting associated with your C++ file is set to C. If you click the C, you can then select the proper highlighting from the popup menu (Figure 5).

Atom offers something for just about everyone. I’ve just scratched the surface here of what this powerful text-editor can do. If you’re looking for the perfect combination of features and ease of use, Atom is ready to become your go-to text editor.

Academics Claim Google Android Two-Factor Authentication Is Breakable

Computer security researchers warn security shortcomings in Android/Playstore undermine the security offered by all SMS-based two-factor authentication (2FA).

The issue – first reported to Google more than a year ago – revolves around an alleged security weakness rather than a straightforward software vulnerability. The BAndroid vulnerability was presented at the Android Security Symposium in Vienna last September by Victor van der Even of Vrije Universiteit, Amsterdam. In the BAndroid microsite (featuring a video and FAQ), the Dutch researchers explain the cause and scope of the alleged vulnerability. 

If attackers have control over the browser on the PC of a user using Google services (like Gmail, Google+, etc.), they can push any app with any permission on any of the user’s Android devices, and activate it – allowing one to bypass 2-factor authentication via the phone.

Read more at The Register

What to Know before Using Windows 10’s New Linux System

Curious about what the new Linux subsystem in Windows 10 can and can’t do? Here’s what we’ve learned about its first release. What sounded like an April Fools’ joke turned out to be anything but: Core Linux tools, including the shell, are now available to run natively inside Windows 10 thanks to an official Microsoft project that translates Linux system calls.

If you using the Linux command line at all, odds are you consider yourself a pro. Consequently, the Linux subsystem in Windows is hidden behind a “for pros only” side entrance that you can only get into if you’re running Windows 10 from the Fast Ring developer builds numbered 14316 or greater, via the Windows Insider program. 

Read more at InfoWorld

Google Adds Cloud Test Lab Integration to New Android Studio 2.0

Google has updated its key Android development tool, Android Studio, to version 2.0 and added cloud test integration, a GPU debugger, and faster emulation and resource allocation. [VIDEO]

Mountain View touts the instant run feature as just about the most important new feature in the upgrade, as it analyses Android app code as it runs and determines ways it can be deployed faster, without requiring app re-installation.

The tool’s Android emulator is three times faster too. Connections over command line tool Android Debug Bridge are 10 times faster than the previous version.

Read more at The Register

A Closer Look into Google Stackdriver

Last month at GCP Next conference, Google announced the public beta of Stackdriver cloud monitoring and logging service. It is designed to be a hybrid monitoring service spanning both Amazon Web Services and Google Cloud Platform.

After launching Compute Engine in 2012, Google moved fast in adding new infrastructure services required by ops teams. To add monitoring capabilities to its cloud platform, Google acquired Stackdriver in May 2014. A year later, it surfaced as the preview of Google Cloud Monitoring service for Compute Engine, App Engine, Cloud Pub/Sub, and Cloud SQL. As expected, Google conveniently dropped the support for AWS. Like most of the GCP services, Cloud Monitoring had its own set of APIs.

Stackdriver is Googles answer to Amazon CloudWatch and CloudTrail. The service has the potential to become the core DevOps platform for applications and workloads deployed in Google Cloud Platform.

Read more at The New Stack.

50 Embedded Linux Conference Presentation Slide Decks on Tap

The Linux Foundation has posted slide presentations from this week’s Embedded Linux Conference, which featured the first ever ELC keynote by Linus Torvalds. In case you missed this week’s North American Embedded Linux Conference and OpenIoT Summit in San Diego, you’ll be happy to know that videos of the live streamed event will be released in the coming weeks. Meanwhile, the Linux Foundation has posted slide presentations from the event…

This year’s event marks the first time Linux creator and kernel overseer Linus Torvalds gave a keynote at an Embedded Linux Conference (ELC). His appearance reflects the growing importance of embedded in the Linux universe, especially of the IoT variety.

Read more at LinuxGizmos