
Big Blue’s so called X6 Architecture is designed to boost performance of x86 servers so they can better handle workloads such as big data analytics. virtualization and enterprise resource planning.
Read more at Enterprise Open Source Toolkit
Creating appropriate menus for your app is vital to creating a good user experience. In the last tutorial, we looked at creating the options menu with XML and also at adding items programmatically. In this tutorial, we’ll look at contextual menus — menus which relate to a particular part of the view.
As of Android 3.0, there are two types of contextual menu: old-style floating menus, which float on the screen, anchored to the element clicked on; and contextual action mode (Android 3.0 and up), in which a contextual action bar (CAB) appears at the top of the screen. The CAB is now the preferred way of providing a contextual menu, but if your code is compatible with Android 2.3 or earlier, you should also provide a floating version to fall back to. We’ll cover both options and also look at how to include both in your code.
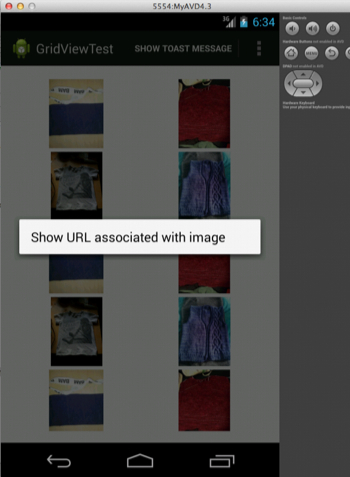
We’ll use the same basic GridView code as in the last tutorial, and our contextual menu entry will use the Intent code from the GridView tutorial, which fires a URL associated with the image clicked on.
We’ll start with the floating contextual menu, which you’ll use for devices running a version older than API 11. First, let’s create our XML menu, res/menu/grid_element_menu.xml:
<?xml version="1.0" encoding="utf-8"?>
<menu xmlns:android="http://schemas.android.com/apk/res/android" >
    <item
         android:id="@+id/showUrl"
         android:title="@string/showUrl_title"/>
</menu>
Next, we handle it in the GridViewTestActivity code. We need to add a call to register the grid items for the context menu, and implement onCreateContextMenu():
protected void onCreate(Bundle savedInstanceState) {
 // as before
 gridview.setAdapter(gridadapter);
 registerForContextMenu(gridview);
 // rest as before
}
public void onCreateContextMenu(ContextMenu menu, View v,
                                ContextMenuInfo menuInfo) {
  super.onCreateContextMenu(menu, v, menuInfo);
  MenuInflater inflater = getMenuInflater();
  inflater.inflate(R.menu.grid_element_menu, menu);
}
registerForContextMenu() associates the provided View (gridview) with a context menu. If the View is GridView or ListView, doing this registers all its items for the same context menu. For other Views, you would need to register each View for its own individual context menu. onCreateContextMenu() works exactly the same way as the last tutorial’s onCreateOptionsMenu(), inflating the menu from XML.
Finally, in order to do the right thing when the user clicks on a menu item, we need to implement onContextItemSelected():
public boolean onContextItemSelected(MenuItem item) {
  AdapterContextMenuInfo info = (AdapterContextMenuInfo) item.getMenuInfo();
  switch (item.getItemId()) {
    case R.id.showUrl:
      Intent i = new Intent(Intent.ACTION_VIEW);
      i.setData(Uri.parse(gridadapter.getItem(info.position).
                          getImageUrlString()));
      startActivity(i);
      return true;
    default:
      return super.onContextItemSelected(item);
  }
}
Here we only have one menu item so far, but we allow for adding more by using a switch statement. This also allows for handing menu items up to a superclass.
Compile and run, and you’ll see your floating menu when you long-click on an item.
Moving on from the floating contextual menu to the now-preferred contextual action bar (CAB). There are two ways to create a CAB. If you want to attach the CAB to a specific single view, you can use ActionMode.Callback. (This is discussed in detail in the Android menus docs.) However, this doesn’t work so well with a ListView or GridView. For those, you’re better off implementing a MultiChoiceModeListener. This allows the user to pick multiple items and then apply a single option to them. Here however we’re only applying our sample choice to a single item, to demonstrate the interface. When creating your app, consider carefully which menus to use under which circumstances to create the best user experience.
The MultiChoiceModeListener looks like this (in GridViewTestActivity):
private MultiChoiceModeListener modeListener = new MultiChoiceModeListener() {

  int itemSelectedPosition;
  public boolean onCreateActionMode(ActionMode mode, Menu menu) {
    MenuInflater inflater = mode.getMenuInflater();
    inflater.inflate(R.menu.grid_element_menu, menu);
    return true;
  }

  public void onItemCheckedStateChanged(ActionMode mode, int position,
                                        long id, boolean checked) {
    itemSelectedPosition = position;
  }
  public boolean onPrepareActionMode(ActionMode mode, Menu menu) {
 	// Used for updates to CAB after invalidate() request
    return false;
  }
  public boolean onActionItemClicked(ActionMode mode, MenuItem item) {
    switch (item.getItemId()) {
      case R.id.showUrl:
        Intent i = new Intent(Intent.ACTION_VIEW);
        i.setData(Uri.parse(gridadapter.getItem(itemSelectedPosition).
                            getImageUrlString()));
       	startActivity(i);
       	mode.finish();
        return true;
      default:
        return false;
    }
  }
  public void onDestroyActionMode(ActionMode mode) {
    // do nothing
  }

};
If you compare this code to the floating contextual menu or to the options menu, you’ll see a lot of similarities. We inflate the menu when it’s first created, and onActionItemClicked() once again has the switch code we’ve seen before. This time though we need to get the position of the selected item from another method, onItemCheckedStateChanged(). Note that as we only have a single int to store the item position in, every time an item is selected or unselected, this int will be overwritten. This means that we only ever send a single URL (of the item most recently clicked) with the Intent. If we wanted to be able to act on multiple items (eg to delete them, or to share them all), we would need to keep track of all the items selected.
Having created the MultiChoiceModeListener, it just takes two lines to set it up in GridViewTestActivity:
protected void onCreate(Bundle savedInstanceState) {
  // as before
  gridview.setChoiceMode(GridView.CHOICE_MODE_MULTIPLE_MODAL);
  gridview.setMultiChoiceModeListener(modeListener);
}
Compile and run, and a long-click will produce the CAB.
You can also use the ActionMode to make changes in the contextual action bar. For example, you can set a custom title or subtitle:
public boolean onCreateActionMode(ActionMode mode, Menu menu) {
  // as before
  mode.setTitle("Action Bar!");
  mode.setSubtitle("Subtitle");
  return true;
}
This screenshot shows where they’ll appear. See the ActionMode docs for other options.

Another improvement in the code would be to change the background color of any selected items, or to set up a checkbox, to show which item(s) have been selected.
If you code both the floating menu and the CAB, and run it on an Android device running API 11 or higher, the floating menu will be ignored in favour of the CAB, which is now the preferred option for contextual menus. To make your code run using the floating menu, on earlier API versions as well, you can code an API check:
protected void onCreate(Bundle savedInstanceState) {
  // as before
  // next line replaces setChoiceMode() and setMultiChoice..() lines
  setUpContextualActionBar();
}
private void setUpContextualActionBar() {
  if (Build.VERSION.SDK_INT >= Build.VERSION_CODES.HONEYCOMB) {
    gridview.setChoiceMode(GridView.CHOICE_MODE_MULTIPLE_MODAL);
    gridview.setMultiChoiceModeListener(new MultiChoiceModeListener() {
      // code to set up MultiChoiceModeListener as before
  });
  }
}
You’ll also need to add a note at the start of the class, to suppress API compatibility warnings and allow the code to compile:
@SuppressLint("NewApi") public class GridViewTestActivity extends Activity
You should only do this if you are very certain that you’ve wrapped all of your new API code in appropriate if clauses or otherwise protected it. For more on supporting multiple platforms and APIs, see the Android docs.
For more in this series see:
If ever there was a goal with universally undisputed support, it’s finding a cure for cancer. Making that happen, of course, is the trick, thanks in no small part to the sheer volumes of data involved.
Cancer is not a single disease, George Komatsoulis, deputy director of the National Cancer Institutes’s Center for Biomedical Informatics and Information Technology, told Linux.com.
 Though it’s traditionally been categorized based on where in the body it appears, “the trouble is that it’s not like an infectious disease” with a single infectious agent, Komatsoulis explained. “Here, there are dozens if not hundreds of possible mutations. Pragmatically, we need to molecularly categorize these tumors — and lots of them — so we can start classifying the ones that will respond well to treatment.”
Translate that imperative into IT terms and what do you get? That’s right: a whole lot of data.
Back in 2005, NCI and the National Human Genome Research Institute launched The Cancer Genome Atlas, a project to collect detailed molecular characterizations from 11,000 tumors, among other data. By the end of fiscal year 2014, some 2.5 petabytes of data will have been collected.
That’s surely a good thing, but here’s the catch: Only researchers at the wealthiest institutions can afford to access it.
“It costs millions of dollars to store that much data, even before you put in the computing resources to analyze it,” Komatsoulis explained — and that’s to say nothing of how long it would take to download the data from the Genome Atlas repository even under the best bandwidth conditions. It’s a download you’d measure “with a calendar, not a stopwatch,” he pointed out.
Enter the NCI’s proposed Cancer Genomics Cloud, an effort now being planned not just to make this treasure trove of data available to researchers at a more reasonable cost but also, on a higher level, to democratize that access.
“The situation right now is that if a smart graduate student comes along with a good idea, they have to go to their institution and ask for a couple million dollars in IT equipment and then take a year to get an answer,” Komatsoulis said. “That’s not where we want to be.”
Toward that end, the NCI has issued a Broad Agency Announcement for three Cancer Genomics Cloud pilot tests, for which it plans to award contracts this year. Those pilots will then be evaluated and used to figure out what a production scale cloud would look like.
The overriding goal for the cloud-based initiative is that researchers will be able to access the data via a Web browser and analyze it remotely. A standard application programming interface and analysis tools are planned to help make that happen.
While it’s too early to say what types of technologies might be involved in the end result, the NCI began with a relatively open approach, including tapping the IdeaScale crowdsourcing platform for public input on the technology’s requirements.
It’s also chosen not to constrain the technology solution, so that public clouds, private clouds and/or dedicated hardware using open or closed source can all be acceptable.
“We are tech-agnostic,” Komatsoulis explained. “We’re asking groups out there to propose their best tech solutions, and we’ll see which work best.”
That said, however, there is a requirement that designs be released to the government under a non- viral open source license. Any new software must be developed and distributed under a non-viral open source license as well. Commercial items will be permitted as long as they are available under standard commercial terms.
The NCI wants to ensure that any third party can build a replica of any of the clouds if that design meets their needs, Komatsoulis noted. It also wants to see the clouds developed as pre-competitive technology that can be reused for commercial or non-commercial, open or closed source derivative works. Avoidance of vendor lock-in is another goal.
Cloud computing represents “a way for large enterprises and service providers to reduce IT waste and increase speed and efficiency, so it is no surprise to see the NCI doing the same thing, particularly as it confronts the vast amounts of Big Data involved in its work,” Jay Lyman, senior analyst for enterprise software with 451 Research, told Linux.com.
“In terms of open source software, it has taken time for open source to become part of the health care and research technology, but it is increasingly on the radar of health IT organizations,” Lyman added. “In addition, the NCI work involves cloud computing and creating an efficient API, which means open source software will likely play a significant role since it is a huge part of cloud and API creation, management and integration.”
Ultimately, the NCI’s overriding goal is to create a brighter future for those afflicted with cancer.
“The nation’s cancer patients shouldn’t have to wait because of technological limitations,” Komatsoulis concluded. “While this won’t remove all the limitations, I think it will be a good start.”