Input-based attacks like Buffer Overflows, Cross-Site Scripting (XSS), and XXE are common in today’s software. And they do not go away. But why is that? Shouldn’t one assume that existing frameworks handle input correctly, and free developers from struggling with correctly implementing input handling over and over again? Sadly, the answer is no.
In this post I wrap up some ideas of Language Security Langsec which find a general solution to this problem and provide some tools to fix it.
With JavaScript, JSON, REST, NPM, and an ever-increasing supply of modules, Node.js should be your first choice for integration.
Because software solutions rarely operate in a vacuum, integration is a necessary fact of life for many developers. Sometimes it’s easy. Anyone who has integrated an application into Slack, for example, will have been treated to an incredibly smooth experience. In many cases it’s as simple as filling in a form (a URL or two, an authentication key) and hitting the Submit button. That’s plain awesome.
Short Bytes: After announcing that Ubuntu 18.04 LTS will ship with GNOME as the default desktop environment, Canonical founder Mark Shuttleworth has shared some details regarding Ubuntu’s future. In a Google+ post, he made clear that Canonical will be investing in Ubuntu GNOME with a motive to deliver an all-GNOME experience. One should also note that despite the demise of Unity 8, Snaps and Ubuntu Core are here to stay.
In his announcement post, Shuttleworth announced that his convergence vision was wrong and the open source community perceived it as fragmentation. But, what’s next for the world’s most popular open-source operating system for desktop, i.e., Ubuntu?
In a Google+ post, which looks like a follow up to the original post, Shuttleworth highlighted some major points that will continue to be the focus of Ubuntu desktop.
In previous versions of triple-quickstart a config file
was used to determine not only the features that would
be enabled in tripleo and openstack but also the number of nodes
to be used. For instance "config/general_config/ha.yml" would
configure pacemaker and ensure three controller nodes
were provisioned.This typeof configuration is now deprecated
but will still work through the Queens release.

The feature and node configuration have been seperated
into two distinct configuration files to allow users
to explicity select the configuration known as
"feature sets" and the nodes to be provisioned.
The feature set configuration can be found under
tripleo-quickstart/config/general_config/
and the node configuration can be found under
tripleo-quickstart/config/nodes/
In general,Ocata overcloud deployment is more memory
consuming then Newton.Minimal memory requirements are
highlighted bellow.
Also minor trobleshooting step was undertaken
after overcloud deployment. Command `pcs resource cleanup`
was issued after detecting resources failed to start
right after original deployment.
Sshuttle command line was also modified to
provide access to control plane and external network
from workstation at a time.
RAID 5 stands for (Redundant Array of Independent Disks). Redundancy means if something fails there is a backup available to replace the failed one. RAID was first invented on year 1987. The main purpose of RAID 5 is to secure the data and protect from being missed or lost, Increase the read speed and also increase the overall performance of the system. RAID is a technology which is uses techniques like mirroring, Partity checking, Striping to secure the data. There are so many levels are there for RAID and each level comes with some new invented features.The types if RAID Level’s are : RAID 0, RAID 1, RAID 2, RAID 3, RAID 4, RAID 5, RAID 6, RAID 10 ( Combination of RAID Level 1 + RAID Level 0 ) but most used and famous RAID Level’s are :
RAID 0 – Striping the Data
RAID 1 – Mirroring the Data
RAID 5 – striping with parity check
RAID 6 – striping with double parity check
RAID 10 – Uses both mirroring and striping
Here in this article we are going to discuss on how to configure RAID 5 (Software RAID) in RHEL/CentOS 7.
Read Full Post: http://www.elinuxbook.com/how-to-configure-raid-5-in-linux-using-mdadm/
pydash is a lightweight web-based monitoring tool for Linux written in Python and Django plus Chart.js. It has been tested and can run on the following mainstream Linux distributions: CentOS, Fedora, Ubuntu, Debian, Arch Linux, Raspbian as well as Pidora.
You can use it to keep an eye on your Linux PC/server resources such as CPUs, RAM, network stats, processes including online users and more. The dashboard is developed entirely using Python libraries provided in the main Python distribution, therefore it has a few dependencies; you don’t need to install many packages or libraries to run it.
In this article, we will show you how to install pydash to monitor Linux server performance.
When I first started working with Linux, some 20 years ago, I sat in wonder at how much I could do. It seemed the roof had been lifted away and the sky was the limit. That held true for nearly every aspect of the platform. In those first years, I was using the likes of FVWM—which, truth be told, wasn’t terribly user-friendly or flexible. But back then, who knew the desktop could be tweaked into a work of art?
And then one day, I connected with a young man named Mark—whom I latched onto, because the guy knew what he was doing. Mark then connected me to AfterStep, which was like a wonderland of magic on the desktop. I had transparent menus and title bars; when I minimized a window, it spun and flipped to the bottom of the screen. I wound up spending countless late-night hours configuring AfterStep… time I felt was very well spent.
One night, during a rather extended search for a rather elusive AfterStep theme, I came across a new window manager: Enlightenment.
I stood (or, rather sat) in awe. This was the first time I’d come across a Linux desktop that might well woo me away from AfterStep. Much later that night, I had a working installation of Enlightenment and the awe continued.
Needless to say, many years later, when I came across Bodhi Linux, I had to give it a try. This was back in 2011 (during its initial release period), so it was just getting off the ground. Even in those early years, Bodhi was something special. It brought the Enlightenment window manager back to relevance and it was glorious.
What is Bodhi Linux?
Bodhi Linux uses a fork of the Enlightenment DDR-17 release, called the Moksha Desktop, (which enables a number of very nice effects that can be enjoyed on low- to high-end hardware) and is based on the current Ubuntu Linux LTS (Long Term Support) release.
Bodhi Linux is a lightweight desktop platform that installs as easily as any operating system and comes with a minimum amount of applications, but it includes its own software center (Bodhi AppCenter) for installing everything you need to be productive.
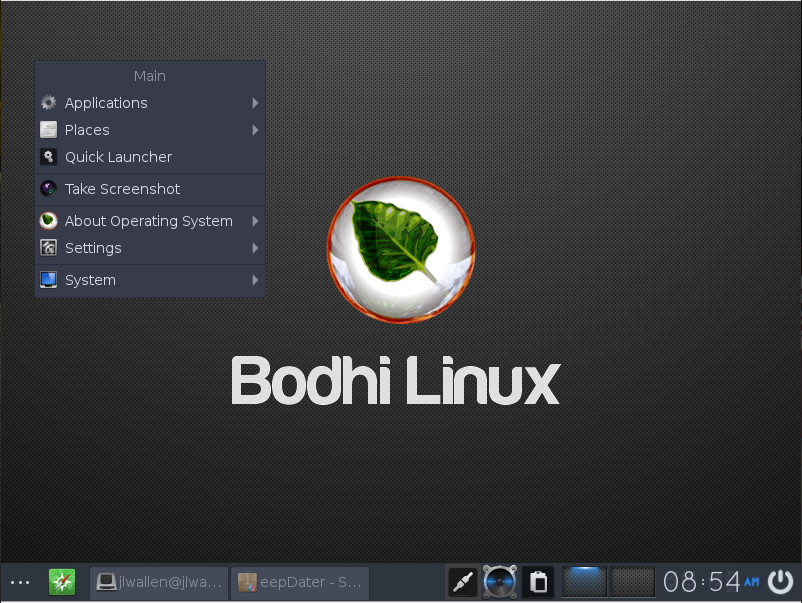
The latest release of Bodhi Linux (4.1.0) was like coming home to an old friend. It had been a while since I’d spun up a release of this particular distribution, but I immediately felt at home. The Moksha Desktop still retains all the things I loved about the Enlightenment desktop:
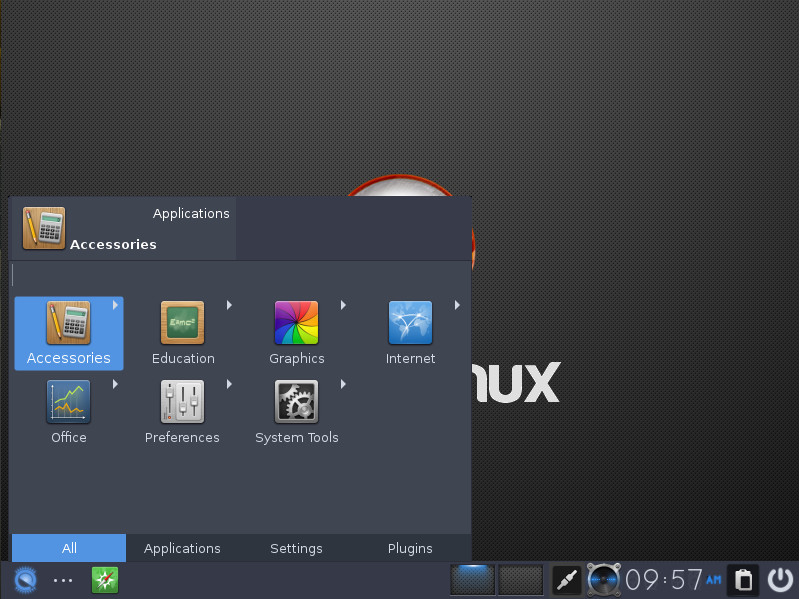
Left-click mouse menu (Figure 1)
Highly configurable
Lightning-fast responsiveness
Perfect balance of minimalism and productiveness
Figure 1: The Bodhi Linux left-click mouse menu.
One thing you should know about using Bodhi—it is not only a tinkerer’s dream come true, it is both a throwback to another era of Linux and a modern take on that same old-school standard. What I mean is this: There is no mistaking the Moksha Desktop has been derived from a look and feel from the past. However, the developers have given it just enough modernity to bring it to the now. If you’re one of those who feels the best days of the Linux desktop are in the rearview mirror, you can relive that past, with modern technology… all thanks to Bodhi Linux.
The Bodhi Linux team have set for themselves a tall order, but they meet and exceed that goal. And even though Bodhi Linux is often lumped in with those distributions that “breathe new life in old hardware,” I think it’s much more than that. Bodhi is like glimpsing Linux’s past, while remaining grounded in the present.
Out of the box
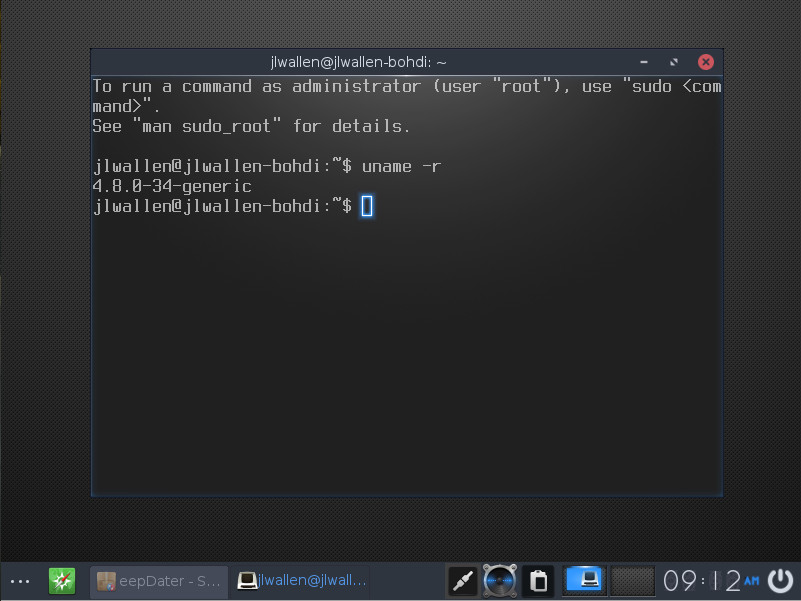
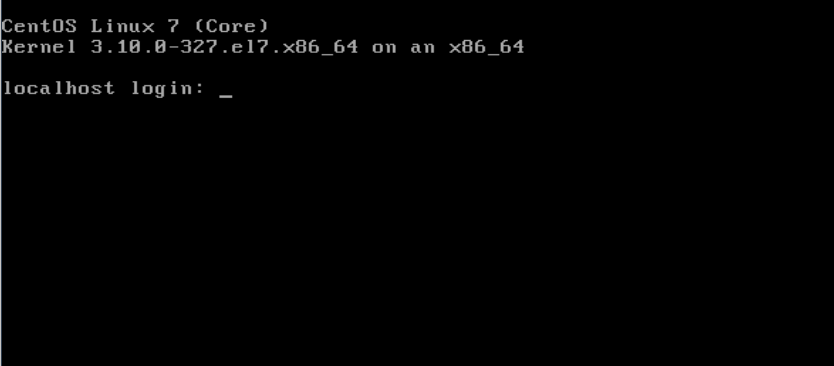
Bodhi ships with the 4.8.0-34 Linux kernel (Figure 2). You can read the changelog for that particular kernel here.
Figure 2: The Bodhi Linux kernel.
Upon installation — the one area that might give the new user pause — is the lack of installed applications. Out of the box, you are faced with a bare minimum of tools. You won’t find anything for productivity and you will see the Midori browser. Every time I see this browser shipped as the default, I cringe a bit. Why? Because of warnings similar to that shown in Figure 3.
Figure 3: Google Drive doesn’t much care for Midori.
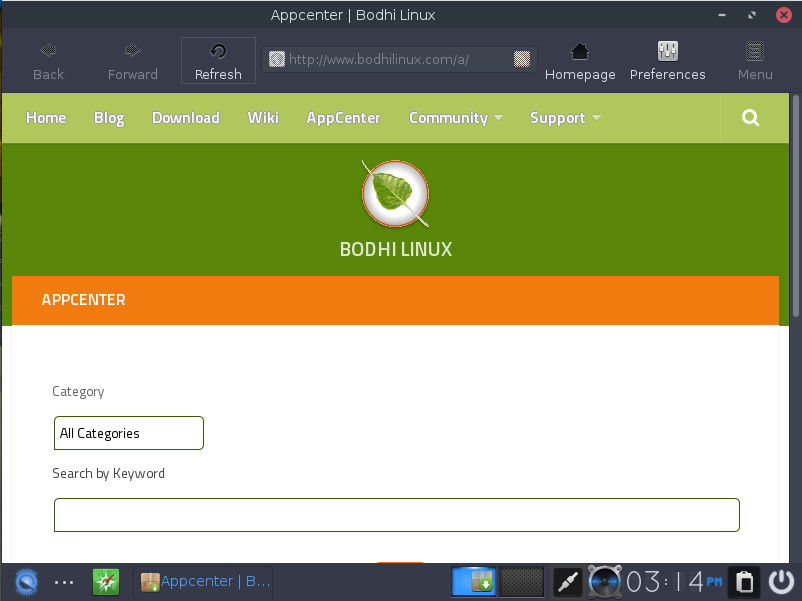
I get it, Midori is a lightweight browser, but when the default browser isn’t fully supported by the likes of Google, there’s a problem (especially to a Google Docs power-user like myself). There is also a solution. Open the main menu (either by way of clicking the three horizontal dots in the bottom left corner of the desktop or left-clicking anywhere on the desktop) and then click Applications > System Tools > Bodhi AppCenter. When the AppCenter opens (Figure 4), you can search for any software you need to be productive.
Figure 4: The Bodhi Linux AppCenter.
The AppCenter works quite well — it’s user-friendly and effective. After a quick install of LibreOffice, I did find that the version installed was out of date. The fault in this doesn’t lie in Bodhi, but in Ubuntu (as that is the most updated version of LibreOffice to be found in the standard repositories). If you’re looking for the newest version of the flagship office suite, your best bet is to download it from the official site and manually install the .deb packages.
One caveat
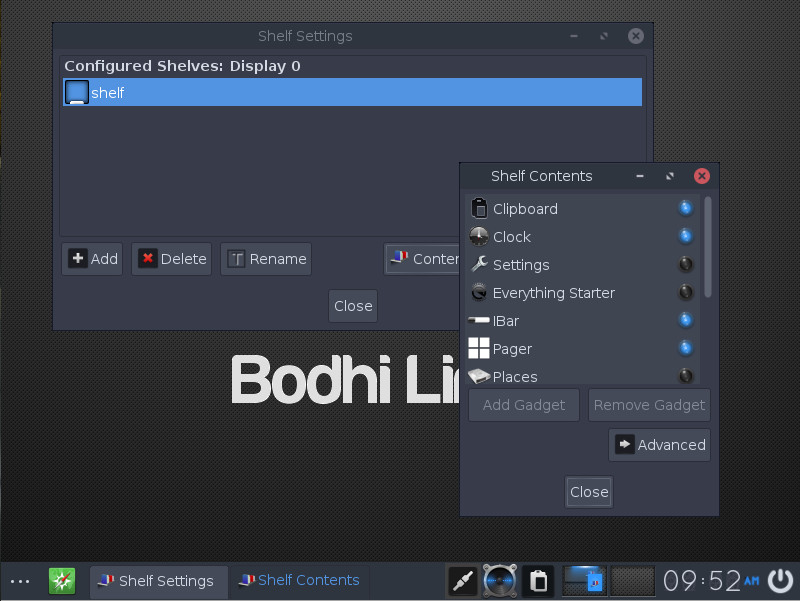
One thing I’ve always warned people about when first giving either Enlightenment or Moksha a go is that the standard desktop terminology doesn’t always apply. For example, panels (or docks) are referred to as Shelves, so when you go to configure the main Shelf, you’ll go to Main Menu > Settings > Shelves. In the Shelves settings window (Figure 5), you can configure the main Shelf or add new Shelves.
Figure 5: Configuring the contents of the main Shelf.
To Shelves, you add Gadgets (as seen in Figure 3), such as the iBar (a bar that allows quick launch icons), Everything Starter (a tabbed-like Main Menu; Figure 6), and much more. Personally, I prefer the Everything Starter to the Bodhi Main Menu, which can be easily taken care of.
Figure 6: The Bodhi Everything Starter is an outstanding replacement for the Main menu.
If you opt to swap out the Main Menu for the Everything Starter, the good news is you can always get to that Main Menu by left-clicking a blank space on the desktop. So, it’s a win-win all around!
Nomenclature notwithstanding, Bodhi is a desktop that can easily meet the needs of those who like to tinker or those who never venture beyond “out of the box.”
Give Bodhi a go
If you never got to experience the Enlightenment desktop, back in the day, I highly recommend you give Bodhi Linux a try. It has just the right combination of “Those were the days” and “Hey, this works really well.” This modern take on the old classic will have your hardware screaming and you configuring the desktop like it was 1999!
Learn more about Linux through the free “Introduction to Linux” course from The Linux Foundation and edX.
Four events, one name: LinuxCon, ContainerCon, CloudOpen and the all-new Community Leadership Conference have combined to form one big event: Open Source Summit North America. The rebranded event, to be held Sept. 11-13 in Los Angeles, will feature a broader range of open source topics, and be more inclusive than ever.
Each of the four conference areas bring a different part of the open source community to the table, providing a holistic overview of the industry for attendees of the new Open Source Summit.
That also means The Linux Foundation is seeking talks on a wide range of subjects from DevOps and Containers, to Security and Networking, to Linux and Kernel Development. Proposals are due May 6 — submit your talk now!
Suggested topics include:
DevOps (Continuous Delivery, Continuous Integration, Lean IT, Moving at Cloud-speed)
Networking (Software Defined Networking, NFV, OpenFlow, Overlays, Networks as Code)
Linux On The Desktop (Porting Proprietary Software, Hardware With Linux Pre-installed, Wine and Emulators, Influencing Closed-Source Companies)
Got a great idea, case study, or technical tutorial you’d like to share? Learn more about the CFP process and submit your speaking proposal before the CFP closes on May 6.
Not interested in speaking but want to attend? Register now to save over $300! Linux.com readers can save an additional $40 off the Attendee All-Access Registration with code LINUXRD5.
This week in open source news, The Linux Foundation’s Open Networking Summit unites software-defined networking and network functions virtualization (SDN/NFV) pros, academics, and enthusiasts for announcements and collaboration, Microsoft has announced the end of CodePlex in favor of GitHub, & more! Keep reading to get caught up on the biggest headlines in open source this week.
1) At the annual Open Networking Summit, SDN & NFV leaders gather. Announcements included the Data Plane Development Kit (DPDK) becoming a Linux Foundation Project and CORD Project working on new OSS service delivery platform.
4) “After six years of pitching the dream of a converged Linux desktop experience that crosses desktop, mobile, server and cloud, Canonical pulls the plug.”
We old coots are forever going on about our favorite keyboard shortcuts, because that is still the fastest way to get stuff done on a computer. Life is too short to faff around the hard way, so let’s try some nice Bash time-saving shortcuts.
The barrier for a lot of people is not having decent typing skills. There are numerous free typing tutors if you need a little help, and if you practice 10 minutes every day you will amaze and delight yourself at your rapid progress. When you can touch-type 40 words per minute without errors, that is a great milestone to reward yourself with a sweet mechanical keyboard, and then you can spend many fun hours hacking your keyboard.
Navigating the Current Line
Ctrl+a or the Home key go to the beginning of the line, and Ctrl+e or the End key go to the end. When you are working with a long command that wraps, remember that it is still just one line.
Alt+b moves back one word, and Alt+f moves forward one word. This does not work in many X terminals because the Alt key is mapped to menu commands. Look at your menus; when the first letter is underlined that means Alt+ the underlined letter opens that menu. So, just for fun try it in the console; exit your graphical session by pressing Ctrl+Alt+F1. This should bring you to a console login, so login, type something random or bring up a command from your history, and lo! Alt+b and Alt+f work as they are supposed to.
Figure 1: Linux console.
If Ctrl+Alt+F1 does not bring you to a console login, as various Linuxes map these differently, try Ctrl+Alt+F2, Ctrl+Alt+F3, heck, try all of them up to F8 and see what happens. To get back to your graphical session, try Alt+F7, which is traditional. If that doesn’t work try Alt+F1-F8 until you find your way home.
That was fun, but what if you want to stay in your graphical session and use Alt-key combinations? This is a function of your desktop environment, individual applications, and Linux distribution, so for now my advice is investigate how your particular environment manages this.
Replay Command History
You can use the up and down arrow keys to scroll through your command history, or type the history command. When you find the command you want, type ![number] to run it. For example, !1626:
carla@studio:~$ history
[...]
1626  ls /etc/default/
1627  less /etc/default/smartmontools
1628  apt-cache search smart-notifier

carla@studio:~$ !1626
ls /etc/default/
[...]
Try Ctrl+r to search your history. Start at a blank prompt, press Ctrl+r, then type your search term, for example “vpn” to find your previous openVPN commands. Then keep pressing Ctrl+r to cycle through your results until you find the one you want, and when you find it press the return key to run it.
Cutting and Pasting
Erase the current command with Ctrl+c. If you change your mind a lot, press the Alt+e or End key to go to the end of the line, then Ctrl+u to delete it. Ctrl+y pastes it back. Ctrl+u deletes from the cursor to the beginning of the line.
Another way is to press Ctrl+a or Home, then Ctrl+k, which deletes from the cursor to the end of the line.
You can copy and paste with your mouse by selecting with the cursor, and middle-click paste. This is my favorite way to copy and paste, but sadly it is not universal, and some applications and Web sites disable it.
Ctrl+l or typing the clear command clears the screen. This would be more useful if it remained cleared after running a command. For example, when you’re running searches that return a lot of results and your screen gets all cluttered, you can clear it and get rid of the clutter. But when you run another command your screen un-clears, so you still have to wade through a lot of stuff to see the results of your last command.
Moving Around Directories
This can take some getting used to, especially in deeper directories like /home/carla/Documents/1articles/linuxcom/bash-shortcuts/. First, just where the heck am I?
$ pwd
/home/carla/sketchbook
Well that’s the wrong place. How do I find where I want to go? There are several ways. My favorite, when I know the directory I want, is to use locate:
Then use mouse select/middle-click paste with the cd command:
$ cd /home/carla/Documents/1articles/linuxcom/bash-shortcuts
No, it’s not cheating to use the mouse. It’s fast. You may also use tab completion to quickly type the path. Tab completion is wonderful and I use it all the time as insurance against typos. Start typing, then press the tab key to auto-complete the directory name.
If you need to browse directories, use the asterisk wildcard to browse many directories at one time:
$ ls dirname /*/*
Adjust the number of asterisk and slashes to control how deeply into the filesystem you want to go. Use Shift+PageUp and Shift+PageDown to navigate long command output.
cd - toggles between your current and previous directory.
cd .. takes you up one level, and cd ../../ goes back two levels.
Plain cd is Bash’s ruby slippers, and it returns you to your home directory.
That’s enough for today, and thank you for coming along!
Learn more about Linux through the free “Introduction to Linux” course from The Linux Foundation and edX.